Beyond the Starter Kit: The Ultimate Guide to Upgrading Your Tufting Gear
yassy
Crafters!

Hello, this is Yassy from Crafters! (・∀・)
Have you ever struggled when trying to cut wood, plastic, or metal parts for your handmade projects, thinking, "Scissors or utility knives just aren't doing the job right"?
Forcing a cut with scissors can shatter your material, while a utility knife blade often gets stuck halfway through, leaving you dissatisfied with the final finish. There are so many moments in crafting where cutting becomes a major hurdle.
That is precisely where saws come to the rescue!
In my own crafting journey, I use various types of saws constantly—for woodworking, miniature making, removing burrs from resin pieces, cutting brass tubing for jewelry, and so much more.
When we say "saw," the options range far beyond the large handsaws used in general carpentry. There are palm-sized mini saws, fretsaws for curved cuts, and super-thin craft saws (hobby saws) designed for precision modeling. Choosing a saw that doesn't match your material or project can result in jagged edges or, worse, ruin your precious materials.
In this guide, I will share the key features, best uses, selection criteria, and professional cutting techniques for four types of saws commonly used in crafting. By learning how to choose and handle the right tool, your crafting process will become significantly smoother and your creative possibilities will expand dramatically. Read on to find your perfect workshop companion!
Many crafters hold common misconceptions about saws: "They look difficult to use," "I'm afraid of cutting myself," or "Saws are heavy DIY tools—isn't that overkill for crafting?"
However, that mindset is a missed opportunity! Modern tools designed for crafting have evolved to be lightweight, easy to hold even in smaller hands, and engineered for safe, delicate work.
If you repeatedly score a piece of material with a utility knife in the exact same spot, the blade can easily slip, increasing the risk of injury. On the other hand, choosing the right saw allows you to cut accurately in a short amount of time with surprisingly little effort.
Using the right tool isn't just about safety; it is an absolute requirement for elevating your work to a professional standard. Clean, straight cut edges immediately boost the visual beauty and structural strength of your finished piece. Let's eliminate any fear of cutting tools and enjoy the thrill of shaping materials exactly as you imagine!
There are four main cutting tools frequently used in craft making. Understanding their unique structures and characteristics is the first step toward choosing the right one.
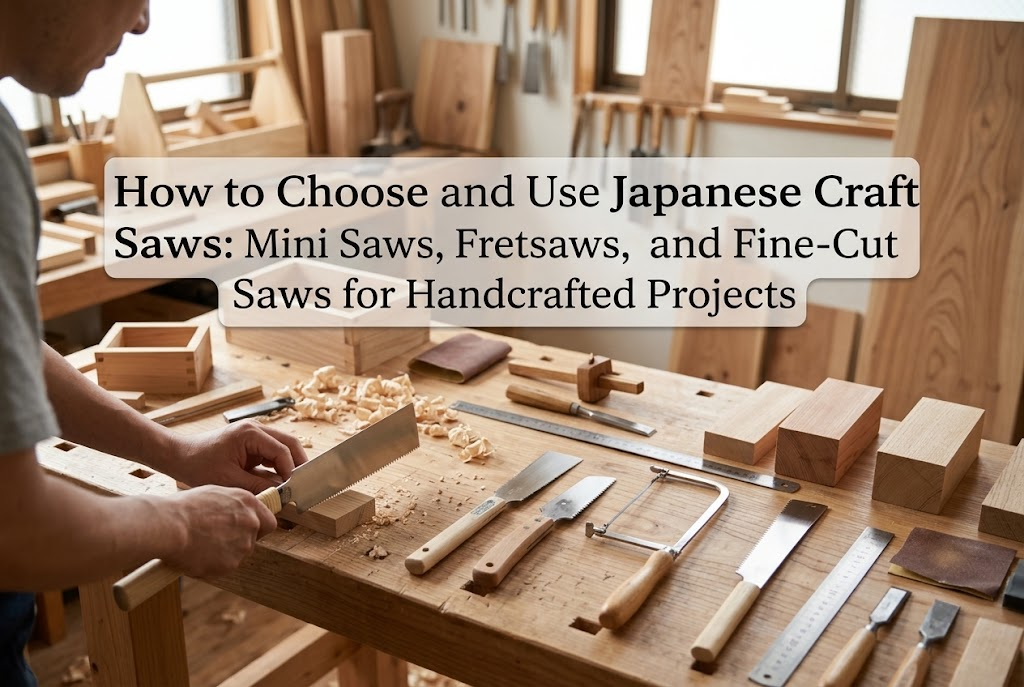
This is a compact version of a full-sized carpenter's handsaw scaled down for craft use. It typically features a blade length of about 15 to 20 cm (6 to 8 inches) with a sturdy handle.
Because the blade is relatively thick, it resists bending under pressure, allowing you to quickly cut through thick timber or wooden blocks. This tool is most effective when cutting base materials for wooden home decor, small shelving, or picture frames. While its coarser tooth profile leaves a slightly rougher surface, its cutting speed is by far the fastest among the four.
A mini saw is a small cutting tool with an overall length of around 15 to 20 cm. Many feature slim, palm-sized handles or pen-style grips.
With its short, thin blade, it is incredibly easy to maneuver even in cramped workspaces. Crafters with smaller hands can easily control the force applied, making it feel non-threatening to use. It is ideal for modifying small wooden boxes, adjusting dollhouse pillars, or trimming thin wooden boards. While it takes longer to cut large items, its ease of use for delicate work is unmatched.
A fretsaw (often referred to as itonoko in Japan) is a specialized saw featuring a C-shaped metal frame that holds a hair-thin blade under tension.
Its greatest feature is the freedom to cut not only straight lines, but also wavy patterns, circles, and intricate curved shapes. Because the blade is extremely fine, you can drill a tiny starter hole in the middle of a material, thread the blade through, and hollow out internal shapes easily.
By swapping out the blade type (metal-cutting, wood-cutting, or plastic-cutting), a single frame can handle almost any material. It is indispensable for cutting out custom jewelry parts, making wooden puzzles, or creating cut-out motifs.
Craft saws consist of a saw blade attached to a utility knife handle or a thin blade backed by a metal spine (often called a razorsaw or hobby saw). The blade thickness is exceptionally thin, usually around 0.2 mm to 0.3 mm, producing virtually no kerf loss (the width of material removed by the cut).
This makes craft saws immensely powerful when dimensional accuracy is critical—such as making miniature furniture, modifying scale model parts, or trimming gate residue from cast resin pieces. The cut surface finishes so smoothly that it looks almost like it was sliced with a razor, dramatically reducing the time needed for sanding.
Every craft discipline uses different materials. Here is how to select the right saw based on the unique properties of what you are cutting.
For wood, your choice depends on thickness and grain direction:
Cured resin and plastics are sensitive to shock and can crack under excessive force:
Standard wood saws cannot cut metal components used in jewelry making, such as brass sheets, aluminum tubes, or silver wires:
Saws are also great for air-dried resin clay, plaster, Jesmonite, or thick dried flower stems:
Beginners often run into three main problems when using saws. Understanding the causes and solutions will help you avoid failure entirely.
Cause: The blade has tilted at an angle relative to the cut line, causing friction between the sides of the blade and the groove. Alternatively, the weight of the material may be pinching the kerf closed.
Solution: Release all force immediately. Forcing the saw back and forth can snap the blade. Align the saw straight with the cut, and gently support the offcut piece with your hand to keep the groove open. The blade will move smoothly again.
Cause: Your line of sight is stuck on top of the cut line, or you are applying downward pressure unevenly.
Solution: Instead of looking directly down at the blade, position your eyes slightly to the side and slightly above to monitor vertical alignment constantly. You can also use a commercial saw guide (cutting jig) to guarantee exact 90-degree cuts every time.
Cause: As the cut finishes, the unsupported weight of the offcut causes the wood fibers to snap away prematurely.
Solution: During the final few millimeters of the cut, slow down your stroke and reduce pressure to a minimum, pulling gently. For an extra clean result, apply masking tape over the backside of the material before cutting; the tape supports the fibers and dramatically reduces splintering.
Once you learn proper body positioning and stroke technique, cutting with a saw becomes effortless.
Trying to make a full sawing motion right away often causes the blade to slip and scratch your material. Creating a starting groove—known in Japanese woodworking as a hikimizo—is the key to success.
Once this initial groove is established, the blade will track along it naturally without slipping sideways.
Traditional Japanese saws operate on a pull-cut system. Material is removed when pulling the blade toward you, while the push stroke is a relaxed return motion. (While Western saws cut on the push stroke, 99% of craft saws distributed in Japan use the pull system.)
Applying force while pushing forward will bend thin blades and cause crooked cuts. Remember the rhythm: Relax on the push, cut on the pull. Letting the pull stroke do the work prevents fatigue and yields straight, clean cuts.
If you look closely at saw teeth, you will notice that they alternate bending slightly outward to the left and right. This offset is called asari (blade set or kerf set).
Knowing whether your saw has asari helps you choose the right tool for smooth finishes versus fast rough cuts.
When selecting a saw in craft shops or online, keep these key criteria in mind:
Coarse teeth cut quickly but leave a rougher surface. Fine teeth cut more slowly but leave an exceptionally smooth cut that requires minimal sanding. For handmade crafts, always select a fine-tooth blade (often labeled for precision or finishing work, around 20–30 teeth per inch).
Saw blades are consumables. Even the highest quality blade wears down over time. Using a dull saw requires extra force and increases the risk of slipping. Look for saws with quick-change or screw-type replaceable blades. Keeping the handle and replacing only the blade is economical and ensures peak sharpness.
A good grip improves safety and precision. While traditional wooden handles have nostalgic charm, rubberized grips or slim cutter-style handles offer non-slip control that fits comfortably in smaller hands, allowing finger-tip control over blade positioning.
The single biggest cause of craft cutting accidents is holding the material loosely by hand while sawing. Always secure your material to your workbench using clamps or a small vise. When your material is solidly fixed, both hands are safe, and you can focus entirely on your cut line, multiplying your accuracy and safety ten-fold.
Craft saw blades are made of carbon steel or tool steel, which rusts quickly if exposed to moisture or skin oils. After work, wipe off all sawdust and debris with a dry cloth. For long-term storage, apply a thin coat of rust-preventive oil (or tool oil) to the blade surface, cover it with its protective sheath, and store it in a dry location.
We've covered everything you need to know about standard mini saws, fretsaws, and craft saws!
To summarize:
In the world of handcrafts, cutting tools are not destructive—they are creative instruments that give birth to new shapes. By pairing the right tool with the correct pull-cut technique, you can transform the design in your mind into a physical reality with complete precision.
Start by practicing on a small scrap piece to experience the smooth efficiency of Japanese pull-cutting. Grab your ideal tool companion and take your crafting journey to a whole new level!
If you found this helpful, please consider sharing this article with your crafting friends on social media or messaging apps! Thank you, and see you in the next article—this was Yassy from Crafters!





For example, if you are looking for articles about mizuhiki, try searching for "mizuhiki"; if you are interested in tools, try keywords like "nippers" or "pliers."
