Japanese Kirie Papercutting: Essential Tools and Blade Techniques for Clean, Fray-Free Cutouts
yassy
Crafters!
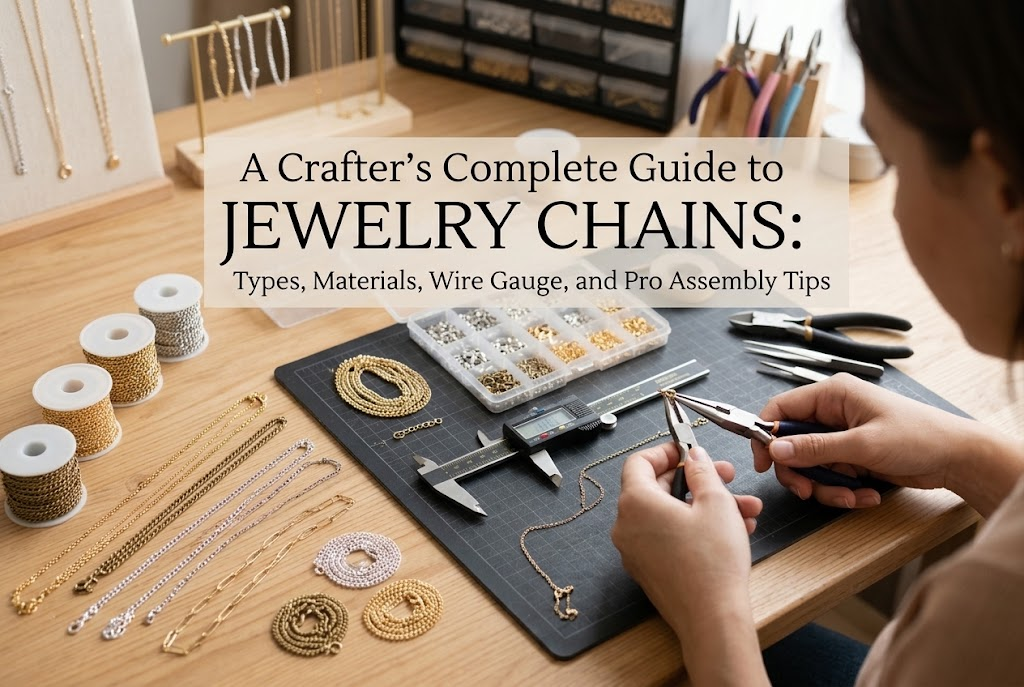

Hello, fellow makers! It's Yassy from Crafters! (・∀・)
When crafting handmade necklaces, bracelets, or elegant drop earrings, how do you choose your chains? Do you grab whatever fine chain happens to be in your stash, or click "buy" on a pre-cut length from an online shop without a second thought? If so, you might be missing out on a massive opportunity to elevate your work.
In jewelry making, a chain is never just a functional cord that connects findings. It sets the tone for the entire piece, deciding whether your focal pendant shines brilliantly or loses its charm. Having made, bought, and closely examined countless handmade jewelry pieces over the years, I can tell you with absolute certainty: simply deepening your understanding of chain selection will instantly elevate your finished pieces to a professional tier.
In this guide, I will break down everything beginner and intermediate makers need to know—from chain styles and materials to selecting the ideal wire gauge, strength balance, and pro-level assembly techniques that prevent costly mistakes. Let's make sure you always find the perfect chain for your designs!
Before diving into specific types, let's understand why choosing the right chain matters so much in the first place.
It is easy to assume that the focal pendant or charm is the sole star of the show. However, when someone actually wears a piece, what captures the eye is the texture and luster of the chain resting against the neck or wrist. No matter how stunning your natural gemstone or UV resin pendant is, pairing it with the wrong gauge or a dull texture makes the whole design look unbalanced. On the other hand, selecting a refined, complementary chain will immediately enhance the perceived value of your piece.
Beyond aesthetics, your chain choice directly dictates durability and everyday comfort. If you attach a heavy, statement pendant to an overly delicate wire, it risks snapping under pressure. How smoothly the metal glides against the skin and whether it accommodates metal allergies are equally crucial factors. Mastering design harmony, structural strength, and material performance is the essential first step to leveling up your handmade jewelry.
Chains come in an astonishing variety of configurations. Depending on how the links (loops) are shaped and interwoven, their light reflection, drape, and suppleness will differ completely. Here are the core chain types most commonly used in handmade jewelry crafting.
By far the most versatile and widely used style in Japanese crafting circles is the Azuki chain—widely known internationally as a cable chain. In Japan, it gets its name from the rounded, oval links that resemble small azuki red beans, interconnected in an alternating orientation.
Its greatest strength lies in its chameleon-like versatility. It never clashes with other focal components, whether you are highlighting a clear UV resin charm, a delicate natural stone bead, or an intricate metal pendant. You will also encounter "cut cable chain" (flat-cut azuki), where the outer curved edges of each link are ground flat. These flat facets reflect light sharply with every movement, making it the go-to option when you want subtle extra sparkle. If you are starting your jewelry supplies stash, this is without question the first chain you should stock.
A Kihei chain—the curb chain—is created by twisting each link of a cable chain and flattening it so that all links lay flush in the exact same plane.
Because the surfaces sit flat, this chain feels remarkably smooth and gentle against the skin. Furthermore, because light reflects off broad, flat planes rather than narrow rounded wires, it delivers a richer, more polished gleam than a standard cable chain. While chunky curb chains are classic staples in men's accessories, ultra-fine curb chains with slender wire gauges pair exceptionally well with delicate, feminine necklaces and bracelets. Choose a curb chain when your goal is a mature, understated look with maximum wearing comfort.
Ball chains consist of tiny hollow metal spheres linked together along an internal wire core. With no visible interlinked rings, they create a rounded, playful texture. They are widely used for casual accessories, pop-inspired aesthetics, keychains, and bag charms.
The key detail to remember with ball chains is that you cannot connect them using standard jump rings. Instead, you must finish the ends using dedicated findings, such as ball chain connectors or "V-cup" fold-over end crimps. These specialized components lock the final bead securely in place. Keep ball chains in mind whenever a project calls for a casual, contemporary touch.
Constructed from closely interlocking square links, the Venetian chain—commonly called a box chain—presents virtually no gaps between its segments. It drapes so smoothly that it resembles a continuous, supple cord of liquid metal.
Its clean, geometric reflections impart an instant sense of high-end polish while creating a flattering, streamlined silhouette along the collarbone. Because it glides without snagging, it is ideal for minimalist solitaire pendants, such as single crystals or premium gemstone drops. When you want your work to project a professional, boutique-brand aesthetic, a box chain is an outstanding choice.
Screw chains and rope chains feature links woven or twisted into an intricate spiral structure. Resembling delicate metallic lace, their multifaceted angles catch and disperse light in every direction.
The defining trait of this style is that it looks completely finished and luxurious on its own—even without a pendant. Using a fine screw chain for a simple short choker or incorporating short segments into swaying drop earrings creates an undeniably graceful, eye-catching effect.
A Figaro chain alternates between a sequence of shorter links and an elongated oval link in a set pattern (most commonly three short links followed by one long link). This variation breaks up visual monotony, lending a rhythmic, vintage-inspired charm that pairs wonderfully with classic or antique designs.
In modern crafting, pre-assembled "design chains"—featuring small faux pearls, glass beads, or textured motifs pre-wired directly into the links—are also incredibly popular. Incorporating design chains allows you to produce visually rich, boutique-quality pieces without spending hours wiring individual segments together.
Once you have chosen your link shape, the next vital decision is the base metal and finish. Whether you sell your work or create pieces to cherish for years, understanding material characteristics is non-negotiable.
Readily available at craft stores and budget suppliers, brass with gold or silver-tone plating is the most economical option. It offers an impressive spectrum of finishes, including bright yellow gold, silver, rose gold, and antique bronze, making it ideal for mockups and entry-level fashion accessories.
The drawback is its susceptibility to sweat, moisture, and oxidation, which can cause the plating to wear off or discolor over time. It can also trigger contact allergies in sensitive wearers. If you choose plated brass, consider applying a tarnish-preventative sealant beforehand, and understand that it is best suited for casual, occasional wear.
Surgical stainless steel (grade 316L) has become the gold standard in the handmade jewelry community. Frequently used for medical instruments, it is inherently hypoallergenic and exceptionally tough.
Its greatest advantage is its supreme resistance to rust, sweat, corrosion, and tarnish. Wearers can keep it on through hot, humid summer days with almost no maintenance required. It also boasts immense tensile strength, meaning even very fine chain links resist stretching or snapping. For gold finishes, look for pieces treated with vacuum PVD coating (such as 18K gold PVD), which bonds tightly and resists fading far longer than standard flash plating. If you want to market your creations as durable and allergy-friendly, 316L stainless steel should be your default material.
When producing upscale jewelry, 14K Gold-Filled (14KGF) is indispensable. Gold-filled material is created by permanently bonding a thick layer of solid 14-karat gold to a base metal core using extreme heat and mechanical pressure.
With a gold layer roughly 100 times thicker than standard gold electroplating, it will not flake or wear away under normal long-term use. It exhibits the exact rich, soft luster of solid 14K gold and is highly tolerated by those with metal allergies. While significantly more expensive than brass or steel, it is the premier choice for fine gemstone pieces and higher-tier maker collections.
For an unmistakable, cool luster, Sterling Silver (composed of 92.5% pure silver alloyed for strength) remains unrivaled. Unlike shiny silver-tone platings, it possesses a soft, deep luminosity that jewelry lovers worldwide adore.
While sterling silver naturally oxidizes when exposed to sulfur in the air, a quick buff with a dedicated polishing cloth instantly restores its original gleam. Its ability to age gracefully and develop character over years of wear makes it an essential asset for heirloom-worthy pieces.
Even after selecting the right design and metal, many makers run into assembly headaches at the workbench. Here are four common mistakes beginners face and the precise ways to avoid them.
The most frequent error is pairing a heavy focal piece with an overly delicate wire diameter. Hanging a hefty gemstone or bulky cast-metal charm on an ultra-fine cable chain (wire gauge under 0.3 mm) puts excessive stress on the links, eventually causing them to stretch open and break. Conversely, stringing a tiny, delicate bead onto a thick, bulky chain looks unbalanced and heavy-handed.
Always verify the wire gauge (the thickness of the wire forming each link) against your pendant's mass. As a practical baseline: pair small, lightweight elements (under 3 g) with slender chains between 0.25 mm and 0.4 mm wire gauge; for heavier elements (5 g or more), choose sturdy chains built with 0.5 mm to 0.8 mm wire gauge. Maintaining this proportion guarantees both safety and visual balance.
You source all your materials online, sit down to assemble your piece, and suddenly realize your jump rings are too thick to pass through the chain link. Chain links have an inner diameter (the open space inside the loop) as well as an outer diameter. If your chain's inner link opening is 0.5 mm, a jump ring made from 0.6 mm wire simply will not fit.
Always double-check both measurements before purchasing. If you are working with an ultra-fine chain where standard jump rings cannot pass through the end link, do not force it. Instead, connect your clasp using specialized crimp-on end caps, fine bead tips, or slender oval jump rings (C-rings).
Nothing ruins a finished piece faster than discovering it pokes the wearer's neck or catches on sweater yarns. This issue is typically caused by tiny metal burrs or sharp, stamped corners on budget-tier machine-pressed chains.
Whenever I acquire a new batch of chain, I always glide it between my fingers and test its drape against the sensitive skin of my inner forearm. If prioritizing skin comfort, smooth curb chains or seamless Venetian box chains are the safest bets. Sourcing high-quality, cleanly deburred materials protects your reputation and keeps your wearers comfortable.
Fine chains—especially cable styles under 0.2 mm wire gauge—can tangle during storage with astonishing ease. Attempting to yank them apart can distort links and ruin entire lengths of chain.
Prevention is everything: store chain lengths wound flat onto card stock, or tuck them into small zip-seal bags with the terminal end secured outside the seal. If a knot does occur, resist pulling on the ends. Lay the chain completely flat on a hard work surface, apply a tiny drop of light mineral oil or dusting of powder, and use the tips of two fine sewing needles to gently tease the knot apart link by link.
To remove the guesswork, here are my go-to pairing formulas tailored to specific types of handmade jewelry:
Once you have selected your chain, the final phase is cutting and securing clasps. Precise technique here marks the true line between amateur work and professional craftsmanship.
Cutting chains with blunt or heavy household cutters will crush adjoining links and ruin their shape. Always invest in precision side cutters designed for fine jewelry wire. Placing the ultra-fine cutting tips directly in the exact center of the single link you intend to remove allows you to sever it cleanly in one motion. Clear away the cut scrap, and ensure the newly exposed end link retains its clean, open loop shape. This tiny step makes attaching connecting rings effortless.
When connecting spring-ring or lobster clasps to chain ends, how you open and close your jump rings is critical. Never pull a jump ring open sideways (widening the diameter); always twist the ends forward and backward along the ring's axis. Pulling sideways causes work-hardening, warping the ring and preventing it from closing flush.
With fine chains, another frequent hazard is the end link sliding right through the tiny microscopic seam of a standard round jump ring. The professional solution is to use oval jump rings (often referred to as C-rings in Japan). Because the opening seam is positioned on one of the longer straight sides rather than the curve where tension rests, the chain link naturally settles into the rounded ends, preventing slippage under tension.
To close, hold two pairs of smooth flat-nose pliers—one on each side of the seam—and twist the ends back toward each other until they meet with an audible, tactile click. When viewed against the light, there should be zero gap visible. A flush, gap-free closure ensures your work will never unexpectedly come undone.
A chain is so much more than functional hardware. It bridges design, comfort, and longevity, determining whether someone falls in love with your jewelry piece for years to come. By applying these guidelines on shapes, materials, proportions, and assembly, your handcrafted creations will look cleaner, feel sturdier, and showcase your creative vision at its absolute best.
Take a fresh look at your current projects and explore how a different chain profile or upgraded metal can transform your designs. If you found these tips helpful, sharing this guide with fellow craft enthusiasts is always deeply appreciated!
Until next time, happy making! This is Yassy from Crafters, signing off! (・∀・)

For example, if you are looking for articles about mizuhiki, try searching for "mizuhiki"; if you are interested in tools, try keywords like "nippers" or "pliers."
