A Crafter’s Guide to Silicone Molds: Types, How to Choose, and Essential Tips for Resin and Crafts
yassy
Crafters!

Hello crafters! This is Yassy from Crafters! (・∀・)
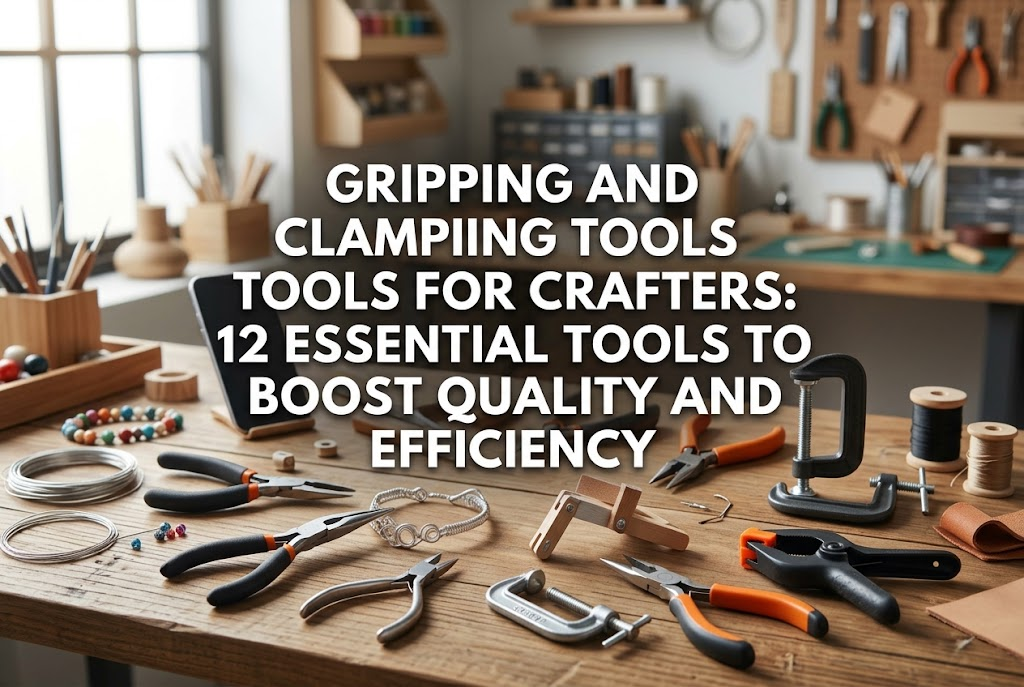
When it comes to handcrafting and DIY projects, our tools become natural extensions of our own hands. In my daily creative routine, I find myself assembling delicate jewelry findings, placing tiny embeds into UV resin, and clamping leathercraft or woodworking assemblies. Across all these diverse crafts, the tools I reach for most often—and the ones that directly dictate the final beauty of a piece—are gripping and clamping tools.
If you've ever thought, "Can't I just hold everything with my fingers?" or "Isn't a cheap pair of hardware pliers from the 100-yen shop enough?" please let go of that mindset right now. Using the wrong tool can gouge delicate metal hardware, exhaust your hands, and in the worst case, ruin your precious materials completely.
In this guide, I will introduce 12 essential gripping and clamping tools every crafter should know, organized by their specific applications. We will break down what each tool does, common pitfalls beginners face, and the exact strategies I use in my own studio. Use this article as your hub to understand how these tools work together and pick the exact instruments you need for your creative work.
Many beginners wonder why so many specialized gripping and clamping tools exist in the crafting world. The answer is simple: material hardness, size, the amount of force needed, and whether the surface can tolerate marks all dictate completely different tool designs.
For instance, using standard hardware pliers with serrated jaws to close a jump ring will press jagged grooves right into the metal plating, ruining the piece. On the other hand, using delicate tweezers to press a glued wooden joint will never supply enough pressure, causing the bond to fail. Understanding each tool's profile and matching it strictly to your task is the fastest route to avoiding frustration and achieving professional-level results.
When working with tiny items that are impossible to manipulate with fingertips alone, tweezers featuring fine tips are indispensable. They are essential across nail art, resin casting, tsumami zaiku (traditional Japanese fabric folding), paper craft, and beyond.
Standard craft tweezers are the most versatile gripping tool in general handicrafts. They typically come in two tip styles: straight and curved. They are designed to gently and accurately pick up beads, folded fabric petals for tsumami zaiku, and delicate dried botanicals.
A common beginner mistake is using ordinary household or medical tweezers found in the medicine cabinet. Household tweezers often lack precision alignment at the tips; pinch a small bead or rhinestone, and it will snap out of the jaws and fly across the room. Tweezers engineered specifically for crafts feature high tip precision and require minimal finger pressure to hold items securely. If you are starting fresh, I recommend a pair of curved-tip craft tweezers. The curve keeps your fingers from blocking your line of sight, letting you position elements exactly where you want them.
Precision tweezers feature ultra-fine tips engineered to sub-millimeter tolerances. They truly shine when handling microscopic glass seed beads, flatback rhinestones, and fine glitter or hologram flakes for resin jewelry. Their metal bodies offer high rigidity, preventing the tips from flexing even under firm pressure.
A common misconception is thinking that owning precision tweezers eliminates the need for standard craft tweezers. Because precision tips are needle-sharp, using them on delicate fabrics, thin papers, or preserved flowers can easily pierce or tear the material. The golden rule is simple: use precision tweezers for hard, microscopic embellishments, and craft tweezers for soft, delicate materials. Choosing a pair with an anti-static coating will also save you from the immense frustration of static cling.
For beaded jewelry, wire wrapping, and fitting findings, smooth-jaw pliers—known traditionally in Japan as yattoko—are absolute essentials. While they look like standard pliers, their defining feature is having smooth jaws without serrations or teeth, ensuring metal stays unblemished.
Round-nose pliers feature conical, rounded jaws tapering toward the tips. They are used to turn neat loops at the ends of headpins, eye pins, and craft wire. Because their inner surfaces are rounded with no flat plane, they are not intended for gripping or clamping flat components.
The most common beginner struggle is ending up with loops of inconsistent sizes. Because the jaws taper, the diameter of your loop changes depending on how far down the jaw you grip the wire. A reliable professional trick to maintain uniform loops is to draw a faint reference mark on the plier tip with a permanent marker, always placing your wire at that exact line. Remember that this tool exists exclusively to form clean circular loops, not to bend sharp right angles.
Flat-nose pliers have smooth, flat jaws and represent the baseline tool for jewelry assembly. They handle foundational tasks like opening and closing jump rings, flattening crimp beads, and steadying small findings. The smooth contact surface distributes pressure evenly, preventing scratches on delicate plated metal.
When opening and closing jump rings, you actually need two pairs of flat-nose pliers. You hold one side of the ring steady with one pair and use the second pair to gently twist the other side forward and back. If you try to open a ring using one pair of pliers and your bare fingers, you will warp the metal out of round, making a seamless closure impossible. If you are venturing into jewelry making, starting with two pairs of flat-nose pliers is the standard best practice.
Chain-nose pliers are a specialized variation of flat-nose pliers with tips that taper down to a fine point while maintaining a flat inner grip. They excel at reaching into compact crevices, manipulating tiny jump rings, and executing intricate wire maneuvers where standard flat-nose pliers are too bulky.
Because their tips are quite fine, you must be careful not to use them to force heavy-gauge wires or thick chain links. Applying excessive force to slender tips will cause the jaws to twist and lose alignment. Use standard flat-nose pliers for heavier holding tasks, reserving chain-nose pliers for tight spaces and delicate findings.
Wire looping pliers are a specialized step up from traditional round-nose pliers. Their jaws feature stepped cylindrical sections of preset diameters. By simply clamping your wire against the desired cylinder and wrapping, you create consistent loops every time without relying on visual guesswork.
For crafters who struggle with uneven loops using round-nose pliers, this tool is an absolute lifesaver. It multiplies your efficiency when making wrapped loops, beaded connectors, or handmade chain links in bulk. While they cost a bit more than basic pliers, their ability to deliver consistent results makes them worth every penny if you want to elevate your wirework.
In jewelry making and general craft work, you often need to cut wire cleanly or apply substantial clamping force. Here is how to navigate wire cutters and standard pliers.
Flush cutters (nippers) are dedicated cutting tools for trimming headpins, eye pins, jewelry chains, and craft wire. For handmade accessories, you should always look for flush-cut or micro-blade models that leave a flat, clean cut. Bulky hardware store diagonal cutters leave a pinched, sharp edge that can snag clothing or scratch the wearer's skin.
A critical mistake to avoid is using plastic model sprue cutters on metal wire. Nippers intended for model kits will chip immediately when cutting wire, ruining the blades. Always choose cutters explicitly rated for craft wire, and never exceed their maximum recommended wire gauge.
Standard pliers feature serrated, grooved jaws designed to grip objects with substantial force and manipulate heavy wire. Many also include built-in cutting blades. Their rugged build transfers leverage directly, making them handy for sturdy DIY woodwork and heavy-gauge wire art.
However, you should never use standard serrated pliers directly on jewelry findings. The teeth will instantly bite through delicate metal plating, gouging deep grooves into your work. Reserve these pliers for structural tasks, hidden areas, or projects where holding power outweighs surface aesthetics.
Long needle-nose pliers combine deep reach with moderate cutting and gripping capabilities. Their extended jaws reach deep cavities, and built-in side cutters allow quick wire snipping.
Most utility needle-nose pliers sold at hardware stores have serrated jaws, presenting the same risk of scratching jewelry. However, craft-specific needle-nose pliers with smooth jaws are readily available. If you want a versatile tool that bends, grips, and cuts without swapping tools, seek out smooth-jaw craft versions.
Slip-joint pliers feature an adjustable pivot point that allows the jaws to open wider across several stepped settings. They handle objects ranging from thin rods to thick, bulky materials, making them helpful for compressing glued leather layers or setting heavy hardware.
Like standard pliers, slip-joint models typically have deep serrations on their jaws. When pressing leather or metal fittings, always cushion the jaws with scrap leather, thick cardboard, or a rubber sheet to avoid marring your workpiece. They provide immense mechanical advantage for heavy-duty crafting tasks.
When you need both hands free to work, or when you need constant pressure while glue cures, specialized clamping tools are invaluable. They hold materials steady in place of your hands, boosting both precision and workflow speed.
Clamps secure your workpiece to a workbench or hold multiple glued layers together during curing. Common options include threaded C-clamps, F-clamps, and spring clamps that squeeze like sturdy clothespins. They are widely used in woodcraft, cartonnage, leatherwork, and miniature modeling.
The common mistake here is over-tightening. Excessive clamping force can leave permanent indentations in wood, binder's board, or leather. Always place scrap wood blocks or protective rubber pads between the clamp faces and your piece to distribute pressure safely and maintain pristine surfaces.
A bench vise mounts directly to your work table, using heavy metal jaws to clamp workpieces firmly. It is great when filing small metal elements, drilling with a pin vise, or pulling wire taut. Holding tiny items with bare hands while carving or drilling carries a slip hazard; a vise makes the process safe and accurate.
For crafting, compact desktop vises that mount via suction bases or table screw clamps are ideal. Because bare metal vise jaws will scratch finished items, always attach rubber or plastic protective jaw covers. If you do metalwork, wire sculpting, or precision miniature fabrication, a small vise dramatically streamlines your workflow.
Having looked at all 12 tools, here are the essential criteria to keep in mind when purchasing, based on years of personal crafting experience.
When shopping, your very first check should be inside the jaws: are they smooth or serrated? Standard utility pliers almost always have serrated teeth that ruin craft hardware. For jewelry and wirecraft, always purchase smooth-jaw tools from craft suppliers. Checking this single detail prevents 80% of common beginner mistakes.
I am often asked if budget tools from dollar or 100-yen stores are sufficient. My takeaway is this: if you only want to try a project once, budget tools are fine; but if you plan to craft continuously, invest in dedicated craft tools from the start. Budget pliers often suffer from misaligned jaw tips and stiff springs that tire your hands quickly. In contrast, mid-tier craft tools have precise tip alignment and comfortable ergonomic grips. If nothing else, I strongly recommend investing in quality for your primary cutters and your two pairs of flat-nose pliers.
Using oversized or heavy tools causes wrist and finger fatigue quickly. Craft tools are purposely built lighter and more compact. Look for models fitted with return springs between the handles. A spring automatically reopens the jaws after each squeeze, saving hand strength and letting you focus on your work comfortably for hours.
Here is a quick reference guide showing which foundational tools to purchase based on your craft:
By tailoring your kit to the specific items you want to make, you avoid buying unnecessary gear. Start with your core essentials, then add specialized tools as your creative projects grow.
While many craft tools look similar at a glance, each is designed with a clear purpose and specialized strengths. Working with the correct tool eliminates dropped parts and damaged hardware, giving you a smooth, enjoyable workflow. When your tools feel like an effortless extension of your hands, crafting becomes so much more rewarding. Start by picking the right tools for your current project, and watch the quality of your handmade work reach new heights!
If you found this guide helpful, please share it with your fellow makers. See you in the next article—this was Yassy from Crafters!


For example, if you are looking for articles about mizuhiki, try searching for "mizuhiki"; if you are interested in tools, try keywords like "nippers" or "pliers."
