How to Stop Stamp Ink Bleeding: Material Techniques & Japanese Crafting Tips
yassy
Crafters!

Hello crafters! This is Yassy from Crafters! (・∀・)
Whether making my own handmade pieces, admiring the work of talented artisans, or shopping for craft supplies, I truly love all things handmade! Having explored everything from resin and woodworking to clay and Jesmonite, I am firmly convinced of one thing: the single most important step that dictates the final quality of any piece is the final sanding and finishing process.
When you first started crafting, did you ever feel disappointed by rough edges or bumpy surfaces on your finished pieces? When you want to cleanly remove burrs from cast resin, give wooden accessories a silky-smooth polish, or reshape dried clay, sandpaper is an indispensable ally.
However, browse an online shop or walk into a hardware store or hobby shop, and you will see an overwhelming variety: standard sandpaper, wet and dry waterproof paper, sponge sanding sheets, and more. It is completely natural to wonder, "What is the real difference between dry sandpaper and waterproof paper?" or "What do all these numbers mean, and which should I pick?"
In this guide, I will thoroughly explain the differences between regular dry sandpaper and waterproof sandpaper, how to choose the right grit, and how to master the sanding process without failing. Once you understand the fundamentals of sanding, the quality of your handmade work will improve dramatically!
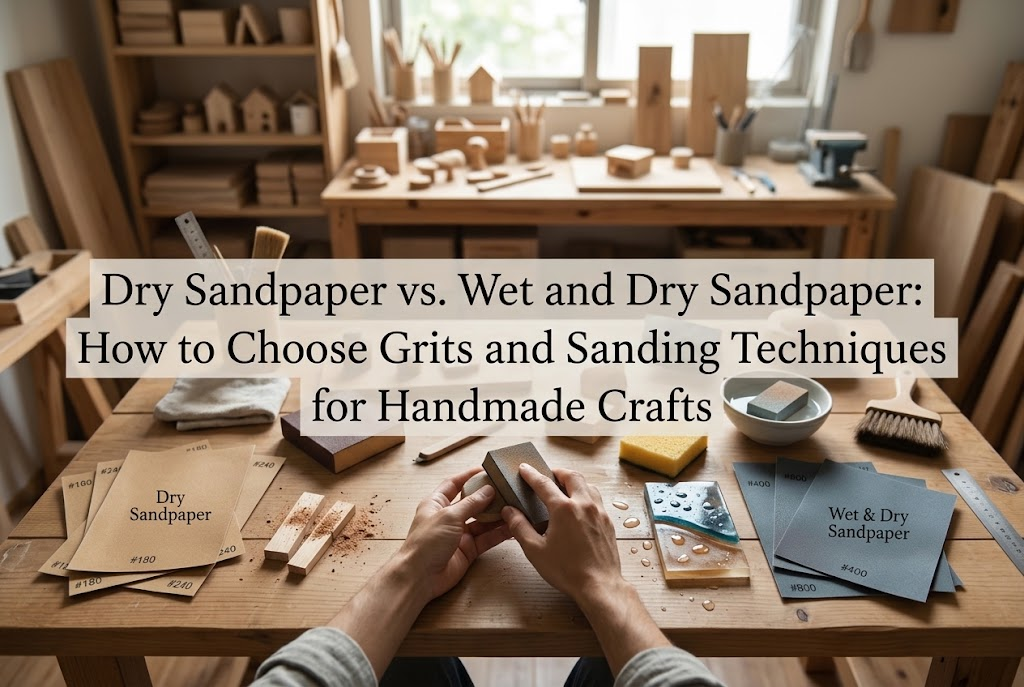
The first hurdle many crafters face is understanding naming and structural differences. In Japanese craft terminology, "kami-yasuri" (paper file) and sandpaper refer to the exact same dry abrasive paper. On the other hand, "taisui paper" (waterproof wet and dry sandpaper) is a completely different tool in both construction and intended use.
Using them interchangeably without understanding these differences not only slows down your work, but can also ruin your piece or instantly destroy your abrasive sheet. Let's clearly break down their unique traits.
Dry sandpaper consists of abrasive mineral grains bonded to a heavy paper backing with glue. Because it is designed strictly for dry use without water, it is often called "kara-togi" (dry sanding) paper in Japan.
Its primary uses include sanding wood, shaping fully dried clay, and prepping surfaces before applying primer or paint. It excels when working with materials that react poorly to moisture, such as timber and air-dry clay.
Its biggest weaknesses are its vulnerability to water and its tendency to clog quickly. If it gets wet, the paper backing softens and tears, and the abrasive grit washes right off, making it unusable. Furthermore, fine sanding dust quickly fills the gaps between the grains, so you must frequently dust off the sheet as you work.
Waterproof sandpaper features durable synthetic paper or cloth treated to resist water, with abrasive grains secured by water-resistant resin. It is specifically engineered for "mizu-togi" (wet sanding)—sanding with water or polishing oil.
Visually, it is usually dark gray or near-black compared to regular sandpaper, and it feels flexible and tear-resistant to the touch. Its primary uses include deburring and polishing resin, smoothing Jesmonite and plaster castings, and finishing plastics and metals.
Because wet and dry paper can be rinsed and soaked during use, sanding debris is constantly washed away, preventing clogging completely. Wet sanding also eliminates frictional heat, allowing you to sand heat-sensitive resin and plastics cleanly without warping or melting the surface. Additionally, water keeps harmful fine dust from dispersing into the air—a huge benefit for crafters working in indoor home studios.
While waterproof paper can technically be used dry, its true durability and ultra-smooth finishing power shine brightest when wet sanded.
On the back of any sanding sheet, you will see a hash mark followed by a number, such as "#240" or "#1000". This number represents the "grit" (known in Japan as bante or mesh).
Grit is an internationally standardized measurement indicating the size of the abrasive particles. Knowing how to choose the right grit sequence is an absolute prerequisite for successful finishing in handmade crafts.
The essential rule to remember is: lower numbers mean larger, coarser grains; higher numbers mean smaller, finer grains.
A lower grit number cuts aggressively and quickly without needing much pressure, but leaves deep visible scratches. A higher grit number cuts very little material, but progressively smooths out micro-scratches until the surface shines.
Sandpaper grits for handmade crafts fall into four broad categories:
A classic beginner mistake is jumping straight to a fine grit like #2000 because you want a glossy finish right away. Attempting to level off uneven edges or burrs with an ultra-fine grit will achieve almost nothing while wasting valuable time. Sanding must always progress systematically from lower grit numbers to higher grit numbers.
Different crafting materials require completely different papers and grit progressions. Here are the specific combinations I personally use in my studio:
Wet sanding with waterproof sandpaper is essential for resin pieces. Dry sanding creates friction heat that can soften or melt the resin, resulting in a sticky, cloudy surface that gums up the paper.
To remove rough flash or burrs right out of the mold, start around #400. Once the edges are flush, progress through the sequence: #600 → #800 → #1000 → #1500 → #2000. Finally, buffing with a liquid polishing compound will restore stunning, glass-like clarity and shine.
Always use dry sandpaper for woodwork. Wood absorbs moisture, causing it to swell, warp, or develop mold later, so wet sanding with waterproof paper should never be used on bare timber.
Use #180 to #240 to clean cut edges. Use #320 to #400 to smooth surfaces after assembly. Prepping the wood with #400 before applying oil stain or varnish, and then gently skimming raised wood grain with #600 after the first coat has fully dried, will yield a luxurious, professional tactile finish.
Because clay softens or dissolves when wet, sand it completely dry using regular sandpaper. Crucially, only sand once the piece is 100% dry or fully cured. Attempting to sand semi-dry clay will tear the material and ruin your hard work.
Clay is softer than wood and cured resin, so using grits that are too coarse will gouge the piece and ruin its shape. Starting at #400 to #600 is ideal for erasing fingerprints and seam lines on dry clay. Use #800 lightly for the final touch before applying paint.
For trending Jesmonite and plaster home decor, wet sanding with waterproof paper is strongly recommended. This is especially true when creating terrazzo patterns, where you must sand back the surface layer to expose the embedded colorful chips.
To reveal the chips effectively, begin with coarse waterproof paper like #80 or #120. Once the pattern emerges clearly, step down the abrasiveness with #240 → #400 → #800. If you desire a smooth matte feel, finishing at around #1000 will produce an exquisite, silky-smooth texture.
In shrink plastic crafts (known as puraban in Japan), sandpaper is used to lightly scuff the surface of smooth, clear plastic sheets before baking. This gives the surface "tooth" so that dry coloring mediums like colored pencils and pastels can adhere evenly.
Use dry sandpaper in #400 to #600 for this technique. Sand vertically, horizontally, and diagonally until the surface achieves a frosted glass appearance, then carefully wipe away all dust before drawing.
Once you have selected your paper and grits, it is time to sand. Simply scrubbing back and forth haphazardly will leave deep gouges or warp your piece. Here are the cardinal rules for achieving crisp, professional surfaces:
When sanding flat surfaces, never press a folded sheet of sandpaper with just your bare fingers. Human fingertips are soft and curved; pressing directly focuses force unevenly, creating dips and wavy, warped surfaces.
To produce a crisp, perfectly flat plane, wrap your sandpaper around a solid backing block (known as an ate-gi in Japanese woodcraft)—such as a wooden scrap block, an acrylic block, or dense sanding foam. A backing block distributes pressure evenly across the entire contact area, keeping edges crisp and planes straight.
For tiny jewelry components, stationary sanding works wonders: secure a sheet of waterproof paper flat onto your work mat with masking tape, and slide the component gently across the paper with your fingers.
When wet sanding with waterproof paper, place a shallow bowl or tray of clean water nearby and keep both the paper and your project thoroughly wet. If water dries up, slurry and loose grit get trapped between the paper and the workpiece, carving deep swirl marks into the surface.
If you feel any slimy drag while sanding, that means sanding slurry has built up. Rinse both the paper and your workpiece in water immediately to keep a clean layer of water present at all times.
The single biggest secret to a mirror-like finish is gradual grit progression. For instance, never jump directly from coarse #240 to fine #1000.
A fine abrasive like #1000 cannot erase the deep grooves carved by #240. The fundamental principle of sanding is that each subsequent grit exists solely to erase the scratches left by the previous grit: #240 scratches are smoothed by #400, #400 scratches by #600, and #600 scratches by #800.
A great tip when switching to the next grit is to change your sanding direction by 90 degrees. If you sanded vertically, sand horizontally with the next grit. This makes it effortless to visually confirm when all previous scratches have been completely removed.
When stepping from #400 up to #600, any stray #400 grit particles left on your piece, hands, or workbench will act as rogue abrasives and gouge your workpiece during your #600 pass. Always rinse your piece in clean water or wipe it down thoroughly with a damp cloth, and wipe your workspace clean before moving on to the next grit.
Sanding may seem straightforward, but it requires mindful technique. Here are three common pitfalls and how to resolve them:
Cause: You moved to final grits while deep scratches from your initial coarse pass were still present.Solution: Step back to #400 or #600. Sand until those deep scratches are completely leveled out, then progress upward through the grit sequence once more. While it feels like backtracking, it is the fastest route to a flawless finish.
Cause: You sanded using bare fingers with excessive, uneven downward pressure.Solution: Always use a rigid sanding block. Also, avoid bearing down on the edges; instead, guide the block across the piece with light, uniform pressure from center to edge.
Cause: You have reached the limit of what sanding paper can do, or you under-sanded at intermediate steps.Solution: Even ultra-fine waterproof paper (#2000 to #3000) leaves microscopic surface abrasions, leaving resin with a slight frosted sheen. To reach optical clarity, buff the surface using a soft cloth with polishing compound (fine rubbing compound), or apply a thin topcoat of clear coating resin and cure it.
Beyond standard sheet paper, several specialty abrasives can dramatically speed up your workflow depending on the project's shape:
These consist of abrasive mineral coatings on flexible foam pads. Their defining feature is flexibility. They conform seamlessly to spheres, organic figurines, and contoured clay or wood turnings without creasing. When polishing round resin beads or curved wooden carvings where flat paper would cause unwanted facets, sponge abrasives are the top choice.
Constructed from hardened steel with teeth cut into the surface, metal files offer aggressive cutting power and virtually never wear out. They excel at deburring metal castings and hacking off thick resin sprues. Because they leave deep grooves, they are strictly rough-shaping tools; always transition to sandpaper for final finishing.
These tools feature electroplated industrial diamond grit on metal blanks. They are built specifically for ultra-hard materials that dull regular files, such as glass, ceramics, gemstones, and hardened metals. They are essential for smoothing rough sea glass, leveling ceramic bottoms, or opening bead drill holes.
Made from tempered glass with precision micro-etched surfaces, these modern tools originally gained popularity for nail care but are now widely embraced in craft circles for plastic models, resin, and shrink plastic deburring. They cut smoothly, almost polishing as they deburr. Because they can be washed clean with water and reused indefinitely, keeping one handy for small jewelry charms is wonderful.
If you are wondering what to buy first, here is the essential set of waterproof sandpaper grits I always keep stocked in my workshop:
Because waterproof sandpaper can be used both wet and dry, keeping these five grits on hand will cover virtually every handmade medium:
With these five grits, you can tackle resin, clay, wood, shrink plastic, and Jesmonite with total confidence.
100-yen stores and budget dollar shops sell sandpaper multi-packs, and for beginners experimenting with crafts, these variety packs are perfectly usable. However, compared to dedicated hobby brands (such as scale-model paint brands) or professional industrial abrasives, budget papers often have less uniform grit sizing and wear down faster. Inconsistent grit size means a #1000 sheet might contain stray coarse grains that leave unexpected scratches.
My recommended rule of thumb:
When transparency and commercial-grade finish matter, investing in consistent, brand-name waterproof paper is the safest approach.
Never use an entire full-sized sheet at once. Fold and cut it into manageable sections. Creasing a full sheet and slicing it into 16ths (or 8ths) creates the ideal handheld size, reducing waste and fatigue.
Important tip: Never cut sandpaper with your good craft scissors! The abrasive minerals on the paper will instantly ruin the scissor blades. Instead, score the paper backing with a utility knife against a ruler, or simply fold the sheet back and forth along the crease and tear it neatly by hand.
While sanding seems gentle, airborne particulate matter poses health risks. Keep your studio safe and comfortable with these precautions:
When dry sanding clay, resin, Jesmonite, or timber, invisible fine dust enters the air. Inhaling this dust over time can trigger respiratory problems or allergies. Always wear a snug non-woven face mask or particulate respirator. Wet sanding with waterproof paper naturally suppresses airborne dust, making it a much safer practice for small indoor studios.
When dry sanding, work over a plastic tray, or spread newspaper or a protective silicone mat over your desk. Using a mini desktop vacuum or a dedicated craft dust collector (like those used for nail salons) prevents dust from drifting across your room and makes cleanup effortless.
Extended sanding sessions can wear down your fingernails and fingertip skin. When holding tiny charms, wrap your working fingertips with masking tape or silicone finger cots. Furthermore, prolonged wet sanding softens skin, making it prone to dryness; always wash your hands thoroughly with soap afterward and apply a nourishing hand cream.
Sanding might seem like a humble, repetitive chore, but the care and patience you invest into it directly determines your work's visual brilliance, tactile feel, and overall luxury. Remembering three core principles—choosing the right paper for your material, balancing wet versus dry techniques, and stepping through grits incrementally—will elevate your handmade crafts to an entirely new standard!
At first, grit numbers and pressure control take a bit of practice, but watching a cloudy, irregular surface turn satin-smooth and glass-clear under your hands is immensely satisfying. Pick up a set of reliable abrasives, follow these tips, and see how vibrant your finished pieces can become!
If you found this guide helpful, please feel free to share it with your fellow makers and craft friends! Until next time, happy crafting—this was Yassy from Crafters!





For example, if you are looking for articles about mizuhiki, try searching for "mizuhiki"; if you are interested in tools, try keywords like "nippers" or "pliers."
