Getting Started with Woodcraft: Ideas, Tools, Costs, and Zero-Failure Tips for Beginners
yassy
Crafters!

Hello, this is Yassy from Crafters! (・∀・)
Have you ever wanted to lay a rug with your favorite design in your room, or turn an illustration you drew into soft, dimensional fiber art? Tufting is the handmade craft that fulfills that wish 100 percent, and it is currently enjoying an explosive surge in popularity around the world.
I personally love making various handmade items, viewing them at craft exhibitions, and buying pieces from independent makers. Among all crafts, tufting stands out with the exhilarating feeling of punching yarn into cloth and the overwhelming cuteness of the finished pieces.
There is no need to hesitate thinking, "Isn't the equipment too large, making it hard for a beginner to start alone?" As long as you have the right knowledge and order a proper starter kit online, you can start making authentic rugs at home starting today.
In this guide, I will share everything you need so you won't get lost when starting tufting. From choosing the right tools to a fail-proof crafting process and exact shopping tips for the fastest setup, I will explain all of my knowledge and experience without holding anything back!
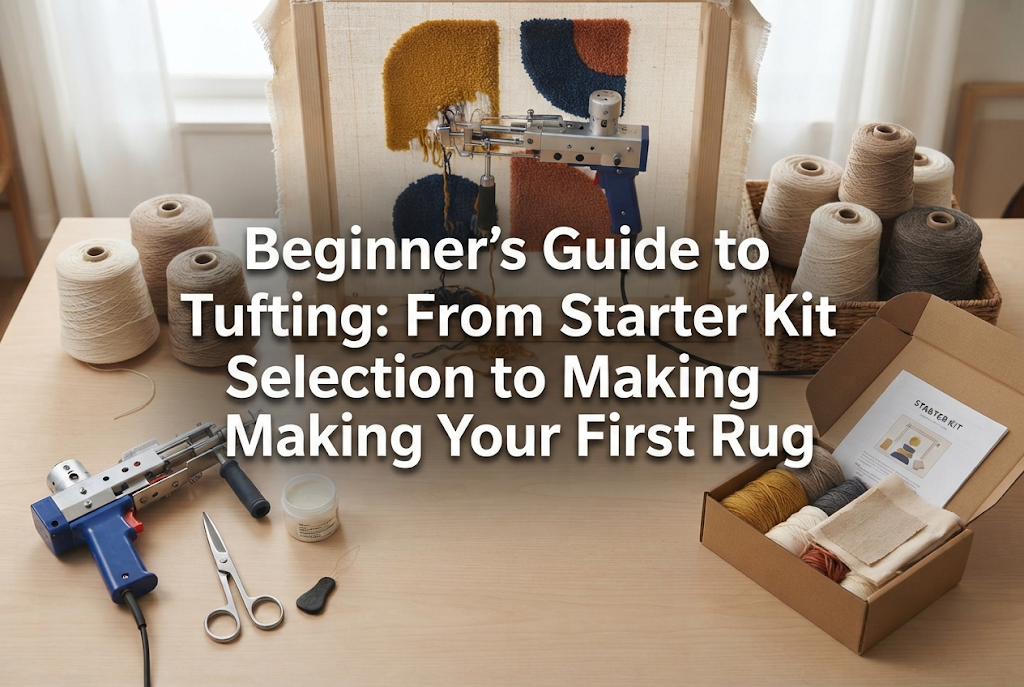
Tufting is a weaving technique where you use a specialized electric power tool called a "tufting gun" to punch yarn rapidly into fabric. Originally a commercial technology used for industrial carpet manufacturing, the development of compact machines has made it easy for individuals to create handmade rugs and wall decor at home.
The decisive difference between tufting and traditional embroidery or knitting is its incredible production speed and freedom of expression. A large rug that would take days by hand-sewing or hand-knitting takes shape in just a few hours using a tufting gun.
By pressing the machine against the back of dedicated cloth and pulling the trigger, a fluffy pile instantly forms on the front side. The sensation of shooting yarn with this pistol-like machine is an exhilarating experience that becomes addicting once you try it.
Your favorite characters, abstract patterns, modern Scandinavian-style designs—whatever you draw turns directly into a plush rug. The greatest appeal of tufting lies not only in the fun of making it, but also in the joy of decorating your room with the finished piece and using it in your daily life.
To start tufting, you need to gather several specialized tools and materials. If even one is missing, you won't be able to complete a project. First, make sure you fully understand the role and selection criteria for these basic items.
The heart of tufting is the tufting gun. Machines generally come in two main types: "Cut Pile" and "Loop Pile", as well as "2-WAY" models that can switch between both.
Cut Pile has internal scissors that automatically cut the ends of the punched yarn, resulting in a fluffy surface texture. Imagine the soft texture of a standard rug.
Loop Pile leaves the yarn uncut in loop shapes, creating a firmer texture and a unique dimensional feel.
The absolute correct choice for beginners is a "Cut Pile dedicated machine" or a "2-WAY machine focused on cut pile." Cut pile is easy to touch up during finishing and creates a soft, versatile rug.
A wooden frame is used to stretch the dedicated cloth as tight as a drum head. "Grippers" (tack strips with sharp pins) are attached to all four sides of the frame to catch and hold the cloth firmly.
The frame size directly dictates the size of your piece. For beginners, a frame around 50 cm × 50 cm to 70 cm × 70 cm is easiest to handle and won't overcrowd your workspace.
This is the dedicated base fabric into which yarn is punched, also called primary backing. Standard embroidery fabric or canvas cannot withstand the powerful movement of the gun's needle and will tear.
Be sure to use durable polyester fabric woven specifically for tufting. A crucial rule is to choose fabric with yellow guide lines (grid lines) woven in at regular intervals. These lines prevent your design from distorting and help you stretch the cloth straight onto the frame.
100% acrylic yarn or wool-blend yarn is best for tufting. Acrylic yarn in particular features vivid colors, excellent cost performance, and high durability against snapping.
Choose medium (worsted) to bulky weight yarn, and thread 2 to 3 strands together into a single bundle through the gun. A single strand of thin yarn will leave sparse gaps and won't finish cleanly.
Punched yarn will easily pull out as is. Therefore, at the end of punching, you apply plenty of adhesive to the back of the cloth to secure the yarn.
Use flexible and durable latex adhesive (rubber-based adhesive) or strong bond glue. When dry, it turns rubbery, giving the rug appropriate thickness and a non-slip effect.
Lining fabric is attached to hide the glued backside and finish it neatly. Use felt fabric or dedicated secondary backing with non-slip processing.
After punching yarn, the surface pile height is uneven. To trim it evenly and make boundaries between colors stand out crisp, use a specialized tufting trimmer and carving scissors (curved scissors). Performing this shearing process instantly elevates your piece to commercial-level quality.
Some of you might be surprised by the number of tools required. But don't worry. There is one clear action beginners should take when starting tufting.
To put it simply: purchase a "Tufting Starter Kit (Full Set)" on major online shops like Amazon or Rakuten. This is the absolute correct path with zero mistakes that prevents unnecessary expenses.
The biggest mistake beginners tend to make is trying to buy tools individually on secondhand apps, DIY stores, or 100-yen shops. Please avoid doing this.
Tufting guns require specific power adapters and voltage compatibility (make sure it matches Japan's 100V–240V range), and there are compatibility requirements for gripper pin orientation on frames as well as cloth mesh density. If you buy items individually without prior knowledge, you will definitely face issues like fabric not matching the gun needle or yarn thickness causing machine jams.
As a result, you'll end up repurchasing parts, going over budget, and getting frustrated before even starting your project.
When choosing a starter kit on an online shop, ensure it includes all of the following elements:
If you have this set, you can assemble the frame the day it arrives and start working immediately. Online shops let you get a perfect setup with just one click.
Once your kit and materials arrive, it's time to start making! Here are the specific steps to prevent failure and complete a beautiful, professional-grade rug.
First, clamp the wooden frame securely to your desk. Next, attach the tufting cloth to the frame.
The absolute rule here is to stretch the cloth as tightly as humanly possible. The correct state is when pushing the center of the cloth produces a high-pitched, drum-like popping sound.
If the cloth tension is loose, the gun's needle won't penetrate properly, causing the fabric to tear. Keep vertical and horizontal guide lines straight and parallel while pressing the fabric deep into the gripper pins to secure it.
Once the cloth is stretched, draw your design on the backside (the punching side) using a permanent marker. Because tufting is punched from the back, the final front side will be mirrored (reversed). If you are drawing text or asymmetrical designs, be sure to mirror your design when sketching.
When drawing illustrations, the easiest and most accurate method is to turn off the room lights, project your sketch onto the cloth using a smartphone or projector, and trace it with a marker. The secret to a beautiful finish is to avoid overly intricate lines and stick to larger, bold block sections.
Now it's time to punch yarn! Thread the yarn into the gun and turn on the power. For medium yarn, thread 2 strands together using the threader wire.
The absolute rule for punching is: press the foot (flat metal plate) of the gun firmly against the cloth and move in a straight line from bottom to top.
Moving horizontally, diagonally, or top to bottom will prevent the yarn from catching properly and will damage the fabric. Always go bottom to top. As you pull the trigger, slide your hand upward at a constant speed matching the machine's vibration.
For density, it's best to leave a 1 mm to 2 mm gap between lines. Packing lines too tightly without gaps will cause the fabric to warp from excessive yarn pressure, preventing the rug from laying flat.
After punching all design areas, use a spatula or brush to apply latex adhesive evenly across the back. The point is to apply light pressure so the glue penetrates right down to the yarn roots.
Once glued, lay the backing cloth (felt lining) on top for drying and press it down firmly with heavy objects. Leave it undisturbed for a full day (about 24 hours) until completely dry. If you touch it before it dries out of impatience, the yarn will pull out and ruin the piece.
When the adhesive is completely dry, cut the cloth off the frame with scissors. Leave about 2 cm of extra fabric around the edges, fold it inward, and neatly finish it with adhesive.
The final highlight is shearing. Place the rug on a flat table and use the tufting trimmer to cut and level out protruding yarn loops across the surface.
Furthermore, insert carving scissors at an angle along the borders between different colors to cut a shallow groove (V-cut). Doing this groove-carving work makes color boundaries dramatically sharp, completing a professional, 3D-looking rug.
There are hurdles that almost every tufting beginner runs into. By knowing the causes and solutions beforehand, you can avoid trouble 100 percent.
The most common issue is tearing the cloth with the gun's needle. The cause is clear: either pushing the gun too weakly or moving the gun too slowly.
If you press the gun too weakly against the cloth, the needle will pull the fabric when retracting, shredding it to pieces. Apply strong pressure, resting a bit of your body weight against the cloth.
Also, if you pull the trigger but don't move your hand upward, staying in one spot, the needle will hit the same hole repeatedly and tear a large hole. Master the rhythm of smoothly moving your hand upward as soon as you pull the trigger.
After punching, checking the front might reveal sparse yarn where white backing cloth shows through. This is caused by insufficient yarn strands or spacing punching lines too far apart.
When using medium yarn, always bundle 2 to 3 strands into the machine. Punching with 1 strand results in a sparse texture. If lines are too far apart, simply insert the gun into those gaps again and punch additional lines to fix it perfectly.
When using the trimmer for the final finish, tilting the blade too vertically against the rug can cause it to gouge out not just surface yarn but the base cloth and necessary yarn underneath.
When using the trimmer, always attach the guard attachment (guide stand) and glide the blade completely parallel (horizontal) to the rug surface. The key to success is to lightly stroke the rug with just the weight of the trimmer without applying downward force.
Tufting involves power tools and large amounts of yarn. Here is how to set up your workspace to enjoy it safely and comfortably in your home.
The operating sound of a tufting gun is equivalent to an electric screwdriver or small vacuum cleaner (around 70–80 decibels). Also, the reciprocating motion of the gun transmits vibration through the frame to the desk.
If working in shared housing or at night, strictly follow these soundproofing measures:
Following these measures completely prevents noise issues with neighbors.
When punching yarn or trimming with a shaver, fine yarn lint and dust fly into the air in large quantities. To keep the room from getting covered in yarn dust, lay plastic sheets or unused cloth directly under your workspace.
In addition, always wear a dust mask during work to avoid inhaling tiny fibers. After finishing, make it a habit to quickly vacuum the entire area with a high-suction vacuum cleaner.
Here are clear answers to detailed questions and concerns beginners often have.
100 percent yes! Tufting is not about freehand drawing. By projecting an image prepared on a smartphone or computer onto the cloth with a projector and tracing it, you can create a perfect sketch.
If it's a design featuring simple shapes, geometric patterns, or fun color combinations, no artistic talent is needed at all—anyone can make a stylish interior rug.
When purchasing a full starter kit containing a tufting gun, frame, trimmer, cloth, and yarn on online shops like Amazon or Rakuten, everything you need is covered in one go for around 25,000 to 35,000 yen.
Once you have the tools, subsequent projects only cost money for yarn, cloth, and glue (about 1,000 to 2,000 yen per piece). For a craft involving authentic power tools, it is a very reasonable and cost-effective genre.
Of course! An increasing number of crafters are selling original rugs and tufted items on handmade marketplaces like minne or Creema, as well as their own online shops or Instagram.
Tufted pieces have a strong presence and high demand as interior decor, meaning they sell well even in higher price ranges. It's a great step-up to enjoy as a hobby while aiming to sell as a handmade artisan in the future.
In this guide, I've thoroughly explained how to start tufting, essential tools, and fail-proof techniques.
Tufting might seem large-scale and difficult at first glance, but the actual mechanism is extremely simple. Once you understand the roles of the tools and follow basic punching rules—stretch cloth tight, press the gun firmly, and move bottom to top—you can create surprisingly high-quality rugs from your very first try.
Wasting time hesitating is a shame! Start by searching for a highly rated Tufting Starter Kit on online shops and placing an order.
The excitement when you open the box and hold the machine, and the thrill of watching your design transform into a soft, 3D rug, cannot be experienced in any other craft. Take your first step as a tufting crafter today!
If you share this article with your friends on SNS or messaging apps, I would be super happy and encouraged! Well then, see you in the next article! This was Yassy from Crafters!





For example, if you are looking for articles about mizuhiki, try searching for "mizuhiki"; if you are interested in tools, try keywords like "nippers" or "pliers."
