A Complete Guide to Japanese UV & LED Resin Crafting: Projects, Difficulty, Workspace & Costs
yassy
Crafters!

Hello, Yassy from Crafters here! (・∀・)
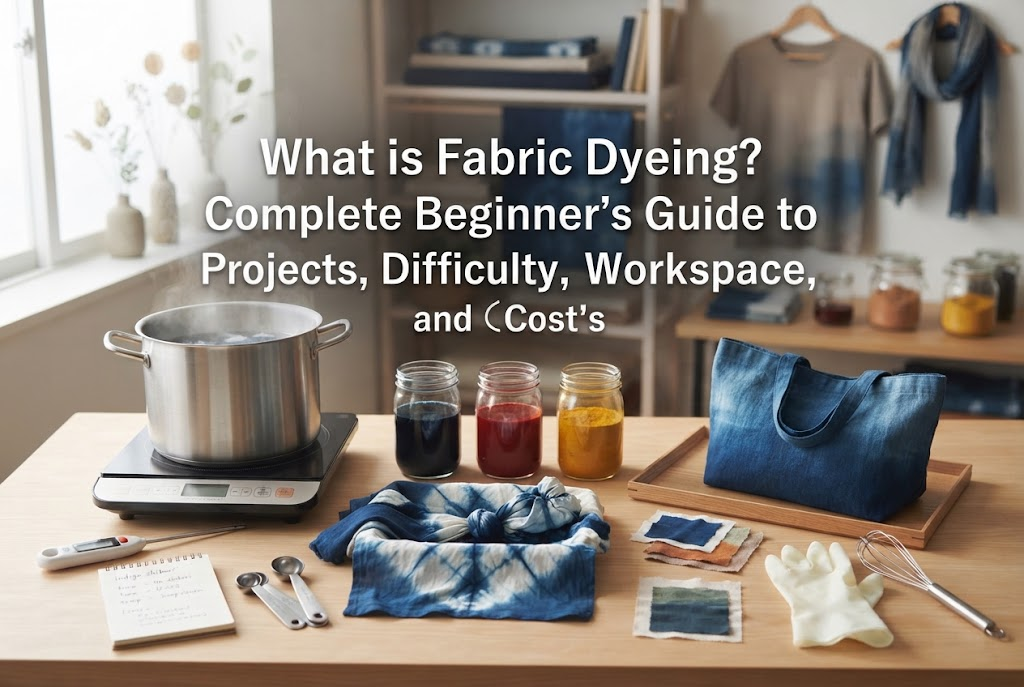
Fabric dyeing lets you transform plain textiles into your favorite colors, creating truly one-of-a-kind original fabrics and clothing. As someone who runs a comprehensive handmade craft site, fabric dyeing is one of my absolute favorite genres—whether I am dyeing pieces myself, admiring beautifully dyed handmade works, or buying hand-dyed creations crafted by talented artists!
"Isn't dyeing clothes and fabrics a difficult technique that only professional artisans can do?"
Many people hesitate to try fabric dyeing because of this exact misconception. However, I can say with confidence: as long as you understand the basic knowledge and follow the correct steps, fabric dyeing is one of the best craft genres that even complete beginners can succeed at right in their own homes!
There is an overwhelming joy unique to fabric dyeing—like creating subtle, delicate shades you can't find in mass-produced store items, or giving new life and vibrant color to an old favorite piece of clothing. In this article, I will fully explain everything a beginner needs to know, including what you can make, the actual difficulty level, required workspace, and initial costs!
Fabric dyeing is a technique where color pigments (dyes) penetrate inside the textile fibers and bond with them chemically or physically to color the fabric. Unlike painting on fabric with acrylic paints, the greatest strength of dyeing is that it changes the color while preserving the fabric's natural softness, texture, and breathability.
To succeed in fabric dyeing, there is one absolute rule you must always remember: the combination of fabric material (fiber) and the dye you use. If you get this compatibility wrong, your fabric will not take the color at all, no matter how much time you spend.
Fabric materials are broadly divided into two types: natural fibers and synthetic fibers. Beginners should focus on natural fibers, which are by far the easiest to dye.
When starting fabric dyeing, always check the care label on the fabric you want to dye. Choosing 100% cotton or 100% linen is your very first step toward zero mistakes.
Incorporating fabric dyeing into your craft repertoire instantly expands the variety of handmade items you can create. Because you can dye the fabric itself to your exact ideal shade, your original creations are 100% unique.
Dyeing items you wear every day in your own signature colors is the real highlight of fabric dyeing. Solid color dyeing (dip dyeing) is fantastic, but tie-dye techniques—where you tie or fold fabric to create patterns—are also extremely popular.
Creating fabric items that match your interior decor allows you to design a cohesive room environment. It is highly recommended for decor lovers who want to recreate subtle tones unavailable in mass-produced goods.
Beyond dyeing finished goods, dyeing "materials" to use in other handmade projects is also very popular. In fact, I often purchase and craft hand-dyed fabric parts and yarns as handmade craft supplies!
Many people hold the image that fabric dyeing is a complex skill reserved for expert craftspeople. To give you a clear answer right away: when using commercial household dyes, the difficulty level is low!
The main reason it feels daunting is simply preconception caused by chemical terminology and images of large, complex equipment. The actual steps involve only three simple actions: dissolve dye in warm water, soak and stir the fabric, then rinse and dry. You don't need exceptional manual dexterity or years of specialized training.
However, required procedures and difficulty vary depending on the type of dye you select. Make sure to understand which level you are trying out.
For beginners, warm-water household dyes are undeniably the absolute best choice.
Preparing your workspace and tools properly accounts for 80% of your success in stress-free and safe fabric dyeing. It is essential to organize where you work and what you need beforehand.
The ideal dyeing environment is a spot close to a water source where floor or wall contamination can be easily prevented. Specifically, consider these locations:
Good ventilation is also crucial. When handling powder dyes, fine particles can float in the air. Always turn on exhaust fans high or open at least two windows to ensure fresh airflow while working.
Tools for fabric dyeing can easily be gathered from around your home, 100-yen shops, or local hardware stores. You don't need to purchase expensive professional equipment.
Here is a golden rule when getting your tools ready: Never share buckets, tongs, or measuring cups used for dyeing with kitchen cooking! Store and manage dyeing tools separately for craft use only.
When starting a new craft, cost is always a top concern. Fabric dyeing is an outstanding craft because its initial setup costs are among the lowest across all handmade genres.
Even if you buy all the basic tools from scratch, your initial investment stays comfortably under 4,000 yen (roughly $15–$30 USD). Here is the breakdown:
Unlike resin crafts, you don't need expensive UV lamps, nor do you need specialized punches or hammers like in leathercraft. Once you have a bucket, gloves, and dye, you can start today!
The material cost per dyeing session (dye + fixative + salt) for a single T-shirt (approx. 150g–200g) is only around 500 to 800 yen. If you dye multiple handkerchiefs or small fabric parts together in one batch, the cost per piece drops down to just a few dozen to a hundred yen.
If you redye a plain white T-shirt sitting in your closet or a favorite piece of clothing with a minor stain, your fabric cost is 0 yen! Transforming an old garment into a stylish, new-looking item for just a few hundred yen worth of dye offers incredible cost performance.
Failure patterns in fabric dyeing are actually quite predictable. Keep these 5 common pitfalls and their prevention methods clearly in mind!
By far the most common beginner mistake is choosing the wrong material. Trying to dye a 100% polyester blouse with standard cotton dye will result in no color adhesion at all—it will simply wash out completely white.
【Prevention Strategy】Always check the care label on the fabric. Choose fabrics that contain 80% or more natural fibers such as cotton, linen, silk, or rayon. If you do want to dye synthetics like polyester or acrylic, be sure to purchase specialized hot-water synthetic dyes separately.
This happens when dark spots remain on the finished fabric or the color turns out patchy overall. The cause boils down to two factors: undissolved dye powder clumps, and insufficient stirring during soaking.
【Prevention Strategy】Never pour dry dye powder directly into the main bucket. Always dissolve it thoroughly first in a small container with about 500ml of warm water (approx. 50°C / 122°F) using a whisk until completely clear of lumps, then pour it into the main bucket. Furthermore, during the first 10 minutes after putting your fabric into the dye bath, stir continuously with tongs so the fabric moves freely. This initial 10-minute stirring determines an even, beautiful finish.
You might be thrilled with a freshly dyed piece, only to have the color wash out in the laundry or transfer onto white clothes washed together.
【Prevention Strategy】Rinse your dyed fabric repeatedly after dyeing until the rinse water runs completely clear. Once clear, never skip applying a color fixative! Soaking the fabric in warm water mixed with fixative for 15 to 20 minutes firmly bonds dye molecules to the fibers, dramatically reducing future color fading in the wash.
"I wanted bright pink, but it turned out dark purple!" or "It turned out far too pale." These discrepancies occur due to color mixing dynamics.
【Prevention Strategy】If the base fabric already has color, the dye color mixes with it like paints. For instance, dyeing a yellow shirt blue yields green. To achieve your exact intended shade, sticking to stark white fabric is an absolute rule. Also, if dye or water proportions relative to fabric weight are off, color intensity changes. Always weigh dry fabric on a scale and follow recommended ratios on the package.
Dye splatters can soak into plastic buckets or kitchen counters and become permanent stains.
【Prevention Strategy】Cover your entire workspace with large plastic sheets. Dye on skin won't wash off for days, so wearing thick rubber gloves is mandatory. If dye splashes onto sinks or floors, rinse immediately with plenty of water before it dries, or wipe up with chlorine bleach right away.
If a beginner craft friend asked me, "I want to try fabric dyeing, how should I start?" here is the exact step-by-step roadmap I would give them for guaranteed success on their very first attempt!
Dyeing actual clothing right away can make you nervous. Start with a white 100% cotton canvas tote bag or plain handkerchief. The flat fabric is easy to manage, and even if slight subtle variations occur, it looks delightfully stylish as a hand-dyed texture!
Purchase a household dye that works in warm water (40°C–60°C), available easily at craft shops or online retailers. Pick your favorite shade from a well-known brand, and buy the matching color fixative from the same manufacturer as a set.
Choose your bathroom as the workspace. Spread open large plastic sheets or trash bags over the floor, and place a plastic bucket (10L or larger) in the center. Put on rubber gloves, wear an apron or old clothes, and you are ready!
In fabric dyeing, guessing or using self-styled methods is strictly off-limits. Follow package guidelines precisely:
When you see your beautifully dyed item emerge after it dries completely, you will no doubt fall in love with the magic of fabric dyeing!
Fabric dyeing may seem complex at first glance, but once you grasp the simple rules, anyone can achieve beautiful, professional-looking results. There is an irreplaceable joy in creating your own custom-colored textiles from scratch that simply cannot be matched by buying off-the-shelf fabrics.
Let's review the key takeaways once more!
Once you experience the delight of fabric dyeing, walking through town will spark endless inspiration—like thinking, "That shirt would look amazing dyed in navy," or "I should try a gradient dye on this white cloth!"
Why not take your first step by dyeing a small eco bag or drawstring pouch in your absolute favorite color?
If you found this guide helpful, sharing it with your craft friends on social media would mean the world to me! Thanks for reading, and see you in the next article! This was Yassy from Crafters!


For example, if you are looking for articles about mizuhiki, try searching for "mizuhiki"; if you are interested in tools, try keywords like "nippers" or "pliers."
