Beyond the Beginner Kit: The Golden Order for Upgrading Your Knitting Tools for Beautiful Stitches
yassy
Crafters!

Hello, it's Yassy from Crafters! (・∀・)
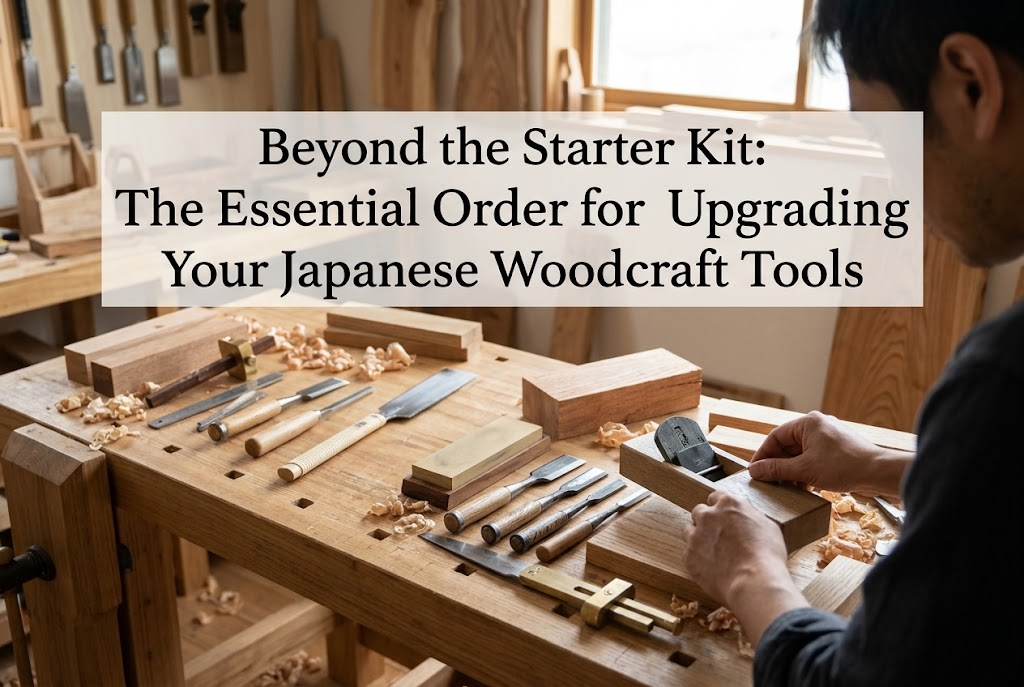
There is something truly wonderful about woodcraft—shaping a piece with your own hands while feeling the natural warmth of the wood. I love making, looking at, and buying all kinds of handmade crafts, but the sense of accomplishment I feel the moment a beautiful wood grain finishes in woodcraft is second to none.
When first starting out, most people begin their projects using a "starter kit" that comes with a complete set of basic items. A starter kit is the absolute best choice for easily experiencing the joy of woodworking. However, after making a few pieces, you will almost certainly hit a wall: "Why are my cut surfaces uneven?" "Why is the wood surface rough instead of having a smooth finish like store-bought items?" or "Why do the edges of my carvings look frayed instead of crisp?"
The cause of these frustrations is not a lack of skill on your part. It is 100% due to the limits of the tools included in the starter kit! The tools provided in kits are merely simplified tools designed to give you a low-cost taste of the craft. If you want to step beyond that and aim for a professional-quality finish that looks ready to sell, upgrading your tools is an absolute necessity.
In this guide, I will thoroughly explain the essential order in which you should replace your tools once you have gotten used to woodcraft! I will share secrets to dramatically boost the quality of your work in the shortest time without taking unnecessary detours, so please read through to the end.
If you are thinking, "I'll buy good tools after I improve my skill," discard that thought right now! In woodcraft, the order is completely reversed. The absolute law of woodworking is that using good tools allows your skills to be properly expressed so you can create beautiful pieces.
Wood is a material where fibers are intricately intertwined, and resistance varies across areas depending on hardness and grain. If you use a dull blade or an imprecise tool, instead of cutting the wood fibers, the tool tears them away. This is the primary cause of splinters, fuzziness, and dimensional inaccuracies.
Professionals and experienced crafters can create beautiful pieces not because they have magical hands, but because they use real tools with overwhelming sharpness and precision that beat the resistance of wood fibers. Sharp tools enter the wood smoothly without needing excessive force, which eliminates hand instability and drastically reduces the risk of injury.
To raise your work to a professional level and eliminate stress during crafting, the correct approach is to assess the right timing and upgrade your starter kit tools step by step. Let's look closely at the absolute priority order for upgrading!
I can confidently say that the sanding process accounts for 80% of the overall quality of a woodcraft piece. No matter how perfectly you cut and assemble the wood, if the sanding on the surfaces and edges is subpar, it will instantly look like an amateur DIY project. That is why the absolute first thing you should invest in is sanding tools!
The sandpaper included in starter kits is small, uses low-quality abrasive grit density, and wears out quickly. Furthermore, if you hold sandpaper with just your hands, uneven finger pressure will cause flat wood surfaces to warp into rounded shapes. This is the biggest trap for beginners.
The first thing to buy is professional-grade sanding paper with excellent wear resistance (such as dry sanding paper or waterproof paper). High-quality sandpaper available at home centers or online shops resists clogging, lasts longer, and has vastly superior cutting power.
Additionally, you must introduce a sanding block made of wood or hard rubber. Simply wrapping your sandpaper around this block ensures the surface sands evenly, creating razor-sharp edges and flat surfaces like a professional.
Many people who fail at sanding try to start immediately with fine grits or skip grit levels entirely. The correct approach is to step through the levels in order: #120 (rough sanding/shaping) → #240 (medium sanding/removing scratches) → #400 (finishing/smoothing touch) → #800 or higher (ultra-fine sanding before coating).
Simply using high-quality sanding tools and following proper grit steps will give your wood a smooth, inviting texture the moment you touch it. Since this is the most affordable upgrade and brings the most dramatic improvement in quality, sanding tools deserve the #1 spot!
The second priority to upgrade after sanding tools is cutting tools, such as carving chisels, carving knives, and craft knives. When making spoons, small dishes, three-dimensional wooden reliefs, or decorative parts, the performance of your blades directly determines the expression of your work.
Carving tools included in starter kits are often made of cheap pressed steel, and many are dull right out of the box. Forcing a dull blade through wood tears the fibers, leaving white, jagged blade marks and a dull surface. Worse, applying extra pressure can cause the blade to slip, leading to finger injuries.
When upgrading, choose blades made from high-quality steel such as High-Speed Steel (HSS) or Yasuki Steel (a famous Japanese blade steel). These steels possess extremely high hardness, maintaining an astonishing sharpness for a long time.
When you carve wood with a genuine, high-grade carving tool, it produces a pleasant crisp sound and smooth, beautiful shavings. The carved wooden surface reflects light with a natural shine even before sanding. The beauty of these clean cut marks is the secret to elevating your work to professional quality.
You do not need to replace all your carving chisels at once. If it were up to me, I would start by replacing the most frequently used flat chisel (Hiratou) or shallow gouge (Asamarutou), along with a single, versatile craft carving knife.
Even getting just one real blade will surprise you with its difference in sharpness. When the blade is sharp, you gain complete control over your hand movements, allowing you to carve curves and fine decorations exactly as imagined!
The third item in the upgrade order is the saw used for cutting wood stock. In crafts that combine multiple pieces of wood—such as wooden boxes, miniature furniture, or frames—cutting accuracy is the lifeblood of the project.
Starter kit saws have thick blades and large "set" (the teeth bent outward alternately), making cuts wide and rough. Rough cuts inevitably leave noticeable gaps when glued, leading to wobbling and reduced structural strength.
For precision woodcraft, you should immediately switch to a precision craft saw without tooth set (no-set saw) or a Dozuki saw (a Japanese back saw with a thin blade reinforced along the spine)!
A saw with no set does not damage the surrounding wood grain, yielding a cut section as smooth as a mirror. The joy of joining cut surfaces together to find a seamless, tight fit is something you can only experience with a good saw.
If your designs feature many curved cuts, upgrade your coping saw frame and replacement blades. Starter kit coping saws tend to have flimsy frames with weak blade tension, making vertical cuts difficult and causing angled edges.
By switching to a rigid metal frame and high-quality replacement blades (such as German-made blades), you can achieve perfectly vertical curved cuts even on thicker wood. Higher cut precision makes later corrections vastly easier.
In fourth place are clamps and measuring tools (such as Japanese try squares and calipers) that elevate safety and accuracy. People often put off these items because they aren't cutting or sanding tools, but they are the unsung heroes that raise project completion levels.
Starter kits rarely include clamps, or at best provide one or two weak plastic ones. If you hold wood by hand while sawing or gluing, millimeter-level errors accumulate, resulting in a distorted final piece.
When measuring right angles (90 degrees), avoid using plastic school set squares. For woodworking, use a precise metal right-angle ruler known as a try square (or Kanaguta in Japanese woodworking).
Simply placing a try square against a wood corner reveals subtle warps or slanted cuts at a glance. If your baseline 90-degree angle is off, the finished product will wobble no matter how carefully you assemble it. Checking your work with a try square is the first step away from beginner mistakes.
Woodworking glue achieves its full strength only when pressure is applied firmly during curing. Pressing pieces together by hand for a few minutes leaves trapped air, causing joints to pull apart easily.
Equip yourself with at least four clamps, such as F-clamps, bar clamps, or corner clamps designed for right-angle joints. Securely clamping your work overnight yields strong, beautiful joints with hidden seams.
Fifth in the order are finishing materials (paints, oils, waxes) and application tools (brushes), which define the final impression of your work.
Starter kit finishing supplies often consist of craft water-based paints or varnish that can hide the natural grain or give a cheap, plastic-like shine. Furthermore, cheap brushes tend to shed bristles, resulting in disastrous loose hairs stuck in the paint film.
To highlight the natural texture and grain of wood—the real highlight of woodcraft—switching to oil finishes (natural botanical oils) or beeswax is the best choice!
Oil finishes penetrate into the wood without forming a hard surface film, preserving the smooth, tactile feel of timber. Over time, you can enjoy a rich color shift (patina) that gives your craft a refined aura similar to high-end furniture.
When using stains or varnishes, use fine nylon brushes or specialized woodworking brushes that do not shed hair and leave minimal stroke marks.
The key to applying finish is to avoid thick coats. Apply thin layers, let them dry, lightly stroke the surface with ultra-fine sandpaper (#600 or higher), and reapply. This extra effort, combined with good paint and brushes, produces a smooth finish indistinguishable from store-bought products.
Let me share a slightly embarrassing failure from when I first fell in love with woodcraft!
At first, I assumed, "As long as it cuts, any tool is fine!" I made a small accessory case using tools entirely from 100-yen shops and cheap starter kits. However, the cut edges were jagged, light leaked through gaps after assembly, the sanded surface ended up wavy, and applying varnish left brush marks and loose bristles everywhere. I couldn't help but sigh in disappointment.
I almost lost confidence, thinking I lacked talent for woodworking. But then I decided to invest in a well-reviewed sanding block, high-quality waterproof sandpaper, and a Japanese no-set craft saw.
What a difference it made! The saw cut straight and smooth with minimal effort, leaving silky edges. The corners sanded with the sanding block were as sharp as lines drawn with a ruler. Just upgrading my tools made me feel as if my skill had jumped three levels overnight! Because of this personal experience, I can confidently tell you how important tool upgrades really are.
Here are common misconceptions and mistakes beginners make when buying new tools. Check these tips to spend wisely and upgrade smart.
Some people try to buy expensive power sanders or jigsaws immediately because hand work feels tedious. This is often a mistake. If you use power tools without first understanding the tactile feel of manual sanding or cutting, you can easily over-sand or ruin a piece in a split second.
Focus first on getting quality hand tools (manual files, blades, saws) so your hands learn how wood feels and cuts. Once you can create great work with hand tools, it's not too late to consider power tools.
If you buy a set of 5 to 10 carving chisels, you'll likely only use one or two, while the rest sit at the back of a drawer. This wastes your budget.
Instead of buying sets, the smartest approach is to buy individual high-quality tools that match the specific shapes you use most often. Investing in a single real blade offers far more value than buying a cheap set.
In this guide, we covered the essential order for upgrading your tools after graduating from a starter kit to dramatically boost your woodcraft quality.
Let's review the ultimate upgrade order once more:
You do not need to replace every tool at once. Start by upgrading tools one by one, beginning with whatever area feels tricky in your current project.
The moment you carve wood with a genuine new tool, the smooth feedback and beautiful finish will surely make your heart leap! Make good tools your ally and create many wonderful, one-of-a-kind woodcraft pieces. I'm cheering for your craft journey with all my heart!
If you found this article helpful, I'd be thrilled if you shared it with your friends on social media! See you in the next article! This was Yassy from Crafters!






For example, if you are looking for articles about mizuhiki, try searching for "mizuhiki"; if you are interested in tools, try keywords like "nippers" or "pliers."
