How to Choose Japanese Knitting Needles: The Ultimate Guide to Materials, Shapes, and Sizes
yassy
Crafters!

Hello, craft lovers! This is Yassy from Crafters! (・∀・)
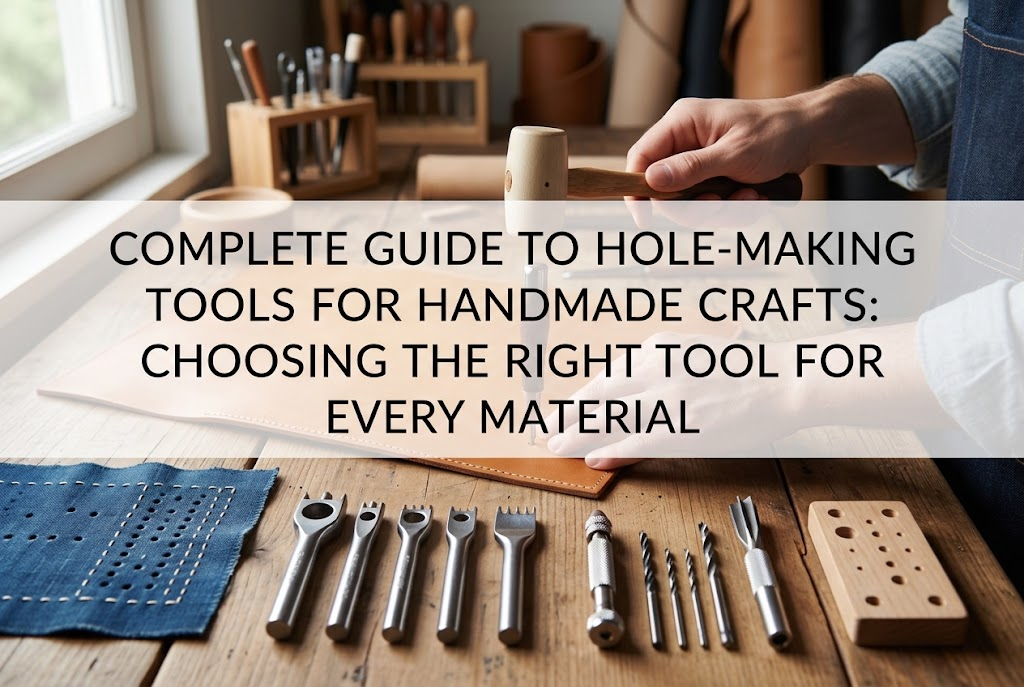
Whenever you make handmade items, one task you encounter constantly is making holes. Whether you are installing an eye pin into a cured resin charm, setting eyelets in leather goods, preparing buttonholes or grommets in fabric, or binding paper stationery with string, creating holes is an essential step across almost every craft genre.
I personally enjoy making and collecting all kinds of handmade crafts. However, back when I was a beginner, I made the mistake of thinking, "A hole is just a hole—any sharp tool will do!" I tried to make a hole in resin using a paper awl and cracked the piece, and I forced a tailor's awl through leather, leaving a ragged, messy edge. I learned through many painful failures.
Hole-making tools have distinct structural designs and specific materials they excel at handling. Trying to force an unsuitable tool through a material will not only ruin your hard work, but also risks damaging the tool or causing personal injury.
In this guide, I will introduce 13 essential hole-making tools frequently used in handmade crafting, organized by their working mechanisms and practical applications. Use this overview to master which tool belongs in your toolkit and when to use it!
Before looking at specific tools, it is important to understand the actual mechanism by which each tool creates a hole. Broadly speaking, hole-making mechanisms fall into three distinct categories:
Understanding these differences is the fastest shortcut to preventing ruined projects. Always choose a tool that matches the structural nature of your material.
Whenever I tackle an unfamiliar material, I always pause and ask myself: "Should I scrape this, push it aside, or punch it out?" Keeping this standard in mind guarantees you will never pick the wrong tool.
Let's begin with tools that pierce and push fibers aside. These are accessible, basic tools available at craft shops, hardware stores, and general supply shops, yet their specific shapes serve clearly differentiated purposes.
A tailor's awl (known as me-uchi in Japan) is an indispensable basic tool for sewing and fabric crafts. It consists of a metal shaft with a very sharp, tapered point that gradually widens toward the handle.
You insert the sharp point between the woven threads of a fabric, spreading the weave open without severing the threads. Beyond making temporary holes, it is widely used to guide fabric under the sewing machine presser foot and to poke out crisp, neat 90-degree corners on turned fabric edges.
It is not suited for making holes in resin or hardwood. Forcing it into rigid materials will bend or dull the fine tip, so always reserve it for textiles and pliable sheet materials.
The senmaitōshi closely resembles a tailor's awl, but its metal shaft is noticeably longer, thinner, and more uniform in thickness. Its Japanese name literally translates to "piercer of a thousand sheets," reflecting its strong penetrating power through paper.
This tool is used to punch starter holes through stacks of paper for binding, create pilot guide holes for small screws in soft wood, or score precise fold lines in paper crafting. Because of its straighter, narrower shaft, it excels at making deep, straight punctures.
If you are working on paper crafts or bookbinding, reach for a senmaitōshi instead of a standard tailor's awl. Note, however, that because it pushes paper fibers aside rather than coring them out, the hole perimeter will have a slight raised lip.
The kiri is a traditional Japanese manual boring tool primarily used in woodworking and timber crafts. You place the wooden handle between your palms and rub your hands back and forth, rotating the tool to bore into the wood.
Various blade profiles exist, such as the triangular-tipped mitsume-giri, the square-tipped yotsume-giri, and the cylindrical tsubo-giri designed for rounded holes. Because the blade slices through wood grain as it advances, it is exceptionally effective for making pilot holes for nails and screws.
Never use a traditional gimlet on brittle materials like acrylic, plastic, or resin. The heavy inward pressure exerted while twisting will crack the material instantly. Keep in mind that a kiri is strictly for wood.
When you need clean, round holes in cured resin pieces, shrink plastic, acrylic parts, or metal blanks, you must rely on tools that scrape material away through rotation. This category dramatically elevates the quality of your finished items.
A pin vise is a vital handheld tool for manually drilling precise, small-diameter holes. It features a pen-like handle with an adjustable chuck at the tip that securely clamps fine drill bits.
You rest the domed head of the pin vise in your palm and twist the knurled shaft between your fingertips to drill gradually into the piece. Because it is completely manual and non-powered, there is no risk of drilling out of control, allowing you to position holes between 0.5 mm and 3.0 mm exactly where you want them.
Whether preparing a pilot hole for an eye pin in a resin charm or making hanging holes in shrink plastic, a pin vise should be your first choice. In my own resin crafting, it is easily the hole-making tool I reach for most often.
A drill bit is the cutting blade mounted in the chuck of a pin vise or power drill that physically carves through the material. It features spiral flutes designed to pull shavings and debris up and out of the hole as it spins.
Bits are available in increments as small as 0.1 mm, allowing you to switch sizes according to your project hardware. They come in various compositions, including high-speed steel (HSS), titanium-coated steel, and solid carbide.
The most common beginner error is snapping thin drill bits. Bits thinner than 1.0 mm will snap instantly if lateral or angled pressure is applied during drilling. Always keep the bit perfectly perpendicular to the material surface as you turn it.
A step drill bit features a cone-like, stair-stepped shape resembling a bamboo shoot. A single bit allows you to enlarge a hole through multiple predefined diameter steps incrementally.
It shines when you need to make larger holes in thin metal sheets, plastic casings, or shrink plastic. Applying a large conventional twist bit all at once often cracks thin materials, but a step bit expands the opening in gentle stages, preventing splits.
It also naturally deburrs the hole opening as it works. It is an extremely useful accessory when modifying thin panels or fitting hardware into craft enclosures.
A hand drill is a manual mechanical tool that uses a hand-cranked gear system to spin a chuck at higher speeds than a simple pin vise. It is suited for drilling holes between 3 mm and 10 mm safely and by hand.
While it lacks the sheer power of an electric drill, it offers superior manual control, eliminating the risk of spinning out of control or shattering your piece under sudden torque.
For beginners working on wooden crafts or thicker cast-resin blocks who feel intimidated by electric power tools, a hand drill is an ideal and reassuring compromise.
Electric mini drills and rotary tools spin cutting bits at high speeds using an integrated motor. They allow you to produce clean, round holes in mere seconds with virtually zero physical effort.
These tools are essential when you need to process large batches of resin charms or bore through hardwood elements and metal plates. Because they reduce work time by tenfold compared to manual drilling, production crafters consider them a must-have.
However, excessive rotational speeds generate intense friction heat, which can melt resin or plastics and cause melted sludge to seize onto the bit. Always select a model with variable speed control to prevent this issue.
These tools produce crisp circular cutouts with zero fraying or tearing. They are workhorses in leathercraft, carton-making (cartonnage), and paper crafts.
A hole punch uses lever action to shear through materials between an upper punch and a lower die. Alongside familiar two-hole office punches, handmade crafters rely on single-hole punches and heavy-duty lever punches.
They create clean, circular cutouts in paper, thin non-woven fabrics, and sticker sheets in a split second. They are perfect for tags, custom packaging, and threading holes on jewelry display cards.
Avoid using paper punches on stretchy or soft woven fabrics, as the fibers will easily snag in the mechanism and jam the punch. Treat them primarily as dedicated tools for paper and stiff craft sheets.
A hollow punch features a cylindrical steel cutting edge at its tip. You place the cutting tube against the material and strike the top end with a mallet or hammer to punch out a circular disk.
In leathercraft, this is the standard tool for belt holes and hardware installation holes. It also cleanly handles fabric, heavy cardstock, rubber, and felt.
If you craft in an apartment where hammering noise is a problem, or if you dislike using mallets, I highly recommend a screw punch. By simply pressing down on the handle by hand, an internal spiral mechanism automatically twists the circular blade, cutting clean holes silently. For quiet home crafting, the screw punch is my personal favorite.
An eyelet punch either combines hole-punching and metal-crimping capabilities in a single tool, or comes as a matching set designed to set metal eyelets and grommets into paper, fabric, or leather.
This tool is used whenever you want to reinforce and decorate the perimeter of a hole with metal, such as on gift tag cord holes or leather key fob loops. Squeezing the plier-like handles flattens and flares the metal barrel securely.
If the punch dies are misaligned or the setting order is reversed, the eyelet will crush unevenly. Make sure the size number of your eyelets precisely matches the sizing specification of your setter before buying.
In leathercraft, specialized tools are used to create stitching holes rather than plain round holes. Because leather is tough and difficult for needles to pierce directly, dedicated tools are used to form all stitching holes prior to sewing.
A diamond pricking iron (known in Japan as hishime-uchi) is a steel punch featuring multiple diamond-shaped (rhombus) teeth arranged in a row. You align it along your stitching line and strike it with a mallet to stamp evenly spaced diamond holes designed to nestle hand-sewing thread neatly.
They come with 1, 2, 4, or 6 prongs. Crafters typically use irons with higher tooth counts for straight lines, and switch to 2-prong versions when navigating tight curves.
Sewing through holes created by diamond pricking irons creates the iconic slanted, saddle-stitched look characteristic of fine leatherwork. It is one of the very first tools you should acquire when starting leathercraft.
A diamond awl (hishi-giri) is a handheld piercing tool with a blade cross-section shaped into a precise diamond. It is used to push entirely through the leather where guide marks were made by a pricking iron.
When stitching through multiple layers of thick leather, trying to drive a diamond iron completely through to the back can warp the leather and cause the rear holes to wander out of alignment. Lightly marking the placement with an iron and then piercing through one hole at a time with a diamond awl is the standard method for achieving a professional finish.
The tip of a diamond awl is exceptionally sharp, requiring careful handling, but mastering it elevates the neatness of leather stitching dramatically.
To help you see at a glance which tool belongs with which material, here is a summary pairing common handmade genres with their recommended tools:
Even with the right tool, disregarding core technique will lead to spoiled work. Here are four foundational rules I always follow in my own studio:
Creating holes in handmade crafts directly dictates the structural strength, hardware fit, and overall beauty of your finished piece.
Each of the 13 tools introduced here was designed to deliver peak performance on specific materials. Avoid settling for whatever sharp object happens to be lying around. Instead, ask yourself whether your material needs to be pushed aside, scraped away, or punched out.
To begin, simply assemble the foundational tools for your primary craft (a pin vise for resin, hollow punches and pricking irons for leather, or a tailor's awl for sewing). Understanding how these tools function will immediately lift the quality of your craft projects to the next level.
I will explore detailed maintenance, usage tips, and product comparisons for individual tools in future articles, so stay tuned!
If you found this guide helpful, sharing it with your fellow makers on social media is always deeply appreciated!
See you in the next article! This was Yassy from Crafters!



For example, if you are looking for articles about mizuhiki, try searching for "mizuhiki"; if you are interested in tools, try keywords like "nippers" or "pliers."
