Complete Leather Care Guide: How to Prevent Mold, Cracking, and Losing Shape for a Lifetime of Use
yassy
Crafters!

Hello everyone, this is Yassy from Crafters! (・∀・)
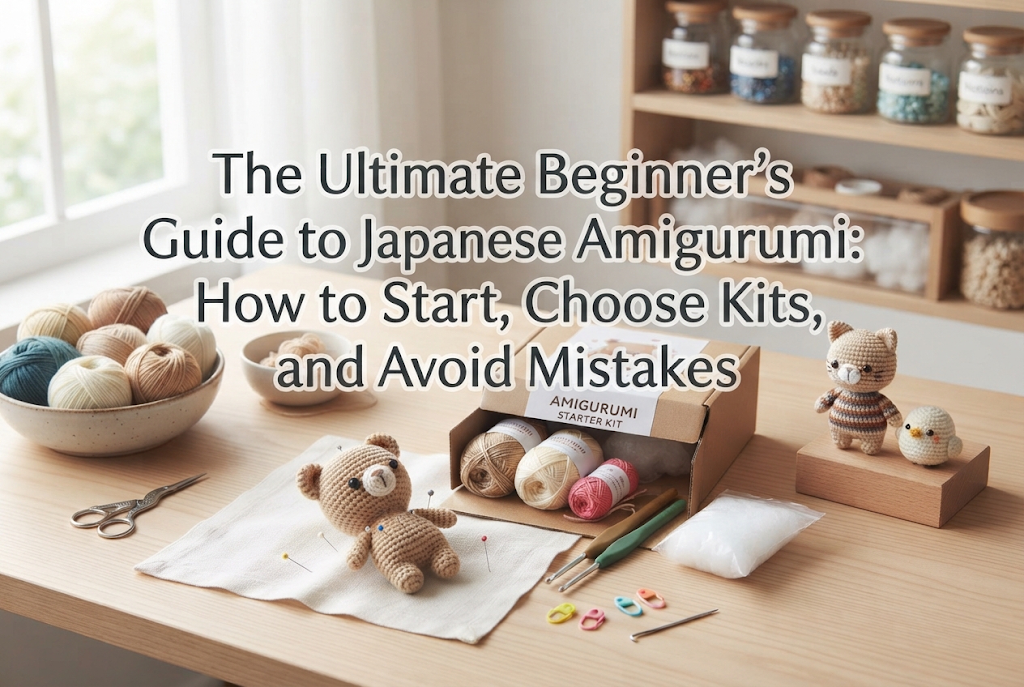
Adorable amigurumi stuffed animals are filled with the warmth of handmade craft. Whenever you see them in shops or craft fairs, have you ever thought, "I wish I could make such a cute plushie myself"?
While looking at and buying amigurumi is delightful, the joy of creating one yourself is truly special. As you crochet round by round, a rounded shape forms, and the moment it seems to come to life is utterly addictive once you experience it.
There is no need to give up thinking, "I'm too clumsy for yarn crafts." Amigurumi is actually one of the most beginner-friendly genres in crochet. About 90% of the work relies on a single, basic technique called koma-ami (single crochet). Unlike long scarves, you don't need to maintain exact stitch counts over flat surfaces for hours, and you can complete a three-dimensional piece in a short time.
In this article, I have condensed all the knowledge you need to start amigurumi without getting lost and create cute pieces in the shortest time possible. I will thoroughly cover everything from selecting essential supplies to fail-proof tips and leveraging starter kits available online right now.
The biggest reason amigurumi is so recommended for handmade beginners is that it requires very few tools and materials. With just one crochet hook, one skein of yarn, and some fiberfill, you can complete a small piece in a single day.
Unlike flat crochet, amigurumi is the art of creating three-dimensional shapes. You make round spheres using increases and decreases, then fill them with stuffing to shape them. Once you master this technique of making a sphere, you can create all the parts—head, body, arms, and legs—using the exact same principles.
Best of all, you can create a one-of-a-kind original piece simply by how you style the facial features. Even when using the same pattern, every creation turns out with a unique face depending on eye placement and stuffing density. This ease of feeling an emotional connection to your work is the true essence of amigurumi.
Even with zero basic knowledge of crochet, you will never get frustrated as long as you follow the correct steps and prepare the right tools. To start, set your goal simply to "crochet one sphere." Once you can crochet a sphere, 80% of amigurumi crafting is already conquered.
When starting amigurumi, there is no need to waste time wondering what to buy. The essential items are fixed. Using low-quality tools can cause hand fatigue or yarn snagging, leading to frustration, so make sure to choose the right gear.
The most commonly used hooks in amigurumi are Japanese sizes 4/0 to 6/0. The absolute best recommendation for a beginner's first hook is a Japanese size 5/0 (3.0 mm) crochet hook.
Instead of a plain, thin metal hook, always choose a hook with an ergonomic rubber grip. Ergonomic handles reduce hand fatigue and help keep your stitch tension consistent. Eliminating tool-related stress is the key to preventing frustration.
Yarns suitable for amigurumi are 100% acrylic or 100% cotton. Avoid fuzzy yarns like wool, as they make stitches hard to see and are difficult for beginners to manage.
For thickness, choose medium to DK weight yarns (known in Japan as namibuto or gobuto). Yarn that is too thin makes stitches invisible, while yarn that is too thick can lose its shape easily. Medium acrylic yarn offers vibrant colors and clear stitch definition, making it ideal for beginners.
Stuffing serves as the skeleton of your creation. Be sure to use high-quality 100% polyester craft fiberfill. It is essential to select stuffing that is soft and bouncy, like cotton candy.
Using cheap or stiff stuffing can cause your piece to sag or deform over time. Polyester fiberfill holds its shape well and is perfect if you ever need to wash your finished project.
These parts define the expression of your amigurumi. Look for insertion-type plastic eyes with a back post.
Sizes around 4mm, 5mm, and 6mm are easy to use for small amigurumi. While there are various types, such as solid black button styles or crystal eyes, starting with simple black post-style safety eyes is the right move.
In particular, stitch markers are an absolute necessity in amigurumi. Without them, you will lose track of your stitch count during a round and guarantee a mistake.
Many people wonder, "Can I just buy everything at a 100-yen shop (dollar store) to start?" The conclusion is that while 100-yen shops are fine for some materials, your main tools should definitely come from specialized craft brands.
For crochet hooks, invest in ergonomic grip hooks from established craft manufacturers like Clover or Tulip. Hooks from 100-yen stores tend to have poor glide or rough hook tips that split the yarn easily. Hook quality changes the ease of crocheting by 180 degrees.
On the other hand, auxiliary supplies such as polyester stuffing, tapestry needles, stitch markers, and scissors from 100-yen shops are completely adequate. Acrylic yarn from 100-yen shops is also perfectly fine for practicing.
Buying a high-quality crochet hook while sourcing small materials and practice supplies affordably is the smartest and most cost-effective way to begin.
The reasons beginners get stuck with amigurumi are almost always the same. If you know these failure patterns and solutions in advance, you can create a high-quality piece right from your very first attempt.
Because amigurumi is worked continuously in a spiral, it becomes hard to visually spot where the first stitch of a round is. If you miscount, what should be a circle turns into a distorted shape.
Solution: As soon as you complete the first stitch of a round, attach a stitch marker to it. Because the marker always indicates the start of the round, you won't need to recount endlessly, 100% preventing stitch count errors.
Stuffing density determines the final look of your piece. Too little stuffing results in a squishy, saggy figure, while too much stuffing stretches the stitches and lets the stuffing show through.
Solution: Stuff firmly until it reaches the firmness of a well-made plush toy. Use tweezers or chopsticks to push stuffing into every corner without gaps. The professional secret is to stuff evenly right up to the limit before stitches start stretching.
When sewing ears or snouts to the head part while holding them by hand, they will almost certainly shift position. Seeing a crooked face from the front after finishing is a very common disappointment.
Solution: Always use at least four sewing pins to hold parts in place before sewing. Inspect from the front, sides, and angles to confirm the balance is perfect before starting your stitches.
Beginners tend to either pull too hard and create tight stitches where the hook can't enter, or loosen up too much and create gaping holes.
Solution: Pull your yarn loop up to match the thickness of the hook shank before making the next stitch. Instead of forcing your hands, focus on letting the yarn rest against the hook's diameter to achieve consistent, beautiful tension.
A shift of even one millimeter in eye placement completely changes an amigurumi's expression. Placing eyes too far apart or too high can make the face look awkward.
Solution: Before fixing insertion eyes with glue, use an awl to pierce guide holes and test-insert the eyes. Take your time adjusting their positions repeatedly until you find the absolute cutest expression. Deciding on facial placement is the step that deserves the most time in amigurumi crafting.
When starting amigurumi from scratch, buying books, yarn, and tools separately is not recommended for beginners. Just finding the exact yarn type listed in a book can be a chore, and there's a high risk of pairing the wrong yarn weight with the wrong hook size.
The fastest and most reliable way to complete an amigurumi without failing is to purchase a starter kit online (such as on Amazon) and jump right in.
When selecting a kit online, make sure it meets these three conditions:
Video instruction is especially crucial. Understanding stitch movements purely from printed diagrams is a high hurdle for beginners. Seeing how to insert the hook and wrap the yarn in a video is the easiest and most accurate method.
With a video-guided kit, you can simply mirror the instructor's hand movements on your smartphone screen, pausing and rewinding as needed, allowing you to move forward smoothly even with zero prior experience.
Avoid complex dolls wearing elaborate dresses or projects with more than 10 separate parts for your first kit.
Great first choices include simple, round animals where the head and body are combined or require minimal assembly—such as bears, chicks, cats, or rabbits. Building one small success experience is the best secret to long-term enjoyment.
If I were a complete beginner starting amigurumi today, I would follow these four steps to guarantee success without any unnecessary detours:
First, search online for "amigurumi beginner kit video tutorial" and purchase a well-reviewed kit with a cute design. If the kit doesn't include an ergonomic crochet hook, add a standalone Japanese size 5/0 (3.0mm) ergonomic hook to your cart as well.
While waiting for delivery, watch a few short videos on YouTube for "amigurumi magic ring" (wa no tsukurime) and "single crochet" (koma-ami) to visualize the process.
Once your kit arrives, use the included practice yarn (or scrap acrylic yarn) to practice making a magic ring and working a few rounds of single crochet.
Rather than jumping straight into the main project, spend just 15 minutes letting your hands get used to holding the hook and pulling loops. This step drops your chance of making mistakes on the final project to zero.
When ready, begin the kit using the main project yarn. Play the video tutorial, pausing after each stitch to check your hands. Place a stitch marker at the end of each round to verify your stitch count matches the pattern.
As the sphere takes shape, pack the fiberfill in firmly without gaps. The moment you hold a plump, clean sphere in your hand, your sense of accomplishment and excitement will skyrocket.
Crochet the remaining parts like ears and limbs, fix their positions with sewing pins, and attach them with a tapestry needle.
Finally, poke holes in the head using an awl, apply craft adhesive to the posts of the plastic eyes, and insert them. The instant the eyes are placed, what was just a bundle of yarn transforms into a cute character filled with life. Your very first amigurumi is complete!
Completing a piece is not the end of the journey. The ways to enjoy amigurumi after finishing are endless.
By attaching strap cords, jump rings, or keychain hardware to the top of your finished piece, you can carry it as a bag charm or key ring.
Going out with a one-of-a-kind amigurumi that you crocheted yourself attached to your bag brings a level of satisfaction that ready-made items simply cannot match.
Once you master making one figure, changing the yarn color while using the exact same pattern produces a completely different mood. For instance, swapping brown yarn for pink transforms a basic bear into a strawberry-colored friend.
Furthermore, using thicker yarn yields a larger amigurumi, while ultra-fine yarn creates miniature creations. Without changing the pattern, altering materials expands your variations infinitely.
Once you craft amigurumi yourself, your appreciation when viewing others' creations deepens dramatically. You'll gain new perspectives—wondering how a part was sewn on or admiring how clever increase placement created a smooth curve. Shopping at craft events or handmade platforms (like Japanese marketplace sites minne and Creema) becomes many times more enjoyable.
The joy of making, observing, and collecting connects like a circle, enriching your handmade lifestyle.
Amigurumi is not a craft that requires special talent or years of training. With the right tools and a clear starter kit, even a complete beginner can start creating adorable plush creations today.
Spending time worrying, "It looks too hard" or "I can't read crochet charts," is a missed opportunity. Today's starter kits come with video tutorials designed so beginners never get stuck.
All you need is a bit of curiosity and the action to take the first step. Head online to Amazon or your favorite craft site, search for a kit that makes you think, "That's so cute, I want to make it!" and place your order.
The day your kit arrives marks the wonderful start of your new craft journey. Enjoy the soothing feel of yarn and experience the delight of crafting your very own cute companion with your own hands!
If you enjoyed this guide, sharing it with friends on social media or messaging apps would mean the world to me! See you in the next article—this was Yassy from Crafters!




For example, if you are looking for articles about mizuhiki, try searching for "mizuhiki"; if you are interested in tools, try keywords like "nippers" or "pliers."
