A Complete Guide to Authentic Japanese Leathercraft: Projects, Difficulty, Workspace, and Costs
yassy
Crafters!

Hello, crafters! It’s Yassy from Crafters! (・∀・)
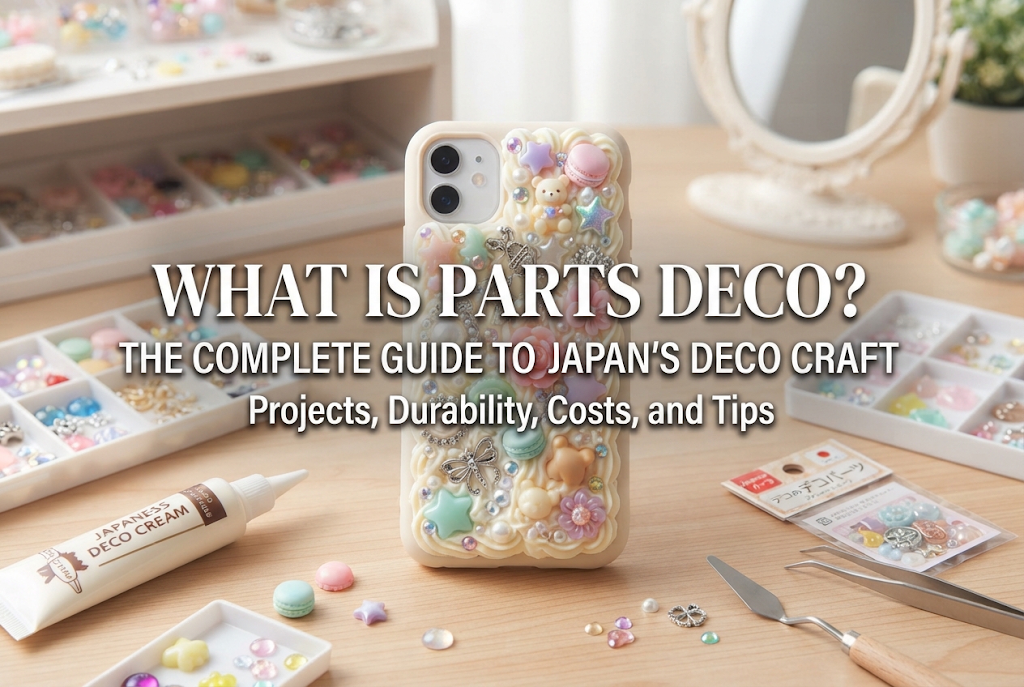
Have you ever seen accessories, phone cases, or small trays completely covered with cute acrylic charms, sparkling rhinestones, and colorful resin pieces, and thought, "I really want to make something like that myself!"? That craft—transforming everyday base items by adhering charming pieces to express your unique style—is known in Japan as "Parts Deco" (パーツデコ)!
I personally love making all kinds of handmade crafts, browsing craft markets, visiting exhibitions, and finding special pieces at handmade shops. Among all these hobbies, I can confidently say that Parts Deco is one of the absolute best genres: it requires no specialized heavy machinery or complex techniques, yet it delivers immense satisfaction and instant cuteness.
Still, beginners who want to dive into Parts Deco often share concerns like these:
In this guide, I will walk you through everything you need to know about Parts Deco—from the fundamentals and popular project ideas to durability secrets, difficulty level, workspace setup, and realistic startup costs. By the end of this article, you will have a clear roadmap and the confidence to jump right into creating!
Parts Deco is a handcrafted embellishment technique where you apply various items—such as acrylic shapes, resin charms, cabochons, rhinestones, pearls, and jewels—onto a solid base surface (such as a plastic case or tin) using specialized craft adhesives or deco cream (whipped clay/silicone paste).
Unlike ceramics, sculpting, or knitting, where you build shapes from scratch, Parts Deco focuses on combining an existing base with pre-formed, ready-to-use decorative charms. That means you do not need drawing skills or complex 3D modeling experience to craft an incredibly high-quality, eye-catching piece on your very first try.
At its core, Parts Deco is all about the aesthetic of layout and color curation. A plain, clear plastic case or an inexpensive trinket box from a 100-yen shop (or dollar store) transforms under your hands into a cherished, one-of-a-kind statement piece.
You can create an elegant, mature design using a monochromatic palette, or go all out with vibrant, candy-like charms for a high-energy pop look. The ability to directly bring your personal "kawaii" vision to life is the greatest superpower of Parts Deco.
What drew me into this craft is simple: it delivers maximum creative excitement in a very short amount of time. The thrill of picking out individual charms, planning their placement, and setting that final piece down brings a unique sense of accomplishment you don't always get from longer, more tedious crafts.
The creative combinations are infinite. Buying ready-made accessories is fun, but nothing beats looking at something and thinking, "This exact color combination is the cutest thing ever, and I made it." Handmade deco items also make fantastic gifts that friends genuinely adore.
Basically, any hard surface that is flat or gently curved can become a canvas for Parts Deco. Here are four of the most popular and beginner-friendly project categories currently trending in Japan.
Right now, one of the hottest trends in Japan's deco scene is decorating hard trading card cases (toploaders). Fans of idol groups, anime, manga, and gaming love personalizing clear protective cases that hold their favorite photocards or instant photos (Cheki).
The standard style is framing the border with resin charms, rhinestones, and decorative whipped cream while keeping the center clear to showcase the photo. Coordinating the pieces to match your favorite character or idol’s image color elevates your "oshikatsu" (fan support activities) to an entirely new level.
Clear smartphone cases are an absolute classic base, balancing everyday practicality with standout visual appeal. You can cover the entire back with a dense mosaic of charms or place a few focal pieces for a minimalist accent.
Beyond phone cases, you can decorate wireless earbud charging cases, phone grip rings, and portable power banks. It is an effortless way to customize the tech gadgets you carry every single day.
Compact pocket mirrors and small metal or resin pill boxes make wonderful gifts and personal pick-me-ups. Because the lids provide a flat, stable surface, they are ideal for beginners, offering minimal risk of placement errors.
Their palm-sized format allows you to achieve a rich, luxurious look using only a modest number of charms. Every time you pull one out of your bag, it brings a little spark of joy.
Deco crafting extends naturally into daily household goods. Flat clip hairpins decorated with tiny resin pieces can be whipped up in minutes and are perfect for holding back bangs while working or washing your face.
You can also embellish pens, calculators, desktop staplers, small standing mirrors, or whip-deco photo frames. If an item has a hard, solid surface with enough space to adhere a charm, it can instantly become your next craft canvas.
One of the most common worries among beginners is: "It looks gorgeous, but won't the pieces pop right off when I carry it around?"
Let me reassure you: caring for Parts Deco pieces is not difficult at all. As long as you follow the proper bonding rules and surface preparation, your charms will not easily fall off in daily use.
Over 90% of failures happen because of two avoidable mistakes: choosing the wrong adhesive and skipping surface cleaning (degreasing).
Using standard school PVA glue, wood glue, or brittle instant superglues that are incompatible with plastics means that shock and daily vibrations will cause charms to detach very quickly.
To permanently secure charms, you must use a two-part epoxy adhesive or a solvent-free, high-strength multi-purpose craft adhesive rated for metals, glass, and hard plastics. In addition, you must wipe the base surface with an alcohol wipe to remove natural finger oils, moisture, and dust before applying glue. This quick degreasing step alone multiplies bonding strength several times over.
Even a strongly bonded piece can sustain damage if handled roughly. Keep these everyday precautions in mind:
If you consider yourself clumsy or worried about lining things up neatly, take heart: technically speaking, Parts Deco is one of the easiest craft genres out there (rated around 1 to 2 stars out of 5 for difficulty).
You do not need to master consistent yarn tension like in knitting, hone clay sculpting finesse, or develop precise paintbrush control. The charms themselves are already manufactured into finished, adorable shapes.
Your primary role is simply choosing your favorite pieces, deciding where they sit, and gluing them down. Your core tools are just tweezers and glue. Anyone—from young crafters to adults—can achieve a professional-looking finished piece on their very first session.
While the mechanical difficulty is low, almost every beginner runs into two specific challenges: getting stuck on the layout, and making a mess with excess adhesive.
Another major advantage of Parts Deco is that it requires very little physical space.
To enjoy Parts Deco, all you need is enough table space to lay down an A3-sized craft mat or a single sheet of newspaper. The corner of a dining table or a compact study desk is plenty.
You do not need bulky machinery, curing ovens, or large water containers. A comfortable work light, your tools, and a small flat surface are everything you need, making this craft ideal even if you live in a cozy apartment.
Because you work with small components, preventing clutter keeps your process smooth and stress-free. Spilling charms directly onto a flat tabletop makes them easy to bump, roll, and lose.
Always work over a silicone craft mat or a shallow tray. Keep your pieces organized by color or style in sectioned bead organizers (commonly found at 100-yen stores or craft retailers) or small shallow dishes. Having items clearly visible and reachable allows you to stay in your creative flow.
If you hesitate to try a new craft because startup equipment usually costs a fortune, Parts Deco is fantastic news. It has one of the lowest entry barriers in the handmade world.
If you want to test the waters on a minimal budget, you can assemble a complete setup for under 1,000 yen using 100-yen shops or online value packs.
Sample 1,000-Yen Beginner Kit:• Base item (Hard card sleeve, compact mirror, etc.): ~110 yen• Deco charms & rhinestone sets (3–4 packs): ~330–440 yen• Strong multi-purpose adhesive: ~110 yen• Tweezers and wooden toothpicks: ~110 yen• Silicone mat or shallow tray: ~110 yenTotal: Approx. 880–990 yen
Being able to walk into a shop with a single 1,000-yen bill and walk out with everything needed to finish a project that afternoon is an incredible perk.
If you plan to use higher-end materials or sell your creations on handmade marketplaces (such as minne, Creema, or Etsy), plan an initial budget around 3,000 to 5,000 yen.
With this budget, you can order wholesale packs of premium acrylic charms, brilliant cut-glass rhinestones, and professional-grade two-part epoxy or dedicated deco adhesives through Amazon, Rakuten, or craft specialty vendors. Buying charms in bulk lowers your per-unit cost significantly, reducing your production expense per completed piece.
The number one mistake beginners make is buying large grab-bags of charms simply because they look cute on the shelf. If you buy pieces without a planned base or color palette, you end up with mismatched tones and awkward sizes that sit unused in storage.
To shop smart, always choose your base first (e.g., an iPhone case), pick your theme second (e.g., pastel pink Yume-Kawaii), and only then purchase the pieces that fit that concept. Defining base and theme beforehand guarantees zero wasted supplies.
Here is the proven, step-by-step method to ensure your very first creation turns out gorgeous without frustration.
After wiping down the base surface with an alcohol wipe, resist the urge to squeeze out glue right away! First, arrange your charms completely dry directly on the base.
Set down the focal pieces first, then surround them with smaller cabochons, pearls, and stones until you love the composition. Once your layout is finalized, take a clear photo from directly above using your smartphone! This photo acts as your blueprint, so you never lose track of where pieces belong once you start gluing.
With your reference photo ready, slide the charms slightly to the side of your working tray. Begin adhering the largest focal charms first, matching your photo.
Place a small dab of adhesive onto the center of the charm's back using a toothpick. Pick up the piece with tweezers, set it gently onto the targeted spot on the base, and apply light pressure for a few seconds to seat it firmly. If any adhesive squeezes out around the edges, immediately wipe it away with the clean tip of a dry toothpick before it sets.
Once all primary pieces are anchored, inspect the open spaces between them. Tucking tiny rhinestones or micro-pearls into these small gaps increases overall visual density, giving your work a lush, professional finish.
When everything is placed, resist the temptation to touch or handle it. Let the piece sit completely flat to cure. Depending on your adhesive, leave it undisturbed for at least 12 to 24 hours. Allowing the adhesive to reach full chemical cure ensures a rugged, impact-resistant bond that lasts!
Let’s recap what makes Parts Deco such a wonderful craft:
Parts Deco captures both the joy of crafting by hand and the fun of designing your own miniature world of cute aesthetics. Being naturally "good with your hands" is not a requirement; your personal taste and the excitement of working with pieces you love are the best ingredients you can bring.
Next time you visit a craft store or browse online, pick up a small clear case and a few charms that catch your eye. Experience the creative rush of bringing a sparkling idea to life with your own hands!
If you found this guide helpful, sharing it with your craft-loving friends on social media means the world to me. See you in the next craft guide! This was Yassy from Crafters!


For example, if you are looking for articles about mizuhiki, try searching for "mizuhiki"; if you are interested in tools, try keywords like "nippers" or "pliers."
