The Ultimate Guide to Craft Stamp Inks: How to Choose the Perfect Ink for Paper, Fabric, Leather, and Slick Surfaces
yassy
Crafters!
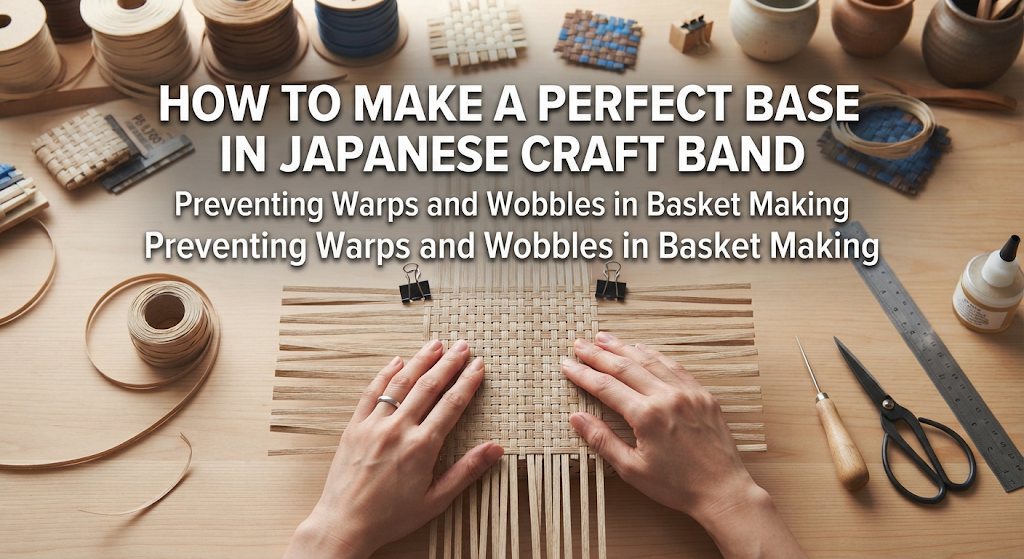

Hello, craft lovers! I'm Yassy from Crafters! (・∀・)
I have always loved making various handmade items, checking out wonderful pieces at shops and exhibitions, and using handmade items in my daily life. Japanese craft band—also widely known as Eco Craft (paper band)—is one of my favorite craft mediums. Over the years, I've made countless items ranging from woven basket bags and storage bins to petite decorative organizers.
While working on craft band projects, have you ever run into frustrating issues like these?
Actually, all of these problems stem directly from how the base is constructed. In Japanese paper craft band weaving, the base is the structural foundation of your entire project—much like the foundation of a house. If the base is skewed by even a millimeter, or if its right angles are slightly off, you cannot fix the distortion later on, no matter how carefully you weave the sides.
Conversely, once you master crafting a flawless base, the quality of your finished baskets will jump to a professional level. The side walls will naturally stand straight, resulting in sturdy, beautiful baskets that look store-bought.
In this guide, I'll walk you through the essential rules and concrete techniques for creating completely flat, warp-free craft band bases. From the common pitfalls beginners face to the routines I practice myself, I'll cover it all!
In paper craft band making, constructing the base requires the utmost precision and focus. There are clear structural reasons why the accuracy of the base dictates the quality of the entire piece.
First, the vertical bands—the structural uprights that form the body of the basket—intersect and anchor within the base. If an upright is displaced by just 1 mm at the base, it starts climbing upward at that 1 mm offset. As you weave dozens of rows up the sides, that slight discrepancy compounds into significant twisting, warping, or bulging.
Second, the flatness of the base directly affects everyday functionality. A rippled base or floating corners will make the basket rock back and forth on a flat surface. Especially for tote bags and storage baskets meant to hold items, a rigid and flat base is essential.
Once you master building a solid base, you will be able to tackle projects of any shape or size without failure. Perfecting your base technique is truly the quickest shortcut to leveling up your craft band skills.
If your bases aren't coming out neat despite your best efforts, you might unknowingly be making one of these common mistakes. Let's look closely at the four main causes behind distorted bases.
Craft bands come tightly wound on spools or folded into bundles. If you cut and assemble them while they still hold these coils and folds, the bands' natural tendency to snap back into shape will cause the entire base to warp.
Never use cut bands right away without prepping them. It is a strict rule to straighten each strip completely—using your fingers or the edge of a ruler—before beginning assembly.
Eyeballing your layout and thinking "it looks straight enough" is the biggest obstacle to a neat base. Human vision is surprisingly imprecise; what feels like a 90-degree angle can easily be 88 or 92 degrees in reality.
When forming a square or rectangular base, a single angled strip can cause the entire grid to shift into a parallelogram as you assemble more strips. Working by instinct without a visual grid guide or ruler is a recipe for uneven results.
How you handle the wood glue (craft PVA glue) used to join paper bands makes a huge difference. If you apply too much glue, the moisture will soak into the paper band, softening it and making it buckle, while also lengthening drying time and inviting slippage.
On the other hand, applying too little glue or moving the pieces before the adhesive dries will cause joints to lift, drastically reducing structural strength. Applying a controlled amount and clamping firmly until fully dry is an indispensable step.
When weaving a base using chasing weaves (running weaves) or structural knot weaves like ishidatami (cross-knot weave), varying your pulling tension from spot to spot causes uneven gaps and dense patches.
Tight sections pull inward and shrink, while loose sections push outward and bulge, creating a wavy surface. Maintaining a consistent pulling force throughout the base is critical.
Craft band bases come in different structures and weaving methods depending on the intended design and purpose. Knowing their features will help you pick the right base for your project.
This is the most standard and popular style, made by crossing vertical and horizontal bands in a flat grid and securing the intersections with craft glue. It is widely used for square baskets, rectangular storage bins, and simple tote bags.
While the process is intuitive and beginner-friendly, maintaining true 90-degree angles across all bands requires care, as the outer corners tend to splay out. Using a grid guide is the key to success here.
These bases are constructed by interlocking folded bands into continuous knot patterns. They yield thick, extraordinarily durable bases, making them ideal for heavy-duty tote bags and sturdy organizing baskets.
Because each knot is tied individually, keeping a consistent dimension is relatively straightforward. However, uneven tension can cause the base to cup or twist. Keeping your pulling direction and strength consistent ensures a crisp, flat finish.
These bases are built by crossing bands in an "X" or star pattern at the center, then weaving around them in concentric spirals. They are used for round baskets, fruit trays, and rounded pouch-style bags.
Because the spacing between spoke bands widens as you move outward from the center, maintaining uniform radial angles requires good control.
Here is a step-by-step breakdown of how to build a classic glued rectangular base with zero warping and crisp right angles. Follow these steps to achieve a stable, wobble-free base every time.
Cut your bands precisely to the lengths specified in your pattern. Even a 1 mm discrepancy can cause the edge of your base to become uneven, so always measure carefully against a firm ruler.
Once cut, remove any remaining curves or coils. Hold one end of the band with one hand, and run your other thumb and index finger—or the smooth corner of a ruler—firmly down the length of the band. Make sure the strip lies completely flat like a stiff ruler before assembling.
Lay down a craft cutting mat featuring a 1 cm printed grid. If you don't have a cutting mat, take a sheet of grid paper and tape it securely to your table with low-tack tape or place it under a clear desk mat.
This grid allows you to maintain exact right angles and parallel lines without relying on guesswork. In craft band base-making, a grid guide is an essential tool.
Never start gluing from one edge toward the other. First, pick the exact center vertical band and center horizontal band. Lightly mark the midpoint of each strip with a pencil.
Align the horizontal band along a horizontal grid line, then cross the vertical band at a right angle, matching their center marks. Apply a tiny dot of fast-drying wood glue at the intersection, align both pieces carefully to the grid lines, and press down firmly.
This central cross serves as the baseline for the entire piece. As long as this initial cross is fixed at a precise 90-degree angle, your base will not twist out of shape.
Once the central cross is secure, add the remaining bands outward toward the left and right, and top and bottom. Starting from one edge and working across allows tiny alignment errors to accumulate, which can severely distort the final corner.
Working outward from the center disperses any minor variances, resulting in a balanced, symmetrical piece.
Push the strips tightly together with your fingertips to eliminate unwanted gaps before bonding, and check after every band that it sits perfectly parallel to the grid lines.
Finger pressure alone is often not enough to set glued joints flat. Use craft clips or sturdy clothes pins (pegs) to clamp every glued intersection securely.
Holding everything by hand until the glue dries is impractical. Let the tools do the work to prevent shifting and ensure a firm bond. Wait until the glue turns completely clear and dries thoroughly before moving on to the next step.
Round and oval bases involve distinct techniques compared to rectangular ones. Here are key methods for keeping them flat and balanced from the center out.
When forming a round base, crossing multiple bands at the center point can create a bulky, raised bump that prevents the basket from sitting flat.
To avoid this, keep the center overlap as thin as possible. You can split bands in half widthwise for the core spokes, or stagger the overlapping points slightly when gluing the core spokes down.
If the spokes radiating from the center are unevenly spaced, the base will warp into an irregular oval or polygon as you weave outward.
Use a circular grid template or protractor underneath your work. For example, if you are using eight radial spokes, lock them in at equal 45-degree intervals.
When weaving the base cord around the spokes, pulling too tightly will cause the base to cup upward like a small bowl. Weaving too loosely, on the other hand, will leave slack, messy gaps.
Instead of pulling outward or upward against the spokes, weave with a light downward pressing motion on the flat base with one hand, keeping the piece flush against your table. Get into the habit of setting the base on the table after every row to verify that it remains flat.
Even a beautifully constructed base can lose its shape during the "turning up" (folding up) stage, where the uprights transition into vertical side walls. Here is how to make clean folds without distorting the base.
Once the base weaving is complete, fold the vertical uprights upward. Avoid casually bending them with just your thumb pads, as this results in soft, rounded edges that blur the base perimeter.
Instead, press a metal ruler, bamboo scoring tool, or the blunt spine of an awl firmly along the edge line of the base. Fold the bands sharply upward at a clean 90-degree angle against this straight edge. Creating a distinct, crisp crease defines the perimeter and ensures the walls rise straight.
The very first woven row on the side walls establishes the basket's profile.
If you pull the weaving band too tightly on this first round, it will pull the corners inward and collapse the neat perimeter of your base. Weave the first row with gentle, consistent tension, letting it rest softly against the uprights, and leave adequate slack around the corners.
Here are the personal habits and favorite techniques I always rely on when making craft band items. They are easy to implement and make an immediate difference in your finished work!
Before applying glue, I temporarily tape the arranged bands onto the cutting mat using masking tape. This lets me step back and inspect the symmetry and spacing before committing with adhesive, virtually eliminating placement mistakes.
Using high-tack tape can tear the paper fibers, so I always reach for gentle, low-tack Japanese washi masking tape.
I keep two types of craft wood glue on hand. For the crucial center cross, which I want to anchor instantly, I use a fast-setting, high-tack wood glue. For the surrounding bands where I might need a few seconds to fine-tune spacing, I use standard wood glue with a slightly longer open time.
Matching the glue's characteristics to the task makes the whole process smoother and much more accurate.
If my assembled base has a slight warp or wave once glued, I lightly mist the entire base with clean water using a fine spray bottle. Because craft band is made of paper, moisture temporarily softens the fibers, allowing them to relax and be reshaped.
I place the damp base on a flat surface, cover it with a smooth board or plastic sheet, and set heavy books or a water-filled container on top as a weight until it dries completely.
When the paper dries under weight, the bands fuse and settle together, producing a remarkably flat, rigid, and sturdy base! This technique is one of my absolute favorites.
Here is a checklist of tools that make base construction much easier and more precise. None of these are expensive, but having the right tools on your work table will drastically reduce mistakes.
Here are answers to common questions beginners encounter during base building.
Q: After gluing, the entire base warped upward as it dried. How can I fix this?A: This happens when the moisture in the glue causes the paper fibers to shrink unevenly as they dry. Don't worry—you don't have to start over. Lightly mist the warped area with water, gently press it flat, and let it dry thoroughly under a heavy, flat object. It will return to a flat shape.
Q: The upright bands cracked along the corner when I folded them up.A: Folding dry paper bands sharply can sometimes split the fibers. Before folding, dab a tiny amount of water along the fold line using a damp brush or your finger. The added moisture softens the paper, allowing it to crease cleanly without cracking.
Q: My rectangular base ended up a few millimeters larger than the pattern measurements.A: This is caused by tiny gaps between adjacent bands accumulating across the grid. When gluing bands together, use your fingertips to snug each band firmly against its neighbor before securing it to avoid spacing creep.
We've explored the fundamental methods and fine details for building clean, stable craft band bases.
Let's review the key rules for making a perfect base:
At first glance, this might seem like a lot of steps. However, by adhering to these basic practices, you will be able to make beautifully flat, stable baskets without annoying wobbles!
When your base is sound, weaving the side walls becomes far more enjoyable and effortless. There's nothing quite like the feeling of holding a sturdy, polished basket bag that looks like it came straight from an artisan boutique.
I hope you give these techniques a try on your next craft band project. Wishing you a happy, fulfilling handmade journey!
If you enjoyed this guide, sharing it with your fellow crafting friends is always deeply appreciated! See you in the next article—this was Yassy from Crafters!




For example, if you are looking for articles about mizuhiki, try searching for "mizuhiki"; if you are interested in tools, try keywords like "nippers" or "pliers."
