Rubber Stamps vs. Clear Stamps: Complete Guide to Feel, Durability, and Flawless Stamping
yassy
Crafters!

Hello, everyone! It’s Yassy from Crafters! (・∀・)
As someone who loves making, looking at, and buying all kinds of handmade crafts, there is one tool in hand embroidery where I can state with absolute certainty: "Having this tool or not completely changes the quality of your finished piece." That essential tool is the embroidery hoop!
When you first decide to try embroidery, you might think you only need a needle, thread, and fabric. However, finishing a beautiful piece of hand embroidery without an embroidery hoop is practically impossible. If your fabric isn't stretched tight with consistent tension, no matter how neatly you move your needle, the fabric will pucker, shrink, and leave you with a disappointing, wrinkled result.
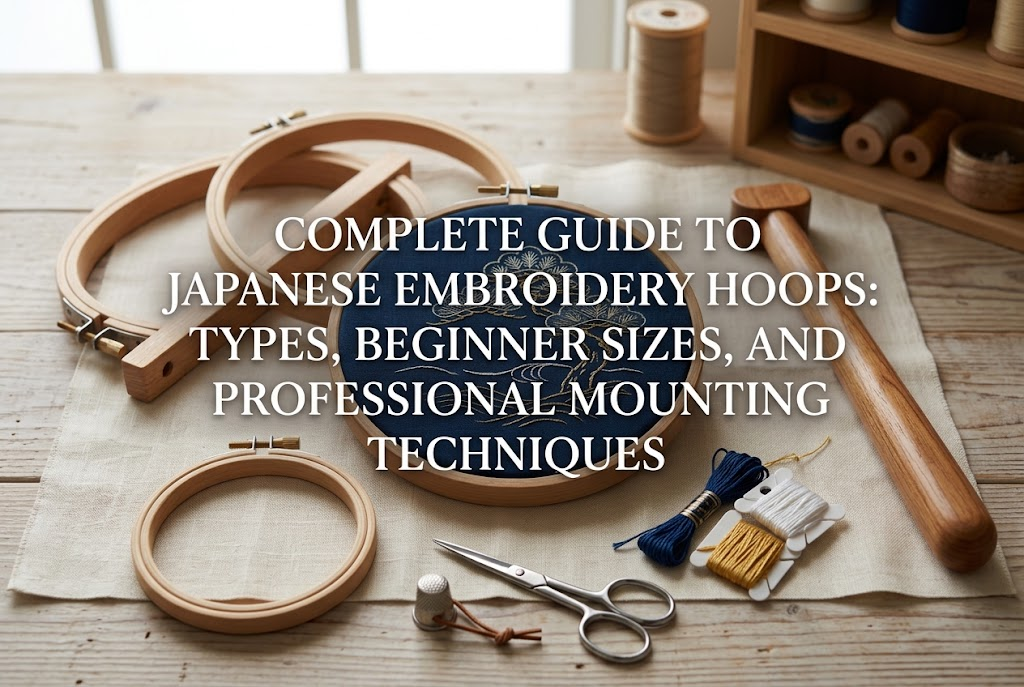
In this guide, I’m pouring in all my knowledge and experience as a Japanese craft writer to explain everything: from the fundamental role of embroidery hoops to the characteristics of different materials, key differences from similar tools, how beginners should choose their very first hoop, and professional techniques to make your finished work look dramatically better! Read on, and you'll be able to confidently pick the perfect hoop for your projects and enjoy stress-free, beautiful stitching.
An embroidery hoop is a specialized tool designed to sandwich fabric between two rings, keeping it taut while you stitch. Here is why using one is so critical for hand embroidery.
When you embroider, the pulling force of the thread places far more strain on the fabric than you might realize. If you hold fabric in your bare hands while stitching, every tug on the thread pulls the fabric inward, causing your pattern to distort. Worse yet, once stitching causes fabric puckering, stretching the fabric afterwards will not restore its original shape.
By using an embroidery hoop, you gain three major advantages:
I once tried to cut corners on a small accent embroidery design by stitching without a hoop. The result was a complete failure—the fabric puckered and rippled so badly that it couldn't be sold or even used for myself. If you aim for a beautiful finish, an embroidery hoop is an indispensable tool you can never skip.
Furthermore, embroidery hoops aren't just for the stitching process. Recently, "hoop art"—where finished embroidery is left inside the hoop and hung on a wall as interior decor—has become wildly popular. Combining practical functionality with display appeal is one of the greatest charms of embroidery hoops.
Embroidery hoops come in various materials and shapes. Understanding the specific advantages and disadvantages of each type is the first step toward finding the perfect hoop for your needs.
This is the classic, standard embroidery hoop and the material I recommend most highly. Made from natural wood (such as beech, beechwood, or bamboo), it features an outer ring tightened with a metal screw.
Features & Advantages:The greatest strengths of wooden hoops are their natural friction and comfortable feel in the hand. The slight texture of the wood surface grips the fabric, keeping it firmly stretched. Additionally, wood feels warm to hold and reduces hand fatigue during long stitching sessions. Its natural aesthetic is beautiful, making it ideal for displaying finished pieces as hoop art.
Disadvantages:Because it is natural wood, slight warping can occur due to humidity or dryness. Also, if you buy poorly made, extremely cheap hoops, wood burrs can catch on your fabric or embroidery thread, damaging your materials. Choosing products from reliable craft brands is an absolute must.
These modern hoops are made from synthetic resin. They come in vibrant colors and are easily accessible online or at craft supply shops.
Features & Advantages:Plastic hoops will never warp and offer structural stability. Many models feature built-in ridges or grooves along the inner ring that lock the fabric securely in place to prevent slipping. They are also washable, resistant to dirt, and very lightweight.
Disadvantages:Because the surface is slick, cheap plastic hoops without inner ridges tend to let thin fabrics slip. Additionally, the distinct plastic appearance means they are generally less suitable for framing work on display.
These hoops feature a hard plastic inner ring and a flexible rubber (PVC) outer ring, often printed with wood-grain or antique-style finishes.
Features & Advantages:There is no adjustment screw; you simply stretch the flexible outer rubber ring over the inner ring to secure the fabric. Without protruding hardware, they look sleek, refined, and elegant. They excel as display frames for finished pieces.
Disadvantages:Because you cannot fine-tune the tension with a screw, they are unsuitable for very thick fabrics or extremely delicate, thin materials. Think of them as finishing/display frames rather than working hoops for active stitching.
These are larger frames designed to sit on a tabletop or floor, or rectangular scroll frames where fabric is rolled onto top and bottom bars.
Features & Advantages:You don't need to hold the frame with your hand, leaving both hands completely free. This allows for high-speed stitching—inserting the needle from the front with your right hand and receiving it from the back with your left. They also allow you to work on large patterns or long strips of fabric without folding your work.
Disadvantages:They take up considerable space and can be difficult to store. They are significantly more expensive than standard round hoops, making them overkill for beginners buying their first tool.
When browsing craft stores or online shops, you might see tools that look very similar to embroidery hoops. To prevent buying the wrong item, let's clarify the differences.
Q-Snaps consist of square plastic pipes assembled together, using snap-on clamps to hold fabric. They are commonly used for patchwork quilting and large cross-stitch projects.
The key differences from embroidery hoops are the clamping mechanism and shape. Round embroidery hoops pull fabric uniformly in all directions using a tightening screw, whereas Q-Snaps clamp the four sides with plastic clips. While Q-Snaps excel at holding thick quilt batting, round embroidery hoops are infinitely easier to handle for delicate hand embroidery and smaller motifs.
Some metal rings or wooden frames look like hoops but lack a double-ring clamping structure. These are meant for dreamcatcher bases or weaving warp threads; they do not have the mechanism to clamp and tighten fabric between two rings. When purchasing, always look for a "double-frame structure with an adjustment screw."
In punch needle embroidery (free-stitching), pushing a thick needle repeatedly creates impact that easily loosens fabric in a standard hoop. Therefore, dedicated punch needle frames feature sharp metal teeth (grippers) or heavy-duty tightening screws inside. Using a punch needle frame for regular hand embroidery will damage delicate fabrics, so be sure to keep these tools separate.
When buying an embroidery hoop, beginners struggle most with selecting the right size (diameter) and material. Here is the golden rule to follow.
To put it simply: the absolute best first hoop for any beginner is a 10 cm to 12 cm (approx. 4 to 4.7 inches) wooden embroidery hoop. There is no better starting point!
Here are three clear reasons why:
Many beginners make the mistake of buying an 18 cm or 20 cm hoop thinking "bigger is better," but large hoops are awkward to hold, tire your wrist from weight, and cause fabric to loosen quickly in the center, severely disrupting your workflow.
If you already know what you want to make, use this quick reference guide:
Beyond diameter, the depth (width) of the hoop ring matters. Standard hoops are about 1 cm wide, though thinner and thicker options exist. For beginners, a standard width of 8 mm to 10 mm is ideal. Look for sturdy screw hardware that includes a notch for a flathead screwdriver or coin. Flimsy screw heads that can only be turned by hand won't tighten sufficiently, causing the fabric to slip mid-project.
Once you have the right hoop, mastering how to set up your fabric is key. Simply sandwiching fabric and turning a screw won't yield perfect tension. Here is the 5-step mounting process used by professionals.
When crafting my own pieces and teaching workshops, there is one professional technique I always recommend: wrapping the inner hoop with bias tape or thin cotton tape (known as waku-maki in Japanese craft culture).
Wrap thin cotton bias tape diagonally around the entire inner wooden ring without leaving gaps, securing the ends. This simple step delivers dramatic benefits:
Once you wrap an inner hoop, you can leave it on permanently. If you ever feel your fabric slipping in a wooden hoop, try this right away—it completely transforms your stitching experience!
While embroidery hoops are wonderful tools, misuse can ruin your fabric or thread. Here are critical mistakes you must avoid.
This is the most common beginner mistake. When you finish stitching for the day, do not leave the fabric clamped inside the hoop for days on end.
Prolonged pressure crushes fabric fibers, leaving deep, stubborn "hoop marks." On natural fabrics like linen, silk, or wool, severe hoop marks can become permanent—unfixable even with ironing or washing. Always make it a habit to remove your hoop at the end of every stitching session. This small step protects the longevity and beauty of your work.
Even with careful work, light hoop creases can remain. Once your embroidery is complete, finish it properly with these steps:
Mist the back of the finished embroidery fabric with water until damp. Then, press a steam iron from the back side of the fabric. Ironing directly on the front will flatten your dimensional embroidery stitches, ruining your hard work!
Always lay a clean, plush bath towel beneath your work and gently press from the reverse side to preserve the beautiful 3D texture of your stitches.
Desperate for tight fabric, some crafters use pliers or screwdrivers to force the screw tightly. This is risky! Over-tightening can split the wooden ring around the metal joint or strip the screw threads completely. Tighten firm using your fingers strength; if the fabric still slips, rely on the hoop-binding technique mentioned earlier instead.
If your design is larger than your hoop, you'll need to move the hoop as you progress. Clamping the outer ring directly over finished stitches flattens and frays the embroidery thread.
If placing the hoop over completed stitches is unavoidable, place a soft piece of scrap cloth or tissue paper over the stitched area before clamping the hoop in place. This simple cushion minimizes damage to your thread.
In this guide, we explored the world of embroidery hoops—from why tension matters to choosing materials, sizing, and professional mounting techniques.
An embroidery hoop isn't just a fabric holder. It is your best partner for rendering clean lines, eliminating puckering, and making your time spent hand-stitching smooth, comfortable, and satisfying.
Let's review the key takeaways for success:
Equipped with the right tool knowledge and techniques, your hand embroidery will look noticeably neater and more professional. Find your favorite hoop and enjoy a wonderful handmade crafting time!
If you found this guide helpful, please share it with your craft friends on social media or messaging apps—it means the world to me and keeps me motivated! Until next time, this was Yassy from Crafters!

For example, if you are looking for articles about mizuhiki, try searching for "mizuhiki"; if you are interested in tools, try keywords like "nippers" or "pliers."
