The Ultimate Guide to Choosing Crochet Hooks: Japanese Sizing, Materials, and Ergonomics
yassy
Crafters!

Hello everyone, it’s Yassy from Crafters! (・∀・)
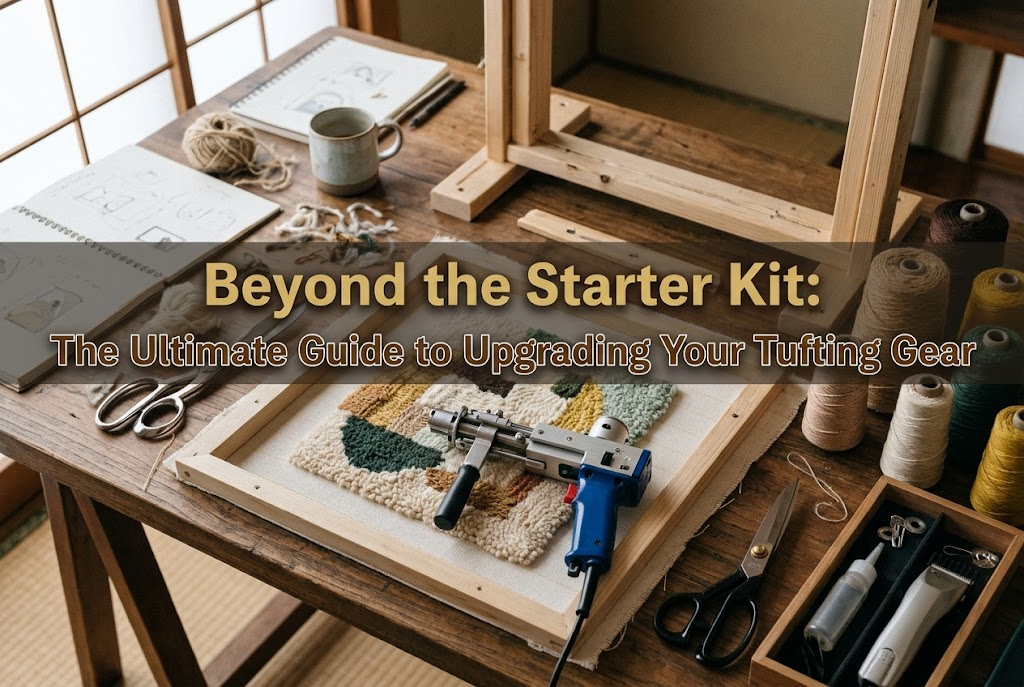
Tufting is such a rewarding craft—punching yarn through primary backing cloth to create your very own custom rugs and wall decor. Beyond the sheer fun of making them, watching the yarn pack tightly into a soft, plush surface and displaying the finished piece in your home is absolute magic! I fell head over heels for tufting myself, to the point where my room is practically covered in handmade rugs.
If you recently picked up a starter kit and completed your first few projects, you might be running into some frustrating roadblocks: design lines looking blurry, the rug surface appearing uneven instead of smooth like professional work, or the fabric tearing mid-tufting.
Let me be completely honest with you: it is not due to a lack of skill on your part. The real culprit is simply reaching the performance limit of the entry-level tools included in starter kits.
Starter kits are fantastic for getting a feel for the tufting process. However, if you want to elevate your work to a sellable, professional grade, upgrading your tools is essential. Simply changing your gear will dramatically improve the quality of your finished pieces.
That said, tufting gear isn't cheap, and replacing everything at once can stretch anyone's budget. Having tested countless craft tools over the years, I’m going to share the definitive order of gear upgrades that delivers the highest impact on your rug quality for every dollar spent!
From practical criteria for choosing tools to beginner traps and a realistic budget roadmap, let's dive into how you can upgrade your setup step-by-step to create truly pro-level rugs!
Before we jump into the upgrade order, it’s crucial to understand why starter kit tools eventually hold you back. Understanding this structural reason will save you from spending money on unnecessary purchases.
The primary purpose of a starter kit is to allow you to experience tufting at an accessible price point. Because of this, the tools and materials included are designed with budget-friendly entry specs.
For example, the thread snips, small trimmers, and basic backing cloth in starter kits are only intended for minimal, basic tasks. They lack the cutting power needed to trim pile evenly or the durability to handle high-density yarn punching. No matter how meticulously you work, the limitation of the tools will create a visible difference in the final finish.
If you want to dramatically transform your work, the golden rule is to invest first in tools that have the greatest direct impact on visual beauty. You don't need to buy everything at once—upgrading in order of visual impact is the smartest, fastest way to improve.
Here is the absolute order in which you should replace your starter kit gear. Following this sequence guarantees a noticeable boost in craft quality that far outweighs the financial investment.
The number one tool that will completely transform your work is a dedicated rug carving trimmer equipped with a transparent guide base! Surprised? It’s neither the tufting gun nor the backing cloth—carving trimmers take the top spot by a landslide.
The defining feature of a professional tufting piece is the final carving process (carving grooves and leveling pile). This involves cutting angled grooves along color borders and shearing the top surface completely flat. Carving creates crisp design lines, crisp color separation, and a luxurious 3D dimension.
Small pet clippers or cheap hair trimmers bundled in starter kits lack the torque required to shear dense yarn bundles. They tend to stall, yank out yarn, or leave jagged surfaces because they lack a stabilizing guide base, easily ruining your rug.
Investing in a high-power rug carving trimmer paired with a transparent attachment guide base ensures the blades remain parallel to the fabric surface. This enables anyone to instantly achieve a smooth, flat, professional-looking surface.
Because it makes the single biggest difference in visual polish, a dedicated carving trimmer is unquestionably the first piece of equipment you should upgrade. This alone will make your rug look like it came from a high-end design studio.
Coming in at number two is high-density tufting cloth (primary backing). Although technically a supply rather than a tool, it is a decisive factor in your final product's success.
Starter kit backing cloth is often loosely woven, thin, and overly soft. Punching yarn into thin fabric with a tufting gun easily causes tears or holes, and because the fabric lacks springy tension, yarn slips right back out after being punched.
You should upgrade to a heavy-duty polyester-cotton blend cloth featured with yellow marking grid lines. Using a dense, firm backing cloth provides three massive advantages:
Even with a great tufting gun, a flimsy backing cloth will prevent you from making dense, beautiful rugs. Switching to professional-grade backing fabric dramatically improves yarn tightness and plushness, making it one of the most cost-effective upgrades available.
At rank three, the professional tufting gun makes its entry! You might wonder why the gun isn't number one, but its priority naturally comes third after carving and backing cloth.
Budget starter guns (such as 2-in-1 cut and loop models) often have poor weight distribution and strong vibrations during operation. Additionally, their internal scissors can be dull, leaving frayed, fuzzy yarn tips upon cutting.
Upgrading to a dedicated, high-precision tufting gun offers immediate, noticeable benefits:
Cleanly cut yarn ends elevate the rug’s surface neatness. Furthermore, faster, steady operation lets you execute intricate, detailed designs effortlessly.
Ranked fourth are duckbill scissors (pelican shears) and high-quality rug latex adhesive for precision finishing.
When trimming stray strands from a rug surface with standard scissors, it is easy to accidentally nip neighboring pile or damage the backing. Duckbill scissors feature a flat, paddle-shaped blade on one side that slides flat against the fabric, allowing you to trim protruding strands precisely without digging into the base.
Using duckbill shears prevents backing damage and accelerates your detail shearing speed by more than five times.
Pair this with high-grade backing adhesive. Moving away from basic craft glues to specialized latex adhesive keeps the rug flexible yet locks yarn fibers permanently in place, making the finished rug durable enough for daily foot traffic and cleaning.
Rounding out the top five is the foundation of your setup: a sturdy tufting frame and heavy-duty clamps.
Starter frames are usually small and constructed from thin wood that bends when the cloth is stretched tightly. In tufting, maintaining cloth tension as tight as a drumhead is an absolute necessity.
Upgrading to a larger frame constructed from thick, rigid wood secured to your workspace with heavy metal clamps ensures zero fabric sagging. A taut canvas eliminates gun bounce-back, maintains consistent pile depth, and opens the door to larger, ambitious rug projects.
Now that you know the ideal upgrade order, let's go over three frequent pitfalls beginner crafters encounter. Avoiding these will save you unnecessary spending.
The most common mistake is thinking, "I want to make better rugs, so I should buy a top-tier expensive tufting gun first!" While understandable, this logic is backwards.
Even with the most expensive gun, if your carving trimmer is cheap, your rug surface will remain uneven. And if your backing fabric is thin, the fabric will tear regardless of the gun. Always secure a quality trimmer and backing cloth first to achieve maximum results on a modest budget.
Assuming "scissors are just scissors" and relying on cheap household shears is risky. Yarn bundles and tough primary backing quickly dull standard craft scissors.
Dull blades fray yarn ends and cause fuzziness. Always use sharp, specialized craft or tufting shears for clean cuts and smooth pile surfaces.
Buying expensive wool or acrylic yarn to improve texture will not yield great results if your backing cloth is low quality. A weak base simply cannot support dense yarn placement.
Prioritize backing cloth quality first. With a high-density primary backing, even standard acrylic yarn yields impressively plush, full rugs.
Upgrading gear all at once isn't practical for everyone. Here is how I, Yassy, would plan tool upgrades based on budget and goals.
This initial step delivers an immediate, visible leap in quality:
Continuing with your starter gun and frame while adding these two items allows you to produce cleanly carved, dense rugs right away.
Once comfortable with Step 1 and ready to refine finer details and surface finishes, add these items:
Duckbill shears speed up surface cleaning, while proper latex backing ensures sellable durability and flexibility.
When you are ready to sell rugs regularly or work effortlessly on larger designs, complete your setup with:
With these, your workspace matches the setup of professional tufting studios in speed, comfort, and final visual perfection.
Even top-tier gear loses performance without proper maintenance. Follow these essential care rules to prolong tool life:
Tufting guns are high-speed precision mechanical tools. Perform this maintenance after every completed project:
1. Clear out yarn fibers and lint from gears and moving parts using a brush or compressed air. Accumulated lint jams gears and leads to mechanical failure.
2. Apply 1 to 2 drops of machine oil (sewing machine oil or lubricant) to bearings and sliding shafts as indicated in your manual. Running a dry gun causes metal friction and degrades cutting performance.
After each session, detach the trimmer blade and brush away trapped yarn dust inside the housing.
Apply dedicated blade oil across the contact surfaces before storing. Yarn absorbs natural moisture and oil, so running dry blades generates heat and dulls edges quickly. Regular oiling can easily triple your trimmer's lifespan.
To recap, here is the definitive tool upgrade order for tufting:
If you've mastered your starter kit, you already possess the foundational skill. What you need next are the right tools that allow your talent to shine fully through your work.
Start by upgrading your carving trimmer and switching to high-density tufting cloth. The moment you make your first smooth carving cut and feel the plush density of your rug, you’ll be amazed at the transformation!
Quality tools fuel creative passion. Upgrade with confidence, and enjoy creating one-of-a-kind rug masterpieces!
If you found this guide helpful, please share it with your fellow crafters on social media or messaging apps! See you in the next article—Yassy out!


For example, if you are looking for articles about mizuhiki, try searching for "mizuhiki"; if you are interested in tools, try keywords like "nippers" or "pliers."
