Types and Essentials of Japanese Stamps and Ink Pads: A Guide to Elevating Your Handmade Crafts
yassy
Crafters!

Hello, everyone! It’s Yassy from Crafters! (・∀・)
Have you ever found yourself in the middle of a knitting project, clutching your head and wondering: "Wait, what row was I on again?" or "Why does my stitch count not match the pattern?!"—only to end up unraveling rows and rows of hard work?
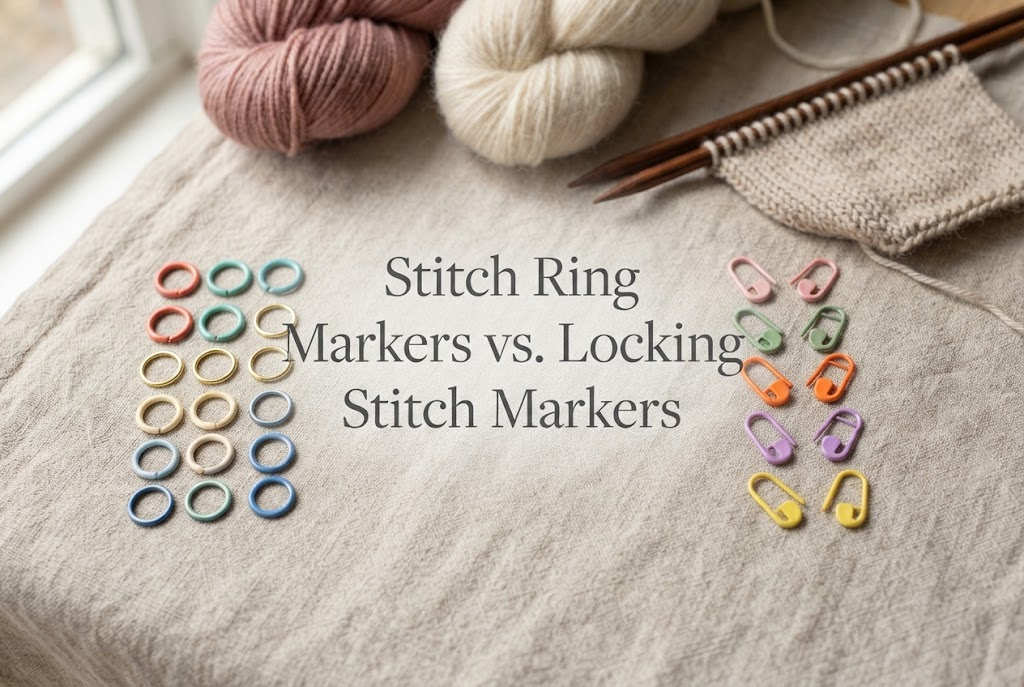
I absolutely love making all kinds of handmade crafts, browsing independent artisan shops, and collecting beautiful knitwear. But when it comes to hands-on knitting, the absolute first tools I would name as "must-haves that I can never live without" are stitch ring markers (mesū ringu) and locking row markers (dansū mākā).
Knitting is a remarkably delicate craft where miscounting a single stitch or miscalculating a single row directly affects the final shape and dimensions of your finished piece. The frustration of constantly having to recount stitches not only slows down your momentum, but it can also cause beginner crafters to give up altogether.
Once you understand how to choose and use stitch ring markers and locking stitch markers correctly, that recounting stress drops to zero. Your tension and edges will become much neater, and the overall quality of your work will improve dramatically.
In this guide, I will walk you through the differences between these two notions, how to use them, what to look for when buying, and practical tips to avoid damaging your projects—everything you need to know, especially if you are just starting out!
Before diving into techniques, let's clarify the key distinction between "stitch ring markers" and "row/locking stitch markers." While they may look somewhat similar, their roles and where they go on your work are completely different.
Confusing the two can cause your knitted fabric to warp or leave a marker trapped where it cannot be removed. Understanding their primary purposes is the first step.
Stitch ring markers (closed rings) are primarily used in knitting with needles. They feature a seamless, unbroken ring (or closed loop) shape and are placed directly onto the knitting needles—not into the yarn fabric itself.
Their main purpose is to manage your horizontal stitch count across a row or round.
For instance, if you are casting on a wide piece of 100 stitches, placing a ring marker every 20 stitches means you never have to recount the entire 100 stitches from the edge. You only need to verify that there are 20 stitches between each ring.
They also serve as clear visual checkpoints on your needles for pattern repeats (such as cables or lace) or where shaping decreases begin. Because they sit on the needle, you simply slip them from the left needle to the right needle as you knit along.
Row markers (commonly locking or split markers) are hooked directly into the yarn loops of the fabric. They resemble miniature safety pins that can be opened and closed, making them indispensable for both needle knitting and crochet.
Their main purpose is to track vertical row progress or mark a specific stitch in the fabric.
Common uses include clipping a marker every 10 rows or placing one directly onto a stitch where an increase or decrease was worked. Because they attach to the actual fabric, they stay fixed in place as your project grows upward, maintaining a permanent reference point.
In crochet, hooking a locking marker into the turning chain or the first stitch of a round is an essential technique. Because they lock securely into the yarn, there is no risk of them slipping out while you work, and you can easily unlock and move them whenever needed.
Many beginners wonder: "Do I really need to buy dedicated markers? Can't I just use standard safety pins, paper clips, or scraps of leftover yarn?"
In short, I strongly advise against makeshift substitutes. There are very clear, practical reasons why crafters rely on dedicated knitting markers.
Using metal office safety pins or paper clips is dangerous for your knitwear. Standard safety pins have a tiny coiled gap near the spring base where delicate yarn plies can easily get caught, frayed, or shredded.
Paper clips and office stationery also have sharp edges and rough burrs that can snag fibers and split the yarn. In the worst-case scenario, they can sever the yarn plies entirely, ruining a piece you spent hours crafting.
Dedicated crafting markers are made from smooth plastic or polished metal with carefully rounded edges designed specifically to protect yarn from snags.
Knitting kits often include large metal safety-pin-style tools called stitch holders (hotsure-dome). While they look like giant pins, they serve a completely different purpose: holding live stitches on standby (such as when working necklines or pocket openings).
Stitch holders are far too large and heavy to use as row markers. Leaving heavy metal holders hanging on your fabric will pull and stretch out the surrounding stitches, warping the fabric.
Tying a scrap piece of contrasting yarn into a loop is a classic traditional substitute for a ring marker. While it costs nothing, it frequently causes headaches: the working yarn can accidentally get knitted into the scrap loop, or your needle tip can pierce the scrap yarn when slipping it.
If a scrap loop becomes tangled with your working yarn, you might have to cut it out with scissors, running the terrifying risk of accidentally snipping your project's main yarn. For smooth gliding and safety, purpose-made smooth rings are far superior.
When shopping at craft stores or online, you will come across various materials and shapes. Understanding their structural pros and cons will help you match them to your personal crafting style.
These are seamless, completely closed loops made from rigid plastic, silicone, or smooth metal. They are designed strictly for knitting needles and cannot be clipped into finished fabric.
Featuring a clasp that snaps securely shut, these are usually made of lightweight plastic. They are the most versatile marker style and perform brilliantly in both knitting and crochet.
These teardrop- or spiral-shaped clips do not lock; instead, they simply slide onto a stitch loop or needle.
Here are some of the practical ways I personally rely on stitch rings and row markers in my studio to boost accuracy and save time:
When tackling intricate Aran cables, lace patterns, or colorwork, insert a ring marker between each pattern repeat. For example, if a pattern has a 12-stitch repeat, place a marker every 12 stitches.
If you reach a marker and discover you have 1 stitch left over or 1 stitch missing, you immediately know the mistake occurred within that specific 12-stitch block. Without markers, you might knit several rows before noticing an uneven alignment, forcing you to rip back countless stitches.
One of the most frequent stumbling blocks for beginner crocheters is uneven, slanted edges caused by adding or dropping stitches at the ends of rows. This happens when the turning chain or the very first stitch of the row gets lost.
The fix is effortless: the moment you make the first stitch of a new row, clip a locking marker into the top "V" of that stitch. When you work across and return on the next row, you will know exactly where your final hook insertion belongs. Your edges will stay straight and uniform every time.
When shaping sweater armholes, necklines, or sock heels, patterns often call for instructions like "decrease 1 stitch every 4 rows."
Clip a marker right at the edge of the row where you worked the decrease. When working upward, simply count the rows visible above that marker: 1, 2, 3, 4—time for the next decrease! While tallying rows in a notebook works, having the marker physically anchored on the fabric prevents counting errors.
For long stretches of plain knitting, like scarves or sweater bodies, clipping a marker every 10 rows saves enormous amounts of time. If you need 50 rows, you just count 5 markers instead of counting 50 individual bars with your fingers. Using a special color (like bright red) for milestone rows (e.g., row 50 or 100) and yellow for standard 10-row intervals makes visual tracking effortless.
To make sure you get the best value and functionality, keep these four criteria in mind when selecting your notions:
The inner diameter of a stitch ring is crucial. If the ring is too small, it will jam on the needle; if it is excessively large, it feels clumsy and distorts nearby tension.
Japanese and international notions typically list recommended needle size ranges on the package. When in doubt, start with a medium size suitable for standard worsted-weight needles.
Smooth surfaces are vital. In inexpensive plastic packs, look out for rough seams or mold burrs. Even a tiny plastic ridge can catch on delicate wool fibers and cause pilling or pulled plies. Run your fingers over the markers before use; if you detect any rough edges, gently smooth them with a fine nail file or discard that piece.
When choosing locking stitch markers, test the plastic's flexibility. Overly brittle, stiff plastic requires high finger pressure to latch and can snap at the hinge under repeated use. Markers made from flexible materials like polypropylene flex comfortably, click shut with light pressure, and hold up over years of crafting.
Never pick a marker color that blends into your yarn! If you are knitting with white or cream wool, a white marker will disappear into the texture. Choose vibrant, high-contrast shades—neon green, hot pink, turquoise, or bright orange—so your eye can locate them instantly across the row.
Yassy's Recommendation for Beginners: If you are buying your very first set, pick up a multi-colored pack of locking stitch markers (around 20 to 30 pieces). Because locking markers can both clip onto fabric and slide onto needles, they handle both crochet and knitting tasks with ease. Once you feel the desire for faster needle gliding on pure knitting projects, you can add a dedicated set of smooth closed rings.
Even the handiest tools can damage your fabric if mishandled. Here are key precautions I always follow in my crafting routine:
Let's recap what we've covered:
Knitting is a wonderful, rhythmic craft built one stitch at a time. Welcoming stitch markers into your tool pouch cuts down the time spent counting and frees up your creative energy to simply enjoy the rhythm of making. You'll rip back less, finish projects faster, and enjoy cleaner, more consistent results.
Find a set of markers that brightens your crafting space, and have fun making your next knitwear project! If you found this guide helpful, please share it with your fellow makers. Until next time—happy crafting from Yassy!

For example, if you are looking for articles about mizuhiki, try searching for "mizuhiki"; if you are interested in tools, try keywords like "nippers" or "pliers."
