Essential Tools for Japanese UV Resin Crafts: How to Choose the Best UV/LED Curing Lamp
yassy
Crafters!

Hello, crafters! It’s Yassy from Crafters! (・∀・)
When you start making woodwork and handcrafted wooden pieces, hand saws and sandpaper feel perfectly fine at first. But as you continue building, there comes a point where you want to take your work to a higher level of quality. Maybe you want to round the edges of freshly cut lumber, carve crisp and straight grooves, or add ornate decorative profiles like those found on antique furniture. Relying solely on hand tools quickly reaches its limits.
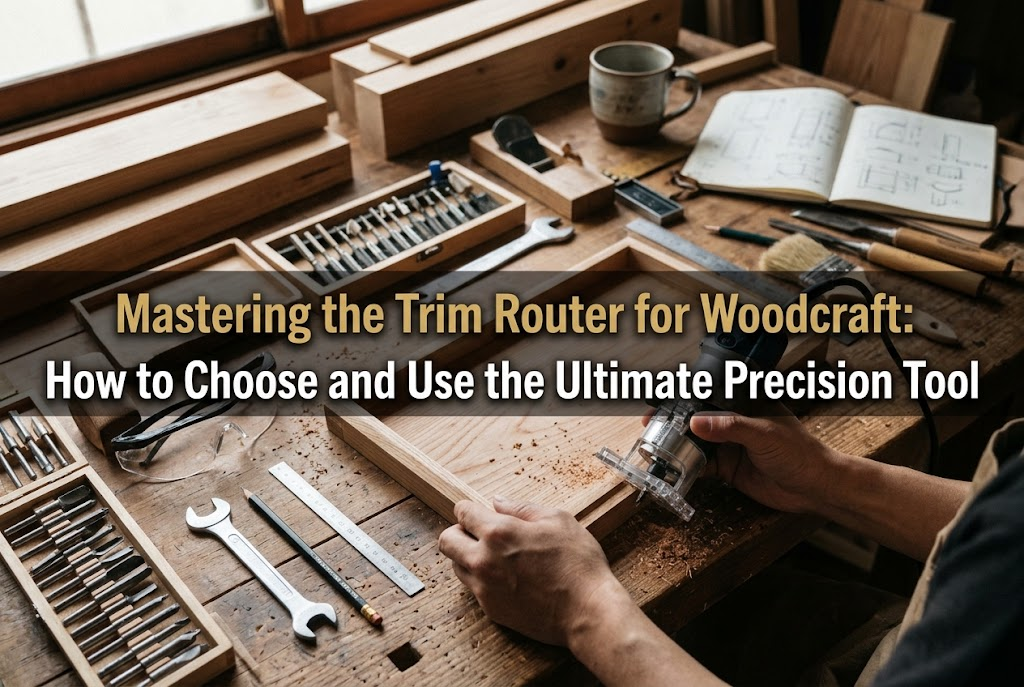
That is where a compact power tool known in Japan as a "trimmer"—often called a trim router or palm router—becomes an absolute game changer. When used correctly, tasks that would take hours by hand and still end up uneven can be finished in just a few seconds with razor-sharp precision. In my own workshop, introducing a trim router while crafting wooden home goods, coasters, and miniature furniture instantly elevated the finished quality of my creations.
In this guide, I will break down everything you need to know: the role of the trim router in handmade woodworking, the cuts it can perform, how it differs from similar tools, how beginners can choose the right model without regrets, and how to operate it safely and accurately.
A trim router is a compact power tool that uses a high-speed rotating cutter, known as a bit, to shave edges, hollow out recesses, and carve grooves into wood. Despite being small enough to fit comfortably in one hand, the bit spins at astonishing speeds of roughly 20,000 to 30,000 RPM.
Trying to round off edges by hand requires sanding back and forth, constantly feeling the surface with your fingers, and visually checking whether the curve is uniform. No matter how careful you are, subtle shifts in manual pressure lead to unevenness. With a trim router, you simply glide the base along a guide or bearing, creating a perfectly smooth, uniform contour in an instant.
The greatest advantage of bringing a trim router into your toolkit is giving your work professional-grade texture and precision. Properly profiled edges not only feel pleasant to the touch, but they also take stains and finishes far more evenly, creating an immediate sense of luxury. For artisans looking to sell handmade wooden crafts, a trim router is a powerful investment that directly increases the perceived value of your work.
By swapping out the router bit attached to the spindle, a single machine can handle an impressive variety of shaping techniques. Here are the most practical applications for woodcrafting:
This involves shaving the sharp corners off lumber to make them rounded or beveled. Beyond simply making the item safer to handle, it softens the visual appearance of the finished piece.
Roundover profiling (R-edge): Shaves corners into a smooth curve. Applying this to coasters, children's toys, and serving trays gives them an inviting, tactile finish that sits comfortably in the hand. Chamfering (C-edge): Cuts corners at a clean 45-degree bevel, imparting a sharp, modern aesthetic.
This technique cuts stepped or curved architectural contours into edges, similar to what you see on antique furniture or ornate picture frames. Using specialized stepped or ogee bits transforms a simple flat board into an elegant piece of decorative woodwork.
A straight bit allows you to carve straight or curved channels into the face of a board with pinpoint depth control. It is ideal for routing thin slots to insert drawer bottoms, cutting sliding tracks for wooden box lids, or carving shallow recesses designed to hold poured epoxy resin.
By preparing a template board and guiding the router along its edge, you can duplicate identical shapes over and over again with exact measurements. This technique is invaluable for batch-producing handmade wooden products of consistent dimensions.
Browsing craft stores or online tool shops can be confusing because several tools look or sound similar. Understanding these distinctions ensures you pick the right tool for your specific projects.
The tool most easily confused with a trim router is a standard woodworking router. While their fundamental mechanism is the same, they differ dramatically in size and horsepower.
A full-size router is a heavy-duty tool weighing between 4 and 6 kg (9 to 13 lbs) designed to be held firmly with both hands. It is built for deep cuts in thick construction lumber and large-scale cabinetry. A trim router, on the other hand, is a lightweight model weighing roughly 1.2 to 1.5 kg (2.6 to 3.3 lbs) that can be guided with one hand, making it far better suited for delicate handmade goods and small furniture. Full-size routers are overpowered and clumsy for intricate craft projects, so I do not recommend them for beginner crafters.
A jigsaw is built specifically for cutting materials apart. Its thin, reciprocating blade moves up and down at high speed to cut freehand curves through boards. A trim router, by contrast, is designed to shave, hollow, and carve. Using a trim router purely to slice stock is inefficient and misses its intended purpose.
A sander vibrates sandpaper electrically to smooth the surface of lumber. It cannot reshape profiles or dig deep channels. In a typical workflow, the sander comes in after the trim router to polish the cut surface to perfection.
Before purchasing a trim router, familiarize yourself with power options and collet sizing.
Trim routers come in corded models that plug into an AC outlet and cordless models powered by rechargeable batteries.
Corded models deliver consistent power during extended use, stay lightweight, and are generally more budget-friendly. While the cord can occasionally catch on the edge of a workbench, a corded unit offers more than enough performance if you work primarily at a dedicated craft table.
Cordless models offer fantastic maneuverability without cords getting in your way. However, the attached battery adds noticeable weight and alters the tool's balance. Weigh your budget and workshop setup carefully, but if you prioritize reliable, continuous power, a corded router is a solid choice.
The part that clamps the router bit is called the collet chuck. In Japan, the standard router shank diameter is typically 6 mm. While Western tools often adopt a 1/4-inch (approx. 6.35 mm) standard, most replacement bits sold domestically in Japan use a 6 mm shank. Always verify the collet diameter of the machine and match it to your bits.
A wide range of models exists, from professional job-site tools to casual DIY models. If you are picking up your first router for craft projects, focus on these five points:
Using a trim router involves pressing the tool steadily against the workpiece while guiding it along. If the machine is too heavy, your hand will tire quickly, introducing wobbles and rippled cuts. Aim for a compact model weighing around 1.2 to 1.5 kg. A slim body wrapped with non-slip rubber provides the best control.
This is arguably the most critical feature to look for! Entry-level routers often operate at a single fixed speed, but I strongly advise choosing a variable-speed unit.
Because trim routers rotate at extreme speeds, cutting dense woods or heat-sensitive softwoods (such as pine or agathis) at maximum RPM causes friction burns that turn the wood black. A variable speed dial lets you dial down the RPM to suit the wood species and bit size, ensuring a clean, scorch-free cut.
The base plate sits directly on the lumber during cutting. Look for a model featuring a clear acrylic base. Being able to see the cutter contact point from above makes it much easier to align your cuts with marked layout lines.
An electronic brake halts the bit's rotation the instant you flip the switch off. Without a brake, the bit can take several seconds to spin down completely. Setting the tool down while the bit is still coasting can gouge your workbench or cause injuries, making a brake a crucial safety feature.
You cannot route a straight line freehand. Look for a kit that includes a straight guide and a trimmer base guide (used with unbearing bits), or check that compatible attachments can be readily purchased.
Once you have your trim router, follow a disciplined routine. Skipping steps can lead to injuries or ruined stock, so take your time with each action.
Always unplug the power cord or remove the battery before handling bits! This is an unbreakable safety rule.
Lock the spindle with the included wrench and tighten the collet nut securely. If the bit is seated too shallowly, it can fly out during operation. Insert the shank deep into the collet, past the safety marking on the bit (or at least two-thirds of the shank length), and tighten it down firmly.
Loosen the base clamp lever and adjust the depth of the bit projection to match your target cut. Use the graduated scale on the side of the base for fine adjustments, then lock the clamping lever down tightly.
A trim router exerts substantial rotational torque. Never attempt to hold the wood in place with your bare hand while routing; the vibration can easily fling the piece across the room. Rest the stock on a sturdy workbench and secure it firmly using F-clamps or toggle clamps.
Switch the power ON while the bit is completely clear of the wood. Wait until the motor reaches full operating speed, then gently guide the bit into contact with the lumber edge. Starting the tool while the bit is touching the wood causes violent kickback and is extremely hazardous.
Hold the router firmly with both hands to maintain balance, guiding it along at a constant feed rate. Moving too slowly causes heat buildup and scorch marks; moving too quickly causes chatter and rough tear-out. Practice on scrap lumber to develop a smooth, continuous gliding motion.
The absolute most important rule when routing is feed direction. Getting this wrong causes the bit to catch on the wood and run out of control.
Viewed from above, router bits spin clockwise (to the right). To maintain stable control using cutting resistance, you must push the router against the direction of the bit's rotation.
Feeding the tool in the same direction as the bit's spin (such as right to left on a front edge) results in a "climb cut." The router will pull itself violently along the edge and can easily tear out of your grip. Always strictly follow the proper feed direction for both safety and cut quality.
Here are three typical routing issues every crafter encounters early on, along with practical solutions:
Dark scorch marks on the shaped surface are caused by friction heat build-up.
Solution: The most common culprit is moving the router too slowly. Feed the tool smoothly without hesitation. If your tool has variable speed control, dial back the RPM. To fix existing burn marks, sand them away or lower the bit a fraction of a millimeter and make one quick, final cleaning pass.
As the bit exits the end of a board, the unsupported wood grain can splinter off, ruining the corner.
Solution: Use a sacrificial backing board (backer block). Clamp a piece of scrap wood of identical thickness tightly against the exit edge. Route straight through your workpiece and into the scrap piece; any tear-out will happen on the scrap, leaving your actual project completely clean.
Trying to rout a 10 mm deep groove in a single pass overloads the motor, causes severe vibration, and leaves a rough, ragged profile.
Solution: The golden rule of routing is to make multiple shallow passes. Limit each pass to about 3 mm of depth. For a 10 mm channel, adjust your depth stop and make three progressive passes (3 mm, 6 mm, and 10 mm). This approach is actually faster and yields a significantly cleaner cut.
Because trim routers operate at much higher speeds than most other cutting tools, safety must be your top priority.
Avoid loose-fitting garments, wide sleeves, or hanging necklaces that could catch in the spinning bit. Wear fitted sleeves, and tie back long hair securely.
Crucially, never wear knit cotton gloves (such as Japanese "gunte" work gloves) while operating a router. If loose fabric fibers touch the rotating bit, your entire hand can be pulled into the cutter in a fraction of a second. Work with bare hands or snug, tear-away rubber work gloves rated for rotary tools.
Here are three practical woodworking projects where adding a trim router makes a world of difference:
After cutting organic shapes with a scroll saw or jigsaw, run a bearing-guided roundover bit along the entire perimeter. The ball bearing rides against the edge of the wood, allowing you to trace curved profiles perfectly without extra guides. The resulting edge feels delightfully soft in the hand, instantly giving the piece a retail-ready finish.
Using a straight bit, rout a recessed tray area 3 to 5 mm deep into the center of a thick wooden board. Arrange pressed flowers or dried botanicals inside the hollow, then pour clear epoxy resin over them. The combination of natural wood framing and crystal-clear resin creates gorgeous serving trays and jewelry holders—a design that relies on the router's ability to create a perfectly flat bottom.
Rout a straight 3 mm wide by 3 mm deep channel along the inside upper edge of your box side panels before assembling them. After glue-up, slide a thin sheet of acrylic or wooden veneer into the groove to create a smooth sliding-lid trinket box. This hidden joinery technique keeps hardware out of sight for a minimalist, refined aesthetic.
A trim router can seem intimidating at first due to its loud motor and high RPMs. However, once you master the correct feed direction, wear proper safety gear, and take shallow progressive cuts, no other tool expands your creative capabilities quite like it.
Rough cut lines and tedious hand-sanding will become things of the past. Try introducing a trim router to your craft space and see how it transforms the precision of your woodworking projects!
If you found this guide helpful, please share it with your fellow makers on social media! Until next time, happy crafting—this was Yassy from Crafters!










For example, if you are looking for articles about mizuhiki, try searching for "mizuhiki"; if you are interested in tools, try keywords like "nippers" or "pliers."
