Craft Knives & Cutters Guide: Types, Materials, and Pro Techniques to Transform Your Cuts
yassy
Crafters!

Hello crafters, I’m Yassy! (・∀・)
Cozy knit accessories, charming motifs, and unique handmade bags—crochet holds a steadfast and beloved place in the world of handmade crafts.
Personally, I adore everything about handmade goods: creating them myself, admiring the works of wonderful artisans, and picking up unique pieces at craft markets. Among all the different crafts out there, I can say with confidence that crochet possesses a truly special appeal.
With just a single hook and a skein of yarn, you can craft anywhere—at a cozy cafe, while traveling, or lounging on your living room sofa. The fact that setup and cleanup take mere seconds puts crochet far ahead of many other craft genres in terms of sheer accessibility.
You might be thinking, “Doesn’t crocheting look difficult?” “I can’t read crochet charts,” or “What tools am I supposed to buy?” Please don’t let those worries hold you back. Spending time overthinking is a waste of creative energy!
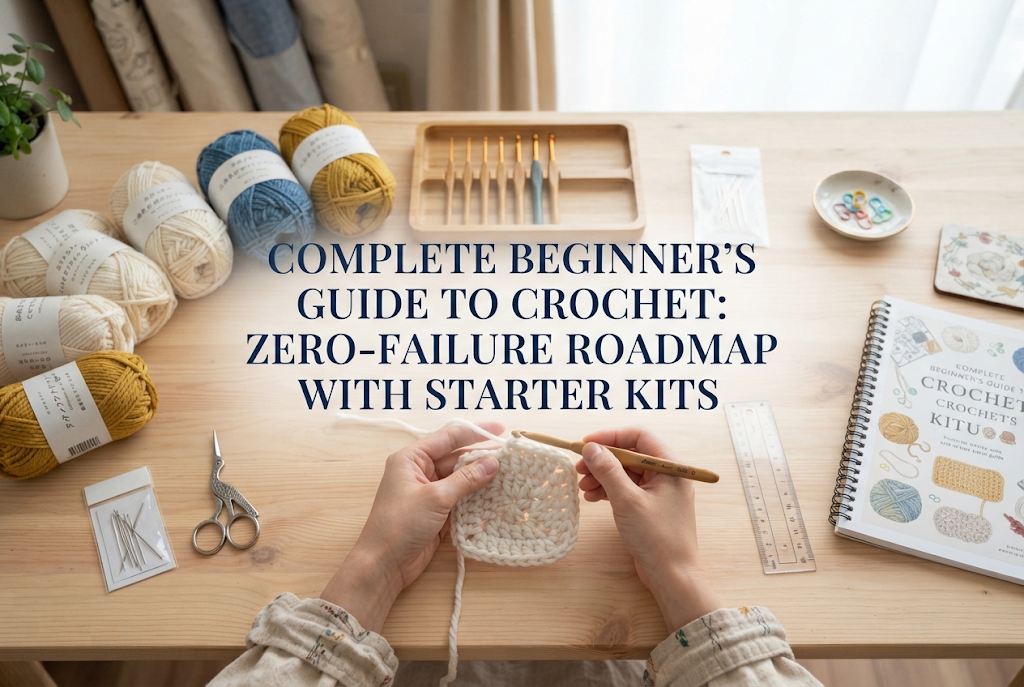
Here is my bottom line: the fastest, most foolproof way for a complete beginner to master crochet and finish their first project is to pick up a starter kit online and start moving your hands right away.
In this guide, I will walk you through essential tool knowledge, how to choose the perfect kit, and a step-by-step roadmap to make sure your first project is a success. By the time you finish reading, you’ll be ready to grab your supplies and begin your crochet journey!
Yarn crafts generally fall into two main categories: crochet (using a hook) and knitting (using two needles). If you are a complete beginner, crochet is hands down the best place to start.
The reason lies in the ease of handling the tool and the fundamental structure of the stitches. Let’s look at the decisive differences between the two.
In traditional knitting, you work with two long pointed needles and keep dozens of live loops on the needle at once. If a loop accidentally slips off your needle mid-row, it can cause catastrophic unraveling that is notoriously hard for beginners to fix.
Crochet, on the other hand, uses only one hook with a notched tip. You are constantly managing only the single active loop you are currently working on. Even if you put your project down, the risk of your entire piece coming undone is practically zero.
Whenever you need to pause, simply pull up the loop slightly or secure it with a clip or stitch marker, and you’re done. For busy people looking to enjoy crafting during small pockets of free time, nothing beats the convenience of crochet.
Crochet makes it easy to create flat items like square coasters, but it also shines when shaping 3D items like amigurumi (stuffed plushies), bags, and hats.
By simply adjusting where you increase (adding stitches) or decrease (reducing stitches), you can sculpt almost any silhouette you imagine. This incredible freedom of form is why crochet is treasured by makers all over the world.
Whenever I spot a gorgeous crocheted bag at a craft fair, I find myself examining its structure closely to see how it was built. Once you understand the construction, you realize you can craft something similar yourself—which multiplies the joy of both admiring and making handmade items.
You actually don’t need an overwhelming array of tools to begin crocheting. However, choosing the wrong supplies can lead to unnecessary frustration. Here are the core tools every beginner needs and the exact criteria for selecting them.
Crochet hooks generally come in two styles: traditional bare metal hooks and ergonomic hooks featuring silicone or resin-cushioned handles.
Beginners should unequivocally choose a hook with an ergonomic grip.
Bare metal hooks cause hand fatigue quickly and can make your fingers sore. In contrast, cushioned grips are ergonomically designed to keep your hands comfortable even during longer crafting sessions. A stable, comfortable grip also makes it far easier to maintain consistent tension across your stitches.
Hooks are sized by millimeters (and in Japan, by traditional go sizing). The easiest range for beginners to handle is roughly 3.0 mm to 4.0 mm (equivalent to Japanese sizes 5/0 to 7/0).
Choosing your yarn affects not only the look of your finished project but also how easy it is to work with. Beginners should stick strictly to these three criteria:
Avoid thin lace-weight yarn, fluffy mohair, and dark shades like black or deep navy at all costs. These make your stitches almost invisible, leaving you guessing where to insert your hook—a surefire recipe for frustration.
Worsted-weight acrylic yarn offers balanced springiness and firmness, making each individual stitch stand out clearly. As a beginner, prioritize high stitch visibility above all else.
Stitch markers look like miniature plastic safety pins. You attach them directly into stitches to mark the beginning of a round or the edge of a row.
When starting out, it is extraordinarily easy to lose track of how many stitches you have made or where the final edge stitch is located. Using stitch markers prevents you from accidentally skipping edges, eliminating the common issue of your work turning lopsided.
Crocheting without stitch markers is like hiking up a mountain without a map. Make sure to have them on hand!
A tapestry needle (also called a darning needle) is used to weave in loose yarn ends neatly inside your work once you finish. These needles feature a blunt tip and a wide eye that easily accommodates yarn.
Any basic pair of household sewing or craft scissors will do for trimming yarn, while tapestry needles should match the thickness of your yarn.
You might wonder, “Can’t I just pick up individual items at a local craft store or 100-yen discount shop?” While that sounds straightforward, it is often a trap for beginners.
If you want to start smoothly without guesswork, ordering a comprehensive starter kit online via platforms like Amazon is by far the smartest choice. Here is why:
When beginners purchase items separately, they frequently end up with mismatched combinations, like pairing a thick 5.0 mm hook with fine yarn meant for a 2.5 mm hook.
If your yarn thickness and hook size do not match, the yarn will snag or your stitches will turn out overly loose and floppy, making the learning process miserable. Starter kits eliminate this problem completely by including yarn and hooks that work together seamlessly.
While discount stores offer tempting bargains, budget crochet hooks often suffer from rough seams or burrs that snag fibers, and their metallic finish may create excessive friction that tires out your hands.
Inexpensive yarn can also split easily, where individual plies unravel as you hook them. Mistaking tool-related frustration for your own lack of skill is a discouraging way to start. Quality starter kits provide reliable ergonomic hooks that eliminate hardware-related hurdles.
Hunting down hooks, multiple yarn colors, stitch markers, tapestry needles, and a measuring tape individually takes time and effort. A starter kit bundles everything inside a tidy travel pouch, meaning you can open the box and start crafting within seconds.
Searching for crochet kits online will return countless options. To ensure you purchase a practical, beginner-friendly set, look for one that checks off these four boxes:
Almost every new crocheter runs into the same three roadblocks early on. By knowing what causes them and how to fix them in advance, you can breeze past them with confidence.
The most common beginner mistake is gripping the yarn with too much tension. Nervousness about dropping stitches causes people to pull the yarn excessively tight.
When stitches become rock-hard, there is no room to insert the hook on the next row, leaving your hands strained and fatigued.
The Solution: Slide each loop down onto the wider shaft of your hook rather than keeping it near the tapered neck or tip. The diameter of the shaft defines the true size of your stitch. When guiding yarn over your fingers, relax your grip and let it glide smoothly. Aim for a tension that feels slightly looser than you think it should be.
You intended to make a straight-edged square coaster, but your work keeps tapering inward or flaring outward as you build rows.
This happens when you accidentally miss the very first or very last stitch of a row—or inadvertently add an extra stitch at the turnaround point.
The Solution: Make it a strict habit to place a locking stitch marker directly into the first stitch of each row (right after your turning chain) and into the final stitch. When working your way back, only insert your hook where the markers guide you. This foolproof habit guarantees crisp, straight edges every single time.
Mid-stitch, your hook pierces straight through the yarn plies instead of capturing the entire strand, leaving frayed threads and messy stitches.
The Solution: Pay close attention to the orientation of your hook’s notch. When catching yarn and pulling it through loops, always angle the hook tip downward (facing toward your work or toward yourself). Pulling upward will split the fibers. Use a gentle, fluid wrist motion to rotate the hook smoothly through each loop.
Resist the urge to start with a full-sized sweater or a massive throw blanket. Projects requiring dozens of hours often lead to burnout before completion.
Building your craft confidence through small, quick wins is the secret to loving crochet long-term. Try these three beginner-friendly projects in order:
Your very first project should be a basic square coaster made entirely with single crochet (koma-ami in Japanese patterns).
Create a short foundation chain, then work single crochet stitches back and forth in rows. It takes only about an hour to finish, giving you an immediate sense of accomplishment. Placing your favorite coffee mug on a coaster you made with your own hands is an unforgettable feeling!
A beloved staple in Japanese craft culture, the acrylic tawashi is an eco-friendly cleaning sponge crocheted from 100% acrylic yarn.
Thanks to the unique texture of acrylic fibers, these scrubbers wipe away light dish grease and clean sinks using water alone—no detergent required. Even if your tension is uneven or edges are slightly crooked, it doesn’t matter at all for a cleaning tool. It serves as the ultimate low-pressure practice project.
Once you are comfortable with basic stitches, take on a traditional granny square using double crochet (naga-ami).
Granny squares are worked in rounds from the center outward, creating a charming, vintage motif. By joining multiple squares together, you can later expand into bags, pouches, or cushions. Mastering the granny square opens up a vast universe of creative designs.
As I mentioned earlier, I love making crafts just as much as I enjoy admiring and collecting handmade work from other creators.
Once you learn how to crochet, your perspective at craft markets and online shops completely transforms. You begin to appreciate the remarkable tension control in an artisan’s micro-crochet jewelry, or marvel at unexpected color combinations. Your appreciation for handmade goods becomes much deeper.
Using your own creations around the house brings its own special delight. Storing cosmetics in a pouch you stitched yourself, or setting seasonal coasters on the dining table, adds warmth and character to everyday routines. Crochet is an exceptionally rewarding hobby that elevates daily living without demanding a large budget.
You now possess all the core insights you need to embark on your crochet journey. The only step left is to take action.
If you tell yourself you’ll look into it later or browse a craft store next weekend, that initial spark of creative excitement can easily slip away. Follow this quick checklist today:
Don’t worry about perfection. Irregular stitches and wobbly edges are completely normal when you start. The real magic is experiencing the feeling of yarn transforming into fabric directly under your fingertips.
Crochet is an accessible, deeply fulfilling craft that requires neither innate artistic genius nor a dedicated studio space.
From a single hook and a single strand of yarn, you hold the power to create beautiful, tangible objects. That experience never stops feeling magical.
Take the leap, grab a starter kit, and make your very first stitch today. I’m cheering you on as you discover the wonderful world of yarn!
If you enjoyed this guide, please share it with your fellow crafting friends on social media. It means the world to me and keeps my creative engine running!Until next time—this was Yassy!


For example, if you are looking for articles about mizuhiki, try searching for "mizuhiki"; if you are interested in tools, try keywords like "nippers" or "pliers."
