How to Swirl and Pattern Handmade Soap: From Marbling to Layering Techniques
yassy
Crafters!
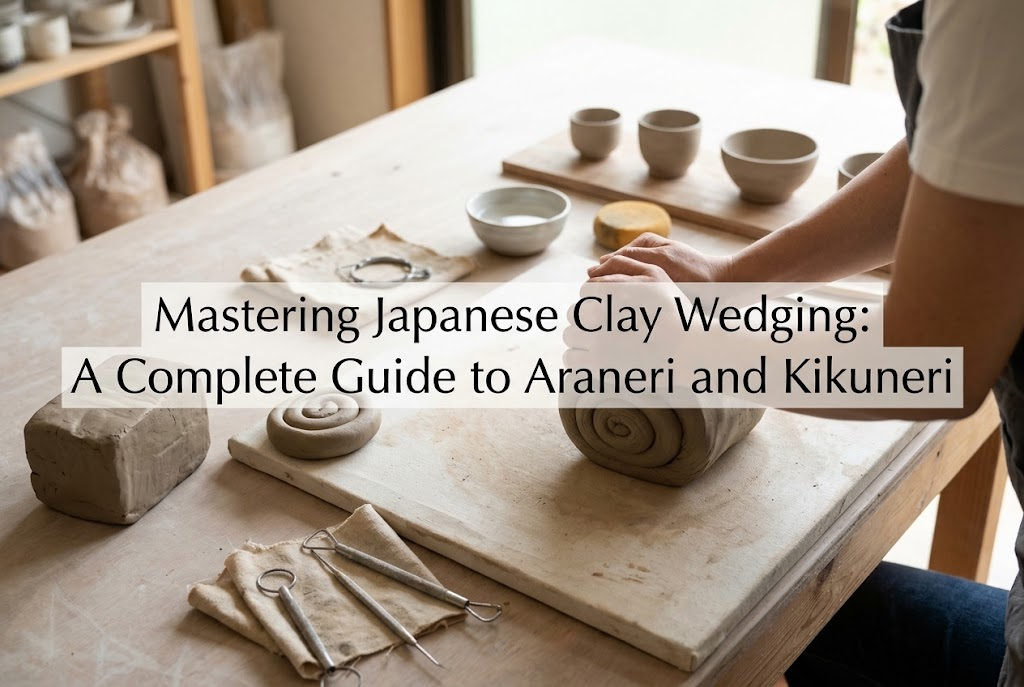

Hello, crafters! It’s Yassy! (・∀・)
Welcome to the wonderful world of pottery! While I have a deep love for all kinds of handmade crafts, the time spent working directly with raw earth in pottery is truly special. Watching clay kneaded by your own hands transform vividly on a wheel or through handbuilding, survive the intense heat of the kiln, and emerge as a cherished piece for life is an experience that moves me every single time.
However, almost every beginner in pottery runs into a major obstacle early on: clay wedging (known in Japan as tsuchineri or clay preparation).
"Can't I just squish and knead it like dough?" If you are thinking that, it's time to rethink the process right now! Clay wedging is far more than just a simple prep step. It is the absolute foundation of ceramic art, essential for preventing cracks and kiln explosions while allowing you to shape clay precisely as you envision.
Once you master proper wedging, the quality of your pottery will transform completely. In this guide, I will thoroughly break down the two primary Japanese wedging techniques: Araneri (rough wedging) and Kikuneri (chrysanthemum wedging). I’ll also dive deep into common beginner mistakes and practical troubleshooting, so read through to the end and master this essential skill!
Before jumping into the actual steps, it is essential to understand why we take the time to wedge clay so thoroughly. Once you understand the purpose, your awareness changes and your progress will accelerate dramatically.
Wedging clay serves three main purposes:
Clay fresh out of a bag or stored for a while often has uneven moisture levels between its surface and its core. The outside dries out and becomes stiff, while the center remains soft.
If you build a piece with uneven moisture, different parts will shrink and dry at different rates. This leads to severe warping and large structural cracks during drying or firing. The first objective of wedging is to bring the entire clay body to a uniform consistency.
Clay naturally harbors countless microscopic pockets of trapped air. Leaving these pockets inside before loading your piece into the kiln invites disaster.
As the kiln reaches high temperatures, any trapped air and residual moisture expand rapidly. With nowhere to escape, the pressure bursts violently, blowing the piece to pieces. Not only is your own creation destroyed, but flying shards can also ruin the work of fellow potters sharing the kiln. Eliminating air entirely is an absolute rule in pottery.
Thorough wedging aligns the microscopic clay platelets tightly together. This enhances plasticity—giving the clay exceptional elasticity and strength so it won't tear easily even when pulled thin.
Clay with high plasticity responds smoothly and obediently to your fingers. To reduce shaping stress and create pieces exactly as you imagine, wedging is completely indispensable.
In traditional Japanese pottery preparation, there are two distinct wedging techniques: Araneri (rough wedging) and Kikuneri (chrysanthemum wedging). While they may look somewhat similar, their roles and mechanics are entirely different. It is vital to understand the difference and follow their proper order.
Araneri is designed to eliminate uneven hardness and moisture, thoroughly mixing the entire lump of clay.
It involves folding the clay over itself and firmly pushing it down, much like kneading bread dough. Araneri is also used when blending new clay with older clay, or when reintroducing water to adjust softness. You always begin with Araneri to get the overall condition of the clay uniform and ready.
Once Araneri is complete, you move on to Kikuneri. This is an advanced technique designed to drive out fine trapped air bubbles and compact the clay's internal structure to the utmost degree.
By pressing down with your palm while rotating the lump, distinct petal-like folds appear on the surface, resembling a blooming chrysanthemum flower (kiku in Japanese). As these folds overlap, trapped internal air is pushed out through the seams. Because its primary function is degassing, Kikuneri is truly the core mastery of clay preparation.
Many beginners wonder, "Can't I just start with Kikuneri right away?" The answer is no.
If you attempt Kikuneri on clay that has uneven hardness, it will not rotate smoothly and can actually fold new pockets of air into the center. You must strictly follow the sequence: first use Araneri to even out consistency, then follow with Kikuneri to expel all air. Adhering to this two-step process is the key to consistent success.
Proper tools and a well-arranged environment are vital for successful wedging. If you practice on an unsuitable surface, you risk injuring your lower back, or the clay will stick stubbornly and stop your work in its tracks.
Here is how I set up my own workspace:
Your wedging surface must have moderate absorbency so the clay does not adhere tightly to it.
The best options include:
Never use slick plastic or metal tables. The clay will form an airtight seal against the smooth surface, making wedging nearly impossible. If using a wooden board, wiping it lightly with a damp cloth beforehand provides just the right amount of moisture for smooth work.
Clay wedging relies on your body weight rather than arm strength. Because of this, the height of your table is critical.
The ideal height is slightly below your waistline—around navel height or just below. If the surface is too high, you will end up kneading purely with your arm muscles, quickly straining your wrists and shoulders. Stand with your feet shoulder-width apart, positioning yourself so your upper-body weight can lean directly over the clay.
For beginners, the sweet spot for a single batch is about 1 kg to 1.5 kg (around 2.2 to 3.3 lbs).
Attempting to wedge more than 2 kg right away often overwhelms your hands. On the other hand, a lump smaller than 500 g does not receive enough palm pressure, making it surprisingly tricky to establish the Kikuneri spiral. Starting with an amount that comfortably fits between both hands is the golden rule.
Now let’s look at the actual steps. We begin with Araneri.
Araneri involves repeatedly flattening and folding the clay. Pay close attention to the direction of force and how you shift your body weight.
Take about 1 kg of clay, shape it lightly with your hands into an elongated oval resembling a rugby ball, and place it vertically on your wedging board.
The thick, fleshy base of your palm near the wrist is called the heel of the hand (shōkon). Place the heels of both palms firmly on the upper, farther side of the clay block.
Keep your fingertips relaxed. If you curl or tense your fingers, they will dig holes into the clay, trapping unwanted air. Focus entirely on pushing with the heels of your hands.
Keep your elbows straight, lean your upper body forward, and press the clay firmly down and away at a forward angle. You should feel the clay flatten out toward the front.
Do not push using arm strength; shift your center of gravity forward to compress the clay. This is the professional secret to wedging without fatigue.
Grab the far, flattened end of the clay and fold it in half back toward you. Place the fold closest to you, position the heels of your palms on the far side again, and compress downward and forward once more.
Repeat this rhythmic cycle: flatten forward, fold back toward you, and flatten forward again.
Repeat this folding cycle about 30 to 50 times. Once the clay offers uniform resistance with no hard or soft patches, Araneri is complete.
Aim for a smooth surface where the entire mass feels supple, uniform, and slightly springy.
With the clay thoroughly homogenized, it’s time to move on to the core skill: Kikuneri. While many beginners struggle here, understanding the underlying mechanics will help you master it reliably.
Kikuneri involves holding the clay at an angle while pressing down and applying a slight rotation simultaneously, creating a spiral of overlapping folds. Let's break down the hand movements step by step.
During Kikuneri, a spiral of layered folds forms on the side of the clay. Each time you compress the clay, internal air is squeezed toward the edge, and rotating it brings a fresh surface forward.
Each overlapping fold serves as an escape path for air bubbles. Rather than simply squishing a lump, envision yourself peeling and rolling the surface into a continuous spiral.
We will explain this assuming a right-handed potter (if you are left-handed, simply reverse hands).
Shape your Araneri-wedged clay into a vertical oval. Place your left hand on the left side of the clay, tilting the lump roughly 45 degrees toward your front-right. Your left hand acts as a guide, supporting the clay so it doesn't roll away and providing the rotational twist.
Place the heel of your right palm against the upper-right corner of the clay (its "right shoulder"). Keep your elbow straight, lean your weight into it, and press down diagonally toward the wedging board.
Do not flatten the entire lump flat. Instead, apply force specifically to push that right corner down and inward into the core.
Ease the pressure of your right hand without taking it off the clay. As you draw your right hand back slightly, use your left hand to twist the clay clockwise toward you by about 15 to 20 degrees.
This rotation is crucial. Turning the clay brings a fresh section of clay directly beneath your right hand where you just pressed.
Establish a smooth rhythm with the following sequence:
As you repeat this, the compressed clay gathers into wrinkles on the left side. These folds overlap progressively, creating a gorgeous radial pattern that resembles chrysanthemum petals on the flank of the clay. This is the signature mark of proper Kikuneri.
Aim for at least 100 to 150 rotations during Kikuneri.
As you wedge, you may hear a faint "pop" or "pshh" sound. That is the sound of an air bubble bursting and escaping—clear proof that your wedging is working perfectly!
Once you reach 100+ cycles and the petal pattern is evenly developed, the air removal process is complete.
Never leave your clay in its folded state. You must finish by shaping it into a smooth cone, traditionally called a takenoko (bamboo shoot) in Japan.
Continue the rhythmic motion of Kikuneri while gradually lightening the pressure of your right palm. As you do, the folds gathered on the left will naturally draw inward, tapering the lump into a neat cone.
A tiny bit of air can sometimes linger at the very tip of the cone. Pinch and twist off the very point with your fingers, smoothing the cone completely. Your clay is now perfectly prepared and ready for the wheel or handbuilding!
"Did I really get all the air out?" It’s completely natural to worry. While you are building your skills, make a habit of verifying the internal condition of your clay.
Here is the definitive way to check:
Place your finished cone on the board. Hold a ceramic cutting wire taut with both hands and slice the clay vertically right down the center into two halves.
Examine the exposed faces closely:
If you spot any holes, air remains trapped inside. Recombine the two halves, run through Araneri again, and perform another 100 cycles of Kikuneri. Repeating this test will train your hands to recognize what properly prepared clay feels like.
Almost everyone runs into the same hurdles when learning to wedge. Here are five common problems beginners face, along with straightforward solutions.
Cause: You are rotating the clay too far with each turn, or your right hand is pressing in inconsistent spots.
Solution: Keep your rotation small—about 15 degrees per push. Make sure your right palm strikes the exact same spatial point on the board every time. Focus on rotating the clay into that single pressing zone, and the folds will begin to layer cleanly.
Cause: Cupping your palm so air gets trapped underneath, or creating hollow pockets when folding during Araneri.
Solution: Never curl your fingers. Keep your palm flat and use the fleshy heel of your hand to push air from the inside out. When folding clay back, ensure it seals flush without any hollow gap before pressing down.
Cause: The clay is too wet, the board lacks absorbency, or your hands are warming the clay and making it sticky.
Solution: Use an unglazed plaster board or secure heavy canvas over your work surface. If the clay is overly soft, let it sit on a plaster board for a while to draw out moisture, or incorporate slightly drier clay during Araneri. Avoid dusting your board with dry clay powder or silica, as this disrupts the clay's uniformity.
Cause: You are relying entirely on arm strength instead of engaging your body weight.
Solution: Always stand up; never wedge while sitting in a chair. Spread your feet apart and bend your knees slightly. As you push into the clay, shift your center of gravity forward over your front foot. Keep your elbows extended and let your core weight compress the clay. You do not need raw strength—use your weight!
Cause: You have not calibrated the clay's firmness for your specific forming technique.
Solution: Use these standard rules of thumb for firmness:
When you press your thumb firmly into properly wedged clay, it should sink in smoothly without resistance while the surrounding shape remains stable.
After putting in the effort to wedge your clay, storing it incorrectly can turn it rock-hard overnight. Learning how to preserve and recycle your clay is just as important as wedging itself.
If you aren't using your wedged cone immediately, store it using this reliable method:
Stored this way, your clay will maintain its freshly wedged condition for weeks or even months. Always keep it away from direct sunlight and air conditioning drafts.
Never throw away dried scraps left over from making pottery. Ceramic clay can be reclaimed indefinitely!
Break stiff clay into small chunks and submerge them in a bucket of water until they break down completely into a smooth slurry (slip). Spread the slurry onto a plaster slab to pull out the excess moisture.
Once it firms up to earlobe consistency, give it a thorough session of Araneri to equalize the moisture, followed by Kikuneri to expel all air. It will be completely revived and just as good as brand-new clay!
Clay wedging is the foundation of ceramic craft—the very first step where you breathe life into your material.
At first, your hands might feel awkward, and your chrysanthemum spiral might not look perfect right away. There is no need to rush. Focus each time on the basics: evening out the consistency with Araneri, and using your body weight to expel air with Kikuneri.
What takes five minutes of fumbling at the start will soon take just a minute or two of rhythmic work, yielding a smooth, beautiful bamboo-shoot cone every time.
Clay that has been wedged to perfection responds effortlessly to your touch, helping you create exactly what you envision. And when your finished piece emerges unbroken and radiant from the kiln, the satisfaction is truly unmatched.
Put these wedging principles to work on your next studio session, and experience the depth and rhythm of preparing clay with your own hands! I’m cheering you on in your pottery journey!
If you found this guide helpful, please share it with your fellow makers on social media! See you in the next article—this was Yassy from Crafters! (・∀・)


For example, if you are looking for articles about mizuhiki, try searching for "mizuhiki"; if you are interested in tools, try keywords like "nippers" or "pliers."
