A Complete Guide to Types of Leather for Handmade Crafts: How to Choose the Perfect Japanese Leather for Every Project Without Mistakes
yassy
Crafters!

Hello everyone! It’s Yassy from Crafters! (・∀・)
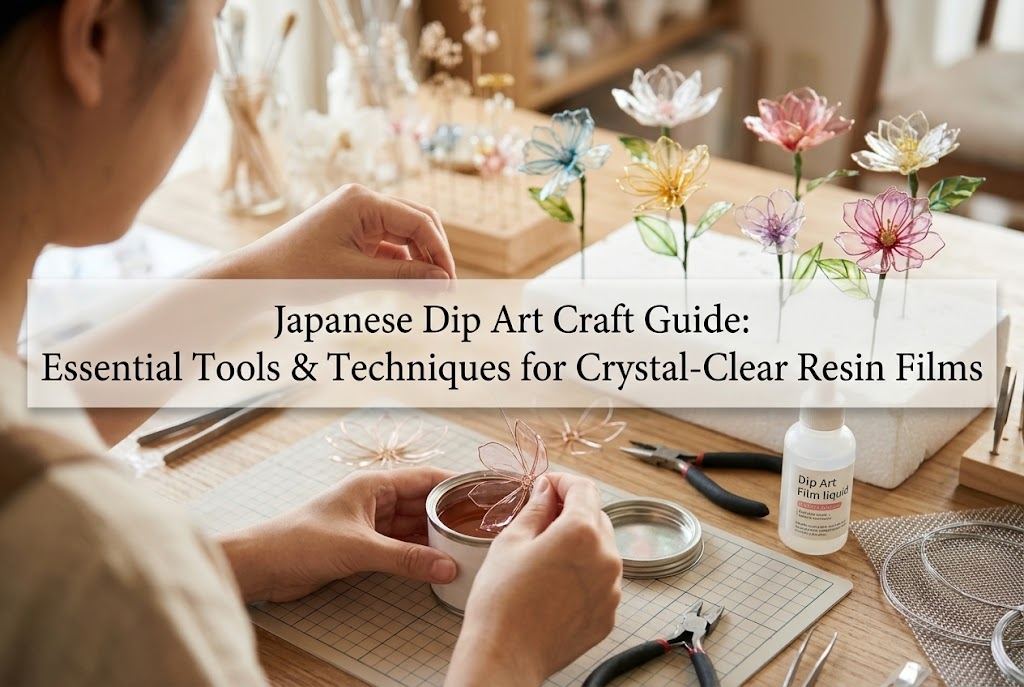
Have you ever seen craft pieces where delicate wire frames are transformed into crystal-clear, glass-like petals and leaves just by dipping them into colorful resin liquid? That is the fascinating craft known as Dip Art (also widely known in Japan as American Flower craft). With its delicate radiance reminiscent of stained glass or quartz, it’s easy for anyone to fall in love with it at first sight.
As someone who loves making, viewing, and buying handmade crafts, I still vividly remember the excitement I felt when I first encountered a Dip Art creation. The sheer transparency and elegance captivated my heart instantly, and I couldn't wait to learn how to make such stunning pieces myself.
However, when beginners try to start Dip Art, many run into immediate hurdles: "What tools do I actually need?" or "Why does my resin film pop before it even dries?"
If you choose the wrong tools, your wire won't bend smoothly, or your dipping liquid will become too thick and ruin your work. The good news is that Dip Art is a craft where anyone can reliably create gorgeous, crystal-clear resin films once you have the right tools and master a few essential techniques. In this guide, I will thoroughly explain the absolute must-have basic tools and step-by-step techniques for beginners to succeed without frustration.
In Dip Art, you construct a wire framework (petal, leaf, or geometric shape) and submerge it into a specialized synthetic resin liquid. By utilizing surface tension, a thin film stretches across the open frame. Once dry, this resin forms a delicate, durable film that can be combined to assemble three-dimensional flowers, botanical arrangements, or sparkling accessory pieces.
To succeed with this technique, two things are essential:
Trying to substitute specialized crafting tools with random household items often leads to failure. Investing in the proper tools is the fastest route to improving your craft. We can divide the necessary equipment into three main categories: Shaping Tools, Film-Forming Liquids, and Drying & Work Support Tools.
The wire frame forms the foundation of your Dip Art piece. If the base frame is warped or loose, the resin film will not set beautifully regardless of how careful you dip.
In Dip Art, wire thickness is measured in standard wire gauges (# / AWG / Japanese wire numbers). The larger the number, the thinner the wire; the smaller the number, the thicker the wire. Here are the three primary gauges beginners should stock:
Equally important is the surface coating of the wire. There are bare metal wires and coated wires (paper-wrapped or resin-coated wires). For Dip Art, always choose coated wire (color wire or paper-wrapped wire). Bare metal wire has a slick surface that causes the resin liquid to slip off, making it extremely difficult to catch the film. Coated wire provides grip so the resin stays anchored. Common colors include white, green, gold, and silver, depending on your project.
To bend, twist, and cut wire cleanly, you will need three basic jewelry and craft pliers:
While inexpensive hardware store pliers work, precision craft pliers reduce hand strain and yield far neater twisted joints.
A gauge pipe is a tool consisting of stepped plastic or metal cylinders of various diameters. Trying to shape wire petals into identical circles using only your fingers inevitably leads to uneven sizes and shapes. By wrapping wire around a specific diameter on a gauge pipe and twisting the base, you can effortlessly mass-produce identical, perfectly round wire loops. Most gauge pipes feature small alignment grooves that secure the wire while twisting. While household items like pens or makeup bottles can be used in a pinch, a proper craft gauge pipe ensures accuracy and consistency.
These are the specialized liquids responsible for creating the translucent resin film that defines Dip Art.
Dip Art liquid is a specialized synthetic resin mixed with organic solvents, supplied in metal cans. It comes in a vast range of finishes: high-transparency clear, vibrant solid colors, pearlescent shades, and glitter finishes. For beginners, I recommend purchasing just two cans to start: Clear and One Favorite Color. The Clear liquid is essential not only on its own, but also for diluting dark colors, creating gradients, and clearing bubbles. Master the basics with clear resin first before expanding your color collection.
You must purchase Dip Thinner alongside your dip liquid—it is an absolute necessity. As you open the liquid can during crafting, the solvent gradually evaporates, causing the liquid to thicken into a sticky, heavy goo. Dipping wire into overly viscous resin produces thick, heavy films that sag, trap large air bubbles, or snap before drying. Adding a small amount of dip thinner maintains a smooth, liquid consistency. Without thinner, your dip resin will solidify quickly and become unusable.
Dip resin and thinners contain organic solvents that produce strong chemical odors similar to paint thinner. Establishing a safe workspace is mandatory. Never work in a closed room!
Freshly dipped wire parts are wet and easily damaged. You need solid holding bases while they cure completely.
To dry your dipped petals upright, you need a base to stick the wire stems into. High-density melamine sponges or floral foam blocks (available at craft stores or dollar shops) work best. They hold wire stems firmly without letting them tip over. Melamine sponges are especially clean, reusable, and leave no flaky residue. Remember to cover your workspace beneath the drying block with old newspaper, vinyl sheets, or cardboard to catch any rogue drips.
If small air bubbles pop up inside the resin film right after dipping, pierce or gently drag them to the edge of the frame using the sharp tip of a bamboo skewer before the liquid sets. Fine-tip tweezers are also handy for picking up small wire parts or assembling delicate components later.
Once your workstation is set up, follow these core steps to achieve flawless, crystal-clear films.
Crucial Rule: The twisted base of the wire loop must be fully closed and tightly secured! If there is even a tiny gap at the base, surface tension will fail, and the liquid film will instantly pop. For beginners, practice with smaller loop diameters (1.5 cm to 2.5 cm / ~0.6 to 1 inch). Frames larger than 4 cm are harder to keep stable.
If you pull the frame out too quickly, air resistance will pop the film or trap bubbles. Keep your lifting motion slow, steady, and calm. If a film fails to form on the first try, gently sweep the frame across the surface liquid once more.
Freshly lifted wire parts will have a thick drop of excess resin hanging at the bottom. If dried as-is, the petal will look lopsided and heavy.
Cause: 90% of the time, this is caused by a loose wire twist or a tiny gap at the frame’s base. Dirty or oily bare wire can also repel resin.
Solution: Use flat-nose pliers to tighten the twisted base completely so there is zero gap. Wipe your wire clean before shaping. If the frame is very large, try reducing its size.
Cause: Shaking the resin can, stirring violently, or pulling the wire frame out of the liquid too fast.
Solution: Never shake the resin can. When mixing in thinner, use a bamboo skewer to gently trace slow circles. Always pull the wire frame out smoothly and vertically.
Cause: The dip resin has lost solvent through evaporation and has become too viscous.
Solution: Add Dip Thinner a few drops at a time and blend gently. The ideal consistency is reached when the resin drips freely from a stick like light syrup without pulling long sticky strings.
Cause: Inadequate room ventilation or relying on standard dust masks.
Solution: Work near an open window with cross-ventilation or near an exhaust fan, and wear a proper respirator designed for organic solvents. Investing in safety equipment makes crafting enjoyable and worry-free.
To keep your dip resin and tools usable for years, proper maintenance is vital after every crafting session:
If I were starting Dip Art from scratch today, here is the exact sequence I would follow:
Focusing on perfecting one small petal gives you the foundation to create complex, breathtaking floral sculptures down the road!
Dip Art might seem intimidating at first glance, but the principle behind it is beautifully simple: shape a clean wire frame, adjust your liquid thickness, dip smoothly, and let surface tension work its magic.
Holding a completed translucent petal up to the light is a uniquely rewarding experience that only Dip Art can offer. Make sure to prepare your tools, ensure good ventilation, and dive into this wonderful Japanese craft tradition!
If you enjoyed this guide, please share it with your fellow crafters on social media or messaging apps—it truly means the world to me and inspires my work. Until next time, happy crafting! This was Yassy from Crafters!







For example, if you are looking for articles about mizuhiki, try searching for "mizuhiki"; if you are interested in tools, try keywords like "nippers" or "pliers."
