Japanese Pottery Glaze Guide: Types, Selection, and Glazing Secrets for Beginners
yassy
Crafters!

Hello, crafters! It's Yassy from Crafters! (・∀・)
Among the countless wonderful materials in the crafting world, epoxy resin never fails to captivate us with its breathtaking clarity and substantial, glass-like presence.
I personally love making various handmade items, browsing charming craft shops, and collecting finished pieces. Every single time I encounter a well-crafted epoxy resin piece, I am enchanted by its pure beauty.
However, nearly every beginner who starts working with epoxy resin hits a major roadblock: curing time.
If you approach epoxy resin with the same mindset as UV resin, you will quickly run into frustrating troubles: "Why isn't it curing at all?", "It's still completely liquid even after using a light!", or "Days have passed and the surface is still sticky!"
The truth is, once you understand the unique characteristics and chemical curing mechanism of epoxy resin, you can consistently create stunning, crystal-clear pieces without failing.
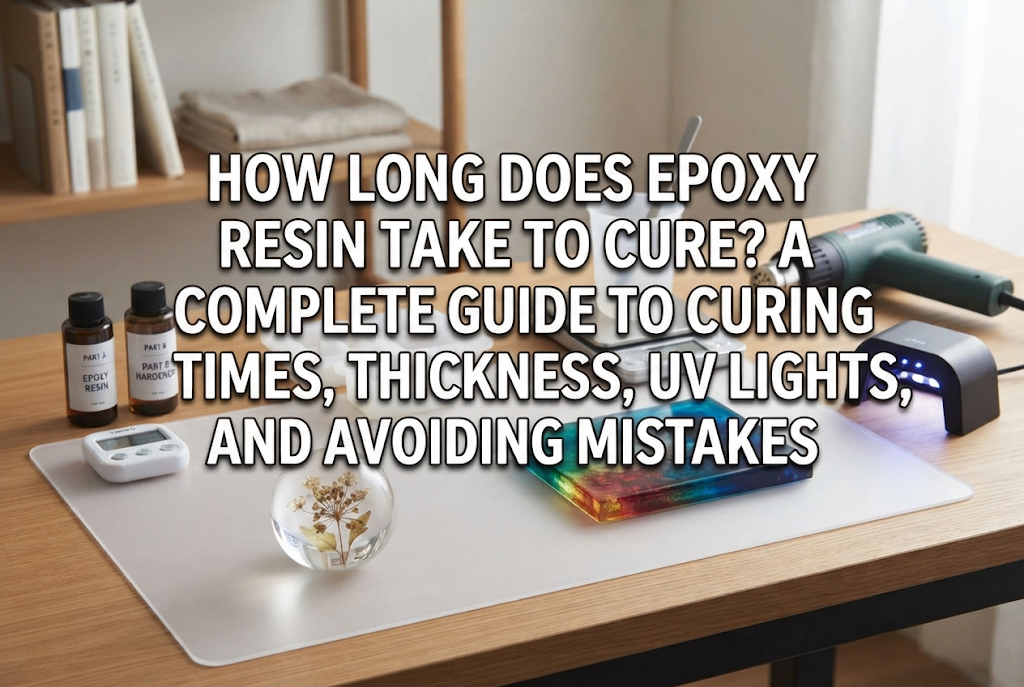
In this guide, I will share all of my knowledge and practical experience to thoroughly explain everything you need to know: standard curing times, how piece thickness and ambient temperature affect the process, and the answer to the most common beginner misconception—"Does a UV light make it cure faster?"
The first step toward resin crafting success is understanding the exact scientific principle behind how epoxy resin hardens.
Its curing mechanism is fundamentally different from that of UV resin. Proceeding without a clear grasp of this difference is a guaranteed recipe for frustration.
Here is the single most important rule to remember: epoxy resin is a two-part resin (main resin and hardener). It hardens solely by accurately measuring and thoroughly mixing these two liquids together.
UV and LED resins cure almost instantly when exposed to ultraviolet light or specific light wavelengths, triggering a photochemical reaction. As long as the light hits the liquid, it hardens within minutes.
Epoxy resin, on the other hand, does not care about light at all. It relies entirely on a chemical reaction between the resin and the hardener. Over time, molecules slowly link together, transitioning the mixture from a liquid to a solid.
Keep this fundamental principle firmly in mind: light does not cure epoxy resin.
When the main resin and hardener are combined, a chemical process called a cross-linking reaction begins. During this reaction, the mixture naturally generates a subtle amount of heat.
This self-generated "reaction heat" (exothermic heat) acts as the driving energy that further accelerates the curing process. Epoxy resin is essentially a self-contained material that cures using its own thermal energy.
Right after mixing, you won't feel any heat at all. But as time passes, the internal temperature of the liquid rises, and the curing speed gradually increases.
From the moment you mix the two components until the resin turns into a fully hardened solid, it passes through four distinct stages. Identifying which stage your piece is in is key to success:
Under typical room temperature conditions (20°C–25°C / 68°F–77°F), the timeline for standard craft-grade epoxy resin is as follows:
While UV resin cures in mere minutes, epoxy resin requires at least two full days before a project is truly complete. In epoxy resin crafting, rushing—such as wanting to sell an item tomorrow or needing to see the finished result right away—is your biggest enemy.
One of the questions I receive most frequently from craft beginners is: "Can I use a UV lamp to make my epoxy resin cure faster?"
Let me give you a definitive answer: A light will not speed up epoxy curing by even a single second.
Exposing epoxy resin to UV or LED light will never shorten its curing time. The effect is absolute zero.
UV resin liquids contain photoinitiators—special compounds designed to react and trigger polymerization when exposed to specific wavelengths of light. Epoxy resin liquids contain none of these compounds.
No matter how long or intensely you shine UV rays onto epoxy resin, its molecules will not react to the light. Doing so simply wastes electricity and wears out your lamp.
As explained, the speed of an epoxy cure is dictated entirely by chemical reactions and temperature, not light.
Shining light onto the piece does nothing to alter that chemical process. In fact, the slight radiant heat coming from a UV lamp can unevenly warm just the surface layer, leading to ripples, wrinkles, or warping on the finished piece. Using a UV/LED light on epoxy resin brings zero benefits and only potential downsides.
You might wonder: "If heat accelerates the chemical reaction, shouldn't I just blast it with an embossing heat tool or hair dryer?"
While higher temperatures do accelerate the reaction, continuously blowing air from a heat gun or hair dryer will push the liquid around, blow it out of the mold, or freeze wavy ripples permanently onto the surface.
Quickly waving a heat tool over the top to pop surface bubbles is an excellent technique, but using continuous airflow to speed up curing should be strictly avoided.
If you wish to safely use heat to encourage curing, you need an environment that maintains a steady temperature (around 40°C–50°C / 104°F–122°F) without airflow, such as a heated drying booth or a craft-dedicated warming cabinet.
Without specialized heated boxes, the single best and safest way to maximize curing speed without compromising quality is properly controlling your room temperature.
Maintaining a comfortably warm ambient temperature throughout the entire room allows the chemical reaction to proceed smoothly, resulting in a clear, flawless, and fully cured piece.
A crucial factor governing epoxy resin curing time is the thickness (volume) of your project. Even when using the exact same resin brand, curing speed changes drastically depending on how deep your pour is.
Remember, epoxy resin generates its own heat as it cures. The more resin concentrated in a single space, the more heat builds up inside the liquid, warming itself and accelerating the reaction even further.
In short: thicker, higher-volume pours cure faster, while thin pours cure much slower.
When pouring pieces only a few millimeters thick—such as coasters, flat keychains, or decorative trays—the curing time is noticeably longer.
Because the liquid layer is shallow, the heat generated escapes immediately into the surrounding air. Without trapped exothermic heat to boost the reaction, curing relies purely on ambient room temperature.
It is very common for a thin coaster to feel bendable or slightly soft even after 24 hours. This is not a failure; it simply means the heat dissipated and the reaction is taking longer. Don't panic—just leave it undisturbed for 48 hours or more.
Conversely, deep geometric molds, orgonite pyramids, or thick resin blocks trap significant amounts of heat inside. Because the heat cannot escape, internal temperatures rise rapidly, causing the resin to cure much faster than a thin piece.
While faster curing might sound convenient, it carries a major risk that beginners must be cautious of.
If you pour too much standard craft resin all at once into a deep mold, you risk triggering thermal runaway.
Internal temperatures can spike beyond 80°C to 100°C (176°F–212°F). The resin can literally boil, emitting crackling sounds, smoke, and violent bubbles. The piece will often turn an unsightly yellow or develop severe internal cracks, completely ruining your work.
The golden rule for avoiding thermal runaway is layering (multi-stage pouring).
When making a deep piece, never fill the mold all at once. Pour in increments of roughly 1 to 2 cm (about 0.5 to 0.75 inches). Wait until the previous layer reaches a semi-cured state (gel to early cure) before pouring the next layer.
Taking this extra time completely eliminates the risk of overheating, ensuring a safe, crystal-clear masterpiece.
Today, craft suppliers and specialty shops offer epoxy resins specifically tailored for different project depths:
Deep-pour resins avoid thermal runaway, but in exchange, they require a much longer curing time—often 3 to 5 days. Selecting the resin that matches your desired thickness is the secret to zero mistakes.
Epoxy resin is surprisingly sensitive to seasonal shifts and room conditions. If you followed the exact same recipe as last time but your resin won't harden, the cause is almost always room temperature or humidity.
Epoxy resin achieves peak performance within an ambient temperature range of 20°C to 25°C.
In this range, the viscosity remains easy to handle, bubbles rise and pop effortlessly, and the piece cures rock-hard within the standard 24 to 48 hours. Straying outside this temperature bracket disrupts the curing schedule dramatically.
When room temperature climbs past 30°C (86°F) in summer, the chemical reaction accelerates rapidly.
While faster curing sounds nice, the major pitfall is that your working time (pot life) shrinks drastically. The resin can start heating up and turning into a thick gel while still sitting in your mixing cup before you even have a chance to pour it into your mold.
During hot summer months, always turn on the air conditioner to bring the room down to 22°C–25°C before you begin mixing.
Winter is when beginners struggle the most. In a cold room where temperatures drop below 15°C (59°F)—or near 10°C (50°F)—the chemical reaction almost completely halts.
Even after 24 or 48 hours, the surface will remain sticky and the piece will feel soft and pliable. Do not give up and throw it away! It hasn't failed; the reaction is simply paused due to the cold.
Once you warm the room up to the proper temperature, the chemical reaction will resume and the resin will cure properly.
To cure epoxy resin reliably in cold weather, you need to create a suitable micro-climate.
While keeping whole-room heating on for 24 hours is the most dependable method, you can save energy by crafting a simple insulated warming box.
Place your pouring project inside a styrofoam cooler or thick cardboard box, accompanied by a small electric heating pad or a hot water bottle, keeping the internal environment around 25°C (77°F). This enclosed warmth ensures summer-quality curing even in the depths of winter.
Humidity is just as critical as temperature. Working on rainy days or during humid seasons when relative humidity exceeds 70% to 80% can cause a frustrating defect known as amine blush.
Moisture in the air reacts with the amine compounds in the hardener, causing a cloudy, milky haze on the surface or leaving a permanent, oily, sticky residue that never goes away.
Avoid pouring epoxy resin on high-humidity days. If you must work, run a dehumidifier until the room's humidity drops below 50% before you begin.
If your room was kept at 25°C and you waited a full three days, yet your resin surface remains sticky or gooey, the issue lies in your preparation or measurement technique. Here are the three most common culprits:
In epoxy resin, the ratio of resin to hardener is an absolute mathematical requirement.
Most manufacturers specify an exact weight ratio, such as 2:1 by weight. If this balance is off by even a few percent, unreacted liquid molecules will remain, preventing the resin from ever fully solidifying.
A common beginner mistake is measuring by volume (milliliters) using graduated mixing cups. The resin and hardener have different specific gravities (densities)—a milliliter of resin does not weigh the same as a milliliter of hardener.
Always use a digital scale accurate to 0.1 grams and measure strictly by weight. This is the single most important rule for error-free results.
Even with 100% accurate measurements, the resin won't harden unless the two components are blended thoroughly at a molecular level. Beginners often stir a few dozen times, see clear liquid, and assume it's ready. That is not enough!
While stirring, you must scrape the stirring stick thoroughly along the bottom corners and the inner sidewalls of the mixing cup where unblended liquid clings.
My go-to recommendation is the "Double-Cup Method":
This method prevents any unmixed residue from the walls of the first cup from contaminating your mold, completely eliminating soft, sticky spots.
Using water-based acrylic paints or colorants that contain moisture will severely disrupt the chemical reaction, causing curing failure. Always use specialized resin pigments, alcohol inks, or oil-based/powder pigments.
Similarly, when embedding botanical items like dried flowers, any residual moisture hidden inside the petals or stems will prevent the surrounding resin from curing properly, leaving soft, sticky patches. Ensure every inclusion is 100% bone-dry before casting.
Here is a reliable working timeline to ensure your finished pieces come out clear, flawless, and perfectly shaped.
The countdown starts the second the resin and hardener touch. If left sitting in a mixing cup too long, heat accumulates rapidly, accelerating premature curing.
Once thoroughly mixed, let the cup rest for about 5 minutes to let large air bubbles rise to the surface. Pop them with a quick wave of an embossing heat tool, then pour immediately into your mold. Aim to finish all pouring and inclusion placement within your resin's 30-minute working window.
During the 24 hours after pouring, the liquid surface is completely exposed. Dust particles, lint, or stray hairs floating in the air can settle onto the surface and ruin an otherwise flawless, glossy finish.
As soon as you finish pouring, cover the mold with an inverted plastic container, a clean cake cover, or a cardboard box. This simple step makes a world of difference in achieving a professional-grade finish.
Once 24 hours have passed, it is tempting to pop the piece out right away. But don't rely solely on the clock!
Test the resin by very gently pressing the edge of the piece—or a leftover drop in your mixing cup—with the tip of a fingernail.
If you feel even the slightest softness, or if your fingerprint sticks to the surface, do not demold yet. Forcing it out now will leave permanent fingerprints or distort the shape forever.
Only demold when the surface feels completely hard, slick, and glassy to the touch. Then, gently peel back the silicone mold.
Freshly demolded resin has not yet achieved its maximum hardness. Place the demolded piece on a flat surface and let it rest undisturbed for another 24 to 48 hours (reaching a total of 48 to 72 hours from the initial pour). This is known as post-curing (secondary curing).
This extra resting period allows internal molecular bonds to fully lock into place, resulting in a scratch-resistant, heat-resilient, and exceptionally durable finished piece.
Here are a few personal studio habits I always follow to guarantee zero failures when working with epoxy resin:
On days when I pour epoxy resin, I turn on the room's climate control two hours in advance, locking the temperature stably at 23°C–24°C (73°F–75°F).
On my workbench, I place a perfectly flat acrylic sheet or polished marble board, checking it with a bubble level. Because epoxy resin remains liquid for hours, an unleveled surface will cause the resin to pool toward one side, resulting in uneven thickness across your piece.
I also inspect the batteries in my digital scale and weigh my materials in a draft-free spot so air currents don't skew the reading.
Epoxy resin is a craft where time is your ally. I always schedule my projects across at least three distinct days: Day 1 for pouring, Day 2 for demolding, and Day 3 for post-curing, sanding, and final polishing.
I never attempt rush jobs like "make it today, gift it tomorrow." Patiently waiting while the resin cures by its own natural chemistry is one of the most rewarding parts of handmade crafting—it is the secret ingredient behind truly exquisite work.
What if three full days pass and your piece is still sticky on top due to a minor surface defect? Leaving it alone won't make it cure at this point. But don't throw it out just yet!
Carefully wipe away the sticky uncured layer using a cloth soaked in anhydrous ethanol (high-purity isopropyl alcohol). Once clean and dry, apply a fresh, thin topcoat of properly mixed epoxy resin—or a thin brush-on layer of UV resin—and let it cure. The new coat will bond and provide a crystal-clear, rock-solid surface, salvaging your hard work.
Epoxy resin curing doesn't have to be mysterious. By understanding the science behind temperature, thickness, and careful preparation, you can achieve consistent, professional results every time.
Let's recap the key points:
Epoxy resin may not offer the instant gratification of UV resin, but the profound optical clarity, depth, and satisfying weight of a fully cured epoxy piece are truly unmatched.
Take your time, enjoy the process, and let the magic of epoxy resin transform your craft projects!
Until next time, happy crafting—this was Yassy from Crafters!




For example, if you are looking for articles about mizuhiki, try searching for "mizuhiki"; if you are interested in tools, try keywords like "nippers" or "pliers."
