The Complete Guide to Figure Armatures: Core Materials, Clay Compatibility, and Sculpting Techniques
yassy
Crafters!

Hello, everyone! It’s Yassy from Crafters! (・∀・)
Have you ever wanted to sculpt your favorite anime or game character, or bring an original character living in your imagination into the three-dimensional world with your own hands? Hearing the phrase "figure sculpting" might make it sound like a daunting craft reserved only for professional prototype sculptors and master modelers.
In reality, as long as you gather the right materials and basic tools, even complete beginners can craft high-quality figures right at home! Today, fantastic craft supplies are easily accessible via online hobby shops, hardware stores, and local craft suppliers. Bringing 3D characters to life has become much more approachable than ever before.
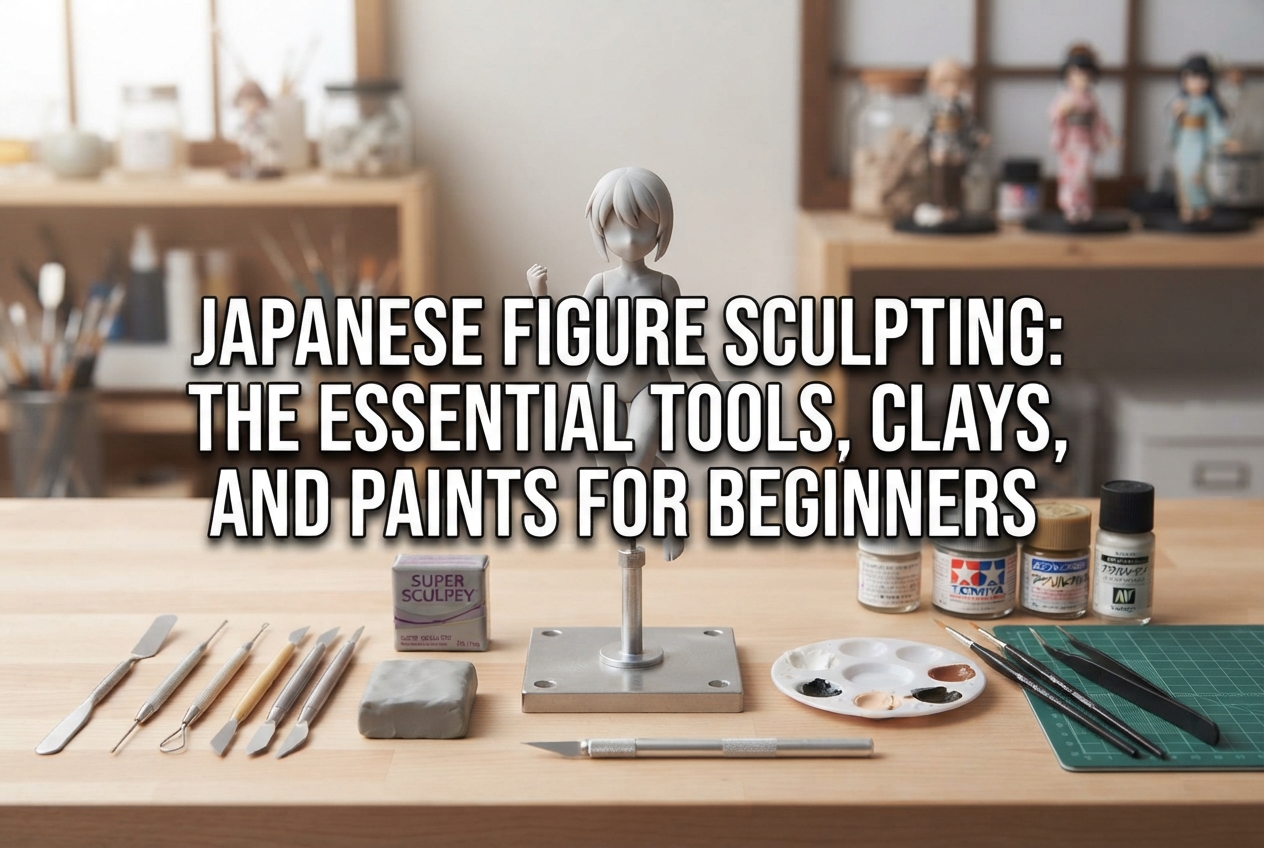
In this guide, I will thoroughly explain the fundamental materials and essential tools you need to kickstart your figure-sculpting journey, along with recommended items that will make your workflow dramatically smoother. I will also share my personal criteria for choosing supplies so you can get started without second-guessing your purchases!
When embarking on figure creation, the very first decision you must make is what medium to use for sculpting. There are several primary materials utilized in garage kit and figure sculpting, each with distinct handling properties, drying behaviors, and final durability. Picking the right medium for your workflow is the crucial first step.
For anyone sculpting a figure for the very first time, the material I recommend most is stone powder clay (known in Japan as sekifun nendo). This air-dry clay is made primarily from finely ground stone minerals, and once cured, it hardens almost like solid wood.
While moist, it handles like traditional modeling clay, allowing you to freely shape your forms. Once fully air-dried, it can be crisply sliced, carved, and scraped down with a design knife or smoothed with sandpaper. Furthermore, you can easily add fresh moist clay over cured sections to build up volume. This makes stone powder clay the absolute best material for mastering the fundamental figure-sculpting cycle of "building up, drying, and carving down." It is readily available and budget-friendly, so you can sculpt freely without stressing over mistakes.
Air-dry resin clay (jushi nendo) cures into a durable, slightly flexible material with plastic-like properties. It does not cure rock-brittle; instead, it retains a slight flex, making it ideal for thin, breakable features such as delicate hair strands, flowing clothing hems, and ribbon edges.
However, once dry, it becomes quite firm and takes significant effort to carve with blades. Rather than carving shapes out of a hardened block, resin clay is best shaped precisely with your fingers and spatulas while it is still soft. A very popular and effective technique is to build the main body out of stone powder clay and use resin clay solely for delicate hair tips prone to snapping.
Two-part putties that cure through chemical reactions are widely used in Japanese figure prototype sculpting: epoxy putty and polyester putty.
While putties are more expensive than clay, they are indispensable when you need crisp, sharp angles and edge retention.
Oven-bake clays, represented by brands such as Super Sculpey, feature a unique property: they will never dry out at room temperature until baked with heat.
Because the clay remains soft indefinitely on your desk, you can spend hours, days, or weeks refining your sculpture until you are completely satisfied. Once the piece is ready, heating it in an oven cures it into a rigid, workable form. Many professional sculptors love this medium for its capacity to capture microscopic details. Keep in mind, however, that you will need an appropriate baking appliance, and the material itself is slightly more expensive.
If you feel overwhelmed by all these options, I strongly recommend completing your first full figure using only stone powder clay! You do not need expensive putties or oven-bake clays right away. Familiarizing yourself with the rhythm of stone powder clay—applying, drying, and carving—is the fastest track to improving your sculpting skills.
If you try to build a figure entirely out of solid clay, it will collapse under its own weight or snap cleanly in two during the drying process. To prevent this, placing an internal skeleton—an armature—is essential.
Aluminum wire forms the core skeleton of your figure. It is much softer than steel wire, making it easy to bend and reposition by hand or with pliers to establish dynamic poses. A thickness between 1.5 mm and 2.0 mm is ideal and easy to manipulate.
To build bulk around the wire frame for the torso and head, standard kitchen aluminum foil is your best friend! Tightly compressing foil around the wire saves a tremendous amount of clay, drastically reduces the drying time, and prevents core cracks. Because clay becomes heavy in large solid masses, an aluminum foil core also keeps the finished piece lightweight and well-balanced.
Prepare a pair of wire cutters (side cutters) and needle-nose pliers to cut and manipulate your aluminum wire.
Never use crafting scissors to cut metal wire, as doing so will ruin the cutting edge. Always use dedicated cutters. Needle-nose pliers with slim tips are invaluable for bending wire inside tight joints or gripping small loops where your fingers cannot reach.
If you hold a figure in your hands throughout the entire sculpting session, you will inevitably crush freshly shaped details with your fingers. For this reason, sculptors mount the armature's foot wires securely into a wooden block or work base.
Drilling holes into a block of wood to insert the wire, or clamping the wire feet into a small hand vise, allows you to sculpt while viewing your character from every angle across 360 degrees without ever touching delicate surfaces directly.
Once you pack clay over your armature, you transition into defining anatomy, hair, and clothing. Specialized sculpting tools will help you reach tight recesses and craft smooth contours.
Spatulas are sculpting implements made of metal, bamboo, or rigid plastic. Their tips come in varied geometries: knife edges, rounded spoons, needle points, and curved hooks.
With a spatula, you can carve deep facial planes, sculpt natural fabric creases, and separate flowing clumps of hair that fingers cannot achieve. Metal spatulas are especially versatile because they do not bend, transferring pressure directly and accurately to the clay. A starter set containing three to five double-ended metal spatulas is ideal for beginners.
A design knife—an angled precision hobby blade—is completely indispensable for shaving cured clay and putty. Unlike standard utility box cutters, a design knife features an acute blade tip and a pen-like handle, offering absolute control for cuts down to the millimeter.
You will use it across every stage: trimming excess material, cutting clean seams between components, and scoring deep parting lines. A dull blade requires extra force and increases the risk of slipping and injury. Replace your blades frequently whenever the tip feels slightly blunt; fresh blades guarantee cleaner cuts and safe handling.
After carving with a knife, the clay surface will still look faceted and uneven. Sanding is required to polish the silhouette smooth. In figure modeling, we typically alternate between wet/dry sandpaper and flexible sponge sanding pads.
Sandpaper grits are categorized by number: lower numbers indicate coarser grits, while higher numbers indicate finer grits. A standard progression begins with coarse 240 or 320 grit to establish major contours, moves to 400 grit to eliminate deep gouges, and finishes with 600 to 800 grit for an ultra-smooth finish.
Sponge sanding pads flex gently against organic curves, making them exceptional for buffing rounded cheeks, limbs, and flowing drapery without flattening deliberate contours.
When crafting clothing panels, ribbons, or flat hair locks, you must roll clay into sheets of uniform thickness. An acrylic clay roller accomplishes this smoothly without sticking excessively.
Always work over a self-healing cutting mat to protect your desk and keep your knife blades sharp. Choosing a mat printed with grid lines provides a built-in scale reference to check symmetrical sizing between left and right parts.
As your build progresses, you will encounter situations where a fragile part breaks, or where you want to separate the head and limbs from the torso to make painting easier. Here are the tools to manage jointing and repairs.
Different adhesives serve distinct purposes during figure builds:
When you detach arms, legs, or hair pieces into separate parts to paint them cleanly, you need a technique known in Japanese model making as jiku-uchi (pinning). Gluing flat joint surfaces alone results in weak joints that snap under slight pressure. Pinning—drilling matching holes into both joining faces and bridging them with a rigid metal rod—creates an exceptionally strong mechanical bond.
A pin vise is a miniature hand drill that holds fine drill bits. Drill clean holes on both sides, insert a segment of brass or aluminum wire, and join them with glue. Having drill bits ranging from 0.8 mm to 2.0 mm will cover nearly any figure-joint requirement.
Once sculpting and surface polishing are complete, you reach the most exciting stage: painting! Applying the right surface preparation and color layers turns sculpted clay into an eye-catching display piece.
Before applying color, spraying a specialized hobby primer known as "surfacer" is an essential step. Surfacer fills micro-scratches left by sanding and creates a uniform tooth so your paint adheres smoothly without peeling.
Additionally, coating your piece in neutral gray or white surfacer eliminates visual clay stains and exposes hidden surface flaws, pinholes, and rough patches with total clarity. When you spot a blemish, sand it down, re-prime with surfacer, and repeat until the surface is completely pristine.
For coloring, water-based acrylic hobby paints are ideal for beginners because they dilute with water, dry water-resistant, and emit very little odor compared to hobby lacquer paints.
Prepare flat brushes for covering wider planes and garments, and invest in a high-grade ultra-fine detail brush (known in Japanese craft traditions as a menso-fude) for eyes, lips, and fine trim. For hand-painting character eyes, a premium fine-point brush that maintains a crisp tip under pressure will elevate your final result dramatically.
Once your paint has dried thoroughly, seal the entire figure with a clear topcoat spray to protect it from handling wear and harmonize the surface sheen.
Spraying a matte (flat) clear coat over skin and fabric removes any unnatural plastic shine, imparting a soft, organic texture. Conversely, applying a touch of gloss varnish with a brush to the irises, lips, and metallic accessories introduces vibrant moisture and realistic metallic reflections. Mastering the contrast between matte and gloss finishes is the secret to making a handmade figure look professionally finished!
Sculpting figures is immensely rewarding, but it involves fine airborne dust, sharp blades, and aerosol fumes. Setting up a safe workspace ensures a healthy and productive hobby.
Sanding cured clay and putty generates microscopic airborne dust. Inhaling this dust over extended periods is hazardous to your lungs, so always wear a particulate dust mask (or a well-fitting non-woven mask) while filing and sanding.
Furthermore, aerosol spray cans like primers and clear coats contain organic solvents. Never spray them inside an enclosed, unventilated room. Always spray outdoors in a well-ventilated area, or use a dedicated hobby spray booth with an exhaust duct vented outside. Always read manufacturer safety guidelines before using chemical products.
As you get absorbed in sculpting, you might feel tempted to purchase airbrushes, ultrasonic cutters, and rotary rotary tools right away. But there is no need to buy high-ticket gear from day one!
A simple starter setup—stone powder clay, aluminum wire, a design knife, a small spatula set, sanding pads, basic brushes, and acrylic paints—is more than enough to create an incredible first piece. As you complete projects and identify specific needs (such as wanting smoother gradients or faster rough-carving), you can add tools one by one. This approach prevents wasted expenses and ensures every tool you purchase fits your personal sculpting style.
Figure sculpting might seem intimidating from the outside, but it breaks down into clear, satisfying steps: build an armature, apply clay, carve contours, polish the surface, and paint. With the right fundamental tools and basic safety habits, anyone can experience the thrill of crafting their own three-dimensional characters from scratch.
Your first sculpt might not turn out 100% flawless, and that is completely natural. The tactile journey of carving and building up clay until your vision appears before your eyes is wonderfully immersive. Grab some clay and tools, and take that exciting first step into figure sculpting!
If you found this guide helpful, sharing it with your fellow makers on social media means the world to me!
See you in the next craft article! This was Yassy from Crafters! (・∀・)




For example, if you are looking for articles about mizuhiki, try searching for "mizuhiki"; if you are interested in tools, try keywords like "nippers" or "pliers."
