Epoxy Resin Curing Time Depends on Thickness and Volume: Complete Control Guide for Flawless Results
yassy
Crafters!

Hello! I'm Yassy from Crafters! (・∀・)
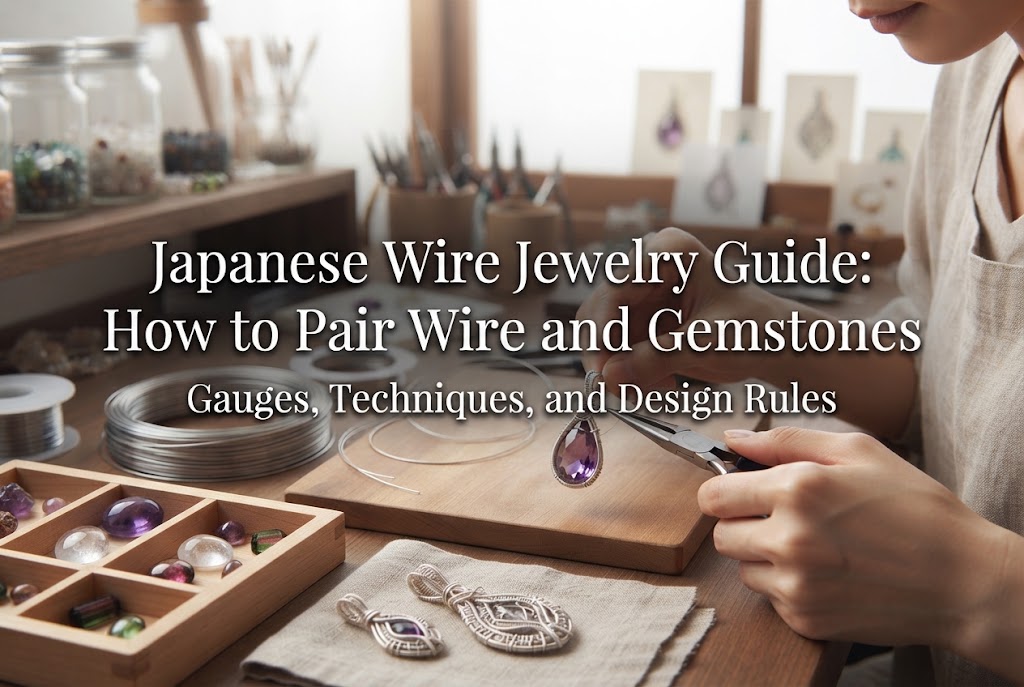
I love making accessories myself, admiring lovely creations by other artists, and buying natural gemstones that instantly catch my eye. Today, I'm going to explain in detail how to achieve the perfect combination of wire and gemstones in wire jewelry crafting.
Wire jewelry that highlights the beautiful colors and shapes of natural stones possesses a unique presence and warmth you won't find in mass-produced items. However, when you actually try to make a piece, you might hit a wall: "I don't know which wire gauge to choose," "The stone keeps spinning and won't stay in place," or "The colors just don't look right together."
There are clear rules and techniques for combining gemstones and wire. Once you master these basics and tips, anyone can freely create beautiful accessories where the stones stay firmly in place without wobbling.
In this guide, I'm revealing all my practical know-how—from choosing the optimal wire based on stone shape and drill holes, to wrapping techniques that lock stones securely, and color coordination that dramatically elevates the finish of your work.
In wire jewelry making, three main factors determine how well a gemstone and wire work together: wire thickness (gauge), wire hardness, and the color balance between wire and stone. Making a mistake in selecting these three elements can cause wire to snap during crafting or lead to stones falling out of finished pieces.
The first thing to master is selecting wire thickness (gauge / wire diameter). Wire thickness is indicated in millimeters (mm) or gauge (GA) on craft products like Artistic Wire. Remember that the smaller the gauge number, the thicker the wire is.
When using bead-type gemstones with pre-drilled holes, the very first thing to check is the hole diameter. The absolute rule is to choose a wire slightly thinner than the diameter of the hole.
If you use a wire that is too thin relative to the hole size, the wire will have too much play inside, causing connected areas like wire-wrapped loops to warp. On the other hand, if the wire is too thick, it can get stuck inside and crack the stone.
Gemstone beads, such as common 6mm or 8mm round beads, typically have hole diameters of around 0.6mm to 0.8mm. Use the following guide as your basic standard for wire selection:
Next in importance is wire hardness. Craft wire widely distributed on the market (such as copper-based Artistic Wire with non-tarnish coatings) is usually available in "soft" or "half-hard" tempers, making it easy to bend with hands or pliers.
When holding heavy, large stones, raw stones without holes, or cabochons/loosely cut gems (luces), use half-hard wire or soft wire 0.8mm (#20) or thicker so it retains its shape firmly. For small, delicate stones or designs requiring many fine coils, soft wire of 0.4mm (#26) or thinner is the correct choice for flexible bending.
Gemstones offer completely different charms depending on their cut and shape. Choosing the appropriate wire technique for the specific shape of the stone is the ultimate key to achieving both beauty and durability.
For spherical round beads or faceted beads, the most basic and crucial technique is the wire-wrapped loop (loop & wrap). Unlike simply bending a headpin or eye-pin, this technique wraps the tail wire around the stem to create a secure loop, resulting in a strong connection that will never come undone.
When making a wire-wrapped loop, using 0.5mm to 0.6mm wire is ideal. Bend the wire at a 90-degree angle right above the stone, make a neat loop with round-nose pliers, and then coil the wire tightly 2 to 3 times around the neck without leaving gaps. The tightness of these wraps directly affects the strength and overall beauty of your jewelry piece.
For teardrop or briolette-cut stones (tear-shaped stones with a horizontal hole near the top), use the shank wrap method. Cross the wire passing through the hole above the stone to form a triangle shape, then wrap down toward the neck. Use fine 0.3mm to 0.4mm wire for delicate briolette cuts, wrapping gently against the head of the stone to avoid damage.
Cabochon-cut stones—flat on the back and domed on top—do not have holes. Therefore, we use a technique called wire wrapping (framing) to encase the outer perimeter of the stone.
The golden rule for securing a cabochon is creating a two-layer structure: a wire that holds the bottom edge of the stone and a wire that catches the top sloped edge of the stone. If you skip this, vibration or impact will cause the stone to slip out of the frame.
The most foolproof method is to take two 0.8mm wires side-by-side, bind them at a few points using fine 0.3mm wire to form a band, and shape it into a ring along the side profile of the gemstone. Tilt the back wire slightly inward to create a seat for the bottom, and use flat-nose or round-nose pliers to gently bend the front wire inward to catch the rim of the stone.
When this "sandwiching from front and back" is executed perfectly, you achieve the thrilling result of a stone that won't budge at all—without using a single drop of glue.
Unpolished raw mineral specimens or smoothly rounded tumbled stones feature irregular surfaces where every single piece is unique. For these organic shapes, rather than a rigid linear frame, techniques like cage wrapping or freeform wrapping—which catch the wire in the stone's natural nooks—are best.
When wrapping a raw stone, first inspect it carefully to identify the indentations or "waistlines" where the wire can grip. Cross your main 0.8mm or 0.6mm wires along these narrow points, and securely bind the intersection points with fine wire.
Because smooth tumbled stones tend to let wire slip easily, creating a mesh-like "cage" by twisting wires together behind the stone and enclosing the stone inside is the most reliable way to secure it.
The most common stumbling block for beginners in wire jewelry making is finding that the finished stone rattles inside the frame, or that the wire loosens and creates gaps. Specific techniques exist to eliminate wobble completely.
Ninety percent of the reason a gemstone fails to stay fixed comes down to a lack of wire tension and misplaced holding points relative to the stone's shape.
When wrapping wire, you must maintain constant pulling tension with your hands while pressing the wire firmly against the stone using your fingers or pliers. No matter how many times you wrap a slack wire, the metal's natural elasticity (springback) will inevitably create looseness.
In the final step of securing a stone in a frame, apply the principle of claw settings (jewel settings). Use flat-nose pliers to bend small sections of the frame wire into a slight "zigzag" or tiny "wave." This action slightly shrinks the overall perimeter of the frame wire, applying strong, direct pressure onto the stone to lock it completely in place.
Tool selection and usage also directly impact your results. Gemstones vary in hardness depending on their type. Hard stones like quartz resist scratching, but softer stones like fluorite, apatite, or sphene can chip or scratch simply from touching metal tools.
When handling delicate gemstones, use nylon-jaw pliers (pliers with protective nylon covers on the tips) or wrap masking tape over the tips of your metal tools. Preventing direct, hard metal contact with the stone is an absolute requirement for preserving your piece's beauty.
Never compromise on how you trim and tuck wire ends, either. Flush-cut wire ends left exposed can scratch the wearer's skin or snag on clothing fibers. When cutting wire, use flush cutters (with the flat side of the cutters facing toward the finished piece), and tuck the cut end tightly into the inside of the frame or a groove using flat-nose pliers. Make sure the finish feels completely smooth to the touch with zero snags.
Matching the color of your wire to your gemstones can dramatically elevate the overall look of your jewelry. Depending on the wire color you choose, the exact same gemstone can take on an elegant, vintage, natural, or modern aesthetic.
Here are the main wire colors widely used in handmade craft jewelry today:
By selecting a wire color based on the stone's color family and transparency, you can maximize its natural beauty.
Warm-toned gemstones like rhodochrosite, carnelian, citrine, sunstone, and garnet harmonize perfectly with gold or rose gold wire.
Gold wire adds radiance and luxury, making the vibrant hues of the stones pop even more. If you want a soft, gentle look that blends nicely with skin tones—or when working with pale pink stones like rose quartz or morganite—rose gold wire creates a wonderfully soft and graceful ambiance.
For cool-toned gemstones such as lapis lazuli, sapphire, aquamarine, amethyst, and kyanite, silver wire is the best match. The crisp shine of silver enhances the clarity of blue and purple tones, conveying cleanliness and sophistication.
On the other hand, pairing these stones with gunmetal (dark/black) wire is an exceptionally effective design choice. For example, combining gunmetal wire with labradorite (featuring mysterious iridescence), black onyx, or deep blue lapis lazuli creates a sharp, stylish, and cool aesthetic for mature jewelry pieces.
Green stones like peridot, aventurine, and moss agate, as well as natural raw minerals and amber, look stunning when wrapped with vintage-style Spanish copper or classic copper wire.
Copper-toned wires evoke a natural, earthy feel reminiscent of forest plants and trees. If you want to create classic, antique-style creations, this wire color is the ultimate choice.
While wrapping a single gemstone is lovely, combining multiple stones or beads expands the depth and narrative world of your design many times over. Here are the core rules for building a cohesive design layout.
When using multiple stones, clearly define the roles of your main star (focal stone) and supporting accents (sub-stones). If the main and accent stones compete for attention, the design will look cluttered and chaotic.
For your main focal stone, select a large cabochon, a vibrant tumbled stone, or a uniquely faceted drop cut. Then, place smaller round beads or button-cut accent stones around the main stone or along the connection chain.
When choosing accent stones, you can't go wrong with one of these color formulas:
You must also control the density of your wire wraps. If your main gemstone possesses beautiful clarity and transparency, covering too much of its surface with wire will hide its natural beauty. For highly transparent stones, the rule is to keep the frame minimalist and clean.
Conversely, for opaque stones with strong visual presence like onyx or turquoise, elaborate wirework, filigree coils, and decorative swirls will not overpower the stone. Always adjust the amount of wire according to the stone's transparency.
The biggest trap for beginners in wire crafting is jumping straight into wrapping without a plan, only to end up with a tangled, messy wire. Once wire is sharply bent, kinks remain even if you try to straighten it out, and metal fatigue makes it snap easily. To avoid ruining both wire and gemstones on your first try, here is the exact step-by-step procedure I follow in my own practice.
Every gemstone has a "front face" where it looks its absolute best. Examine the stone carefully to see how inclusions sit, how light reflects (labradorescence or chatoyancy), and where the facets shine brightest, then decide which side will face forward.
At this stage, feel the stone's thickness, edge angles, and drill hole positions with your fingers to plan where your structural wires will rest.
If you plan your design entirely in your head, you run the risk of running out of wire mid-way or hitting a structural dead end. Place your gemstone directly on a sheet of paper and trace its outline with a pencil. Then, draw your plan at 1:1 scale: "Run main frame here," "Twist here," "Add small accent bead here." Taking this quick extra step completely eliminates hesitation during crafting.
Beginners tend to cut wire too short in an attempt to save material. However, if your wire is too short, you won't be able to get enough leverage with your fingers or tools during the final wrapping steps, making neat finishes impossible.
The rule of thumb is to prepare wire that is 1.5 to 2 times the estimated length needed. Excess wire at the ends can simply be trimmed off at the very end. Always prioritize ease of handling and a clean finish over saving a few inches of wire.
Always start your project by building the foundation frame with your thickest wire. Never jump into adding delicate 0.3mm accent wraps or small beads while your base structure is still wobbly.
Once the gemstone is securely held by the thick structural wire and you've confirmed the base is solid, bring in your finer wires to execute decorative coils and accents. Following this order is the absolute secret to creating durable, long-lasting jewelry.
Here are typical issues craftspeople face during production and how to solve them.
This is caused by metal fatigue. Repeatedly bending and unbending wire breaks down its internal crystalline structure, making it hard and brittle until it snaps.
To fix this, don't try to fix mistakes over and over with pliers on the same piece of wire. Scrapping the bent section and starting fresh with a new piece of wire is actually the fastest way to get a clean result. Also, when making bends, avoid sharp sudden angles; instead, use the pads of your fingers to gently guide the wire into smooth curves so it stays strong.
Distorted top loops on pendant drops or earring connections are usually caused by improper round-nose plier technique.
When shaping a loop with round-nose pliers, trying to rotate the pliers themselves in a full circle causes your wrist axis to shift, resulting in an uneven loop. The correct method is to keep the round-nose pliers stationary while using your other hand to pull and wrap the wire around the plier tip. By focusing on wrapping the wire around the tool rather than turning the tool itself, anyone can create crisp, perfectly round loops.
Gaps or overlapping coils in wire wraps happen when wrapping direction and pulling tension are inconsistent.
Keep the wrapping wire perpendicular (90 degrees) to the core wire at all times, pulling evenly as you work toward yourself. After each turn, use flat-nose pliers to gently squeeze the coils down toward the base—a technique called "packing"—to achieve neat, professional-looking wraps.
If you're eager to dive into wire gemstone crafting, I highly recommend starting with either a Small Gemstone Wire-Wrapped Loop Bracelet or a Simple Tumbled Stone Pendant Top.
The small gemstone bracelet links 6mm or 8mm gemstone beads together in a chain using 0.6mm wire and wire-wrapped loops. Because it repeats the fundamental steps (making a loop, wrapping, cutting, tucking), it builds your core wirework muscles fast.
The tumbled stone pendant top dynamically wraps a favorite undrilled tumbled stone using one or two lengths of 0.8mm wire. It gives you direct, hands-on feel for guiding wire along curved stone surfaces and locking a gem in place.
For both projects, the only tools you need are flat-nose pliers, round-nose pliers, and flush cutters. Bending wire with your own hands and watching your favorite stone transform into a one-of-a-kind piece of wearable art is an incomparable joy!
Combining wire and gemstones is a wonderful handmade craft genre where beginners can unlock endless design possibilities once they master a few core rules and techniques.
Selecting the right wire gauge for drill holes and stone shapes, building front-and-back capturing frames, and picking color schemes that highlight the natural stone—applying these rules step by step guarantees sturdy, wobble-free, and gorgeous creations every time.
At first, wire might feel stiff or tricky to control. But wire is a very honest material! When treated with proper tension and careful tool work, it rewards you with beautiful, graceful curves.
Pick up a favorite gemstone from your stash today, cut a length of wire, and give it a try. I'm cheering you on as you craft a truly unique piece of jewelry with your own hands!
If you enjoyed this guide, sharing it with your crafting friends on social media or messaging apps would mean the world to me!
See you in the next post! This was Yassy from Crafters! Bye for now!




For example, if you are looking for articles about mizuhiki, try searching for "mizuhiki"; if you are interested in tools, try keywords like "nippers" or "pliers."
