The Ultimate Beginner’s Guide to Japanese Amigurumi: How to Start, Choose Kits, and Avoid Mistakes
yassy
Crafters!

Hello, everyone! It’s Yassy from Crafters! (・∀・)
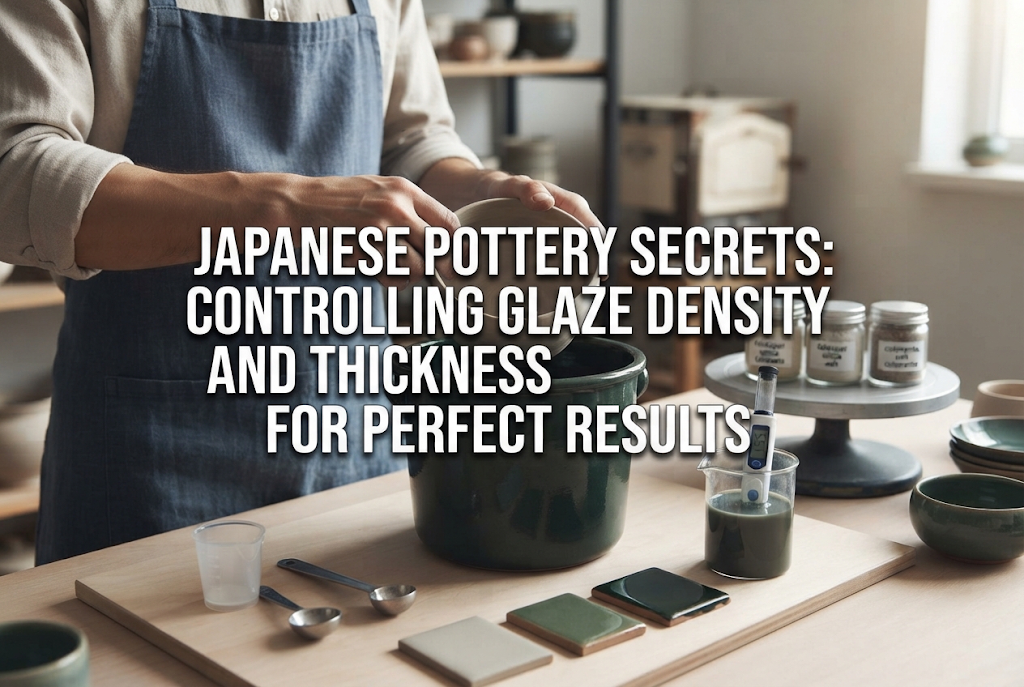
When creating ceramic pieces, the glaze (yuyaku in Japanese) dictates the final expression of your work just as much as—or even more than—the initial shaping. The rich colors and luscious, soft textures of the beautiful ceramics you see in craft shops and exhibitions all stem from secrets hidden in how the glaze is applied.
As someone who enjoys making and buying various handmade crafts, I’ve found that few materials transform as dramatically based on "density and thickness" as pottery glaze. Even when scooped from the exact same bucket, one piece might turn out glossy and richly colored, while another ends up dry, scratchy, and revealing the bare clay body underneath. This is a surprisingly common occurrence!
When beginners struggle because their finished pieces don't match their vision, the culprit is almost always a lack of control over the glaze's "density (concentration)" and "layer thickness." Once you thoroughly understand and master these two factors, the quality of your ceramics will instantly leap to a professional level.
In this guide, I’ll explain in detail how glaze density and layer thickness affect your results, breaking down the mechanics behind common glazing failures, showing you how to judge glaze consistency, and sharing my personal glaze application techniques!
First, there is a crucial distinction that you must never confuse: the difference between "glaze density (concentration)" and "glaze layer thickness." While they sound similar, they are entirely different concepts.
If you keep working without clarifying this difference, you'll never be able to create pieces exactly as you imagine. Let's make sure you understand the precise meaning of each concept and the basics of the chemical reactions happening inside the kiln.
"Glaze density" refers to the concentration of the liquid itself—how much powder glaze component is dissolved or suspended in the water. In the Japanese pottery world, this density is measured using Baumé degrees (Baumé). If there is a lot of water, it's a "thin glaze"; if there is little water, it's a "thick glaze."
On the other hand, "glaze thickness" refers to the physical depth of the glaze coating deposited on the surface of your bisque-fired clay piece. It is measured in millimeters or microns.
Here is the critical point: even if you are using a "thin (low-density) glaze," if you leave the bisque ware submerged in the bucket for a long time, the porous clay will absorb water and build up a "thick glaze layer." Conversely, even with a "thick (high-density) glaze," if you dip the piece for only a split second, you will only get a "thin glaze layer." In short, liquid density does not automatically equal coating thickness! Please lock this core principle into your memory.
The biggest misconception beginners fall into is treating glaze like regular paint. Acrylics and watercolors simply dry on the surface to display pigment. Glazes work completely differently.
A ceramic glaze is a mixture of ground minerals—such as feldspar, silica, limestone, and metal oxides (iron, copper, cobalt, etc.) for color—that melt into glass at temperatures above 1,200°C (2,192°F).
Inside the kiln, as the temperature rises, these powdered minerals melt into a viscous liquid glass and then solidify as they cool. If this molten glass layer is too thin, it reacts excessively with the underlying clay body. If it is too thick, gravity causes it to run down the piece, or gas bubbles get trapped inside. Glazing is literally a grand chemical reaction occurring inside a high-temperature kiln!
What happens when the applied glaze layer ends up thinner than the optimal depth? An overly thin glaze coating severely undermines the charm of your piece.
Let's look at four representative issues that occur when the glaze is too watery, when the immersion time is too short, or when the bisque ware has low absorbency.
If the glaze layer is insufficient, a continuous glass layer cannot form properly. Even with glazes designed to produce brilliant colors and high gloss, the color turns out washed-out and shallow, and the surface feels unpleasantly rough to the touch.
This happens because there isn't enough molten glass to fully cover the surface of the underlying clay. Without a smooth, protective glass coating, light does not reflect cleanly, resulting in a cheap, cold appearance after firing.
Glazes range from transparent or semi-transparent types (which intentionally let the underlying clay color show through) to opaque types like matte or opacifying glazes (which are meant to cover the clay entirely). However, if an opaque glaze is applied too thinly, the color of the underlying clay will bleed through aggressively.
If you apply a white glaze expecting a clean white finish, but end up with a dirty gray or brown because the red or dark clay underneath shows through, a thin coating layer is the cause. The total amount of colorant in the glaze is insufficient, leaving it directly vulnerable to the clay's natural color.
Matte glazes are loved for their quiet, soothing aesthetic, but applying them too thinly yields a dry, rough texture instead. A warm, pleasant matte feel is created only when tiny, uniform micro-crystals form within a glaze layer of proper thickness.
When the layer is too thin, there isn't even enough space for these crystals to form, leaving a dry, moisture-starved finish that looks like underfired pottery. It feels unpleasant to handle and significantly reduces the piece's usability as tableware.
Another major issue with thin glazes is the appearance of pinholes (tiny tiny dots) and dry patches. During the glaze firing, small amounts of gas escape from inside the bisque clay.
If the glaze layer is of appropriate thickness, the smooth, molten liquid glass will seal over and repair the holes left by escaping gas. However, if the glaze is too thin, there isn’t enough glass to fill the void, leaving tiny needle-like holes (pinholes) on the surface. In some cases, this can even cause a vessel to leak water.
Thinking "If thin glaze fails, I'll just coat it extra thick!" is extremely dangerous. In ceramics, applying glaze too heavily causes even more fatal failures than applying it too thinly.
Not only can it ruin your hard work, but it can also trigger disasters that destroy kiln shelves. Let's understand the mechanics behind these thick-glaze problems.
The absolute terrifying aspect of applying glaze too thick is glaze running (known in Japan as yu-nagare). When reaching peak firing temperatures, an overly thick coat turns into a large volume of liquid glass that runs down the sides of your piece like a mudslide under the force of gravity.
As a result, the glaze flows past the foot ring (kodai), spills over wadding or props, and melts directly onto the kiln shelf, fusing tightly as it cools. When you try to remove the piece, the bottom tears off, or expensive kiln shelves get ruined. It is one of the most dreaded mistakes in pottery studios!
When glaze is applied too thick, it can bead up and pull away during firing, leaving bare patches of exposed clay. This phenomenon is called glaze crawling (yu-chidiri).
An excessively thick glaze layer undergoes significant volumetric shrinkage as it dries, creating micro-cracks on the unfired surface. During firing, surface tension causes the melting glaze to curl up into isolated islands, repelling the bare clay beneath—much like water droplets repelled by an oily surface. This severely ruins the visual appeal.
While thin glazes cause pinholes, applying glaze too thick also creates pinholes and blistering (known as buku in Japanese). A thick layer of molten glass becomes extremely viscous and sticky.
When gasses from the clay try to escape through this heavy, viscous glass layer, they get trapped midway, solidifying as swollen bubbles (blisters) or popping at the surface to leave rough, crater-like indentations. Pieces covered in craters are impossible to repair.
Special glazes chosen for their unique visual effects can also be ruined by excessive thickness. For instance, opalescent or semi-opaque white glazes that offer delicate nuance become muddy and heavy, looking like a thick coat of slathered paint if applied too heavily.
Similarly, crystalline glazes—which produce beautiful flower-like patterns—will over-grow if applied too thick, causing the crystal formations to collapse into a muddy, opaque texture. All refined, sharp characteristics vanish, leaving a clunky finish.
A failure that happens before the piece even reaches the kiln is glaze peeling (yu-hage). If you apply an extremely thick coat of liquid glaze, the slurry layer shrinks violently as it dries on the porous bisque surface.
Since the dimensions of the bisque ware itself do not change, the shrinking glaze shell tears itself away, cracking and flaking off with audible crunches. Because the glaze crumbles off before firing, you have to wash the piece and restart the entire glazing process from scratch.
To avoid failures from overly thin or thick coatings, checking the liquid condition right before dipping is essential.
While professional studios use specialized measuring tools, here are foolproof density-checking techniques you can use immediately in your studio or craft space.
A specialized hydrometer used to measure glaze density is called a Baumé meter. While the ideal Baumé degree for standard glazes usually hovers around 45 to 50 degrees, it’s completely fine if you don't own one. Your finger is your best measuring tool!
The test I always perform is the "Finger Drag Test." After thoroughly stirring the glaze bucket, dip your index finger in up to the second knuckle, then gently pull it out.
If the glaze coats your finger evenly so that the skin tone is faintly visible, and glaze remains cleanly in the subtle creases of your knuckle when you bend your finger, you are at the ideal density (around 48 Baumé). If your skin is completely hidden behind a thick white layer, it's too thick; if it runs off quickly like watery milk and leaves your skin clearly exposed, it's too thin. Train your fingers to memorize this feeling!
Once you’ve confirmed the liquid density, the next step is controlling immersion time (how long you leave the piece in the bucket). There is a golden rule here.
For standard bisque ware fired around 800°C (1,472°F), the ideal duration for fully submerging a piece in a glaze bucket is 2 to 3 seconds. Count "1, 2, 3" in your mind and pull it out quickly—that is the ironclad rule.
If you leave it submerged for 5 seconds or longer, the porous clay will absorb far too much water and glaze powder, creating an overly thick layer that leads to glaze running. Conversely, dipping it for less than 1 second won't form a thick enough coat, causing thin-glaze errors. "Correct density for 2–3 seconds" is the core rule you should stick to.
No matter how knowledgeable you are about density, if you neglect stirring (mixing) during your work, everything will go to waste. The mineral powder ingredients in glaze are heavy, so they settle to the bottom of the bucket at a surprising speed.
Leaving a bucket untouched for just 2 to 3 minutes during glazing causes it to separate into watery liquid on top and thick sludge at the bottom. Dipping into the watery top layer yields a thin-glaze failure, while scooping from the sludge at the bottom results in an overly thick application.
Every single time before dipping a piece, use a ladle or your hand to vigorously mix the glaze in large circular sweeps from the very bottom of the bucket. Committing to "One Stir Per Piece" is the biggest secret to keeping your glaze thickness uniform throughout your work.
You don't need to aim for the exact same layer thickness for every type of glaze. Depending on the glaze recipe, some yield their best charm when intentionally applied a bit thin, while others transform magically when applied with a solid, thick coat.
Let's look at how coating thickness affects popular glazes commonly used in handmade pottery.
Transparent glazes are used to show off underglaze paintings or highlight the natural texture of the clay body. This glaze works best at a "slightly thin to standard" thickness.
When the coat thickness is optimal, it produces a crystal-clear, glassy shine. However, applying it too thick loses that transparency, turning white and cloudy (devitrification). Since this blurs underglaze details, thick coats are strictly off-limits for clear glazes. Aim for a lighter density where your skin easily shows through during the finger drag test.
Classic Japanese tableware glazes like Oribe (copper green) and Kiseto (yellow seto) rely on variations in glaze thickness to create rich gradations—their single greatest charm!
Copper-bearing Oribe glaze finishes as a bright, translucent green where thin, a deep emerald green where thick, and a dark metallic sheen where exceptionally thick. Intentionally letting glaze pool or applying it thinner along rim edges creates wonderful three-dimensional color shifts across a single vessel.
Iron-rich glazes (such as Kaki persimmon glaze and Tenmoku glaze) are fascinating because their colors invert dramatically based on thickness.
With Kaki glaze, thin areas burn to a dark, burnt brown, while proper thickness turns a vibrant persimmon red-orange. Tenmoku glaze behaves similarly: thin areas are tea-brown, while thicker areas fired properly yield an intense, deep jet-black. When working with iron glazes, if you don't secure a solid layer thickness, you won't get your targeted reds or blacks, so keep a "slightly thick" application in mind.
Ash glazes (made from natural wood ash) and Irabo glazes (known for their rustic, coarse texture) melt easily and are prone to flowing.
Applying them too thick will definitely cause glaze running that sticks to your kiln shelves, but a moderate, controlled thickness forms gorgeous flowing streak patterns (called ryumon) along the curves of a pot. These delicate glazes demand calculated application, such as dipping thinner near the bottom foot and slightly thicker around the upper rim.
Low-sheen matte glazes and crystalline glazes (which grow visible crystal formations on the surface) only display their true magic when backed by a generous coating layer.
If applied too thin, they end up dry and underfired. To achieve a smooth, elegant tactile surface or dramatic crystal blossoms, you must maintain a layer thickness that is one step thicker than standard transparent glazes. Finding the precise limit where the glaze is thick without running is the key to success.
Now, let me share super-practical techniques I strictly follow in my own studio space to eliminate glazing mistakes!
With just a little prep work, your failure rate will plummet. These are handy tricks you can adopt right away.
Before dunking your piece into a glaze bucket, there are two mandatory steps: dust removal and pre-moistening (mizushitashi).
If shelf dust, clay crumbs, or sanding powder remain on your bisque piece, the glaze will be repelled at those spots, guaranteed to leave pinholes. Wipe down every corner of your piece thoroughly using a tightly wrung sponge.
Additionally, if your bisque ware is bone-dry, lightly dampening the surface with a spray bottle is highly effective. Extremely dry clay absorbs moisture instantly, pulling on an overly thick layer of glaze powder. Adding light moisture slows down absorbency, helping you form an even, ideal coating thickness.
There are several ways to apply glaze, and each technique requires a slightly different approach to thickness control.
For standard dipping (dobu-gake), strictly observe the 2-to-3-second rule mentioned earlier. When pouring glaze with a ladle (shakushi-gake), keep your pouring speed consistent and shake off excess liquid rapidly so glaze doesn't puddle around rims.
When using a spray gun (fuki-gake), you build up thin layers progressively, making thickness adjustments easier. However, because the glaze dries as it hits the piece, it can be easy to misjudge overall thickness. Matching your technique to the shape and contours of your piece is the fastest route to improvement.
"Oh no! I held it in the bucket too long and it’s super thick!" or "I pulled it out too fast and it’s way too thin!" Don't panic. If the glaze is dry or still drying, you can fix it completely.
If it’s too thick, wait until the glaze dries completely, then gently scrape or sand the surface using a dry sponge, bamboo tool, or fine sandpaper to pare down the layer. Even lightly smoothing away excess powder with your fingers works wonders.
If it’s too thin, wait for the surface to dry fully, then carefully spray or brush additional glaze onto the thin areas. However, never double-dip a wet piece into a bucket—the clay will absorb too much water and crumble. Always wait until it is completely dry before adding more glaze!
Firing a finished piece without testing is a gamble, even for pros. That’s why I strongly recommend conducting density experiments using handmade test tiles.
Make plenty of small clay tiles (about 5 cm × 3 cm). Take three tiles and dip them in the same glaze bucket for 1 second (thin), 3 seconds (standard), and 5 seconds (thick), then fire them together in your next kiln load.
Comparing these three fired tiles side-by-side gives you absolute, reliable data: "This glaze looks best with a 3-second dip," or "This one actually looks more transparent and lovely with a thin 1-second dip." Building your personal Glaze Density Matrix is the single best shortcut to zero glazing mistakes!
The world of pottery glazing offers endless possibilities once you master the balance of density and thickness.
Let’s recap today's key takeaways:
When you understand these properties and gain control over glaze thickness with your own hands, the excitement of opening the kiln door grows tenfold. Experiencing that moment when a piece comes out with the exact gloss, tone, and gradation you intended is the ultimate joy of making ceramics!
Start by making a few test tiles! Use this knowledge to fire your most beautiful ceramic works yet. I'm cheering you on!
If you enjoyed this article, sharing it with your craft friends on social media or message apps would mean the world to me and keep me motivated!
See you in the next article! This was Yassy from Crafters!









For example, if you are looking for articles about mizuhiki, try searching for "mizuhiki"; if you are interested in tools, try keywords like "nippers" or "pliers."
