How to Eliminate Bubbles in UV Resin: Pro Tips for a Flawless Finish from Japan
yassy
Crafters!

Hello, everyone! It’s Yassy from Crafters! (・∀・)
Have you ever spent hours carefully crocheting a project following a pattern to the letter, only to wonder why it doesn't quite look as polished as a store-bought item? Maybe the edges look wavy or uneven, the overall piece is slightly misshapen, or loose yarn ends keep popping out and giving it an unfinished look.
The secret that separates an "almost there" homemade item from a crisp, professional-quality masterpiece comes down to one single step: the finishing work. Because crocheting itself is so fun, it is tempting to use or gift a project the moment the final stitch is completed. However, adding proper finishing touches dramatically elevates the quality of your craft.
In this article, I will share essential techniques and tips to give your crochet projects a gorgeous, professional look. Let’s make your next handmade creation truly stand out!
While you crochet, the fabric is directly affected by slight variations in hand tension and the natural twist of the yarn. Even experienced crafters end up with subtle distortions or inconsistent stitch density right after finishing the stitches.
The three main reasons to perform finishing work are:
An unfinished crochet piece is like wearing a laundered shirt that was never dried properly or ironed—it remains wrinkled and out of shape. By properly blocking and tidying up the yarn, you bring out the natural texture, luster, and neat stitch structure inherent to the yarn.
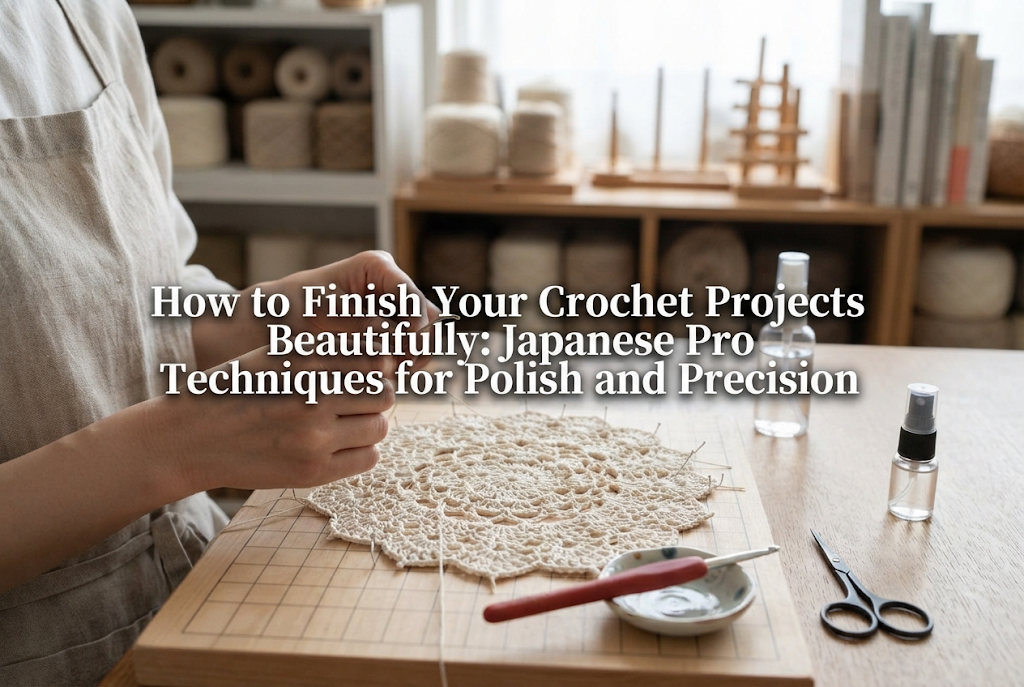
Here are five practical finishing techniques used in Japanese craft making to give your projects a clean finish. None of these require special tools; you can easily try them with basic supplies at home.
Blocking is the process of stretching a crocheted fabric to its target dimensions and fixing its shape using steam or water. It is the most effective and crucial step in crochet finishing.
There are two main methods: steam blocking and wet blocking.
Steam blocking with an iron is the most accessible method. Here is how to do it:
Caution: Never press the iron's soleplate directly onto the crochet fabric! Pressing down flattens the texture, leaving it lifeless and thin. Furthermore, acrylic yarn is sensitive to heat and can melt or harden if touched directly by a hot iron. For acrylics, hold the iron at a distance and apply steam very briefly.
For items like cotton garments or large lace shawls where you want the fibers to thoroughly settle, wet blocking—soaking the piece in water, gently squeezing out moisture, pinning it into shape, and drying it in the shade—is ideal.
How you handle the tail ends when finishing a project or changing colors determines the durability and neatness of the wrong side. Simply tying a knot and cutting the yarn can cause knots to come undone or ends to poke through to the right side during use.
The standard professional method is to use a tapestry needle to weave the yarn through dense areas of the stitchwork.
Thread the needle through 1.5 to 2 cm of dense stitch areas, such as the posts of double crochet or the back of single crochet stitches. To ensure it never slips out, reverse the direction mid-way and weave back through a few stitches. The extra friction locks the end in place.
A helpful trick used by craft experts is to split the fiber strands slightly with your needle as you weave. This entangles the yarn fibers with each other, preventing the tail from slipping out even after washing.
When trimming, pull the yarn end slightly, cut it right at the base, and then stretch the fabric horizontally and vertically. The remaining tip will snap right back inside the stitches, hiding it completely from both sides.
Whether you are joining motifs, closing shoulder seams on garments, or attaching arms and legs to amigurumi, seaming is another critical finishing stage. Seams become bulky or puckered when tension is pulled too tight or when stitches are misaligned.
Common joining techniques include:
For flat items, mattress stitching or slip stitch joins create a beautifully flat finish. Always match the row or stitch counts of both pieces beforehand, and secure the edges and center with stitch markers or pins before you begin joining.
Crochet blankets or scarves worked back and forth in rows often end up with bumpy turning edges. Adding a border or edging around the entire perimeter pulls the entire project together into a clean, squared-off shape.
The simplest and most effective edging is a round of single crochet. Working single crochet stitches evenly along the raw edge straightens out any uneven bumps.
When picking up stitches along the side of rows, a general guideline is to pick up 2 stitches from the side of a double crochet row, and 1 stitch from a single crochet row. Picking up too many stitches causes the edge to ruffle, while picking up too few pulls the fabric tight and causes it to pucker. Lay the piece flat after working the edge to verify that it rests smoothly.
For 3D projects like bags, pouches, or amigurumi, structural support and stuffing techniques dramatically alter the final look.
For bags, placing a bag bottom insert at the base or sewing in a fabric lining prevents sag when items are placed inside. Because crocheted fabric stretches under weight, adding a lining extends the usability and life of the bag.
For amigurumi, stuffing is key. Using too little fiberfill leads to sagging and wrinkles over time. Conversely, forcing too much stuffing inside stretches the stitches, making the fiberfill visible from the outside.
The trick to stuffing amigurumi is to tear the fiberfill into small tufts and insert them little by little into corners and edges using tweezers or a stuffing tool. Fill until there is uniform firmness throughout, then gently roll and shape the piece with your hands to smooth out the surface.
Here are three common mistakes made during finishing and how to fix them:
Mistake 1: Accidentally flattening fabric with a steam ironFix: While fully restoring flattened yarn can be tricky, applying plenty of steam again from a distance and gently fluffing the fabric from underneath with your hands can help restore some loft. Moving forward, always hold the iron 1 to 2 cm away, letting only the steam touch the fiber.
Mistake 2: Yarn ends popping out during useFix: This happens when the tail was woven through too short a distance. Weave yarn tails at least 2 cm long, changing directions. If an end pops out, do not tie or snip it short; thread it back onto a tapestry needle and tuck it deeper into adjacent stitches on the wrong side.
Mistake 3: Asymmetrical facial features on amigurumiFix: Avoid placing eyes or ears by eye measurement alone. Count the exact number of stitches and rows from the center (e.g., 4 stitches right, 4 stitches left) and secure the parts with several pins first. Inspect the balance from multiple angles before permanently sewing them in place.
Here is how I personally handle finishing depending on the type of crochet project:
When making projects with multiple motifs, I weave in ends as I complete each square. Once all motifs are completed, I pin them together on a blocking board and steam them all at once. This ensures every square matches down to the millimeter, making joining effortless and eliminating distortion in the final piece. A light steam after joining gives it a cohesive finish.
For items worn against the skin, I soak and wash the piece gently by pressing it in water after finishing the construction. Washing removes residual dust or processing oils from yarn manufacturing, allowing the fibers to bloom and soften significantly. Roll the piece in a bath towel to absorb excess moisture, lay it flat on a drying rack to dry in the shade, and finish with a light steam. This extra step transforms the comfort of the garment.
For small flat items like coasters and doilies, using fabric starch spray is my top recommendation. After steam blocking, spray a light coat of diluted fabric starch and press gently with an iron (using a press cloth). This creates a crisp, neat structure that holds its shape on a table and adds a refined touch.
Proper long-term care helps keep your carefully finished work looking fresh.
Always hand wash crocheted items using gentle press-washing in cool or lukewarm water with a mild detergent designed for delicates. Avoid rubbing, as friction creates pilling. Rinse thoroughly, spin briefly in a washing machine for 30 to 60 seconds (or press with a towel), and always dry flat in the shade. Hanging crocheted items on hangers will cause them to stretch out from the water weight.
If pilling occurs over time, do not pull or tear the fuzz off by hand. Carefully trim the pills away using small embroidery scissors. Pulling pulls out neighboring fibers and creates more pilling later. Store off-season items in breathable non-woven bags with moth repellents, and place them on top of other garments so they are not crushed.
It is natural to want to use or share your work immediately after making the last stitch. Taking a quiet moment to focus on finishing—blocking out distortions, carefully weaving in ends, and assembling parts precisely—is the magic that turns handmade crochet into a polished craft.
Try these finishing techniques on your next project! Seeing how beautifully your work turns out will make your crochet journey even more fulfilling.
If you found this helpful, please consider sharing this article with your fellow crafters! Until next time, this was Yassy from Crafters!

For example, if you are looking for articles about mizuhiki, try searching for "mizuhiki"; if you are interested in tools, try keywords like "nippers" or "pliers."
