How to Unmold Handmade Soap Perfectly: Mold-by-Mold Techniques to Prevent Chipped Corners and Dents
yassy
Crafters!

Hello, this is Yassy from Crafters! (・∀・)
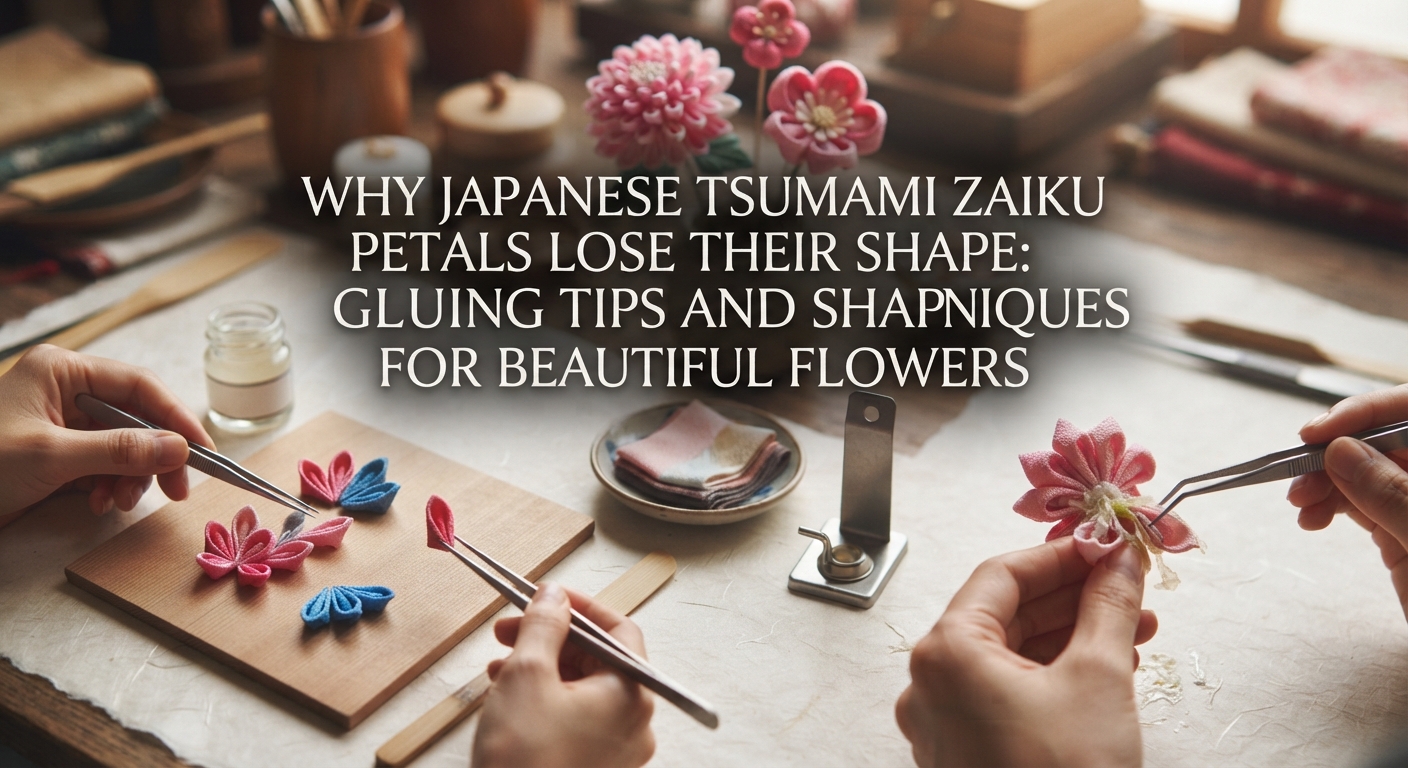
When making Japanese tsumami zaiku, have you ever run into the frustrating problem where the petal you folded so carefully pops open the moment you release your tweezers? Or perhaps that lovely, soft dimension flattens out completely the second you mount it onto the base?
Tsumami zaiku is a delicate traditional Japanese craft where small squares of fabric are pinched and folded to create charming flowers. However, if the petals lose their shape mid-process or while drying, the overall quality of your finished piece can drop significantly.
There is always a clear reason why petals collapse or unravel. Whether it is the moisture balance of your paste or craft glue, the characteristics of your fabric, how you handle your tweezers, or the timing of the drying process—if any one of these factors is off, maintaining a pristine petal shape becomes difficult.
In this guide, we will break down the exact reasons why tsumami zaiku petals lose their shape and explore practical solutions that even beginners can try right away. Let's master the right knowledge and techniques to create stunning flowers that hold their form beautifully!
The causes behind collapsed petals are hidden throughout the crafting process. First, let’s look at the four primary culprits that prevent fabric petals from holding their shape.
The single biggest reason petals lose their shape is an imbalance in the amount and moisture level of the traditional starch paste (nori) or quick-drying craft glue you are using.
If traditional starch paste contains too much water, the fabric fibers absorb excessive moisture, becoming heavy and losing their natural crispness. As a result, folds flatten out and petals lose their soft volume. On the other hand, if the paste is too dry and crumbly, the layers of fabric simply will not bond, causing the petal to spring open the moment you release your tweezers.
The same applies to craft glue. Using too much glue makes the fabric layers slick and slippery before drying, causing the shape to slide out of alignment. Applying the correct amount is fundamental to keeping your petals intact.
Different fabrics have varying degrees of "rebound force"—the tendency to spring back to their original flat state after being folded.
While fabrics like rayon chirimen or hitokoshi chirimen (textured Japanese crepe) are ideal for tsumami zaiku, materials such as cotton, heavy polyester, or crisp silk (like habutae) can bounce open due to their inherent stiffness and tension.
Fabrics that are particularly thick or stiff resist starch paste, making it harder for the corners and bases of the folded folds to adhere firmly, which leads to unraveling.
How you hold your tweezers when folding petals and pinching the base directly affects the outcome.
In tsumami zaiku, you need to apply firm, pinpoint pressure to the exact points where the fabric layers overlap. If your grip slips away from the base, or if you do not press firmly enough, the layers will not bond properly. In addition, pulling your tweezers away at an awkward angle can tug on the neatly folded petal and ruin its shape.
Rushing the fuki step—arranging and mounting the folded petals onto the base—is another major reason petals lose their shape.
If you move petals from the starch paste board to the base before the paste has properly penetrated the fibers and become semi-dry (the point where it develops reliable holding power), the petals remain highly unstable. Working too quickly means that the slightest touch from your fingertips or tweezers can squash the petals out of shape.
The two foundational techniques of tsumami zaiku—maru-tsumami (round petals) and ken-tsumami (pointed petals)—have distinct structures, which means they tend to fail in different ways. Here is how to handle each type.
Maru-tsumami petals are characterized by their soft, plump roundness. However, they are also the most prone to flattening and losing their 3D shape.
Common Issues:
How to Prevent It:When forming a maru-tsumami petal, imagine capturing a pocket of air inside to create volume, and firmly pinch only the base (the "legs") with your tweezers. If you squeeze the rounded front section tightly with tweezers, the 3D form will be crushed and will not bounce back.
When transferring the petal to your base, gently support the back curve while pressing only the base into the glue or paste. As an absolute rule: never apply force to the rounded front curve!
Ken-tsumami petals are known for their sharp points and crisp, clean lines. When they fail, either the sharp tip splits open or it gets squashed into a blunt, rounded shape.
Common Issues:
How to Prevent It:To keep the sharp tip intact, it is crucial to let a tiny amount of glue or paste grab the folded seam at the tip during the final folding step.
Check that the folded fabric edges are aligned flush. Grip the petal just a few millimeters below the tip with your tweezers, pause for a moment, and apply firm pressure. Instead of directly crushing the very tip, focus on bonding the seam together. This keeps the tip sharply defined without letting it split open.
Two main adhesives are used in tsumami zaiku: traditional starch paste (such as hime-nori) and quick-drying wood/craft glue. Understanding the characteristics of each will help you dramatically reduce petal deformation.
Starch paste is spread across a paste board (nori-ita) in an even layer. If this layer is too thick, the fabric petals will absorb too much water and collapse under their own weight.
When working the kneaded starch paste onto your board, keep the thickness to an even 2 to 3 millimeters. After placing folded petals onto the paste board, do not move them to the base immediately. Allow them to rest for 3 to 5 minutes so the paste can properly penetrate the fabric. Once the fabric has absorbed just enough moisture and the surface develops a tacky hold, transfer them to the base. They will adhere securely without losing shape.
Fast-drying craft glue sets rapidly, which is a big advantage when you want to avoid collapsed petals. However, using too much glue can leave visible white residues when dry or cause layers to slide out of position.
The secret is to apply tiny dots using the tip of a toothpick. Place an extremely small amount at the base of the petal or along the inner folds, then hold it gently with tweezers for 5 to 10 seconds. Giving the glue a few seconds to develop its initial tacky grip ensures the petal will not spring open when you let go.
When I create tsumami zaiku pieces that feature intricate, multi-layered flowers where I want to fine-tune every angle and curve, I prefer traditional starch paste. It gives me the time I need to make subtle adjustments to fullness and positioning.
On the other hand, for small accessories with fewer components or when working with stiff fabrics that like to pop open, I rely on pinpoint applications of craft glue to lock the shapes in place quickly. Matching your adhesive to your working pace and fabric properties is the fastest route to success.
Here is a step-by-step workflow to help ensure your petals maintain their ideal shape from start to finish.
Preventing petal distortion starts right at the cutting mat. If your square is slightly skewed, the edges will not align when folded, throwing off the center of gravity and making the petal prone to deforming.
Use a rotary cutter and a grid ruler to cut precise squares along the grain of the fabric (warp and weft). If your fabric frays easily, applying a very thin layer of fray-check liquid to the edges in advance can be very effective.
Fold your fabric square diagonally into a triangle. At this point, make sure the top point and both bottom corners align with millimeter accuracy.
If the corners are misaligned and you proceed to the next fold, the layers will have uneven thickness. This imbalance often causes one side to pop open and ruin the symmetry once tweezers are removed.
Once you finish folding the petal, use scissors to trim the base (the "legs" that sit against the mounting base) horizontally flat.
If this cut is slanted, the petal will lean when placed on the base, causing it to fall or collapse under gravity. Use sharp craft scissors to make a clean, level cut. Lightly touching a tiny dab of craft glue to the cut edge also helps prevent fraying and keeps the layers from separating.
Mount your trimmed petals onto the prepared base, which should have a thin, even layer of glue or paste already applied.
As you place each petal, position them so their sides lightly touch their neighbors. A lone, isolated petal easily tips over, but when petals rest gently against one another, they provide mutual support, stabilizing the entire flower. Adding a microscopic touch of glue where adjacent petals meet will make the structure even stronger.
Even if a petal deforms mid-project, do not throw it away! As long as the adhesive has not fully cured, you can restore it using the following methods.
If the petal is already semi-dry and forcing it with tweezers might tear the fabric, take a tiny drop of clear-drying glue on the tip of a toothpick and insert it into the inner gap where the fold is opening.
Hold the petal in the desired shape with tweezers, then use a hair dryer on the low-power, cool setting for a few seconds to speed up drying. Never use hot air, as rapid moisture evaporation can cause the fabric to warp or shrink.
Here are answers to common questions beginners often ask about preventing petal collapse.
For absolute beginners, I strongly recommend starting with quick-drying craft glue. Traditional starch paste requires practice to master the moisture balance and kneading consistency, and getting it wrong often leads to collapsed petals. With craft glue, placing tiny dots at the base securely locks the fold, allowing you to build confidence without the frustration of petals springing open.
Yes, high humidity makes petals much more prone to collapsing. When using starch paste, atmospheric moisture slows the drying process considerably, causing the fabric to stay wet and sink under its own weight. On rainy days, consider running a dehumidifier or air conditioner in your workspace, or switch to quick-drying craft glue instead.
Not necessarily, but the difficulty level increases considerably. When using thicker fabrics, cut slightly larger squares (at least 3 cm / 1.2 inches) and perform a technique called atsumi-nuki, where you trim away excess inner overlapping layers with fine scissors. Since starch paste may lack the grip needed for thick textiles, pairing your work with a stronger craft glue will keep the petals intact.
We have covered why tsumami zaiku petals lose their form and how to solve each issue with practical adjustments.
Here is a quick recap of the key points:
While tsumami zaiku might seem tricky at first, understanding why shapes collapse and taking care at each step will result in breathtaking, dimensional flowers.
Even if you struggle to maintain petal shapes initially, practice will train your fingers to intuitively judge tweezer pressure and paste consistency. Try using these techniques in your next project and enjoy blooming lots of crisp, beautiful flowers!
If you found this guide helpful, sharing it with your fellow crafters on social media would mean the world to me and keep me inspired!
See you in the next article! This was Yassy from Crafters!






For example, if you are looking for articles about mizuhiki, try searching for "mizuhiki"; if you are interested in tools, try keywords like "nippers" or "pliers."
