A Crafter’s Guide to Wood Adhesives: Types, Characteristics, and Pro Clamping Techniques
yassy
Crafters!

Hello! I’m Yassy from Crafters! (・∀・)
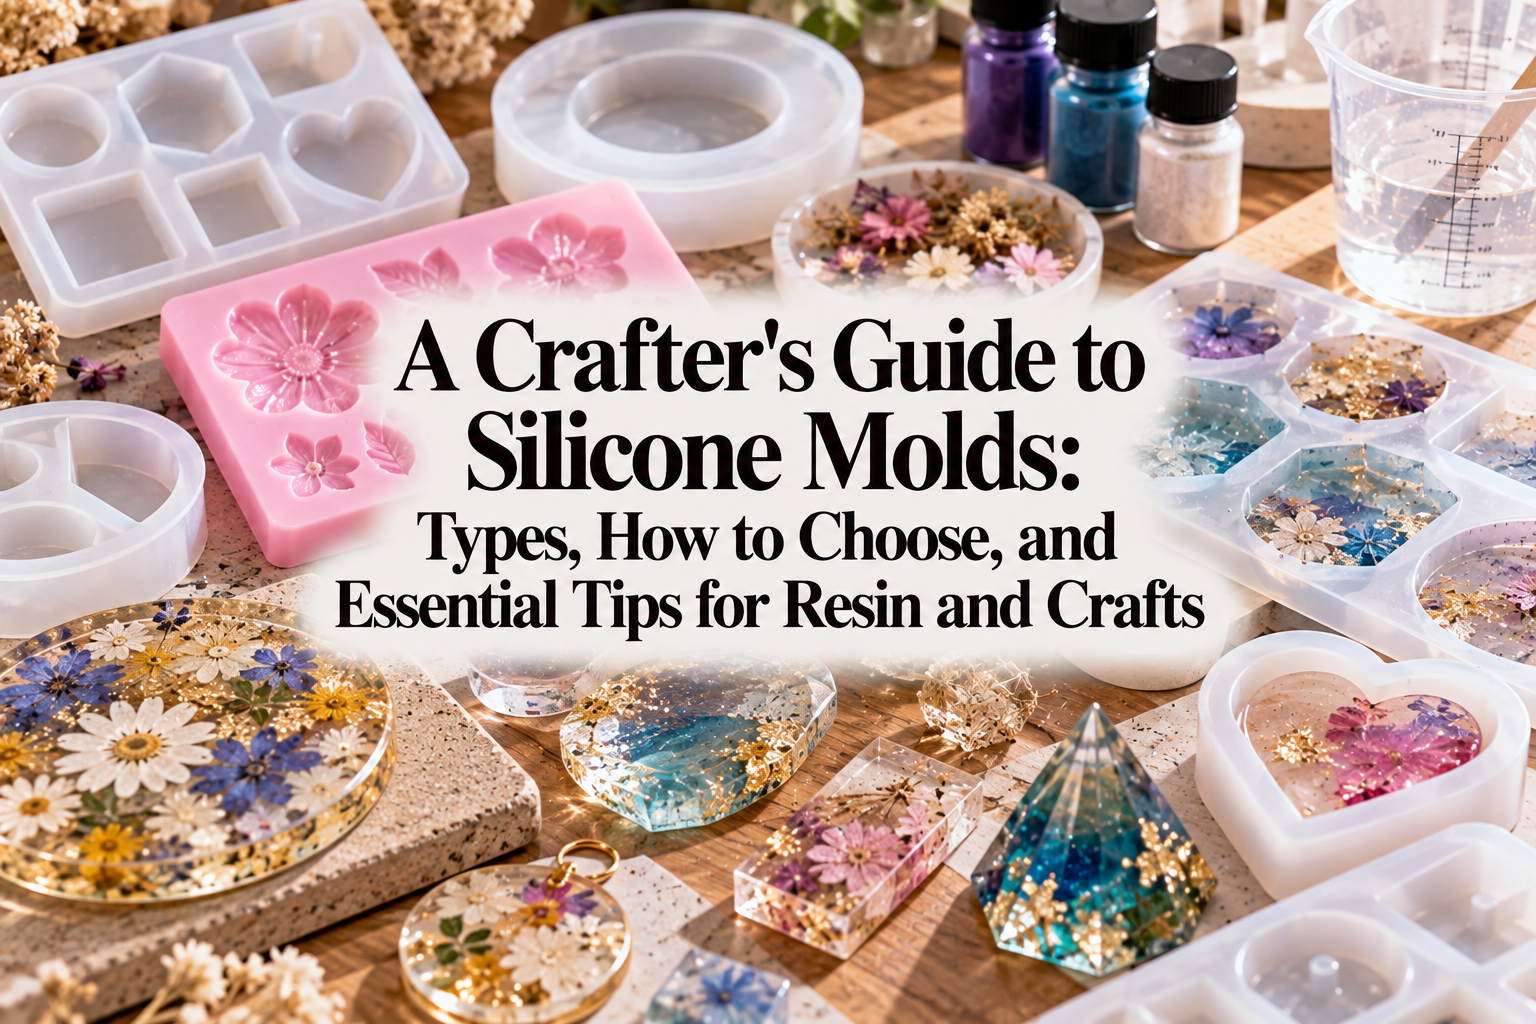
When creating handmade items, one tool that is absolutely essential is the silicone mold. Whether I’m crafting plump, cute accessory components or shaping three-dimensional home decor items, silicone molds are my ultimate, indispensable partner in creative work.
I personally love making various types of handmade crafts, admiring wonderful pieces by fellow artists, and shopping for beautiful crafting supplies. When looking at online shops or craft supply stores, there are so many types of silicone molds lined up that it’s exciting just browsing through them!
However, if you choose a silicone mold based solely on how cute it looks, it can lead to major failures in your crafting. Troubles like "my resin won't cure at all," "the mold tore because I couldn't demold the piece," or "the surface looks cloudy and lacks shine" are all caused by a lack of knowledge about choosing the right mold.
Silicone molds have clear differences in material transparency, flexibility, surface finish, and suitability for specific applications. If you choose with the right knowledge, the quality of your handmade work will improve dramatically.
In this guide, to ensure handmade beginners never get lost, I’ll thoroughly explain the types of silicone molds and the definitive criteria for choosing them. By reading this article, you will be able to select the ideal silicone mold for your project with 100% confidence. Please read to the end and use these tips to make fail-proof supply choices!
A silicone mold is a mold made of silicone rubber used to pour in liquid or soft materials, allowing them to harden and take shape. It is a versatile tool compatible with almost all craft materials, including resin liquid, gypsum (plaster), candle wax, and clay.
The greatest strengths of silicone as a material lie in its high flexibility, excellent heat resistance, and chemical stability. Because it is soft, cured creations can be removed without damaging them, and the mold can withstand repeated use.
A silicone mold dictates not only the "shape" of your creation, but also its surface glossiness and overall level of perfection. No matter how expensive your resin liquid is or how beautiful your colorants are, if the quality of the mold is low, a wonderful piece will not be completed.
To fully enjoy the true pleasure of handmaking and create high-quality pieces that satisfy both you and your buyers, the first step is to thoroughly understand the characteristics of silicone molds.
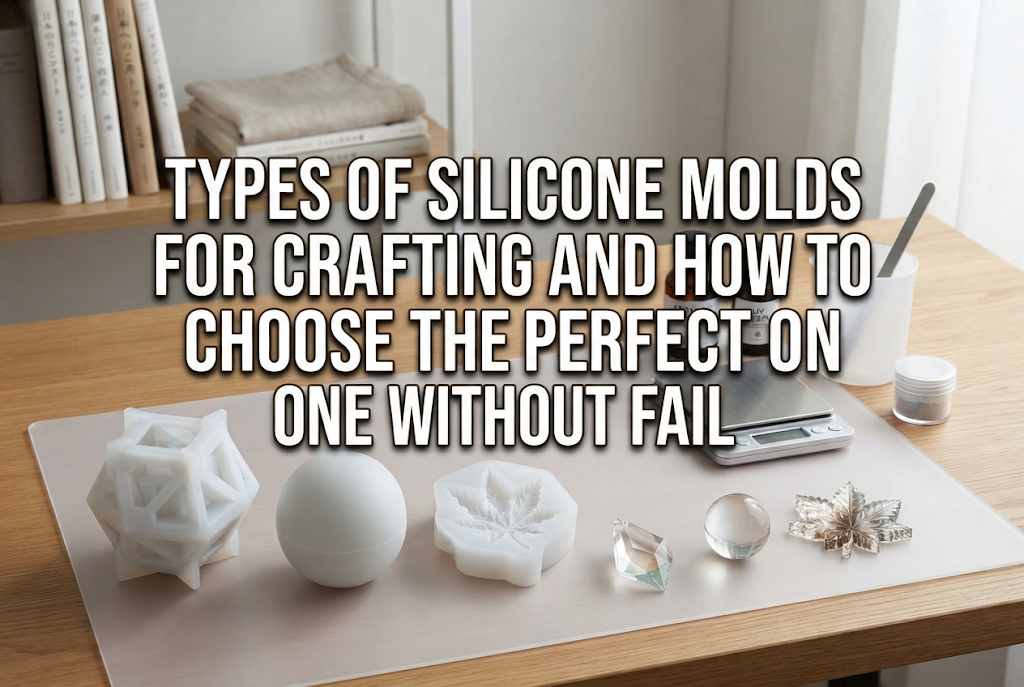
When searching for silicone molds in online shops or craft stores, you’ll find various colors—transparent ones, whitish ones, and colorful ones in pink or blue. This difference in color is not merely a design variation. It is the single most important point that determines the material properties and purpose of the mold.
High-transparency silicone molds feature clarity so high that you can see straight through to the bottom. This type is absolutely necessary when using UV resin or LED resin.
UV resin and LED resin harden through a chemical reaction triggered by exposure to light (ultraviolet rays or specific wavelengths of visible light). The more transparent the mold is, the better the light penetrates all the way to the back, sides, and deep inside. As a result, you can completely prevent curing failures and sticky surfaces.
Additionally, because it is transparent, you can check 360 degrees from the outside to see if air bubbles remain in the poured resin or if embedded dried flowers and components have shifted. In accessory making that requires delicate work, high-transparency molds demonstrate overwhelming power.
Semi-transparent molds with a slightly whitish, frosted glass look are the most widely used standard item in the handmade craft community. They are easy to obtain at affordable prices and offer an attractive variety of shapes.
Because semi-transparent molds allow a certain amount of light to pass through, they can be used with UV resin without issues as long as the piece is thin. However, for deep molds or thick pieces, there is a risk that light will not reach the bottom, leaving the interior uncured.
They excel in usability for craft materials that cure over time or through drying without using light—such as epoxy resin (2-part resin), aroma stones, and clay crafts. They are versatile, highly practical, and user-friendly even for beginners.
Colorful silicone molds in pink, light blue, purple, and other shades are mostly found in imported baking molds, as well as molds designed for candles and gypsum.
The critical fact to note is that colored silicone molds completely block light. Even if you pour UV resin or LED resin into them, light will not pass through at all, so the back and inside will never harden. They are absolutely unusable with UV resin.
On the other hand, colored silicone molds offer high durability and have thick walls that do not tear easily. They are the ideal choice for creating large epoxy resin home decor, scented candles, sachets, and plaster aroma stones.
If commercial molds don't have the shape you want, you can create your own original mold using two-part liquid silicone that cures after mixing. Simply prepare the master piece, pour the liquid silicone over it, and let it harden to complete a one-of-a-kind mold.
DIY liquid silicone comes in high-transparency and opaque (colored or white) types. Selecting the high-transparency type for resin, or the durable opaque type for clay or gypsum, is the correct approach. For artists aiming to expand their own original brands, introducing DIY molds becomes a powerful tool.
When choosing a silicone mold, checking the inner surface treatment is an indispensable step. This is because the interior state becomes the exact surface texture of your finished piece. Silicone mold surface treatments broadly fall into two categories: "mirror finish" and "matte finish."
Mirror-finish silicone molds have inner walls polished to a mirror-like shine. When you pour resin liquid into this type of mold and let it cure, you get a glossy, crystal-clear piece the instant it is demolded.
Because it saves you the trouble of applying a topcoat, a mirror-finish mold is essential for jewel-motif accessories and resin works where you want to emphasize transparency.
However, mirror-finish molds scratch easily, and their inner gloss tends to fade with repeated use. When washing the mold or removing your piece, handle it delicately to avoid scratching it with fingernails or hard tools.
Matte-finish silicone molds feature fine, textured processing on their inner surfaces. Pieces removed from these molds have a frosted glass texture, giving them a calm and elegant finish.
When making muted color accessories where you intentionally want to suppress shine, antique-style goods, or Scandinavian-style interior accents, a matte finish produces the best effect.
If you want to achieve a smooth shine using a matte-finish mold, you will need to apply a thin layer of resin coating or varnish to the surface after demolding. Although it takes an extra step, it offers the advantage of allowing you to freely customize the piece's texture.
When using a mirror-finish silicone mold repeatedly, you may notice the surface of your pieces gradually becoming cloudy. This occurs because the heat generated during resin curing and chemical reactions degrade the silicone surface, losing its mirror state.
When your pieces no longer come out glossy, that silicone mold has reached the end of its lifespan. Decide whether to re-finish the piece using polishing compounds or coatings, or replace the mold with a new one. Continuing to use a degraded mold makes demolding difficult and can lead to the mold tearing.
The criteria for choosing a silicone mold are clearly defined by the specific genre of handmade craft you intend to make. Let's look at the optimal choice for each genre.
When using UV resin or LED resin, your only choice should be a "high-transparency silicone mold." There are no other suitable options.
Furthermore, pay close attention to the mold's depth and thickness. Because UV light has a limit to how deeply it can penetrate, extra-thick molds exceeding 2 cm in depth are unsuitable. Using a mold that is too deep carries the risk of leaving the inside uncured, causing runny liquid to leak out.
If you want to make a thick piece, pour the resin liquid in multiple stages, curing it under the light each time to form layers ("layered curing"). This completely prevents uncured resin inside.
Epoxy resin, which cures over time by mixing a main resin with a hardener, does not require light penetration. Therefore, you can use all types of molds—including high-transparency, semi-transparent, and colored silicone molds.
Epoxy resin is suited for making thick and voluminous items such as orgonites, coasters, and large decorative ornaments. Thus, choosing a thick, sturdy mold that can withstand the weight of the resin is the right move.
If you pour a large amount of epoxy resin into a mold that is too thin, the weight of the resin will cause the sides to bulge outward, distorting the shape of your piece. Carefully select sturdy molds with thick side walls or reinforcing frames.
In making aroma stones by pouring in mixed gypsum, the softness of the silicone and its tear strength (resistance to tearing) are most critical.
Once cured, gypsum becomes a completely solid, rigid object with none of resin's flexibility. If the mold is too stiff, the gypsum will crack or the mold will tear upon removal.
Choose a soft-type silicone mold flexible enough to bend easily. Even with complex 3D shapes or floral motifs, soft silicone allows you to pop out the plaster cleanly without damaging it.
Silicone molds used in candle making require high heat resistance as an absolute condition, because hot melted wax is poured into them. Low-quality silicone can deform from heat or fuse directly with the wax.
Additionally, because candle wicks need to be set before pouring, it is a golden rule to pick specialized molds with a small wick hole at the bottom, or designs structured for easy wick insertion.
Molds for 3D animals or complex candle shapes sometimes come pre-cut along the side. This is not a defect, but a specification designed for easy demolding. When in use, secure the mold tightly with rubber bands or tape before pouring in the wax.
For clay molds used in miniature food or sweets deco creations, smooth mold release is everything. Moist clay easily sticks to silicone, so choose shallow molds or flexible molds that are easy to push out.
A professional trick when packing clay into a mold is to apply a tiny amount of baby oil, vaseline, or release powder inside the mold beforehand. This allows you to remove the clay cleanly without ruining its shape.
Here is a summary of common mold selection mistakes made by handmade beginners. Knowing these failure patterns in advance will help you eliminate wasted expense and working stress.
Buying a cute pink silicone mold just because the shape looks adorable in online photos, pouring UV resin into it, and finding that no matter how long you shine the light, the back stays sticky—this is a classic failure that happens constantly.
Colored silicone molds block light 100%. No matter how powerful your UV-LED lamp is, light cannot reach through. When using UV resin or LED resin, always purchase molds clearly labeled as "high-transparency" or "UV resin compatible."
This happens when you buy a sturdy-looking mold, but the silicone itself is rigid, causing finger pain or snapping delicate parts off your piece when trying to remove it.
Especially when crafting delicate details or designs with deep crevices, silicone stiffness can be fatal. When purchasing, check product reviews or descriptions to select items rated as "soft silicone" or "easy to demold."
When pouring resin or plaster into very detailed, complex motif molds, the liquid may not reach every fine corner, leaving air bubbles that result in chipped edges on the finished piece.
When starting out, it's safer to avoid excessively complex and thin molds. Begin with simple, rounded shapes or molds with wide openings. If you do use complex molds, use a mixing stick or toothpick after pouring to carefully guide the liquid into every corner.
When buying extremely low-priced silicone molds online, you might face issues where the inner surface is unevenly wavy, or the silicone is already yellowed out of the package, preventing a glossy finish.
Extremely cheap products often suffer from poor silicone quality control and low precision. If you plan to sell your creations, I strongly recommend purchasing from reputable domestic craft manufacturers in Japan or trusted specialty stores.
Here is the exact checklist I always follow when purchasing new silicone molds. Use it as your decision-making criteria to avoid bad purchases!
First, check the compatibility between your intended material and the mold. Filter your choices based on material: high-transparency only for UV resin, flexibility and durability for epoxy resin or gypsum.
Second, check the inner surface finish. Choose a mirror finish for glossy results, or a matte finish for subtle textures or custom post-coatings. Use image zoom functions to inspect inner reflections.
Third, verify the depth and dimensions in millimeters. Buying solely off photo impressions can lead to surprises like "it's much smaller than expected" or "too deep to cure under UV light." Always check stated measurements.
Fourth, evaluate the balance between silicone thickness and flexibility. Molds with paper-thin bases or walls tear quickly. Conversely, overly thick and rigid molds make demolding a nightmare. A mold with uniform thickness that bends smoothly is the absolute best.
Fifth, inspect seller reliability and buyer reviews. Utilize major craft retailers or specialized handmade supply shops, and thoroughly read reviews from real buyers. Learning from real feedback regarding ease of demolding and transparency is your best defense against failure.
Once you get your hands on a favorite silicone mold, you’ll want to keep using it in top condition as long as possible. Silicone is a delicate material, but with proper care and storage, its lifespan can be extended several times over.
Washing your silicone molds with water every time to remove dust or resin crumbs is actually a mistake. Silicone easily attracts static electricity, so wiping it dry after washing often leaves behind tons of towel fibers and lint.
For routine care, the proper method is using the sticky side of masking tape or cellotape to gently dab off surface debris. It instantly removes fine dust without scratching the mold.
Only when oily residue or colorant stains are a concern should you gently wash the mold with lathered mild dish soap using the pads of your fingers. Rinse with water and dry thoroughly with a lint-free clean cloth or paper towel. Scrubbing with coarse sponges is strictly forbidden, as it ruins mirror finishes.
The biggest enemies of silicone molds are ultraviolet rays and deformation from heavy pressure. Leaving molds in direct sunlight causes silicone to turn yellow, lose flexibility, and rapidly age or harden.
After use, seal each mold individually in a ziplock bag and store it inside a light-blocking box or drawer. Sealing them in bags also completely prevents dust accumulation.
Also, carelessly stacking molds on top of each other will squash the bottom molds, causing permanent bends and warping that cannot be fixed. Store them laid out side by side or neatly arranged vertically.
If you want to stretch the life of your silicone molds to the maximum, introduce a mold release agent (silicone spray or release gel).
Lightly spraying the interior of the mold before pouring in your material creates a protective barrier that prevents resin or gypsum from adhering directly to the silicone. This makes demolding surprisingly smooth and dramatically reduces silicone wear and tearing caused by pulling during demolding.
For crafters who produce pieces frequently or want to cherish expensive favorite molds for a long time, release agents are a must-have item.
We’ve covered silicone mold types and selection criteria in detail—from materials and surface finishes to genre-specific uses and maintenance techniques.
A silicone mold is not just a simple "tool," but a vital partner that elevates your ideas and passion into wonderful three-dimensional art pieces. By considering compatibility with your chosen craft material and selecting molds with the ideal transparency, flexibility, and finish, the joy and quality of your crafting will skyrocket.
Graduate from curing failures and mold damage caused by incorrect choices, and select your tools with confidence and knowledge. The thrill when a perfectly glossy piece pops cleanly out of the mold is one of the greatest joys of crafting!
Find your ideal silicone mold and expand your handmade journey into something richer and even more marvelous. I'm cheering you on!
If you found this helpful, I’d be thrilled if you shared this article with your friends on social media or LINE! See you in the next article! This was Yassy from Crafters!



For example, if you are looking for articles about mizuhiki, try searching for "mizuhiki"; if you are interested in tools, try keywords like "nippers" or "pliers."
