How to Upgrade Your Epoxy Resin Tools: The Golden Sequence to Professional Quality
yassy
Crafters!

Hello everyone! This is Yassy from Crafters! (・∀・)
As someone who absolutely loves making, viewing, and buying all kinds of handmade crafts, I have a topic today that I am truly passionate about. It is all about the unsung heroes that support the quality of our projects from behind the scenes: clamping and holding tools!
Have you ever experienced any of these frustrating moments during your crafting process?
These issues aren't caused by a lack of skill or talent. They simply happen because the materials weren't held in place correctly! In handmade crafting, securely holding your fabrics, wood, or small parts is the single most critical step that determines the beauty and neatness of your final finish.
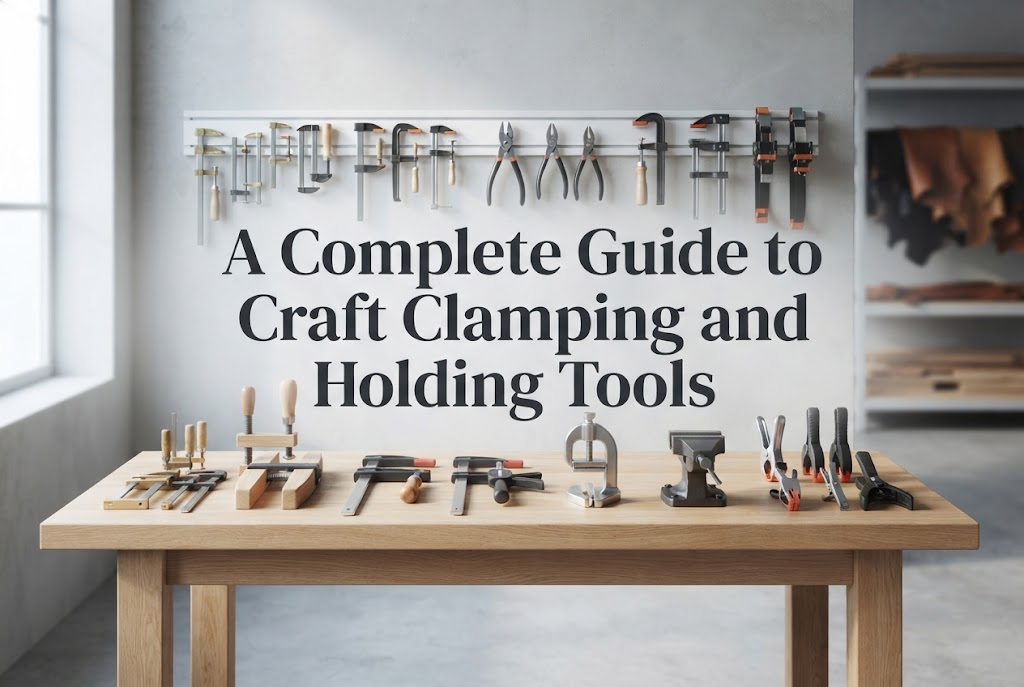
There are countless holding tools available in the craft world. Each tool excels at specific tasks, and using the right one for the job dramatically improves both your work efficiency and project quality. Today, I will break down 12 essential clamping and holding tools commonly used in crafting, categorized into five distinct functional groups.
By reading this article, you will immediately see which holding tools you need for your upcoming projects. Let's get a clear overview of the options so you can find the perfect securing tools for your own workspace!
Before jumping into individual tool recommendations, let me share three fundamental rules for selecting holding tools in handmade crafts. Always keep these criteria in mind when choosing your gear:
1. Never leave marks or dent your materials.If a clamp's pressure is too strong, it can leave unsightly indentations on soft fabrics, wood, or leather. Always choose a tool with clamping force suitable for the hardness of your material, or get into the habit of inserting scrap cloth or protective rubber sheets between the tool and your work.
2. Maintain a clear workspace and freedom for both hands.If a holding tool is excessively bulky, it will obstruct your hands while working. The ironclad rule is to choose a tool shaped so it won't interfere with the specific technique you want to perform—whether that's sewing, painting, sanding, or gluing.
3. Distinguish between temporary holding and permanent pressure clamping.Holding something briefly to prevent shifting during work requires a completely different tool performance than applying continuous pressure until glue fully cures ("pressure bonding"). Don't blur the line between these two functions; always deploy the tool designed for your specific objective.
Now, let's explore the 12 tools organized into five functional categories!
First up are the "pinching" tools, ideal for temporarily holding paper, fabric, or small parts. Their primary appeal is how quickly you can attach and detach them, making them indispensable for keeping up a smooth workflow.
The humble household clothespin is actually a surprisingly effective temporary holding tool in the craft room. Plastic or wooden pegs are especially useful for Japanese tsumami zaiku (delicate folded fabric craft), papercrafts, or lightly securing light fabrics.
Because their pinching strength is gentle, they are less likely to damage delicate materials. Choosing craft-specific pegs with flat gripping surfaces or soft silicone tips helps prevent marks even further.
I personally use resin craft pegs every day for quick temporary holds while waiting for glue to dry during small accessory assembly. They offer incredible cost performance, making them a great starting tool for any workspace.
Sewing clips have become a standard staple for temporarily holding fabrics and leather products. Unlike standard stationery paperclips, these feature a specialized design crafted specifically for handmade projects.
The biggest advantage is that you can use them on materials that cannot be pierced with pins. They are absolutely mandatory when sewing laminated fabrics, synthetic leather, genuine leather, or vinyl, where pinholes would permanently ruin the piece.
They feature wide jaw openings and flat bases, allowing them to glide smoothly under a sewing machine presser foot without getting caught. They grip securely even when holding multiple layers of thick fabric, making them a must-have item for sewists.
Made of sturdy metal with strong spring tension, binder clips show their strength when you need a firmer, more positive grip. They are perfect for bundling heavy paper, stacked felt layers, or groups of crafting wire.
Thanks to their strong spring action, their holding power is top-notch. However, if applied directly to soft surfaces, they carry a high risk of leaving sharp metal indentations on your material.
A professional trick when using binder clips is to always insert a piece of thick cardboard or scrap leather between the clip jaws and your material. This simple step lets you enjoy powerful clamping strength without damaging your hard work.
Next are the "piercing and tensioning" tools designed to give crisp tension to fabrics and sheets, ensuring accurate sewing, stitching, or embroidery. Keeping flat surfaces smooth dramatically upgrades your work's precision.
Sewing pins are the most fundamental holding tool in sewing and garment making. They hold fabrics together point by point to prevent misalignments, allowing for precise stitching.
Pay attention to the head material when buying pins. Plastic-headed pins are inexpensive, but they risk melting if exposed to the heat of an iron. If you want to enjoy crafting seriously, choose heat-resistant glass-head pins exclusively.
With glass heads, you can press seam allowances open with an iron right over the pinned area without trouble. Pins come in various lengths and thicknesses, so keeping both fine-fabric pins and heavy-duty pins on hand prevents common sewing mistakes.
Finer than regular sewing pins and featuring minimal head profiles, specialized pins are used for delicate crafting and 3D object positioning. Silk pins and ultra-fine insect pins leave virtually invisible holes when inserted into materials.
They work wonders for securing floral arrangements onto styrofoam bases, holding clay components while drying, or temporary positioning during miniature furniture assembly.
Beyond temporary fabric holds, they offer incredible versatility for ultra-precise wood and paper craft work. When you need to minimize puncture marks, switching from standard pins to specialized craft pins is the right choice.
An embroidery hoop is an essential tool for keeping fabric stretched drum-skin taut when doing surface embroidery, Japanese sashiko stitching, or bead embroidery. Available in wood or plastic, they clamp fabric securely between an inner and outer ring tightened by a tension screw.
If you stitch on loose, slack fabric, thread tension will cause puckering and unsightly wrinkles across your design. Using an embroidery hoop maintains uniform tension so your stitches align beautifully and yield a clean finish.
Sizes range from tiny palm-sized rings to large frames for expansive designs. Selecting a hoop slightly larger than your intended embroidery motif is the secret to reducing how often you need to re-position the frame.
The third category consists of "sticking" tools that use adhesive properties to cling securely to flat surfaces. From exact positioning to boundary protection, their uses are endless depending on your creativity.
In a craft environment, few holding tools are as versatile as quality masking tape. It offers just the right level of adhesion while leaving no sticky residue behind when removed.
Its applications are extremely wide-ranging: temporary placement of loose parts, surface masking during painting (creating clean color lines), or sealing mold seams and making temporary bases in resin craft.
Instead of cheap decorative tape, keep industrial or painting-grade masking tape with stable adhesive performance on hand. It helps create clean straight lines and prevents the frustrating issue of tape peeling off spontaneously mid-project.
Double-sided tape shines when you need complete, gap-free surface adhesion. It is indispensable for papercrafts, cartonnage (decorative box making), and securing paper patterns onto leather where shifting cannot be tolerated.
When crafting, it is smart to choose specialized varieties rather than standard heavy-duty tape, such as "temporary removable tape," "ultra-thin craft tape," or "water-resistant tape."
For instance, when sticking a paper template onto leather to cut out shapes, using temporary-holding double-sided tape ensures the leather fibers aren't damaged when peeled off. Matching the adhesive strength to your exact task is an absolute rule for avoiding mistakes.
The fourth category includes high-pressure clamping tools used in woodworking, structural gluing, or metalwork. They deliver impressive holding power far beyond human hand grip, locking parts together as one unified piece.
Clamps are medium-to-large tools used to squeeze glued parts tightly together until the adhesive cures completely. They are mandatory for woodworking, thick leather bonding, and picture frame fabrication.
Options include C-clamps and F-clamps tightened via threaded screws, as well as spring clamps for rapid one-handed application. Adhesives achieve their true maximum strength only when dried under firm, even pressure.
The key precaution when using strong clamps is preventing surface dents. Because their force is intense, always insert wooden scrap blocks or thick rubber pads between the clamp jaws and your workpiece to distribute the pressure safely.
A bench vise mounts directly onto your worktable to firmly clamp hard materials like metal, hardwood, or thick resin. It is used during filing, sanding, sawing, and soldering operations.
By securing the material completely immovable, it frees both of your hands to operate tools safely and accurately. Even during heavy force applications, your material won't slip, allowing for precise processing.
Common models include suction-base desktop vises or edge-clamp vises that attach to table margins. Choosing a vise model with soft rubber jaw covers lets you achieve a rock-solid grip without scratching your materials.
Our final category features base tools that stabilize your entire work environment rather than individual components. Eliminating wobble and slippage across your workspace leads to a stress-free creative process.
A third hand holder consists of a weighted base equipped with flexible arms and alligator clips. It holds small accessory components or delicate parts suspended mid-air for you.
This tool yields incredible results when securing items too small to hold with fingertips at exact angles—such as during wire jewelry construction, painting miniature details, gluing tiny parts, or soldering.
Choosing a flexible model where arm angles can be adjusted freely lets you apply brushes or tools from any direction. It is an absolute must-have recommendation for crafters whose fingers tend to shake during micro-detail work.
A stable workstation forms the foundation for all crafting. This ranges from heavy woodworking benches down to non-slip self-healing cutting mats laid across a regular desk.
The critical factor is that the base itself possesses sufficient weight and a non-skid structure. On a desk that is too lightweight or slick, the entire setup will slide around no matter how delicate your technique is.
Introducing a heavy-duty cutting mat or a workbench equipped with clamping holes ensures your overall work area stays rock-solid against downward pressing or lateral pulling forces.
Owning these 12 clamping tools is a great start, but simply having them isn't enough. Here are three typical mistakes beginner crafters make, along with practical tips to avoid them!
When using high-pressure tools like binder clips, heavy clamps, or vises, the most frequent issue is leaving permanent jaw impressions on soft surfaces.
Solution: This happens because pressure concentrates on a single point. Always insert scrap wood blocks, thick scrap leather pieces, or silicone pads between your material and the tool. This simple step spreads the clamping pressure and 100% prevents damage.
When removing masking or double-sided tape, the paper surface might tear off or leave a sticky adhesive film behind.
Solution: This occurs from using tape that is too aggressive or leaving tape applied for too long. Always use products explicitly labeled as "low-tack" or "temporary craft tape" for positioning, and peel them off as soon as your task is complete.
It's frustrating when fabrics slip while sewing or glued joints shift because clamp pressure was uneven.
Solution: You either haven't used enough contact points or picked the wrong tool. When holding wide surfaces or long seams, the rule is to increase the number of clips/pins and place them closer together. For slippery materials, switch to clips with textured silicone grips.
To help you visualize these tools in action, here is how I personally combine them during my own crafting projects!
For layering fabrics, I rely heavily on sewing clips. Unlike standard pins, there's no risk of poking my fingers, and I can quickly pop them off right before they reach the sewing machine presser foot without breaking my rhythm.
For sharp ironed folds or precise alignment on small pockets, I pin targeted spots using heat-resistant glass-head sewing pins. Combining these two tools offers the ultimate efficiency!
When joining wooden pieces with wood glue, I first perform a dry fit using masking tape to keep components aligned without slipping.
Once positioning is confirmed, I apply the glue, attach F-clamps or spring clamps over protective scrap wood blocks, and apply firm pressure. Leaving the assembly overnight until the glue fully cures results in an incredibly strong bond.
When painting tiny rice-grain-sized components or bending thin wire, I clip the part into a third hand holder (helping hands) to suspend it in mid-air.
With both hands completely free, I can hold a magnifying glass in one hand and a fine detail brush in the other. It completely eliminates mistakes caused by hand tremors!
Today, we explored 12 essential clamping and holding tools categorized by their specific functional roles in handmade crafting.
Let's do a quick recap of our five categories:
The moment you move past the temptation to "just hold it with my hands" and start adopting proper holding tools for each task, the quality and neatness of your handmade projects will instantly jump to the next level.
Eliminating shifts, slippage, and distortion reduces crafting stress immensely and makes creating so much more fun! Start by picking up the basic holding tools tailored to your favorite craft genre, and experience the remarkable difference in your finished work!
If you enjoyed this guide, sharing it with your fellow craft lovers on social media would mean the world to me and keep me inspired!
Until next time, happy crafting! This was Yassy from Crafters!




For example, if you are looking for articles about mizuhiki, try searching for "mizuhiki"; if you are interested in tools, try keywords like "nippers" or "pliers."
