Level Up from Starter Kits: The Ultimate Order to Upgrade Your Plaster and Jesmonite Craft Tools
yassy
Crafters!

Hello everyone, Yassy here from Crafters! (・∀・)
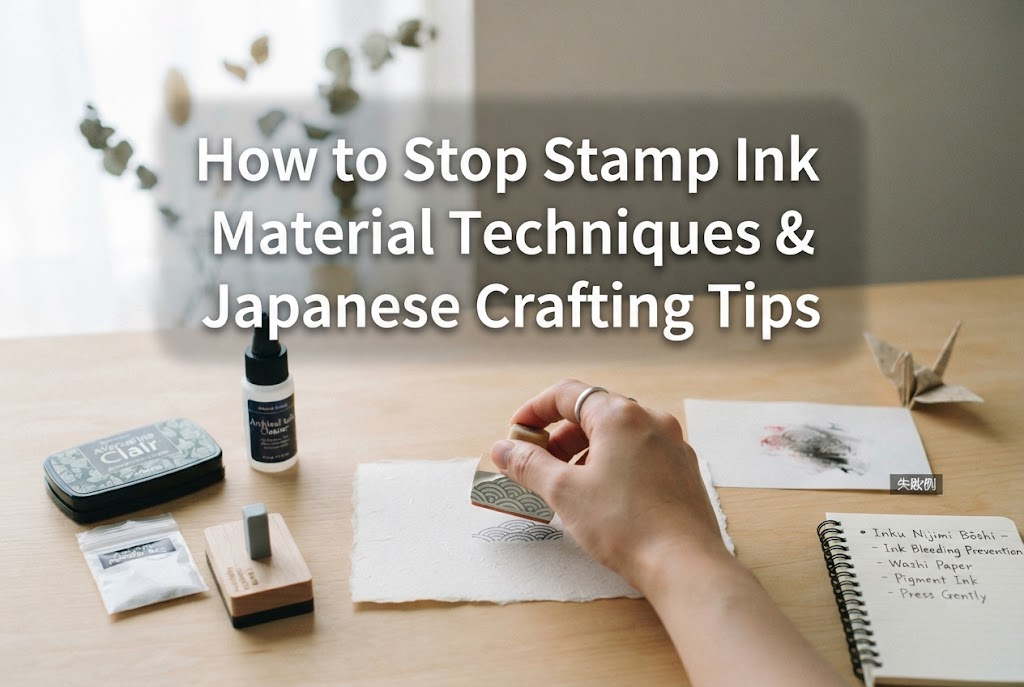
As someone who loves making, viewing, and buying all kinds of handmade crafts, today I am diving deep into a problem that every crafter faces at some point: stamp ink bleeding!
Stamping is one of the most rewarding steps in crafting—it instantly breathes life into papercrafts, fabric goods, leather, and woodworking pieces. But haven't you ever spent hours building a beautiful base project, only to press a stamp down and watch the ink feather out, blur, or turn into a fuzzy blob?
You don't need to blame yourself, wonder if your stamping technique is terrible, or suspect that your ink pad is defective! Ink bleeding happens due to very specific scientific and physical reasons. Once you identify the exact cause, you can get crisp, crystal-clear impressions on virtually any material.
In this guide, I will walk you through the fundamental causes of ink bleeding, common mistakes beginners make, material-specific remedies, and my own step-by-step golden rules for stamping. By the end of this article, you will be completely free from stamping stress!
Ink bleeding isn't random bad luck. It is a physical phenomenon caused by the combination of your ink, your base material, and pressure. Understanding these three core mechanisms is the first step toward flawless stamping.
Fibrous materials like paper, fabric, and raw wood contain countless microscopic gaps between their fibers. When liquid ink touches these gaps, it triggers capillary action—a physical effect where liquid is pulled horizontally along the fibers. If the fiber density is low or if the ink has a watery, low-viscosity texture, capillary action accelerates dramatically. This is the biggest reason why stamp outlines blur immediately upon contact.
If you apply too much ink to the rubber or photopolymer surface of your stamp, it will bleed regardless of how high-quality your paper or fabric is. When you press an over-inked stamp onto a surface, the excess ink has nowhere to go except outward. This creates small pools of liquid along the edges that soak into neighboring fibers before drying, or smear when touched. Ink does not become vibrant simply by adding more; a thin, uniform layer produces the sharpest and most beautiful color.
Stamp inks generally fall into three main categories: water-based, oil-based, and solvent-based (such as alcohol-based inks). Furthermore, they are split into dye inks (which soak into materials to display color) and pigment inks (which sit on top of the surface to set color). If you apply a watery dye ink onto highly absorbent Japanese paper (washi) or wood, the ink will bleed endlessly along the fibers. Conversely, if you apply water-based ink onto smooth plastic, the liquid cannot adhere, resulting in beaded, messy smudges. Ignoring material compatibility leads directly to failure.
When handmade enthusiasts try extra hard to get a clear impression, they often accidentally trigger ink bleeding. Here are five misconceptions to watch out for:
Putting your body weight into pressing a stamp is a major mistake. Excessive pressure squashes the raised rubber design, forcing ink trapped in the grooves outward. This results in heavy, thick, blurry lines. The correct approach is to gently bring the stamp surface into uniform contact with the material. Transfer ink using time and contact, not brute force.
Assuming "oil-based = waterproof = zero bleeding" for every material is incorrect. Oil-based dye inks actually penetrate absorbent materials like thin paper or raw wood even more aggressively than water-based inks, causing heavy bleed-through and lateral feathering. Rather than assuming all oil-based inks are safe, you must choose between dye vs. pigment and standard vs. quick-drying formulations based on your material.
Pressing your stamp firmly down into an ink pad forces ink deep into the recessed grooves of the stamp. When you stamp your project, that excess ink transfers onto your surface as unwanted smudges and blurred edges. Instead, hold the ink pad in your hand and gently tap it onto the stamp face from above. Moving the pad allows you to coat only the raised parts of the design evenly.
Ink can look dry on the surface while remaining wet underneath. If you apply water-based markers, pour resin, or brush topcoats over uncured ink, the ink will dissolve and smear across your work. Pigment and oil-based inks often require extended drying time. Always respect the full drying time or heat-set the ink using a craft tool or hair dryer.
Dust, finger oils, moisture, or factory finish coatings on paper, fabric, or leather interfere with ink adhesion. Oil repels ink while dust pulls ink laterally. Skipping surface prep invites patchy or blurry impressions.
Every material behaves differently. Here is how to handle the most popular crafting materials:
Rough papers like Japanese paper (washi) or watercolor paper have loose fibers that draw in liquid quickly. For these, use oil-based pigment inks or quick-drying pigment inks. Pigment particles are larger and sit on the surface rather than running deep into the fibers.
For glossy or coated paper, the surface repels standard ink, causing it to slide and smudge. Use multi-surface solvent inks (such as StazOn) or fast-drying oil inks designed for smooth surfaces. Allow them to dry undisturbed.
Fabric is one of the trickiest materials because ink runs along woven threads and reacts to humidity. Always use specialized fabric pigment ink. Before stamping, iron the fabric to remove wrinkles and moisture completely. Immediately after stamping, cover with a press cloth and apply a dry iron for at least 15 seconds. Heat cures the resin in fabric ink, locking it permanently into the fibers so it won't bleed or wash out in the laundry.
Raw wood and unglazed pottery pull liquid along their grain and pores via capillary action. Use pigment inks, and sand the surface with fine sandpaper (400 grit or higher) before stamping. Wipe away all wood dust with a thoroughly wrung-out damp cloth to create a smooth, flat foundation.
For leather, the smooth grain side (top) can repel ink due to tanning oils, while the suede flesh side (back) absorbs heavily. On the grain side, use solvent inks or specialized oil-based pigment inks for leather. Press lightly and evenly without shoving the stamp into the hide.
Non-absorbent surfaces cannot absorb ink at all, so pressure causes ink to squish sideways. Use quick-drying solvent-based inks exclusively. Lower the stamp straight down vertically and lift straight up without sliding. If the finished piece will be handled often, seal it with a light spray coating after the ink dries completely.
Here is my step-by-step stamping routine for flawless, crisp impressions every single time:
Inspect your stamp for dust or dried ink buildup. Residual ink alters viscosity and causes smudging. Clean the stamp surface thoroughly using stamp cleaner or wet wipes before starting.
Place your stamp face-up on your worktable. Take the ink pad in your hand and lightly tap it against the stamp surface. Aim for a thin, uniform coat of ink. Look down at the stamp to ensure no ink has gathered in the recessed lines; wipe away any excess in the grooves with a cotton swab.
Hold the stamp with both hands and lower it straight down vertically. Without applying heavy pressure or leaning your body weight onto it, press evenly across the mount using the pads of your fingers. Hold in place while counting "1, 2, 3" in your head. This 3-second contact allows the ink to transfer smoothly to the surface without squishing the rubber.
Lift the stamp straight up to prevent accidental smearing. To lock the impression, dry it immediately using a hair dryer on a cool or low-warm setting held at a slight distance.
Lightly dust absorbent surfaces like paper, fabric, or leather with a tiny bit of baby powder or anti-static powder before stamping. The powder absorbs oils and microscopic moisture, allowing ink lines to set with extreme sharpness. Brush away the excess powder after stamping with a soft brush.
Stamp with a water-based pigment ink, sprinkle clear embossing powder over the wet impression, shake off the excess, and melt it with a heat tool. The melted powder forms a shiny, raised resin barrier over the ink. This completely waterproofs the stamped design, allowing you to color over it with watercolor markers or pour resin over it with zero fear of smudging.
When stamping on highly absorbent raw wood, washi, or coarse canvas, apply a thin coat of clear gesso or fixative spray beforehand and let it dry. This forms a transparent barrier that physically stops capillary action, allowing even delicate fine-line stamps to appear perfectly crisp.
If an accident happens and ink bleeds, don't throw your work away! Try these rescue techniques:
Precision Fixes: For paper, gently scrape the smudged area with a sand eraser or the edge of a fine craft knife to remove the thin top layer of paper. For white backgrounds, touch up smudges with an ultra-fine brush dipped in white acrylic paint or a white gel pen.
Embrace a Vintage Look: Distress the edges of your paper or tag with brown or gray ink using a craft sponge. Adding a soft, aged shadow around the stamp converts the slight ink bleed into a natural, antique-style character!
Stamp ink bleeding isn't an unpredictable mystery—it is simply a sign that ink type, material absorption, coating technique, or pressure need adjustment. Remember these key points:
With these techniques, you can approach every stamping project with confidence and achieve crisp, professional-looking results every time.
If you found this guide helpful, please share it with your fellow crafters on social media! See you in the next tutorial—this was Yassy from Crafters!




For example, if you are looking for articles about mizuhiki, try searching for "mizuhiki"; if you are interested in tools, try keywords like "nippers" or "pliers."
