Essential Guide to Needle Threaders and Thimbles for Hand Sewing, Embroidery, and Sashiko
yassy
Crafters!

Hello, I'm Yassy from Crafters! (・∀・)
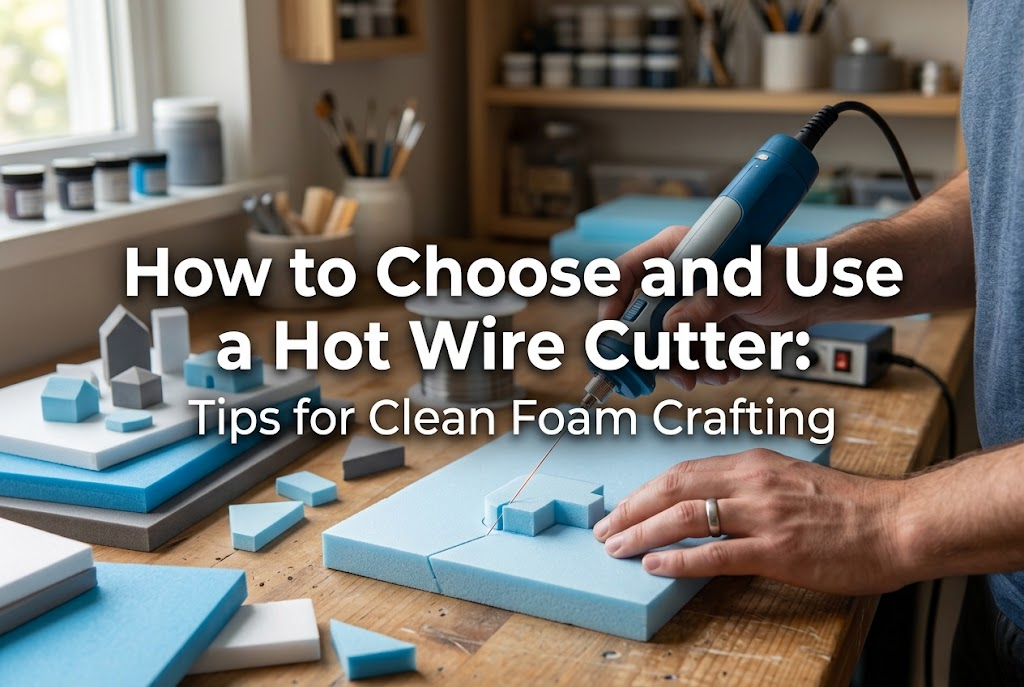
As someone who loves making various handmade crafts as well as collecting wonderful pieces, today I want to thoroughly explain a miracle tool that dramatically improves both work efficiency and project quality: the hot wire cutter!
Whenever you try to make bases for miniatures, dioramas, or large 3D props using Styrofoam or extruded polystyrene foam (often known as Styrofoam or Styrodur), almost everyone hits a wall. Common frustrations include white foam crumbs flying all over the room when using regular blades, or jagged, uneven cut surfaces that ruin the look.
The ultimate tool that solves this problem in an instant is the hot wire cutter. Using a hot wire cutter allows you to slice smoothly through foam like a hot knife through butter. It produces zero messy crumbs and leaves a glossy, professional-level finish on the cut edges.
In this guide, based on my experience and knowledge, I will cover everything from the basic role of a hot wire cutter, the differences between various types, how it compares to utility knives and soldering irons, to how beginners can choose the right model and use it safely. Read through to master using a hot wire cutter in your craft projects!
A hot wire cutter is a thermal cutting tool that passes electricity through an extremely thin metal wire (such as nichrome wire) to melt and slice through materials using heat. It is also commonly called a Styrofoam cutter.
Instead of physically tearing through the material with a blade, it instantly melts its way forward, requiring virtually no force. By simply guiding it gently without pushing hard, anyone can easily cut out their desired shape with precision.
In the world of crafting, hot wire cutters are used in many different scenarios. The most representative uses include building bases for miniatures and dollhouses, crafting railway model dioramas, sculpting large photo props or cosplay gear, and creating bases for various decorations.
When it comes to cutting thick Styrofoam blocks or denser insulation foam boards into precise shapes, no tool outperforms a hot wire cutter. Additionally, it can be used for heat-cutting ribbons or synthetic cords to cut and seal the edges against fraying at the same time.
For crafters building 3D works, the hot wire cutter is an indispensable tool during the foundational staging phase.
When you try to cut Styrofoam with a standard utility knife, static electricity almost guarantees that foam bits will cling to your hands and scatter across the room. Furthermore, the blade catches on the material, leaving a crumbling, rough edge that makes smooth surfaces impossible.
Using a hot wire cutter completely eliminates this stress. Because it glides through by melting the material with heat, absolutely no debris or foam crumbs are produced. The fact that it saves you from post-project cleanup alone makes it worth introducing to your studio.
Even more wonderful is the beauty of the cut surface. As the melted edge cools and solidifies, it creates a sealed, smooth coating. You don't have to worry about it crumbling when touched.
The freedom of movement is also incomparable to traditional blades. Tasks that are impossible with a utility knife—such as cutting gentle curves, complex wavy shapes, or hollowing out the center of a thick block—can be done effortlessly with a hot wire cutter.
Expanding your range of expression while multiplying your working speed is the greatest strength of a hot wire cutter.
Among thermal tools used in crafting, besides hot wire cutters, there are hot knives (heat cutters), soldering irons, and embossing heat guns. While they may look or seem similar in mechanism, their strengths and intended uses are distinctly different. Understanding these differences will help prevent project failures.
First, a hot knife (heat cutter) heats a rigid metallic blade to cut. Because the blade tip is firm, it is well-suited for pushing through hard plastics, thick resin sheets, felt, or thin acrylic plates. However, when cutting thick materials like Styrofoam, heat escapes due to the blade's thickness, causing edges to melt excessively wide or warp diagonally.
Next, a soldering iron heats a metal tip to high temperatures to melt solder. While useful for wood burning (pyrography) or plastic welding, it lacks the length and thinness required for cutting foam blocks. It is suitable for point work, but completely unsuited for making clean cuts across wide surfaces or long distances.
A hot wire cutter features a thin wire structure where the entire line heats up uniformly in an instant. This characteristic of "cutting with a thin line" allows for clean, delicate cuts on Styrofoam with a minimal melt width. For cutting Styrofoam and insulation foam, choosing a hot wire cutter is the single right answer.
Hot wire cutters generally come in three shapes and structures: Bow Type (Frame Type), Benchtop Type (Table Type), and Pen Type (Stick Type). You need to select the right one based on the projects you want to create.
The bow type is the most popular handheld model, featuring a thin wire stretched taut across a C-shaped bow frame.
Because you can hold it in your hand and enter the material from any angle, it is best suited for slicing large foam blocks or cutting dynamic curves intuitively. High flexibility and intuitive operation are its biggest advantages.
On the other hand, because you operate it with the wire suspended in air, making completely vertical, straight cuts through thick materials requires a bit of practice and a steady hand.
The benchtop type is a stationary unit where a hot wire extends vertically from the center of a working table.
Many models come with fence guides (rulers) and angle adjustment features, making them exceptional at slicing foam to exact thicknesses or making precise 90-degree and 45-degree straight cuts. They demonstrate overwhelming power in high-precision projects, such as architectural models or diorama walls.
Because the unit itself is larger, it requires dedicated workspace and costs more than handheld types, but it is the most reliable choice when you want to elevate your finish to a professional level.
The pen type features a rigid metal tube or thin needle-like heating element extending from the tip of a wand handle.
Its greatest advantage is the ability to plunge directly into the middle of a piece of material to hollow out the interior. For carving intricate textures or reaching inside a block where a bow frame would get blocked, the pen type is the only option.
Models with a pipe tip are sturdier than thin wires, but because heat transfer can be slightly unique, controlling your moving speed is key.
Here are four essential criteria to check before buying your first hot wire cutter to ensure you don't regret your purchase.
Power options include AC adapter types that plug into household outlets and cordless battery-operated types using AA batteries.
To jump straight to the conclusion, I strongly recommend the AC plug-in type.
While battery-operated models look convenient and portable, heating drains batteries very rapidly, causing heat output to drop within minutes. As heat decreases, cutting speed drops, causing the wire to snag and leave jagged cut edges.
An AC plug-in model maintains a steady, consistent level of heat continuously, allowing you to slice smoothly through thick foam boards from start to finish. If you want a stress-free experience with beautiful results, an AC plug-in model is the clear choice.
When selecting a bow-type cutter, always check the frame depth (arm clearance) and the length of the stretched wire.
If the frame depth is shorter than the size of the foam block you wish to cut, the frame will bump into the material mid-cut, preventing you from finishing the line.
A good rule of thumb is to choose a frame size one size larger than your planned project. For general crafting, an arm depth of around 10 cm to 15 cm (4 to 6 inches) will handle most needs smoothly.
Some higher-end hot wire cutters feature dial-based temperature (voltage) adjustments.
While standard expanded Styrofoam melts very easily, high-density extruded foam or rigid polyurethane foam requires higher temperatures to cut smoothly. Conversely, if the temperature is too high for thin foam, excessive melting occurs along the sides, creating uneven edges.
If you plan to work with multiple materials or want to be precise about cut quality, choosing a model with adjustable temperature control greatly expands your options.
Hot wires are consumable items. They can snap during work if excessive force is applied or due to wear over time.
When purchasing, check whether spare replacement wires are included in the package and whether those replacement wires can be easily bought individually online or at local craft/hardware stores. Choosing a minor brand whose specific wire is hard to find carries the risk of rendering the entire tool useless the moment a wire breaks.
A tool design that allows easy wire installation is an important checkpoint for long-term use.
Even if you get a hot wire cutter, using it incorrectly will prevent you from cutting the shapes you intended. Here are the correct operational steps and vital tips for creating professional, clean cut faces.
First, set up a safe and comfortable working environment.
When using a hot wire cutter, a slight smell of melting foam is produced. Always open a window or run a ventilation fan while working.
Place a heat-resistant cutting mat or wooden board on your workbench to protect the desk surface in case the hot wire touches it by accident.
Use an oil-based or water-based marker to clearly trace your outline onto the foam beforehand.
Turn on the power switch and wait for the wire to reach its full working temperature.
With AC plug-in models, it takes only a few seconds after switching on. If you rush and press the wire against the material before it heats up properly, the wire will bend, distorting your cut line.
Always confirm that the wire is fully heated before starting to slice.
This is the single most important rule: never force or push the cutter through with hand pressure.
A hot wire cutter works by melting the material ahead of it. If your hand moves faster than the melting action, the wire will bow backward, causing the cut surface to slant diagonally or, in the worst case, snapping the wire apart.
Your hand should merely guide the direction, moving slowly to match the speed at which the wire melts through the foam. The golden secret is not to "push," but to "wait for it to melt forward."
When you want to make clean straight lines with a handheld bow cutter, place a wooden ruler or a thick piece of wood on top of the material as a guide, and slide the wire against it.
Do not use a plastic ruler, as the hot wire will melt the ruler itself upon contact. Always use wooden or metal guides.
Adding a single guide allows you to easily produce straight cuts that rival desktop models.
Here are common problems beginners encounter when starting out, along with their solutions. Understanding the causes keeps you calm.
About 90% of wire breakages are caused by pushing too hard with hand force.
If you push hard as if sawing wood, excessive tensile strain is applied to the nichrome wire, which has softened under heat, causing it to snap easily.
Relax your hands and focus on advancing gently at the speed of thermal melting. Also, if wire tension is too loose, local strain can cause snaps, so keep the frame tension properly adjusted.
If the cut channel becomes too wide or the surface melts unevenly, the cause is moving your hands too slowly.
If the hot wire stays in one spot for too long, heat radiates into the surrounding foam, melting a wider area than intended.
Maintaining a smooth, steady moving speed is the secret to uniform cuts. If you need to stop midway on a complex shape, either switch off the power to let it cool or quickly pull the wire out of the material.
When cutting thick foam boards, you might find that while your top line is accurate, the bottom side drifts diagonally.
This happens because the hot wire was held at an angle relative to the material while moving forward with a handheld bow cutter.
To prevent distortion, place a square wooden block vertically next to your piece to visually verify that your wire remains at 90 degrees as you advance. If you need to mass-produce perfectly vertical cuts, consider getting a benchtop hot wire cutter.
While a hot wire cutter is extremely convenient, it uses heat and electricity, so proper safety management is required to prevent injuries or accidents. Always follow these four basic rules.
During use and immediately after turning off the power, the wire reaches hundreds of degrees. Even if it does not glow red, it is extremely hot.
Touching it can cause severe burns instantly. Never touch the wire or mounting metal parts during operation.
Never use it around small children or pets, and always unplug the power cord when stepping away from your workspace.
When melting foam with heat, small amounts of invisible gas and fumes are produced.
Inhaling these fumes in a closed, small room can cause throat irritation or discomfort.
Always open two windows to create a breeze or run an exhaust fan on high mode while working. For maximum precaution, wearing a dust and gas protective mask during work is recommended.
If the heated wire touches nearby tissue paper, loose sheets, or synthetic fabrics, it can pose a fire hazard.
Clear away unnecessary items and work in a tidy, spacious environment.
Also, make it a habit to turn off the switch whenever you leave your seat temporarily. Leaving the power on unattended is extremely dangerous.
Hot wire cutters are designed specifically for polystyrene (Styrofoam and extruded foam boards).
Never use it on materials like polyvinyl chloride (PVC) or certain synthetic resins, which release highly toxic gases when heated.
Avoid heat-cutting materials of unknown composition, and stick strictly to materials confirmed to be safe.
We've covered everything from basic knowledge, advantages, and type comparisons to selection tips and operational tricks for hot wire cutters.
For anyone who has struggled with utility knives and felt frustrated by static foam crumbs flying around the room, using a hot wire cutter is a truly game-changing experience.
The comfort of gliding through curves effortlessly with no mess and creating clean, smooth cut faces in seconds is something you won't want to give up once you try it.
Whether you're building miniature foundations, diorama terrains, or large props, it will serve as a powerful partner in turning ideas from your mind into tangible 3D reality.
Look for an AC plug-in model with arm clearance suited to your planned project dimensions. Once you master the trick of letting the heat do the work without forcing it, anyone can achieve professional-level cutting precision starting today.
Equip yourself with safe habits, bring a hot wire cutter into your workshop, and expand your crafting possibilities!
If you found this guide helpful, sharing it with your creative friends on social media would mean a lot to me! See you in the next article—this was Yassy from Crafters!






For example, if you are looking for articles about mizuhiki, try searching for "mizuhiki"; if you are interested in tools, try keywords like "nippers" or "pliers."
