Japanese Tufting Guide: Mastering Rug Backing for Professional Durability and Finish
yassy
Crafters!

Hello, this is Yassy from Crafters! (・∀・)
I personally love making, admiring, and buying handmade crafts at online shops and craft events. Among all crafts, amigurumi holds a special place in my heart—it is truly wonderful how a single strand of yarn can bring a cute, three-dimensional character to life.
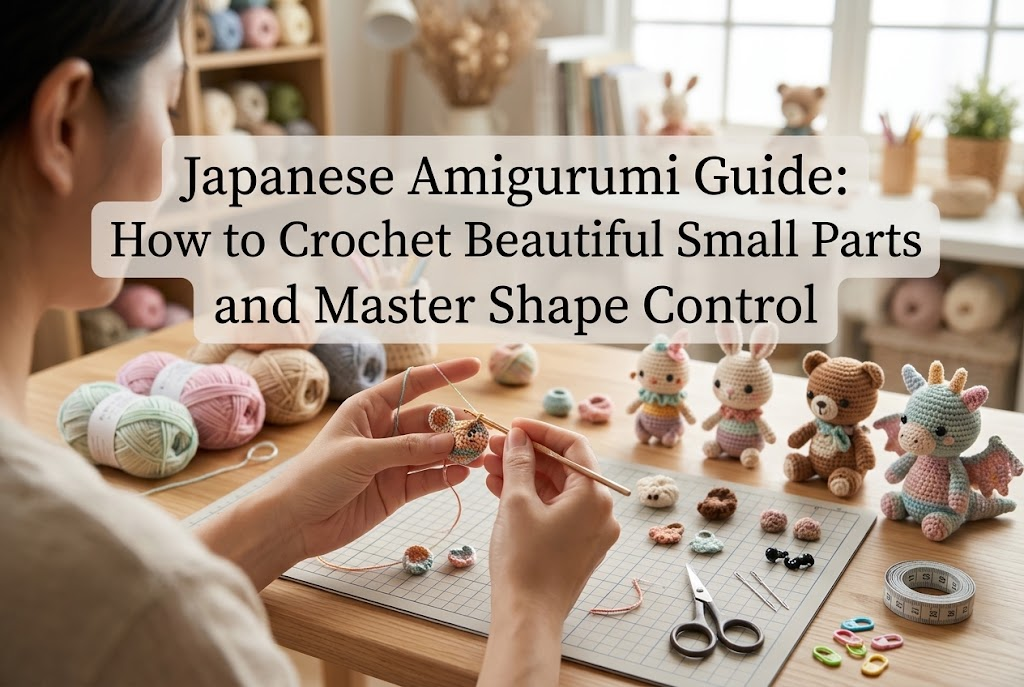
When beginners start making amigurumi, the very first big hurdle they usually encounter is crocheting the smaller parts. While larger sections like the head and body often go smoothly, pieces like ears, limbs, tails, and muzzles suddenly feel much more difficult. With fewer stitches, these pieces are tricky to hold, easily become misshapen, or end up completely different sizes on the left and right sides.
However, once you master the correct crocheting techniques and learn how to control the shape of each piece, the overall quality of your amigurumi will improve dramatically. In this guide, I will thoroughly explain the complete know-how you need to crochet neat, beautifully shaped amigurumi parts exactly as intended.
Amigurumi is built by crocheting multiple individual three-dimensional pieces and sewing them together at the end. Because of this construction, the shape and stitch consistency of every single component directly impacts the finished project.
No matter how flawlessly the head and body are crocheted, if the left and right ears are different sizes, or if an arm is unnaturally warped, the balance of the entire piece suffers. Conversely, when tiny parts are uniform and cleanly worked, the overall silhouette tightens up, resulting in a polished, professional look comparable to commercial pieces.
Crocheting small parts does not mean it is easy just because the pieces are tiny; rather, because they are so small, they require careful technique. There are specific, clear tricks to working with small components. Once you grasp them, anyone can consistently produce neat, well-formed pieces.
Almost all amigurumi parts begin as circular or tubular crocheted shapes starting from a magic ring (adjustable ring). Let us first master the technique for creating an immaculate first round, which serves as the foundation for the entire piece.
When starting an amigurumi piece, you loop yarn around your fingers to create an adjustable ring (known as a wa no tsukurime in Japanese craft books). While you can wind the yarn around your finger once or twice, for amigurumi you should absolutely use a double-wrapped ring.
A single loop runs the risk of expanding over time from the pressure of the fiberfill stuffing inside. By making a double ring, pulling the tail firmly locks the center securely so it will not loosen, preventing any holes from opening even if firmly stuffed. A tight, securely closed center is the essential first step to crocheting small parts.
In standard crochet, you typically end each round with a slip stitch into the first stitch, then chain 1 to begin the next round. For amigurumi parts, however, you should always choose continuous spiral rounds without slip stitches or turning chains.
Adding turning chains leaves a visible vertical seam along the side of the piece, which detracts from its appearance and creates small gaps. Crocheting single crochets continuously in a spiral produces a seamless, smooth tubular piece.
To avoid losing track of where each round starts, always place a stitch marker into the final stitch of the first round or the first stitch of the second round. This is an absolute rule for managing your stitch count accurately rather than relying on guesswork.
Amigurumi incorporates a wide variety of shapes. Here is a breakdown of how to construct ears, limbs, muzzles, and other features based on their structural characteristics.
Ears are vital features that dictate the facial expression of your amigurumi. Construction methods vary depending on the animal type.
Limb pieces typically feature a rounded tip that transitions into a narrower tubular shape toward the body.
To make an arm, begin by shaping the rounded hand. Start with 6 stitches in a magic ring, increase to 12 stitches in round 2, and work several rounds without increases to create a plump fingertip or paw. Then, decrease stitches to narrow the piece into a slim tube and continue until you reach the desired arm length.
For legs, the approach depends on whether you want the amigurumi to stand independently:
When crocheting narrow tubes, pieces with low stitch counts tend to curl inward easily. As you work, always use your fingers to pop the right side facing outward so you continue crocheting in the correct orientation.
The rounded volume of a muzzle is indispensable for giving dogs, cats, and bears a dimensional face.
Muzzle pieces are generally crocheted as small circular or oval disks worked for about 2 to 3 rounds before fastening off. The edge of the piece is then sewn onto the face.
The secret to a neat muzzle is to sew it about halfway to 80% onto the face first, then use craft tweezers to insert a small amount of stuffing through the remaining opening before stitching it closed. If you pack stuffing right after finishing the crochet round, the fibers will pop out and tangle with your yarn while sewing.
Slender pieces like tails and horns are among the trickiest parts in amigurumi, as you often need to crochet narrow tubes of only 4 to 6 stitches.
When working on narrow pieces, avoid crocheting only with the very tip of the hook. Make sure to pull the loop all the way onto the wider shaft of the hook before completing the stitch. Working tightly on just the hook's tip makes stitches far too tight, making it impossible to insert the hook for subsequent rounds.
Furthermore, slender pieces generally do not require stuffing. Forcing fiberfill inside only makes them stiff and unnaturally misshapen. If you need structural support or thickness, insert a pipe cleaner (chenille stem) or wire inside as an inner core instead of stuffing.
There are several stumbling blocks that beginners almost inevitably run into when crocheting small parts. Knowing the causes and direct solutions will prevent unnecessary unraveling.
As an amigurumi piece grows into a tube, it tends to curl inward. Many beginners inadvertently keep crocheting with the wrong side facing outward. Working on the wrong side alters the visual texture, and decreases or increases will not look as neat.
To tell the right side from the wrong side, look for the clean "V" patterns of the stitches—this is the right side (front). Additionally, if your crochet hook enters the stitch from the outside of the piece toward the inside, you are working on the right side. If your hook enters from the inside toward the outside, the piece is inside out.
By round 3 or 4, once the tube starts forming, use your thumb to push the center out so the right side faces outward. Never skip this small adjustment.
A frequent problem is finding that the left and right ears, or left and right arms, are noticeably different in size. This happens because hand tension naturally changes over time.
Tension (the tightness with which you pull the yarn) subtly shifts depending on time of day, fatigue, and focus. An ear crocheted yesterday will rarely match an ear crocheted today because your unconscious tension changes.
The solution is straightforward: always crochet matching pairs in one continuous sitting during the same time frame. Completing both while maintaining the exact same focus and rhythm keeps your gauge consistent, resulting in perfectly matched pairs.
When working on pieces as tiny as a fingertip, holding the fabric securely can be difficult, causing the hook to wobble.
Review the finger placement on your yarn-holding hand (usually the left hand). Firmly pinch the fabric immediately below the stitch you are working on using your thumb and middle finger.
Instability occurs when you try to hold the piece too far from the working loop. By consistently pinching the exact spot right beneath the current stitch, the fabric will remain steady and your hook will slide through smoothly.
After finishing a piece and cutting the yarn, you might discover the tail is too short to sew the part onto the body. Joining a new strand creates knots and leaves a messy finish.
When fastening off, always leave a tail approximately 3 to 4 times the perimeter of the piece's open edge. Whip-stitching or whip-attaching a piece securely takes more yarn than most people expect. If it ends up slightly too long, you can easily trim the excess, so make it a rule to always leave plenty of length.
Even if your crocheting is flawless, improper stuffing can ruin the finished shape. Stuffing is essentially sculpting the form of your amigurumi.
Not every part should be filled with fiberfill. Decide based on each part's intended function:
If you stuff an ear that should lay flat, it will puff up like a dumpling and sit awkwardly against the head. For ears and thin pieces, let the thickness of the crocheted fabric itself provide the structure.
Stuffing tiny parts with your fingers often creates lumpy, uneven bulges. Use slender craft tweezers or a small wooden stick instead.
Never insert large clumps of stuffing all at once. Tear off small tufts and use tweezers to guide them deep into the farthest tip of the part first, building up gradually.
Feel the outside of the piece with your fingers to check for empty voids, and ensure you have not overstuffed to the point where stitches stretch apart. If white fiberfill peeks through gaps in the yarn, the piece is overfilled. Maintaining firm elasticity without stretching the stitches is the hallmark of a professional finish.
Here are my own personal rules and techniques that I consistently apply when crafting amigurumi parts to elevate the finish to the highest quality.
Yarn labels typically recommend a hook size, such as a Japanese 5/0–6/0 hook (approx. 3.0 mm – 3.5 mm). However, for amigurumi—especially small parts—I deliberately choose a hook 0.5 to 1 size smaller than specified (for example, choosing a 3/0 or 4/0 hook instead of a 5/0).
A smaller hook creates tight, dense stitches. This completely prevents stuffing from poking out, no matter how firmly the piece is packed. It also gives the contours a crisp, well-defined edge, creating a structured and refined silhouette.
When shaping parts with single crochet two together (sc2tog), standard decreases leave a noticeable bump on the surface of the fabric.
To prevent this, I use the invisible decrease 100% of the time on amigurumi parts. This technique involves picking up only the front loops of the two stitches to be decreased, then completing a regular single crochet through them.
Using the invisible decrease results in a stitch that looks almost identical to an ordinary single crochet. It eliminates uneven bumps on the surface, making curved transitions exceptionally smooth and attractive.
When sewing finished parts onto the main body, using a tapestry needle that is too thick will push the body's crochet stitches apart, exposing the seams.
I choose the thinnest tapestry needle that the yarn can still pass through. A slender needle slides effortlessly between the fibers of the crochet stitches, keeping the join entirely concealed. The part looks as if it grew naturally from the body from the very start.
Here are answers to common questions often asked by those new to making amigurumi.
Q: I find it hard to count stitches on small parts and easily lose my place. What should I do?
When crocheting in spirals, it is very easy to lose track of the first stitch. As a safeguard, hook a locking stitch marker into the very first stitch of every round.
Alternatively, using a contrasting piece of scrap yarn as a running stitch marker is extremely effective. Laying the scrap yarn between the working loop and the fabric at each round creates a vertical guideline up the piece, letting you see at a glance exactly which round you are working on.
Q: My parts always shift out of alignment when I sew them to the body. How can I fix this?
Attempting to sew a part on without securing it first is a guaranteed path to misalignment. Always use at least four craft pins to firmly anchor the part to the body before picking up your needle.
Examine the placement objectively from the front, back, and sides, checking not only front symmetry but also side profiles. Only thread your needle once you are completely satisfied with the positioning. This preparation step prevents misplaced parts every single time.
Crocheting small amigurumi parts can seem intimidating and fiddly at first glance, but with the correct foundational techniques and theory, there is nothing to fear.
Start securely with a double magic ring, crochet in continuous spirals to avoid seams, monitor the right and wrong sides of your fabric, tailor your stuffing to each specific shape, and always crochet matching pairs together in one go. Keeping these fundamental guidelines in mind will noticeably elevate the beauty of your amigurumi components.
Pouring care into each small part and watching the shapes develop is truly the greatest joy of amigurumi. I hope you experience the heartwarming thrill of assembling these beautiful pieces and watching your creation come to life.
If you found this guide helpful, sharing it with your fellow crafters on social media would mean the world to me! Until next time, this was Yassy from Crafters!






For example, if you are looking for articles about mizuhiki, try searching for "mizuhiki"; if you are interested in tools, try keywords like "nippers" or "pliers."
