Japanese Craft Packaging Secrets: How to Ship Fragile Handmade Items with Zero Damage
yassy
Crafters!

Hello, it's Yassy from Crafters! (・∀・)
I have always loved making various handmade items, as well as browsing and collecting beautiful craft pieces. Sewing fabric goods myself is one of my greatest joys, but spending hours admiring wonderful works at craft markets and online shops is just as blissful.
Through handling and inspecting countless sewn pieces, I have noticed something striking: even when two crafters use the exact same pattern and fabric, one piece can look distinctly "homemade," while the other looks as polished and refined as ready-to-wear store merchandise.
Have you ever spent hours carefully sewing a small pouch or bag, only to feel disappointed because the finished item looks slightly uneven or lacks that crisp, professional sharpness? That difference rarely comes down to sewing machine skills alone. Instead, it lies almost entirely in the preparation before sewing and the small extra steps taken at each stage of the process.
The secret to dramatically elevating your sewing quality is remarkably clear: prepare and align the grain of your fabric properly, cut with millimeter precision, and press with an iron after every single step. Just by committing to these fundamental practices, the standard of your craft will improve exponentially.
Today, I will walk you through concrete, professional techniques that will help beginner and intermediate crafters create clean, commercially finished items that you will be proud to show off!
One of the most critical mistakes in sewing is cutting straight into fabric right after bringing it home from the shop. Doing so often leads to heartache: the finished piece may shrink dramatically after its first wash, or the entire silhouette may twist and warp out of shape.
Fabrics inevitably develop tension, slight twists, and distortions during weaving, bolt winding, and storage. Furthermore, natural fibers will always shrink to some degree when exposed to water. To ensure your creations maintain their intended dimensions and retain their beauty over time, two steps are essential: mizutooshi (water soaking or pre-washing) and jinaoshi (grain straightening).
While these steps might feel tedious when you are eager to start stitching, this upfront preparation forms the true foundation of your work. Never cut corners here.
Mizutooshi involves submerging the fabric in water beforehand to allow the fibers to settle and shrink. This process is primarily meant for natural fibers like cotton and linen.
First, fill a large basin or clean washbasin with plenty of room-temperature water, fold your fabric gently, and submerge it completely. As a general rule, soak cotton for around one hour, and linen—which shrinks more significantly—for one to two hours. Ensure the water penetrates every fold evenly.
Once soaked, avoid wringing the fabric out tightly with a twisting motion. Instead, gently press the excess water out with your hands. Rough wringing causes deep, stubborn wrinkles that make the subsequent straightening step far more difficult. A great alternative is sandwiching the folded fabric inside a dry bath towel and gently pressing down to absorb the moisture.
Hang the fabric in the shade away from direct sunlight. To prevent the grain from stretching unevenly, drape it straight over a drying rack or clothes pole. Once it dries to a slightly damp state, proceed immediately to pressing.
When the fabric is semi-dry and retains just a hint of dampness, perform jinaoshi using your iron. This process aligns the warp (vertical) and weft (horizontal) threads so they cross each other at clean, perfect right angles.
Examine the fabric by checking whether the weft threads run completely perpendicular to the woven edge, or selvedge (called mimi in Japanese). If the weave appears distorted or skewed diagonally, hold the fabric diagonally along the bias and gently tug in the opposite direction to correct the skew.
When ironing, do not glide or drag the iron back and forth across the yardage, as dragging can pull and stretch the grain. Instead, apply the iron with a downward, pressing motion. Working section by section, align the grain horizontally and vertically while letting the heat and remaining moisture smooth out the creases and dry the cloth.
Synthetic fibers like polyester do not require water soaking, but you should always press them to remove fold lines and creases before cutting, always making sure to set your iron to the appropriate heat level for the material.
In sewing, cutting precision directly determines your final outcome. Even if you can sew a perfectly straight line on a machine, your finished piece will be twisted if the fabric parts were cut even 1 or 2 millimeters off the intended grain.
A common beginner pitfall is laying pattern pieces casually across the cloth without honoring the grainline. Mastering precise cutting habits ensures that every pattern piece comes together seamlessly.
Sewing patterns feature a grainline marking, usually shown as a long line with arrows. This line must run strictly parallel to the fabric's selvedge (the direction of the warp threads).
Never rely on a quick visual guess. Always use a ruler to measure the distance from the selvedge to the grainline arrow at both the top and bottom of the line, adjusting until both measurements are identical down to the millimeter.
If the grainline is skewed, finished bags or pouches will twist unnaturally, and the hems of garments will flare or flare unevenly. Never tilt a pattern piece off-grain simply to squeeze it into a remnant of fabric.
Securing patterns solely with thin sewing pins often causes the fabric layers to lift and shift slightly when scissors pass through.
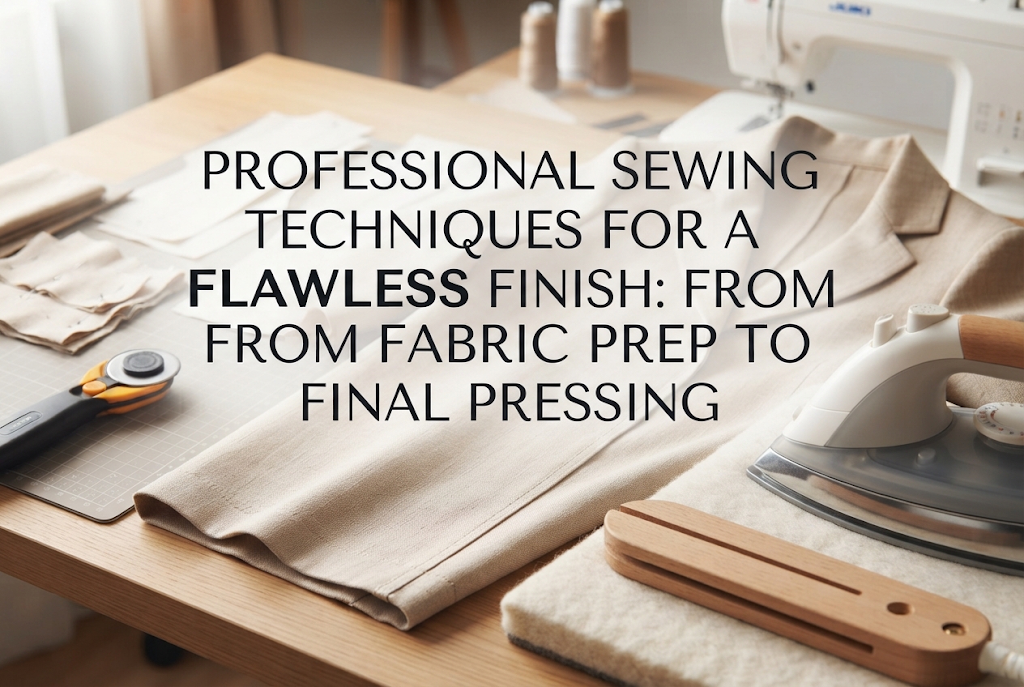
My preferred approach is combining pattern weights with a rotary cutter on a self-healing cutting mat. Lay the pattern flat over the fabric, place heavy weights along the edges, and roll the rotary cutter smoothly along the pattern lines. This keeps the fabric flat against the table, producing crisp straight lines and smooth curves with zero shifting.
If you prefer dressmaking shears, keep the bottom blade resting flat against the table at all times. Sliding the lower blade across the surface rather than lifting the fabric minimizes shifting significantly.
Don't forget to mark your notches (alignment marks) accurately. Making tiny 3 mm snips into the seam allowance with scissor tips, or marking them precisely with tailor's chalk, will make piecing the parts together foolproof.
If your stitches look uneven, pucker, or bunch into a tangled mess on the underside, the issue is almost always a mismatch between your needle, thread, and fabric, or an unbalanced thread tension.
A sewing machine cannot handle every type of textile using factory-default settings. Adjusting your setup for each fabric is an absolute prerequisite for achieving clean, professional stitches.
Using a needle that is too thick for lightweight fabric punches noticeable holes and makes stitches look coarse. Conversely, using a needle that is too fine on heavy fabric leads to skipped stitches or broken needles. Always match your needle and thread to the fabric weight:
For standard medium-weight cotton, a size 11 needle with 60-weight thread is standard. Needle tips wear down imperceptibly through friction; make it a habit to insert a fresh needle after finishing each major project. A sharp needle transforms stitch appearance instantly.
A balanced stitch occurs when the upper and bobbin threads interlock precisely in the middle of the fabric layers, looking equally neat from both the right and wrong sides.
Before stitching your actual project, always test sew on scraps leftover from cutting. Layer the scrap pieces to match the exact thickness of your work (including interfacing if used).
If the upper thread shows small loops or dots on the underside, the upper tension is too loose—turn the dial to increase tension. If the bobbin thread is pulled through to the right side, the upper tension is too tight—lower the dial setting. Taking the time to dial in this balance is the only way to achieve flawless stitching.
Seasoned crafters and professional garment makers dedicate a significant portion of their work time to ironing. In the sewing world, it is often said that 70 percent of a finished piece's quality is determined by the iron.
Beginners often wait until an entire project is assembled before giving it a final press. By then, it is too late to fix bulky seams. The golden rule is: press immediately after stitching every single seam.
Once you sew a seam, briefly press it flat as stitched before opening the allowances. This settles the thread into the fabric fibers, blending the stitch line naturally into the cloth.
Next, open the seam allowances. Depending on your instructions, use either wari-iron (pressing seams open to both sides) or taoshi-iron (pressing both allowances to one side).
Pressing seams open distributes the fabric bulk evenly, allowing corners, borders, and joined panels to sit flat and look refined. Rather than forcing seams open with your fingers while sewing, use the tip of your iron to press crisp creases into the seam allowances before moving to the next assembly step.
This simple habit instantly eliminates clumsiness and produces sharp, clean silhouettes.
Turning flat fabric into a structured, three-dimensional item requires more than just a standard flat ironing board. Professional tools make a dramatic difference:
For curved sections—such as the bottom contours of totes, sleeve caps, or shoulder lines—a manju (tailor's ham or pressing ball) is indispensable. Placing curved areas over this firm, rounded cushion allows you to press curves without crushing their natural three-dimensional shape.
An ironing ruler (heat-resistant measuring gauge) is equally invaluable. By placing this ruler directly along fabric edges, you can fold hem lines and seam allowances over the heat-proof guide and press instantly, creating exact 1 cm or 2 cm folds without measuring deviations.
How you treat raw edges and topstitching directly influences both the longevity and perceived value of a handmade creation. True craftsmanship reveals itself when the inside of an item is as tidy as the outside.
Frayed raw edges and uneven topstitching immediately convey an amateur feel. Here is how to keep details clean.
Frayed edges shorten an item's usable life and look untidy. Choose the best finishing method for your project structure:
When using a standard sewing machine's zigzag stitch, stitch slightly inward from the raw cut edge, then carefully trim away the excess seam allowance close to the stitches for a neat edge. If you own an overlocker (serger), ensure the looper tensions are balanced for an even, smooth finish.
For unlined bags or single-layer garments, techniques like French seams (fukuro-nui) or flat-felled seams (orifuse-nui) are fantastic choices. Because these methods completely enclose raw edges within the seam itself, no loose threads escape, creating an exceptionally clean, premium interior.
In Japanese craft terminology, topstitching placed very close to an edge—typically 1.5 mm to 2 mm away—is known as koba stitch. Consistent, straight edge-stitching provides instant visual polish and structural definition to pocket rims, collar bands, and bag openings.
The secret to neat edge-stitching is not watching where the needle punctures the cloth, but rather keeping your fabric edge aligned against a reliable reference point, such as the edge of the presser foot or an attached guide.
Using specialized presser feet, such as a compensating foot or an edge-stitching guide foot, makes maintaining a uniform distance effortless. If your machine allows horizontal needle position adjustments, shift your needle slightly to find the most natural alignment point along the edge of your foot.
Do the corners on your pouches or placemats end up rounded or bulky? This typically happens when excess seam allowance gets packed tightly inside the corner point.
To fix this, stitch the corner, then clip the seam allowance diagonally across the point before turning the item right-side out. Leave roughly 2 mm of fabric past the stitch line so the corner stays intact without fraying. This drastically reduces bulk.
After turning the piece right-side out, use an awl or point turner to gently coax the corner outward from the inside. Be careful not to pierce or snag threads; lift the corner out thread by thread until a crisp right angle emerges. Finally, press the corner firmly with an iron to lock that clean shape in place.
Once all parts are assembled, you reach the final polishing stage. Taking care of microscopic details here will elevate the finished product remarkably.
Clip all starting and ending thread tails close to the fabric surface. Remove stray thread clippings not just from the outside, but thoroughly from the inside of linings and pockets as well.
For backstitched thread ends that will endure heavy stress, applying a tiny dab of fabric fray sealant provides extra security against unravelling over long-term use. When hand-sewing buttons or metal snaps, backing them with small reinforcing fabric squares or small anchor buttons prevents fabric strain and tearing.
A piece free of loose threads feels instantly clean, refined, and professional in hand.
Once assembly is complete, give the entire piece a thorough final press. This step breathes true life into your creation.
Apply generous steam across the entire piece, relaxing the seams and restoring the fabric's crisp structure. For cottons and linens, use a hot setting and apply steady, downward pressure with your body weight.
Immediately after ironing, the fabric fibers remain soft, warm, and laden with moisture. Touching or folding the piece right away introduces unwanted wrinkles and distorts the shape. Leave your piece undisturbed on a flat surface until it has cooled completely and all moisture has evaporated.
As the cloth cools, the fibers set into their final shape, giving your piece that crisp, structured finish reminiscent of high-end boutique goods.
Achieving a professional standard in sewing does not require innate talent or commercial-grade machinery. It simply requires meticulous adherence to basic craftsmanship across each phase of the project:
By giving each of these foundational steps deliberate attention, your sewn creations will transform, taking on a polished, shop-worthy elegance.
While these intermediate steps may feel numerous at first, watching your fabric transform into a crisp, immaculate piece at every stage is one of the greatest pleasures of sewing! Try bringing these techniques into your next sewing session.
If you found these tips helpful, sharing this guide with fellow craft enthusiasts is always deeply appreciated! Until next time, happy crafting from Yassy!



For example, if you are looking for articles about mizuhiki, try searching for "mizuhiki"; if you are interested in tools, try keywords like "nippers" or "pliers."
