A Crafter’s Guide to Printmaking: Understanding the 4 Core Methods & How to Get Started
yassy
Crafters!

Hello, everyone! This is Yassy from Crafters! (・∀・)
There is nothing quite like the magical moment when you lift a sheet of paper from an inked block to reveal an intricate, stunning image. Relief printmaking offers a uniquely rewarding tactile experience. However, when trying it yourself, many crafters run into common frustrations: "My lines didn't transfer sharply," "Unwanted stray ink smudged the background," or "I accidentally gouged away an essential line!"
In printmaking, more than 80% of your final print's quality is determined before you even touch an ink roller—it all comes down to the quality of the block (the printing plate or han) itself. When your block is carved cleanly and accurately, your chances of running into printing mistakes decrease dramatically.
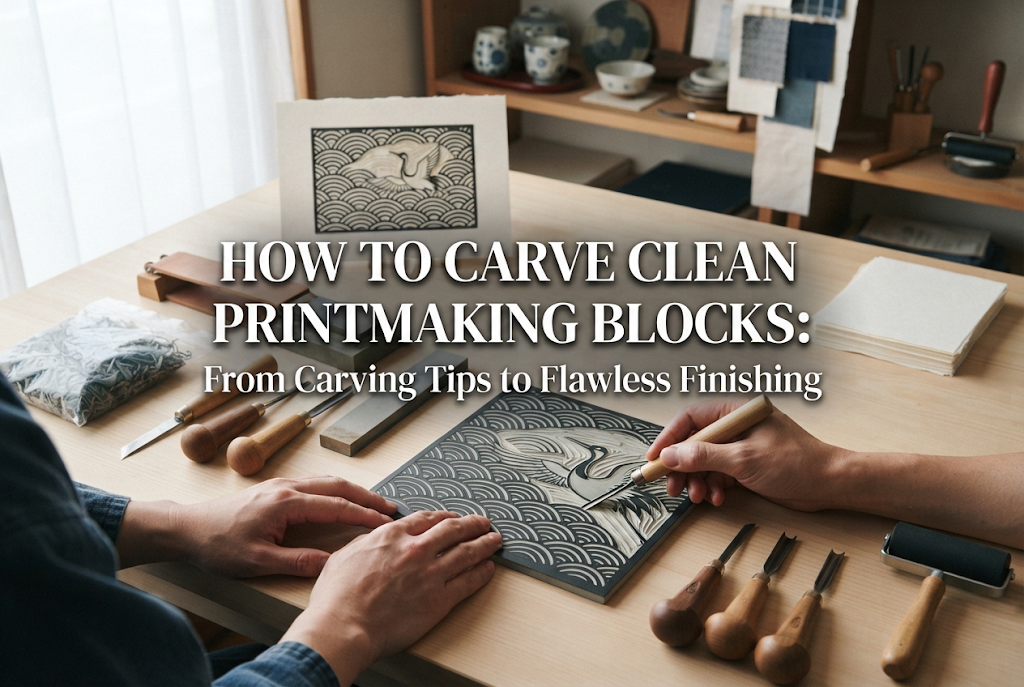
In this guide, I will walk you through how to create clean, beautiful printing blocks, shared from my own studio practice in Japan. Whether you are a beginner or looking to refine your technique, we will cover everything from choosing the right block material and transferring reversed designs, to selecting the right carving gouges, clearing background noise, and performing final finishing steps.
When starting a printing block, beginners often focus entirely on the physical act of gouging into the material. However, thorough preparation before the blade touches the block is the true secret to success.
Carving is essentially a tracing process: your blades are faithfully following the blueprint laid down by your design. If your sketch is distorted or the transfer is faint, no amount of careful carving will yield a crisp print.
Take your time with the prep work and carve patiently without rushing. Keeping this foundational mindset will instantly elevate the quality of your finished relief prints.
The first step in carving a clean block is selecting a material that suits your design. Different materials offer distinct carving sensations and support different line weights.
Here is an overview of the three most popular materials for relief printmaking:
For traditional Japanese woodblock printmaking (mokuhanga), Shina plywood (Japanese basswood/linden plywood) is the most popular and beginner-friendly choice. It has a smooth surface with a gentle, uniform grain that won't snag your carving blades easily, and it is relatively affordable.
If you want to carve crisp, ultra-fine lines, Magnolia (known as Ho-no-ki in Japan) is an exceptional wood. Japanese magnolia is dense and fine-grained, allowing you to cut razor-sharp details without the wood chipping or fraying.
Rubber blocks offer the softest carving experience, letting your gouges glide effortlessly without much hand pressure. Because rubber has no wood grain, blades move uniformly in any direction.
While perfect for small stamps, quick motifs, and beginners, rubber can be too yielding for microscopically detailed linework or extensive print runs.
Linoleum is composed of materials like cork dust and linseed oil. It has no grain and offers a firmer resistance than soft rubber, giving you superb control without blade slippage.
It is strongly recommended for crafters who want to carve distinct outlines, modern graphic designs, and crisp curves or straight lines.
The single most common mistake beginners make is drawing their design directly onto the block without reversing it. Because relief prints produce a mirror image on paper, your block must always bear a reverse (mirror-image) design.
Here is a reliable step-by-step method to transfer your artwork accurately onto your block:
Place a sheet of tracing paper over your original artwork. Using a soft pencil (2B to 4B) or a mechanical pencil, trace every line firmly and carefully. Make sure your line weights and contours are consistent.
Flip the tracing paper over so the graphite side faces down onto your block. This flipped orientation gives you the exact mirror image needed for carving. Secure the corners firmly with masking tape or washi tape so it does not shift.
Using a hard burnisher—such as a Japanese baren (a traditional disc pad used in printmaking), an acupressure stick, or even the rounded back of a ballpoint pen—rub evenly across the back of the tracing paper. The pressure will cleanly transfer the pencil graphite directly onto the surface of the block.
Pencil graphite smudges and rubs off easily under your hands as you carve. Losing your reference lines midway through carving is disastrous!
Once transferred, immediately trace over all the essential lines using an extra-fine permanent marker (a practice related to traditional Japanese sumi-uchi, or fixing lines with ink). I also recommend hatching or shading the negative spaces you intend to carve away. This prevents any confusion about which areas to keep and which to cut.
To produce clean prints, you must understand what each gouge excels at and switch tools appropriately. Trying to carve an entire block with a single tool leads to rough, uneven edges.
Master the four primary carving tools (chokokuto):
In my own workflow, I always begin by outlining critical contours with either a hangito or a fine V-gouge. Then, I scoop out the surrounding negative space with U-gouges, and finish by leveling the background with a flat chisel. Sticking to this sequence drastically reduces the risk of accidentally tearing through your main lines.
Woodblock and relief carving involves very sharp blades. Slipping can lead to painful cuts, especially when you are tense. Keep these fundamental safety habits strictly in mind:
When you feel safe, your hands relax, giving you better control and cleaner cuts.
Here are practical carving techniques that will noticeably boost the quality of your finished prints:
If you hold the gouge too steeply, the tip digs straight down, getting stuck or tearing the wood grain. If held too flat, the blade skips across the surface, resulting in cuts that are too shallow to hold back ink. Keep the blade tilted at roughly 30 to 45 degrees relative to the block. Lock your wrist and elbow, pushing smoothly using your upper body rather than just finger strength, to produce even, uniform grooves.
When carving along fine relief lines that you want to preserve (the raised areas), do not undercut them vertically. Vertical walls leave the base of the line thin and weak, making it prone to snapping under the pressure of a printing press or hand baren.
Instead, carve outward at a slight angle, giving your raised line a trapezoidal cross-section (wide at the base, slightly narrower at the top, like the silhouette of Mount Fuji). This flared base adds tremendous structural support, ensuring your fine lines survive repeated printings without breaking.
When cutting circles or tight curves, twisting your wrist while pushing the blade often causes the gouge to bind, resulting in jagged, shaky lines. Keep your carving hand steady and forward-facing, and use your other hand to slowly rotate the block itself into the blade. You will be amazed at how smooth your curves become!
When relief prints are pulled, unwanted ink marks often appear in open white areas. We call these stray marks "background noise" or ink chatter. Removing them is essential for clean prints.
In wide, open areas without any design, shallow cuts allow paper to sag during printing and touch the inked bottom. Use a large U-gouge to carve these broad empty spaces deeper than the areas close to your linework—aiming for a depth of roughly 1.5 mm to 2 mm (about 1/16 inch).
Carving broad spaces with a U-gouge leaves peaked ridges between parallel strokes. Ink rollers easily deposit ink onto these high peaks, transferring dirty streaks onto your paper. Skim over these raised ridges using a flat chisel (hirato) to level them flat.
Sharp, 90-degree outer corners and edges of a wood block readily catch ink from the roller, creating an accidental framed border on your paper. Bevel or chamfer all outer borders of your block slightly using a flat chisel. This simple touch prevents perimeter smudges and makes paper positioning easier.
Here are common relief carving dilemmas and practical solutions:
Cause: You are carving against the natural wood grain (known as sakamoku in Japanese woodworking).
Fix: Wood grain has a smooth direction (with the grain) and a resistant direction (against the grain). If the blade begins to snag or pull up splinters, immediately stop, turn the block 180 degrees, and carve from the opposite direction.
Cause: Rushing with a blade that was too wide, or blade slippage.
Fix: For wood or linoleum, keep the sheared piece, glue it back onto the block using wood glue, allow it to dry completely, and recarve it carefully. For soft rubber blocks, repairing with glue is difficult, so it is best to protect delicate areas ahead of time by scoring protective boundary cuts with a hangito.
Cause: Fine wood fibers or rubber shavings are trapped inside the cut channels.
Fix: Use an old, dry toothbrush or a stiff drafting brush to thoroughly sweep out the grooves. A can of compressed air is also great for blasting out lingering debris.
Even after putting down your carving tools, do not jump straight into rolling your final ink. Here are the finishing steps I always carry out before printing an edition:
Freshly carved blocks often have microscopic burrs and rough wood fibers along cut edges. Wrap a sheet of fine sandpaper (400 to 600 grit) around a small sanding block and gently glide it across the relief surface with very light pressure. This buffs away burrs and helps ink lay down uniformly.
Wipe the block clean using a slightly damp cloth or damp paper towel to eliminate sanding dust, eraser crumbs, and remaining surface marker ink. Allow the recessed cuts to dry thoroughly.
Before pulling prints on expensive washi or fine art paper, always run a test print (a trial proof) on scrap paper or standard printer paper. Printing in solid black immediately highlights background ridges that need deeper clearance, broken lines, or shallow grooves. Bring your carving tools back to the block for quick fine-tuning until the proof is immaculate.
Let's review the essential steps for carving crisp printmaking blocks:
While these steps might seem like a lot of care, each deliberate action brings your relief prints closer to clean, professional results. There is immense joy in peeling away paper to discover a crisp, expressive image pulled from a block you carved with your own hands. Take your time, enjoy the rhythmic process, and have fun carving!
If you found this guide helpful, please feel free to share it with your fellow makers. See you in the next craft article! This was Yassy from Crafters!




For example, if you are looking for articles about mizuhiki, try searching for "mizuhiki"; if you are interested in tools, try keywords like "nippers" or "pliers."
