Essential Shot List for Japanese Handmade Product Photography: angles and shot counts that boost sales
yassy
Crafters!

Hello, crafters! This is Yassy from Crafters! (・∀・)
When posting your handmade creations to online shops or social media, are you truly satisfied with the backgrounds in your photos? Have you ever felt that, despite the piece itself being flawlessly finished, shooting it over wood flooring, on the living room table, or on a wrinkled piece of cloth accidentally gave away too much ordinary everyday household clutter?
No matter how wonderful a handmade piece is, having that touch of daily home life sneak into the frame immediately detracts from its perceived value. When prospective buyers look at handmade items on their screens, they aren't just examining the individual piece—they are viewing the entire world and atmosphere in which that piece exists.
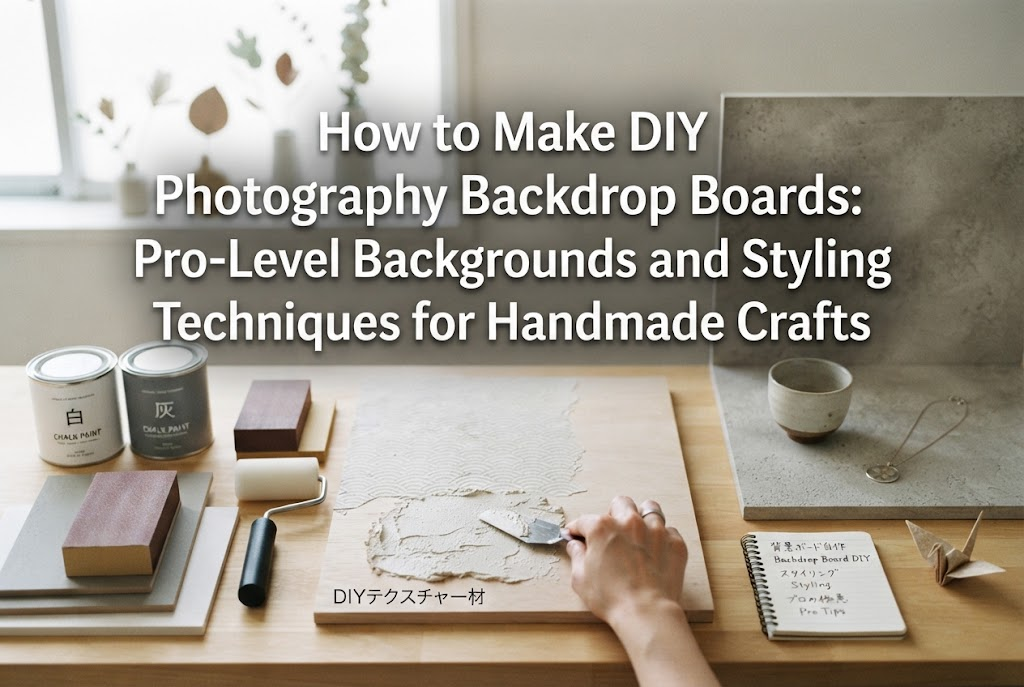
Your greatest asset for elevating your work and making it look professionally crafted is a handmade photography backdrop board. Making your own might sound intimidating, but it requires no specialized heavy tools or complex techniques. Once you understand how to choose your materials and master a few painting tricks, anyone can easily produce chic, high-end backgrounds.
Because I personally love making, looking at, and buying handmade crafts, I know with absolute certainty that the right background can multiply the appeal of your work many times over. In this guide, I will walk you thoroughly through everything—from crafting backdrop boards that even total beginners cannot mess up, to optimal styling techniques tailored to specific craft genres.
While you can easily buy commercial vinyl photo mats or printed sheets, I wholeheartedly recommend making your own backdrop boards. Handcrafted boards offer distinct, powerful advantages that mass-produced products simply cannot match.
Many commercial printed sheets and vinyl photo backdrops reflect light with a harsh, shiny glare. When lighting or natural sunlight bounces off these surfaces, it creates unnatural white blowouts in your photos, washing out the fine details and textures of your craft.
With a DIY backdrop board, you use matte paint, authentic wood, or textured compounds, allowing you to suppress light reflections completely. A surface that diffuses light naturally is an absolute prerequisite for showcasing your creations in a soft, refined manner.
No matter how high-resolution a printed backdrop sheet may be, it remains completely flat. The moment your camera lens brings even a slight focus to the background, that artificial, flat print quality becomes obvious.
In contrast, a board crafted with plaster-style paint, faux-mortar texture, or genuine wood boasts genuine three-dimensional ridges and indentations. When light strikes the surface at an angle, those micro-shadows give depth, realism, and a high-end feel to the entire composition.
Commercial photo backgrounds are designed for generic use, making it difficult to find one that aligns seamlessly with your specific brand image. When you build your own, you have complete creative freedom over color tones, distressed effects, grain coarseness, and wood textures to suit your pieces perfectly.
Using a signature background consistently across your product gallery creates visual cohesion, helping viewers instantly recognize your brand at a glance.
Here is a breakdown of the core materials and tools you will need. Understanding the role of each item will help you select the right supplies without unnecessary spending.
The golden rule for choosing your foundation board is balancing lightness, resistance to warping, and ease of handling. A size between 50 cm × 50 cm and 60 cm × 60 cm is generally the most manageable to work with and store.
The paint determines the final visual impression. To eliminate light reflection, always select materials with a flat, matte finish.
Now let's walk through the actual building process. Below, we cover two of the most popular, versatile styles in craft photography: the Plaster/Mortar-Style Textured Board and the Antique Wood Grain Board.
This versatile background complements virtually any craft genre, providing a bright, clean, and elegant ambiance.
Lightly sand the surface of your MDF or plywood board with 240-grit sandpaper to smooth out any rough patches. Leaving sawdust on the surface will cause paint to peel later, so wipe it clean with a damp cloth and let it dry thoroughly.
To help prevent the board from warping, apply masking tape along the back edges or lightly apply a thin coat of base paint to the reverse side as well.
Using a brush, apply an even, solid base coat of water-based paint in a shade slightly darker than your intended final color (such as a medium gray or warm beige). Once dry, this undercoat will provide subtle depth and shadow beneath the textured top layer. Allow it to dry completely.
Mix white or ivory water-based paint with baking soda at a ratio of roughly 7 parts paint to 3 parts baking soda. This will create a thick, creamy paste. If you are using commercial mortar-effect paint, you can use it straight from the container.
Using a putty knife or a sponge, apply the paste across the board in random motions. Rather than spreading it uniformly, deliberately leave subtle knife marks, ridges, and varied thicknesses. These irregularities create soft, beautiful shadows under photo lighting.
Once the textured layer dries, take a sponge and dip it lightly into a slightly adjusted shade (for example, pure white tinted with a tiny drop of gray). Gently dab this onto only the raised ridges of the texture.
With darker tones resting in the depressions and brighter highlights on the raised areas, the visual dimension increases dramatically. Once fully dry, lightly buff the surface with fine sandpaper to soften any sharp burrs, and your board is complete.
This natural wooden background is an exceptional match for sewn fabric items, leathercraft, and earthy jewelry.
Line up 4 to 5 narrow boards of cedar (sugi) or pine (about 9 cm to 12 cm wide and roughly 1 cm thick) side by side. Instead of painting them right away, use the edge of a screwdriver, a wire brush, or a hammer to introduce random dents, scratches, and texture across the wood. This faux-wear dramatically enhances the vintage character.
Dampen a cloth or sponge with water-based wood stain (in dark brown or walnut tones) and work it thoroughly along the direction of the grain. Wiping off the excess stain with a dry cloth immediately after application will make the grain pop.
The stain settles more heavily into the distressed nooks and scratches, instantly delivering a rich, well-worn antique patina.
After the stain has dried completely, apply a layer of matte white or smoky blue paint over the top. The golden rule here is to use very little paint on your brush so the strokes appear dry and weathered.
Dip your brush into the paint, then wipe most of it off on scrap newspaper until the bristles feel relatively dry. Lightly sweep the brush along the grain in quick, gentle strokes. Once the underlying dark stain peeks through the weathered paint strokes, your pro-level shabby wooden backdrop is finished.
Crafting multiple backdrop boards often leads to storage issues. The best solution to this problem is making a reversible, double-sided board.
By using a single sheet of MDF (7 mm or thicker recommended), you can create two completely different atmospheres on opposite sides:
Combining these contrasting aesthetics onto one board cuts required storage space in half while allowing you to handle almost any photo concept instantly. When working on both sides, make sure one side is completely dry before flipping the board, and apply balanced coats to both faces so the surface tension cancels out, preventing warping.
Once your backdrop boards are ready, how you style your scene makes all the difference. Here are styling approaches matched to specific craft genres.
For accessories where delicate sparkle and clarity are central, the background must remain subtle and non-intrusive.
When you want to convey the warmth and tactile softness of textiles, avoid overly cold or rigid backdrops.
To convey the substantial weight, premium finish, and aging potential of leather goods, aim for contrast and understated sophistication.
For three-dimensional items with notable height, setting up two boards in an L-shape—one acting as the floor and the other as the back wall—is essential.
Here are frequent stumbling blocks crafters encounter when making and using backdrop boards, along with direct solutions.
Cause: The paint used contained satin or gloss elements, or the protective topcoat applied was a gloss finish.
Quick Fix: Finish your board with an even spray or light coat of water-based ultra-matte varnish or flat clear spray. This seals the micro-textures while cutting light glare completely.
Cause: Over-enthusiasm during texturing resulting in excessive color contrasts, overly aggressive ridges, or overly busy grain patterns.
Quick Fix: Remember that the backdrop is a supporting actor meant to highlight your craft. If your board feels too dominant, dilute white paint with water, load a little onto a sponge, and lightly wash it across the whole surface (a whitewash technique). This tones down heavy patterns into a soft, gentle wash.
Cause: Applying heavy water-based paint to only one side causes the board to bow as the paint shrinks during drying.
Quick Fix: Start with a thicker board, such as MDF of at least 7 mm thickness. If using thinner plywood, always coat or moisten the reverse side with paint or water when working on the front to balance the pull on both sides.
Cause: Indoor room lighting (fluorescent or warm incandescent bulbs) interacting with the backdrop hue, causing color cast issues in the camera sensor.
Quick Fix: Use neutral gray (white tinted with a hint of gray) as your foundational reference color. A slightly gray-balanced board stabilizes camera auto-white balance, ensuring your craft's authentic colors are captured accurately.
If you prefer to start simple before investing in larger supplies, here is a comparison chart across different budget tiers:
Budget-Friendly Backdrop PlansEntry-Level Plan (Under 500 yen / minimal spend)・Base: 100-yen foam core board (A3 to A2 size)・Surface: Peel-and-stick makeover contact sheets or removable wallpaper・Features: Super lightweight and quick to make (under 5 minutes). Best for beginners setting up their first photo space.Authentic Texture Standard Plan (~1,000 to 2,000 yen) ★ Highly Recommended!・Base: MDF board (approx. 50 cm × 50 cm)・Surface: Water-based matte paint + baking soda (homemade plaster texture)・Features: Professional non-reflective texture. Can be made double-sided, offering the best cost-to-performance ratio.Vintage Wood Plan (~3,000 yen and up)・Base: Joined natural cedar (sugi) or pine planks・Surface: Water-based stain + dry-brushed matte distressing・Features: Authentic wooden weight and aged character. Ideal for brands wanting a distinctive rustic identity.
My absolute recommendation is the 1,000 to 2,000 yen Standard Plan. Combining an MDF board with baking-soda-infused matte paint delivers exceptional value, turning simple staging into a gallery-ready presentation.
Proper maintenance ensures your handcrafted boards last for years in prime condition.
Unsealed paint surfaces easily absorb finger oils and scuffs from moving items. Always finish your boards with two thin coats of water-based matte polyurethane varnish.
Once sealed with a matte clear coat, any dust or minor smudges can simply be wiped away with a well-wrung, damp cloth.
Never leave your boards leaning diagonally against a wall in direct sunlight near a window. UV light fades paint colors, and resting boards at an angle causes them to sag and warp under their own weight.
Store them either completely flat or standing strictly upright in a well-ventilated area away from direct sunlight. Storing them inside large non-woven fabric sleeves or slim closet crevices keeps dust away safely.
A photo backdrop is far more than a simple mat to rest items on. It is the stage setting that completes the creative vision behind your work, conveying its charm directly to potential buyers.
That non-reflective matte finish and authentic three-dimensional depth simply cannot be replicated by printed vinyl sheets—it comes only from a handcrafted backdrop board.
Following these steps will transform your craft photography today. When your photos improve, your social media engagement and shop conversions will follow.
Pick up your supplies and try building your ideal photo backdrop! I am rooting for your handmade creations to shine and reach craft lovers around the world.
If you found this guide helpful, please share it with your fellow makers on social media! See you in the next post—this was Yassy from Crafters!


For example, if you are looking for articles about mizuhiki, try searching for "mizuhiki"; if you are interested in tools, try keywords like "nippers" or "pliers."
