The Ultimate UV Resin Curing Equation: Master Thickness and Light for Perfect Japanese Resin Crafts
yassy
Crafters!

Hello everyone, I'm Yassy from Crafters! (・∀・)
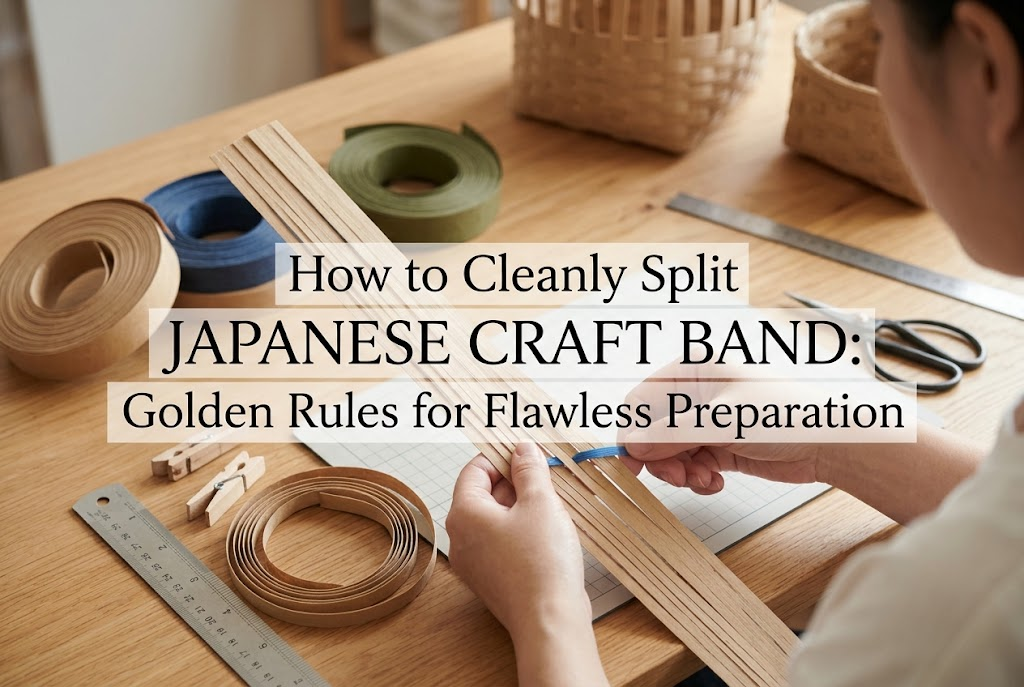
When making bags and baskets using Japanese craft band (also known as paper band or kami band), there is one crucial step that dramatically impacts the overall quality of your finished piece. That is splitting the craft band to your desired width.
If you are a beginner and notice that your weaving looks uneven or that the edges of your work look ragged and messy, about 80% of the time the issue isn't your weaving technique at all. It is because the craft band was not split cleanly.
I personally love creating my own projects with craft band, admiring wonderful handcrafted items, and collecting stylish bands from craft stores. That is why I can say this with absolute confidence: mastering the splitting technique is the foundation of working with craft band and the single biggest factor in making your work look professional.
If you are thinking, "Can't I just cut it with scissors?" or "Sliding a utility knife through should make it clean, right?"—please set those thoughts aside for a moment. With the right knowledge and the right tools, anyone can effortlessly create straight, smooth, and beautiful strips in seconds without using brute force.
In this guide, I will thoroughly explain the absolute rules for splitting craft band cleanly without failing! From the causes of common beginner mistakes to the specific techniques I use myself, I will share everything you need to know. Make sure to read until the end and give these tips a try!
To split craft band cleanly, you first need to understand how it is constructed. If you don't understand its structure, you run the risk of applying unnecessary force, damaging the band, or tearing it diagonally halfway through.
Craft band is made by placing thin paper cords (called koyori in Japan) side by side and bonding them together into a single flat strip using a water-soluble glue. The standard craft band available on the market typically consists of 12 paper cords joined together, known as a "12-strand width."
This means that in the small gaps between each cord, there is already a boundary line held together only by glue. If you apply force correctly along these boundary lines, there is no need to use sharp blades like scissors or utility knives to cut the paper fibers at all. The true secret to "splitting" is simply peeling apart the glue holding the cords together.
If you cut through the paper cords themselves, the cut paper fibers will fray and stick out, resulting in a jagged, uneven edge. However, if you apply force to push apart only the glue between the cords, the band separates cleanly without damaging the paper fibers.
When you try to split craft band using the tip of a blade, slight movements of your hand will cause the blade to bite into the paper cords, slicing up the paper fibers. This is the root cause of the rough, ruined edges that happen when people try to use utility knives.
Therefore, when splitting craft band, keep the mindset of "unjoining the glued seams" rather than "cutting." Once you understand this mechanism, you will see why no force is required at all.
Selecting the right tool is the most important factor in achieving a clean split. While there are various tools people try to use for splitting, the tool you choose changes both your working speed and the beauty of the cut edge entirely. Here is a comparison of typical tools and the absolute best answer I have found.
The most common mistake beginners make is trying to split craft band using a ruler and a utility knife. Let me state this clearly: please never use a utility knife to split craft band.
A utility knife blade is far too sharp. If it strays even slightly from the glue line between the paper cords, it will slice right into the cords diagonally. As a result, the band will thin out and snap midway, or tiny paper fuzz will form along the entire split edge. Furthermore, guiding a knife in a straight line over long lengths of band is extremely difficult and carries a high risk of injury.
The tool I recommend with absolute confidence for splitting craft band is PP strapping (polypropylene packing tape). PP strapping is the hard plastic strap, usually yellow or blue, used to secure cardboard boxes for shipping.
There are three reasons why PP strapping is unbeatable:
You can purchase PP strapping cheaply at home improvement stores or craft suppliers, or simply reuse a piece from a shipping box you received. While specialized splitting tools for craft band exist, nothing beats PP strapping in terms of performance and cost efficiency.
Unused plastic credit cards or reward cards can also be used as splitting tools. Pushing through with the corner of a card works to a degree, but because cards are thicker than PP strapping, they don't enter the narrow gaps as easily and require more effort. PP strapping, which can be cut to any convenient length, is far easier to handle.
Some crafters open a pair of scissors and pull the band through the blades, but I do not recommend this either. The metal blades create friction, which can scrape the surface of the paper and cause white marks or fraying. Preparing a piece of PP strapping is truly your first step toward making beautiful work.
Here is a step-by-step guide to the foolproof method using PP strapping. Doing this haphazardly with brute force will lead to mistakes, so follow these exact steps.
The first step requires the most concentration: making the starter cut. Using sharp scissors, make a clean cut about 1 to 2 cm (around 0.5 inches) deep from the end of the craft band.
The absolute rule here is to count the paper cords accurately and place your scissor blades precisely in the exact center of the gap. For example, if you want to split a 12-strand band into two 6-strand pieces, insert your scissors straight between the 6th and 7th cords.
If this starter cut is off by even a millimeter and cuts into a paper cord, the band will tear diagonally as you split it further. After making the cut, gently spread the strands with your fingers and visually inspect them to ensure no cords are damaged.
Once your starter cut is ready, insert a piece of PP strapping cut to about 5 to 7 cm (2 to 3 inches) in length. Push the edge of the PP strapping deep into the cut, right up to the point where the scissor cut stops.
At this moment, make sure the PP strapping is positioned at a perfect 90-degree angle relative to the craft band. If the angle is tilted, the splitting force will lean to one side, causing the tool to jump across to an adjacent groove and ruin the band.
Once set up, you are ready to split. Hold the split ends of the craft band firmly with your left hand, and hold the PP strapping with your right hand.
The key trick here is not to "pull the tool away," but rather to hold the tool stationary and pull the craft band backward toward yourself. Instead of trying to force the PP strapping forward, pinch the area holding the strap and smoothly draw the main craft band straight back. You will be amazed at how easily and smoothly it splits with minimal effort.
Maintain a steady, slow speed. If you try to yank it quickly, the strap may catch on a spot with strong glue and snap the paper. Gliding the strap through at a steady pace that produces a satisfying "swish" sound is the secret to a flawless result.
When crafting, you won't always split bands in half (6-strand widths). Depending on the design or specific parts of your basket, you may need to prepare 1-strand, 2-strand, 3-strand, or 5-strand widths. Here are techniques tailored to different strand counts.
Splitting a 12-strand band into two 6-strand pieces is the most common task and relatively easy. The middle gap between the 6th and 7th strand is easy to spot visually.
When splitting long strips over 1 meter (1 yard), lay the craft band out straight on a flat floor or large worktable. If the band is twisted while you split it, the angle of the PP strapping will shift and derail the cut. Always keep the band laid flat during the process.
A single paper cord (1-strand width) is used for miniature crafts, securing the rims of baskets, or delicate weaving. Extracting a 1-strand piece is one of the most challenging tasks in craft band work.
Because a single strand is very thin and delicate, applying any sideways pulling force will cause the thin strand to snap midway through splitting.
The golden rule for extracting a 1-strand piece is to pull the thick 11-strand side, never the thin 1-strand side. Keep the thin strand straight and stress-free while pulling the main thick body away. This prevents the single strand from snapping.
Also, make sure your initial scissor cut into the 1-strand gap is ultra-precise. Work under good lighting and use a clear light-colored band so you can see the gap clearly.
If you need 3-strand or 5-strand widths from a 12-strand band, do not try to split it into multiple pieces at once. The correct method is to split step-by-step.
For example, if you want four 3-strand strips (12 ÷ 3 = 4):
By following the process of "always splitting down the center," the tension remains balanced on both sides, reducing the risk of derailment to an absolute minimum. Splitting straight into 3 and 9 strands from the edge has a much higher failure rate than halving step-by-step.
No matter how careful you are, variations in band quality or hand pressure can sometimes lead to mistakes. Here are three common beginner mishaps and how to fix them perfectly.
This happens when the PP strapping jumps out of its channel into the neighboring cord, causing the band to narrow and snap. The cause is uneven pulling angles or pulling while the band is twisted.
[Solution & Recovery]If you notice the split going off-track, stop pulling immediately! Do not force it. Slide the PP strapping back to the point right before it strayed.
Using your scissors, make a tiny new starter snip in the correct gap just ahead of the mistake. Reinsert the PP strapping into the new snip and resume splitting carefully. You can reuse the damaged, narrowed portion by hiding it on the backside of your project or cutting it up for shorter structural pieces.
This occurs when fine paper fibers stick out along the split edge or when glue dries into a white powdery mess. It is caused by using a tool that is too thick or by tilting the PP strapping so it scrapes against the sides of the paper cords.
[Solution & Recovery]Never pull or pluck at frayed paper fibers with your fingers! Doing so will pull out longer fibers and thin out the band even further.
The correct fix is to apply a tiny amount of craft glue (wood glue) to your fingertip and smooth down the fuzzy edge. Slide your glued finger lightly along the frayed section. This glues the stray fibers back down, drying clear and restoring a smooth edge. Alternatively, hold sharp scissors parallel to the edge and carefully trim off only the protruding fibers.
If the split band curls into tight spirals like curling ribbon, it makes weaving difficult. This happens because the paper was stretched too hard while pulling the PP strapping through.
[Solution & Recovery]Weaving with tightly curled bands will warp your final basket. Lightly stroke the band in the opposite direction with your fingers, or pull the backside of the band gently over the smooth edge of a wooden or plastic table to flatten the curl.
If needed, lightly expose the band to steam from a damp warm towel, or wipe it quickly with a tightly wrung damp cloth and smooth it with your fingers. Relaxing the paper fibers this way helps it return to a flat, straight strip. Avoid over-wetting, as too much moisture will make the paper band overly soft; aim for just slightly moist to the touch.
Splitting craft band is part of the prep work before you start weaving. How quickly and stress-free you complete this prep work doubles the fun of crafting! Here are setup tips I use to dramatically boost efficiency.
While you can use a basic piece of PP strapping as-is, modifying it slightly will triple your work efficiency.
Making it is super easy:
Keep this custom PP strapping tool in your craft box so it is always ready to go. If the tip gets bent or worn out after repeated use, replace it with a fresh piece without hesitation. Using a crisp, firm piece of PP strapping is essential for clean results.
When making basket handles or base grids, you may need to split long bands exceeding 2 meters (over 2 yards). Trying to split a long band by yourself using only your hands often results in tangled, messy bands.
This is where clothespins or binder clips come to the rescue! Clip the starting ends (the two split tips) securely to the edge of your worktable.
With the starting point firmly anchored to the table, you can use both hands to pull the PP strapping and main band straight back. By simply leaning back slightly and pulling smoothly, you can split a 2-meter band flawlessly in just 5 seconds. Even in small workspaces, this method works smoothly by letting the split band coil neatly at your feet. It improves stability immensely, so be sure to try it whenever working with long pieces!
We've covered the essential rules and techniques for cleanly splitting Japanese craft band without failing. Let's quickly review the key takeaways:
By taking care with this preparation step, the alignment of your weave, the smoothness of the surface, and the neatness of your rims will improve dramatically. Working with clean, uniform strips makes the weaving process a pure joy for craft lovers.
Don't compromise on preparation—use this PP strapping technique to create high-quality craft band projects you can be proud of! I'm cheering for your creative journey!
If you enjoyed this guide, sharing it with your crafty friends on social media would mean the world to me and keep me inspired! See you in the next article! This was Yassy from Crafters!


For example, if you are looking for articles about mizuhiki, try searching for "mizuhiki"; if you are interested in tools, try keywords like "nippers" or "pliers."
