Why a Glass Slicker Mat Will Transform Your Crafting: Uses, Benefits, and Buyer’s Guide
yassy
Crafters!

Hello, everyone! It’s Yassy from Crafters! (・∀・)
Whenever I make my own handmade projects—or admire and buy lovely pieces created by other artisans—the very first thing I look at is the beauty of the fine details. Cleanly chamfered edges and perfectly smooth hole rims instantly elevate the perceived quality of any craft piece.
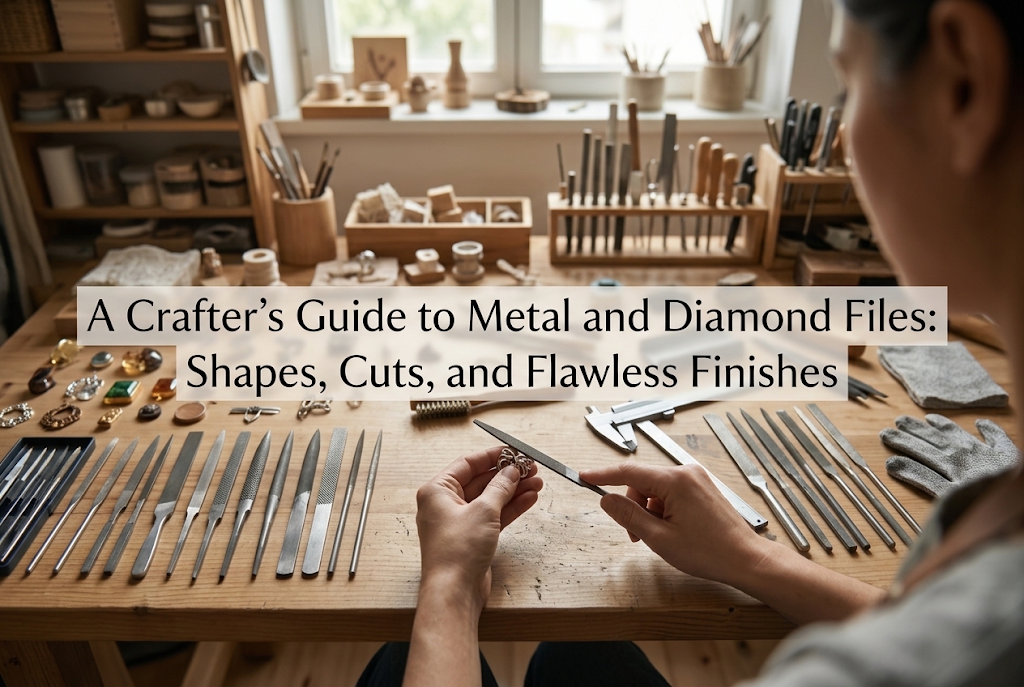
The ultimate partner behind that flawless finish is the metal file (often called a needle file or bar file in craft workshops).
You might think, "Aren't metal files heavy-duty tools just for cutting steel sheets?" or "I already have sandpaper, so why would I need a metal file?" That is actually a huge misconception!
From deburring resin casts and smoothing the edges of metal wire to softening the sharp corners of glass or natural stones, and sculpting wood or clay with precision, metal files are indispensable tools for handmade crafters. Once you experience the satisfaction of shaving away material strictly along a straight, accurate line without the tool bending or flexing like sandpaper, you won't want to craft without one.
In this guide, I will share everything based on my knowledge and experience: from the different file shapes (flat, round, half-round) to the crucial distinction between standard steel files and diamond files, what beginners should choose first, and the proper techniques to use them safely and effectively!
A metal file is an abrasive tool featuring tiny cutting teeth carved across the surface of a metal body. Because craft versions are typically slender and rod-shaped, they are widely known in the Japanese handmade scene as bou-yasuri (bar files) or precision needle files.
First, it is essential to understand the fundamental difference in roles between sandpaper (including sanding sponges) and metal files. Confusing these two will only slow down your crafting progress.
Because sandpaper has a flexible backing, it excels at smoothing broad surfaces and gently polishing rounded curves. However, it is not suited for preserving crisp, sharp corners or aggressively shaping a specific, pinpoint spot. Sandpaper flexes under pressure, rounding off edges you never intended to touch.
In contrast, a metal file has a solid metal core. No matter how much pressure you apply, it will never flex. This gives it unmatched accuracy when flattening a plane or shaping exact lines.
To put it simply: metal files are for shaping, carving, and removing material, while sandpaper is for refining and smoothing surfaces. Keeping this division of labor clear in your mind is the very first step to boosting your work's craftsmanship.
The surface of a traditional steel file contains countless teeth cut into the steel with a chisel. In Japanese metalwork and crafting, the density and fineness of these teeth is called me (the cut). Understanding these grades of coarseness is essential when choosing a file for handmade crafts.
In Japan, file coarseness is typically categorized into four main levels:
A common mistake in handmade crafting is trying to complete every step using just a single file. As a rule, always follow this order: shape with coarse or medium cuts, smooth out tool marks with fine cuts, and finish by polishing with sandpaper or polishing compound.
Additionally, pay attention to whether the file is single-cut (tanmoku) or double-cut (fukumoku):
When you buy a precision needle file set, you will find files in various cross-sectional shapes. Beginners often wonder which shape goes where. Each profile is engineered for specific areas of your workpiece.
The standard rectangular cross-section. The key feature of a flat file is its broad, straight surface. Reach for it when you want to flatten the bottom of a resin piece, remove straight flash lines cleanly, or true the edge of a small wooden block at a right angle. Nothing beats a flat file when it comes to creating true planar surfaces.
A slender rod with a circular cross-section, usually tapering toward the tip. Round files are dedicated tools for working inside holes and smoothing concave curves. For instance, after drilling a pilot hole in resin or clay to insert an eye pin or jump ring, you might find the hole slightly too tight. Inserting a round file and gently rotating it enlarges the diameter while keeping the opening round. It is an absolute must-have for jewelry making.
A file with a D-shaped cross-section—flat on one side and curved like a dome on the other. This is the all-around profile I recommend most to beginners. The flat face works just like a flat file, while the curved face smoothly fits broad interior curves and concave surfaces. Having one tool that covers two jobs saves space on your craft bench and handles diverse shapes easily.
Files with square or triangular cross-sections. These are designed specifically for interior corners and narrow grooves. If you need to crisp up the inside corners of a tiny box-shaped piece, or clear away dust and flashing trapped inside fine decorative grooves, the sharp corners and edges of these files slip right in where other tools cannot reach.
While browsing craft tools, you will frequently come across "diamond files." Are they just expensive luxury tools, or is there a functional difference? The reality is that their cutting mechanisms are completely different, and you should choose between them based on the material you are working with.
A traditional metal file is made by carving teeth into steel. It cuts like an array of tiny chisels. As a result, it works best on materials like wood, uncured or soft plastics, clay, and soft metals like brass and silver.
A diamond file, on the other hand, consists of a steel blank coated with fine industrial diamond particles bonded via electroplating. Instead of slicing with teeth, it grinds and abrades material away with ultra-hard particles.
The superpower of diamond files is their extraordinary hardness. They easily grind through dense, tough materials that would instantly dull or strip the teeth of a standard steel file.
Always use a diamond file rather than a standard metal file for materials such as:
For crafters working with hard resins, glass, or stone, a diamond file is an absolute essential. Using a standard steel file on these hard surfaces will flatten its cutting teeth in seconds, ruining the tool.
Another great advantage of diamond files is that they have no directional restriction. Standard steel files only cut when pushed forward, but diamond files grind whether you push, pull, or roll them. This forgiving nature makes them very approachable for beginners.
Here is how you can put metal and diamond files to work across common handmade craft materials.
When you unmold a resin cast from a silicone mold, you often find sharp protrusions (burrs or flash) around the rim, or a small bump where the resin was poured. Sanding this with sandpaper can accidentally scuff the surrounding clear, glossy surfaces.
Instead, use a fine-to-medium grit half-round or flat precision diamond file. Rest the file directly against the raised flashing and push forward a few times. Because you can work with pinpoint precision, the flashing is leveled without scratching adjacent areas. Wipe away the white dust, brush on a thin coat of UV coating resin, and cure: the file marks will disappear completely, restoring brilliant transparency.
If the tip of an earring post is sharp, the cut end of a piece of craft wire feels prickly, or a jump ring developed tiny distortions from opening and closing, smooth them with a fine-cut precision steel file or a flat diamond file.
A few gentle passes over the cut surface remove rough spots and make the metal smooth against the skin. This step is vital for jewelry safety—never compromise on components that make direct contact with skin, like earrings and necklaces.
After clay pieces have fully dried or baked, you might notice an unwanted bulge along a contour, or two parts that don't fit together neatly. Once cured, polymer and resin clays become quite rigid. Forcing a craft knife through them risks slipping and causing injury, or cracking the clay.
Instead, take a medium-cut half-round metal file and stroke along the curves of the clay. It will shave away material smoothly, allowing you to fine-tune the silhouette. Lightly filing mating surfaces flat before gluing also expands the contact area, dramatically improving bond strength.
Needle files are great for removing burrs inside wooden bead holes and chamfering (softening) the edges of miniature wooden parts. Wood has grain, so pushing a flat file along the direction of the grain produces a clean, tear-out-free edge. A thin square file also makes quick work of adjusting small recess slots when mounting miniature hardware to small wooden keepsake boxes.
Files are powerful and convenient, but mishandling them will quickly ruin your tools or spoil your hard work. Here are four critical pitfalls to watch out for.
The single most common beginner mistake is sawing a file back and forth like a wood saw. On a standard steel file, all the cutting teeth are angled toward the tip (forward). That means the file cuts only on the push stroke.
Dragging the file backward under pressure forces the back edges of the teeth against the material, breaking and dulling the cutting edges instantly—a condition crafters call "killing the teeth."
The golden rule for steel files is: apply pressure as you push forward, and lift or glide lightly as you pull back. (Note: Diamond files, having omnidirectional grit, can be used back and forth without this issue).
When filing softer materials like resin, clay, or wood, fine dust quickly packs into the gaps between the teeth. This is called clogging (mezumari in Japanese craft parlance).
Once clogged, the file cannot bite into the material no matter how hard you scrub. Pressing down harder will only cause the tool to slip, gouging your piece or cutting your fingers. Inspect the file surface regularly. When dust collects, brush it out along the teeth using an old toothbrush or a brass wire brush. Keeping the teeth clear is the secret to clean, effortless filing.
Filing materials with metal or diamond files generates ultra-fine airborne dust particles. Inhaling dust from resin, natural stone, or glass poses serious health risks.
Whenever filing, strictly observe these precautions:
Wet sanding (filing with water) is a technique used to suppress airborne dust and cool the friction zone. For diamond files and waterproof sandpaper, wet sanding is effective and highly recommended.
However, never use water with standard carbon steel metal files. If any moisture remains in the fine crevices of the teeth, rust forms rapidly, destroying the cutting edge. Keep steel files completely dry. For long-term storage, applying a micro-thin layer of rust-preventative oil is the professional way to preserve them.
If you are wondering what to pick up first at a craft shop or online, here is my clear verdict: you don't need single files from a budget shop, nor do you need massive, expensive industrial files.
Look for a set of 5 to 10 precision diamond needle files (around 14 to 18 cm, or 5.5 to 7 inches, in total length).
High-quality precision sets in this size range are readily available online for a reasonable price. Here is why this setup is ideal:
Having a precision diamond file set on hand eliminates almost all common filing frustrations in your craft studio. Once you decide to specialize deeper into metal wirework or fine woodworking, you can gradually add individual high-end steel files (such as fine or dead-smooth cuts) as needed.
Good tools respond to good care. Maintaining your files after each session takes only a moment:
If you notice a diamond file losing its bite over time, try rubbing it with a firm plastic stationery eraser. The eraser grabs and pulls out clogged resin residues and oils trapped between the diamond particles, restoring its sharp cutting action.
Let's review the key takeaways:
The underside of a pendant, the neatness of a seam, the smooth edge of a bezel—these tiny details reflect an artisan's care and dedication. A piece free of burrs with smoothly contoured edges immediately conveys high quality to whoever holds it.
Equip yourself with a trusty file, and take your handmade creations to the next level! Once you get the hang of it, filing is deeply satisfying and fun.
If you found this guide helpful, please share it with your fellow crafting friends! See you in the next article—this was Yassy from Crafters!




For example, if you are looking for articles about mizuhiki, try searching for "mizuhiki"; if you are interested in tools, try keywords like "nippers" or "pliers."
