How to Choose and Use a Hot Wire Cutter: Tips for Clean Foam Crafting
yassy
Crafters!

Hello, everyone! I'm Yassy from Crafters! (・∀・)
You have probably seen wax seals adorning envelopes, packaging, and journal pages. With their warm, tactile wax texture and vintage, luxurious designs, it is hard not to fall in love with them at first sight. Personally, I love collecting cute stamp heads and colorful waxes. Whenever I spot them in stationery stores, handmade craft shops, or online, I can't resist taking a closer look. As someone who loves both admiring and collecting these supplies—and who has spent countless hours crafting them—I am excited to share everything I have learned about creating flawless wax seals.
Many people assume that wax sealing is difficult or requires too many specialized tools, but that is simply not true. In fact, even an absolute beginner with zero experience can order a starter kit from online retailers like Amazon or Rakuten and start creating stunning seals the very day it arrives.
In this guide, I will walk you through the essential tools, how to choose the right wax, and step-by-step techniques for making clean seals without mistakes. By the time you finish reading, you will know exactly what to buy and how to get started. Let's dive in!
Wax sealing (known as furo in Japanese) is a traditional technique originally used in medieval Europe to seal letters and certify authenticity. Today, it is experiencing a massive boom worldwide as a stylish embellishment for modern stationery, craft packaging, and wedding paper goods.
The greatest appeal of wax sealing lies in that satisfying moment when you press the cool metal stamp into smooth, molten wax, resulting in a design that is entirely unique. Even when using the same wax, subtle variations in how you pour or position the stamp give each piece its own one-of-a-kind character.
Another joy is the infinite variety of color combinations. By melting beads of different colors together, you can create gorgeous marble swirls and gradients. The tools also take up very little space, making it an easy, immersive desk craft you can enjoy comfortably at home.
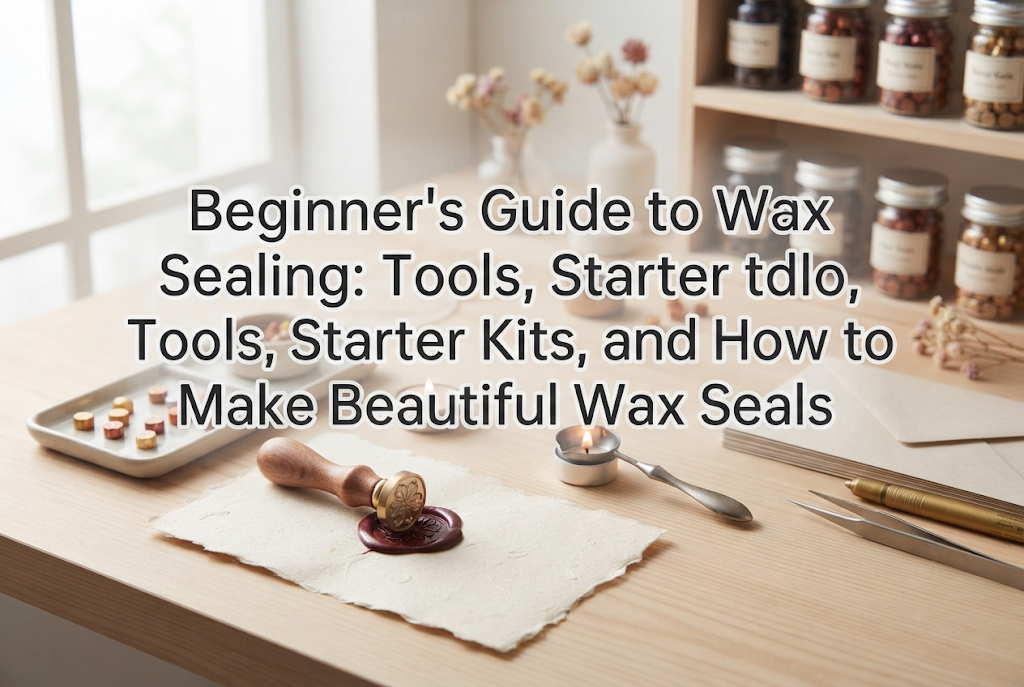
Getting started does not require an overwhelming amount of equipment. Understanding the role of each basic tool is your first step toward success.
Here is your essential checklist:
Once you have these items, you are ready to make wax seals anytime.
Stamp heads are typically crafted from metals like brass, engraved with intricate and beautiful designs. Handles come in materials like wood, resin, or metal, and they usually attach to the stamp head via a standard screw thread so you can swap designs effortlessly.
Using a specialized melting spoon that rests securely on a wax warmer furnace is immensely helpful. You won't have to hold the hot spoon manually, which dramatically reduces the risk of accidental burns.
When starting out, the biggest mistake is buying individual tools separately from different flea market apps or various random shops.
If you mix and match independently, you may run into annoying mismatches—such as a spoon that does not fit the furnace opening, or a candle that sits too far below to melt the wax properly. When tool dimensions and specifications do not align, the wax won't melt smoothly, leading to frustrating failures.
The most foolproof path for beginners is to purchase an all-in-one wax seal starter kit from trusted online marketplaces such as Amazon or Rakuten.
Here is why I strongly recommend a starter kit:
On major online stores, you can find wonderfully comprehensive kits for around 2,000 to 3,500 yen. Having everything ready the moment you open the box is the single best way to avoid getting discouraged before you even begin.
I started with a beginner kit myself. Once you get used to handling the tools, you can easily branch out and buy individual stamp heads with designs you love or specialty wax colors.
Sealing wax comes in several different forms and textures. Each has distinct characteristics that affect ease of use and the finished look.
The three main types available today are:
For beginners, wax beads (especially octagonal pellets) are by far the easiest and most recommended choice.
With wax beads, you simply drop a few into your spoon and melt them. It is easy to portion the exact amount needed, and combining two or three different shades to make marble patterns is effortless. Because beads account for more than 90% of the wax sold in the modern craft market, choosing them is a no-brainer.
Stick wax comes in wicked versions (which you light directly like a candle) and wickless versions (which you cut and melt in a spoon). While wicked sticks seem convenient because they don't require a spoon, soot from the flame often mixes into the melted wax, creating dark smudges—not ideal for beginners.
Glue gun wax is great for mass production, but temperature control can be tricky and the glue can leave fine strings, making it less beginner-friendly.
You will also encounter different finishes:
Choosing a starter kit that contains a rich mix of matte and pearl shades will give you plenty of creative freedom right from the start.
Here is my reliable step-by-step process for making crisp, beautiful wax seals every time. Doing things haphazardly can lead to scorched wax or stamps sticking to the surface, so follow these proven steps:
Clear a flat surface and lay down your silicone mat. Place tissues or paper towels and a pair of tweezers nearby. Set a tea light candle inside your warmer furnace and light it.
For a standard 25 mm stamp head, place 3 to 4 wax beads into the spoon. If you use too little, the rim won't form a nice round edge; if you use too much, wax will spill excessively past the stamp borders. Three to four beads is the sweet spot.
Place the spoon onto the warmer and let the wax melt gently. Avoid shaking the spoon or stirring aggressively. Just letting the ambient heat do the work will melt the wax into a smooth liquid on its own.
Once the wax is fully melted, lift the spoon off the furnace. If you notice small bubbling on the surface, gently pop them with the tip of a toothpick. Pouring wax when it is boiling hot and watery can cause the edges to spread unevenly. Holding the spoon off the heat for about 5 seconds until it slightly thickens produces the cleanest results.
Hold the spoon perpendicular to the silicone mat and pour the wax slowly and steadily in one central spot. Watch as it naturally spreads into a clean, circular pool.
Aim for the center of the wax pool and bring the stamp head straight down vertically. There is no need to press down hard. The natural weight of the metal head will spread the wax outward; just rest your hand gently on the handle.
Once stamped, resist the temptation to touch it until the wax has cooled and hardened entirely. This takes about 30 seconds to 1 minute. As the cold metal absorbs the heat and the wax sets, the stamp will lift away effortlessly with a gentle release. Never force it; waiting for it to detach cleanly is key.
While waiting for your seal to cool, carefully wipe the inside of the warm spoon with a folded tissue or paper towel. Once wax cools and hardens in the spoon, it becomes difficult to remove. The metal will be hot, so please take extra care to avoid burns.
If your wax seal doesn't turn out quite right, there is usually a clear culprit. Here are five frequent issues beginners encounter, along with practical solutions:
Cause: The bottom of the spoon is sitting directly inside the candle flame, or a draft is causing the flame to flicker wildly.Solution: Wipe the bottom of the spoon regularly with a tissue to remove soot buildup. Also, work away from drafts like open windows or direct air conditioning vents.
Cause: Trying to peel the stamp off before the wax has solidified, or the stamp head has become too hot from continuous use.Solution: Wait until the wax is fully cool. If you are making multiple seals in a row, rest the stamp head on an ice pack for a few seconds between uses. A chilled metal head releases from wax remarkably well.
Cause: Overheating the wax to a boil, or vigorously stirring it inside the spoon.Solution: Remove the spoon from the flame as soon as the beads have melted. Instead of stirring, let the wax liquefy calmly to keep bubbles at bay.
Cause: Pouring the wax at an inconsistent speed, or pressing the stamp down at an angle.Solution: Pour in one central spot at a steady rate. When stamping, look from directly above to center the head and lower it completely flat.
Cause: Not using enough wax, or stamping after the wax has already cooled and stiffened.Solution: Always use 3.5 to 4 beads for a 25 mm stamp head. Once you pour, place the stamp promptly without delay.
Once you have mastered the basic technique, you can elevate your creations with a few simple, creative embellishments that give your seals a professional, boutique finish.
Here are four fun techniques I use regularly:
Knowing where to source your materials helps you expand your toolkit smartly as your skills grow:
Because wax sealing involves open flame and hot metal, always observe basic safety rules:
Wax sealing is a delightful craft that doesn't demand complicated artistic training. With the right tools and a few simple rules, anyone can create breathtaking seals right from the first try.
If you're wondering where to begin, pick up a well-reviewed starter kit online. The gentle glow of the candle, the slow swirl of molten wax, and the crisp click of lifting your stamp create a relaxing, deeply satisfying escape from everyday stress.
Whether you use your seals to elevate personal correspondence or to add charm to gift wrapping, they will bring a touch of timeless warmth to your creative life. I hope you give wax sealing a try!
If you found this guide helpful, please feel free to share it with your fellow craft enthusiasts! See you in the next post—this was Yassy from Crafters! (・∀・)


For example, if you are looking for articles about mizuhiki, try searching for "mizuhiki"; if you are interested in tools, try keywords like "nippers" or "pliers."
