Zero Ripples: Why Resin Surfaces Distortion Happens & How to Achieve a Glass-Like Finish
yassy
Crafters!

Hello, everyone! It's Yassy from Crafters! (・∀・)
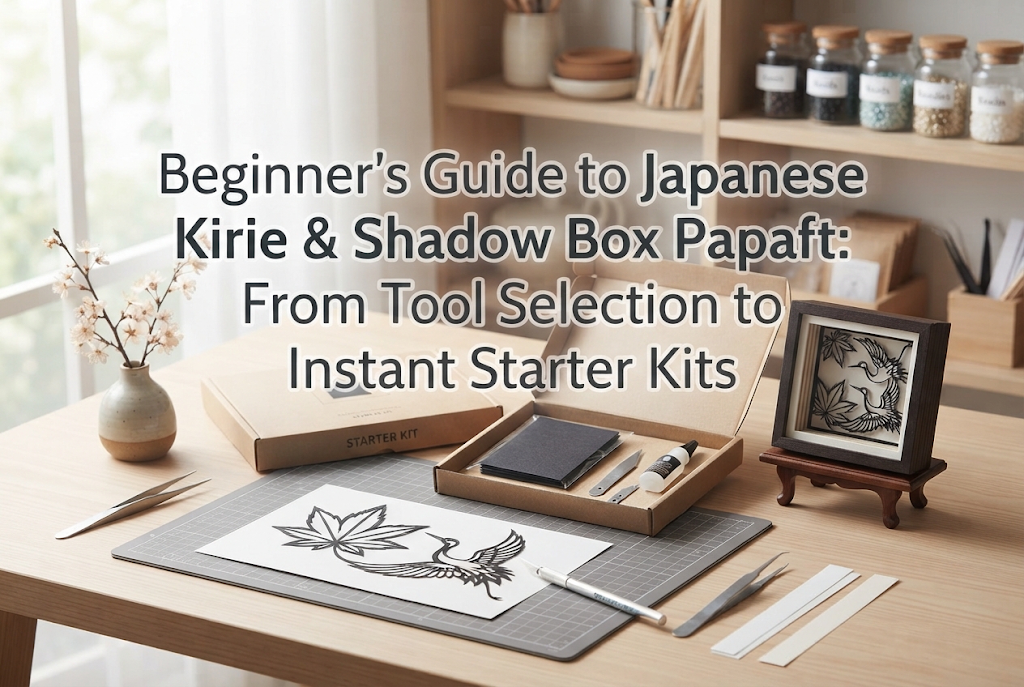
Papercutting, where an infinite world unfolds from just a single sheet of paper and a blade, and Shadow Box art, where layering multiple cutouts creates breathtaking three-dimensional depth—these two papercraft genres are captivating crafts that every handmade enthusiast longs to try at least once!
I personally enjoy making various crafts, looking at countless artworks, and collecting my favorite handmade pieces. Among them, I am always spellbound by the delicate silhouettes of Kirie (Japanese papercutting) and the deep, dimensional beauty of shadow boxes.
There is absolutely no need to give up thinking, "I'm too clumsy for such intricate work" or "Gathering all the tools seems overwhelming!" By choosing the right tools and using starter kits designed for beginners, you can create stunning pieces that look truly professional starting today.
In this guide, I'll share my complete knowledge—from the basic concepts of Kirie and shadow boxes to beginner-friendly tool selection, essential crafting techniques to prevent frustration, and the fastest way to get started using kits available on Amazon!
First, let's clearly understand the distinct charm and characteristics of these two papercraft styles. While both share the action of cutting paper, their final forms and expressions are entirely different.
The quickest path forward is to listen to your intuition and pick the one that excites you most. Of course, knowing both techniques will multiply your papercraft enjoyment many times over!
Kirie is a technique where you cut out design elements from paper (typically black paper) using a precision blade, leaving subtle lines and solid shapes to express a pattern. Because the background shows through the carved areas, its greatest feature is the exquisite contrast between light and shadow.
Once you experience the magical moment when intricate plants, animals, or architecture emerge from a single sheet of black paper, you'll be hooked. Furthermore, by adhering colorful traditional Japanese washi paper or colored construction paper to the back of your cutouts, you can evolve your work into vibrant color Kirie.
The pure simplicity of needing essentially only "paper and a blade" is another major appeal of Kirie. It requires minimal workspace, and the time spent focusing quietly on your cutouts offers supreme relaxation and healing.
Shadow Box art (3D papercraft) is a traditional three-dimensional papercraft that evolved from decoupage in 17th-century Europe. It is made by taking several identical printed sheets of paper, cutting out individual design components, and layering them piece by piece.
By shaping the cut parts to give them rounded contours and placing silicone glue or dimensional foam tape between layers, you create physical space between the elements. This gives incredible depth to a flat picture, making it look as though it's jumping out at you.
The exhilarating feeling of turning 2D illustrations or photos into 3D art can only be experienced through shadow box crafting. When framed and displayed on a wall, it commands such a striking presence that visitors will surely take a double take!
When starting Kirie or shadow box art, tool selection is something you should never compromise on. While you could technically make something using cheap stationery scissors or standard utility knives, the ease of work and the polished quality of the finished piece are night and day compared to specialized tools.
High-quality tools eliminate crafting stress and dramatically elevate your finished artwork. Here are the indispensable tools I guarantee you need to get started.
Please avoid using standard utility box cutters for Kirie and shadow box craft. Their blades are too thick, and they block your view when cutting delicate curves, often causing the paper to tear.
You must use a proper design knife (art knife) for papercraft. Specifically, equipping it with a replacement blade that has a 30-degree acute angle is the absolute best choice.
While standard design knife blades feature a 45-degree angle, a 30-degree acute blade has a much finer, sharper tip. This allows you to cut tiny corners and complex curves with exact precision. Because the blade glides smoothly through paper without requiring heavy pressure, hand fatigue is greatly reduced.
A cutting mat is essential to protect your work table. The criteria for choosing one are simple: select a size of A4 or larger and ensure it features self-healing properties (a soft surface material).
Mats made of overly hard plastic or ultra-thin materials can cause your knife blade to slip—leading to injury—or quickly dull your blade's edge. Using a mat with moderate elasticity allows the blade tip to bite firmly into the paper, producing clean, smooth cut edges.
It is virtually impossible to handle tiny, millimeter-sized cut paper pieces with bare fingers. High-quality tweezers are vital when sticking backing paper onto Kirie or positioning layers in a shadow box.
I strongly recommend precision tweezers with a fine, slightly bent or angled tip. They allow you to position tiny components accurately without slipping and place glued parts cleanly without getting adhesive on your fingers.
If you are tackling a shadow box, prepare two additional specialized items: a modeling tool (embossing stylus with ball tips) and silicone glue (3D craft adhesive).
A modeling tool is a metal stylus with smooth, rounded ball ends. By pressing it against the back of cut paper parts in gentle circular motions, you can add natural rounded curves and dimension to elements like flower petals or clothing folds.
Silicone glue is a clear adhesive that retains its volume as it cures without shrinking. It holds parts firmly in place while maintaining height between layers, making it an essential material for building 3D depth in shadow box art.
Almost everyone who starts papercraft hits a few common stumbling blocks. Knowing the causes and solutions in advance will help you progress smoothly without getting discouraged.
Based on my years of experience, here are 5 common mistakes beginners make and exact techniques to prevent them!
The primary causes of torn paper or rough corners at the end of a cut are dull blades and incorrect cutting directions.
Design knife blades wear down much faster than you might think. Even while completing a single small Kirie project, the blade tip gradually loses its edge. The moment you feel the sharpness drop, don't hesitate to replace it with a fresh blade.
Additionally, when cutting sharp corners, the golden rule is never to turn the blade into the corner, but rather to pull the blade outwards *away* from the corner. By crossing your cutlines into the corner point from two outward directions, you'll achieve crisp, clean points every time.
The most frequent mistake in Kirie is messing up the cutting order. If you cut out the outer frame first, the paper loses its overall tension, causing delicate details in the center to warp and tear as you cut them.
The absolute rule of papercutting is: cut small, intricate details and center sections first, and cut the outer boundary last. Maintaining structural integrity across the sheet throughout the process is essential for success.
Simply stacking flat paper cutouts on top of each other creates nothing more than a layered paper image—it won't produce captivating 3D depth.
The secret to stunning dimension lies in shaping the components and applying edge coloring (koba-nuri). Always shape cut parts using a modeling tool over a soft surface to give them soft, rounded curves.
Furthermore, never leave the raw white paper edges exposed! Use a water-based marker in a matching color to dye the cut edges—a practice known in Japan as *koba-nuri*. Eliminating the white paper edges instantly deepens the visual illusion and drastically raises the professional quality of your piece.
Applying generous amounts of liquid school glue or PVA craft glue causes the paper fibers to absorb moisture, expand, and buckle heavily once dry.
For papercraft, carefully choose low-moisture paste adhesives, fast-drying craft glues, or silicone gel adhesives. Apply glue sparingly in tiny dots using the tip of a toothpick.
When trying to source paper and materials from scratch, beginners often struggle with questions like "Which paper weight should I buy?" or "How do I draw my own patterns?" That is why I strongly recommend starting with a papercraft starter kit available on online shops like Amazon.
Here are three clear reasons why starting with a kit is the smartest move for beginners:
In papercraft, paper thickness, strength, and texture directly impact your success. Paper that is too thin will tear under the blade, while paper that is too thick is difficult to cut and shape.
Starter kits include specialized paper selected specifically for that design. Completely eliminating the guesswork of paper selection is a huge advantage for newcomers.
Printing patterns yourself and transferring them using tracing paper can be a frustrating hurdle for beginners. Starter kits feature high-definition patterns already printed directly onto ideal craft paper.
You can pick up your knife and start cutting the moment the kit arrives. Some shadow box kits even come laser-pre-cut so you can simply push out the parts with your fingers, allowing you to choose a kit tailored to your comfortable skill level.
Many complete kits on Amazon include everything: a design knife, spare blades, a cutting mat, tweezers, modeling tools, and even dedicated display frames.
Purchasing a kit is significantly more economical than buying tools individually, and you won't risk forgetting essential items. The day it arrives, your table instantly transforms into a genuine craft workshop!
Let's go through the actual step-by-step process of creating a Kirie papercut. By following these steps, even first-timers can achieve a clean, professional-looking piece!
Prepare your pattern-printed paper (or stack your pattern sheet over your black base paper). If the paper shifts while cutting, the artwork will be ruined, so firmly tape all four edges to your cutting mat using masking tape.
Hold your design knife like a pencil and place the tip against the paper at roughly a 30-degree angle. No heavy pressure is needed; let the sharpness of the blade glide gently towards you.
A critical technique here is: do not rotate the knife—rotate the paper (cutting mat)! When cutting smooth curves or complex motifs, keep your knife hand steady and use your other hand to smoothly spin the mat. This produces surprisingly fluid curves.
Once all inner details are cut out, cut along the outermost frame line last. Peel off the tape from the mat and gently lift your paper cut. If any tiny spots remain uncut, do not pull forcibly; gently touch the spot with your knife tip to free it.
Place your finished Kirie cutout onto a white or colored backing sheet. Apply tiny dots of craft glue to a few spots on the reverse side to fix it in place.
Mounting your artwork inside a glass frame prevents damage and creates a beautiful shadow on the backing paper when light hits it, completing a piece of home decor you'll be proud to display!
Next, let's look at how to construct a shadow box artwork. Watching a flat illustration come alive in three dimensions is a truly exciting experience!
Shadow box kits typically supply 3 to 5 identical printed sheets. Study the illustration to plan your visual perspective: decide which areas belong in the background (farthest back) and which belong in the foreground (farthest front).
Leave the first sheet intact as your base background. From sheets 2, 3, and beyond, carefully cut out the specific foreground elements using your design knife.
Gently run a water-based marker along the cut edges of all your cutouts. This process is called *koba-nuri* in Japanese craft tradition.
By coloring the raw white paper edges with a marker matching the illustration (such as black, brown, or red), you eliminate bright white edges when layers overlap, giving the piece a seamlessly integrated look.
Place paper parts face down on a soft mat or foam pad. Press the spherical head of your modeling stylus onto the back in gentle circular motions. This relaxes the paper fibers, giving the piece a soft, rounded 3D curve.
Tailor your shaping techniques to the subject: create gentle swells for animal fur, curved arches for flower petals, or soft folds for clothing.
Layer the shaped parts onto the base background sheet using silicone craft glue. Pick up small dollops of silicone adhesive with a toothpick and place them on the back of each component.
By varying the amount of silicone glue, you can freely control height and depth. Stack components so the main highlight elements pop out the furthest, then leave the piece undisturbed until fully dry.
Because shadow box art has noticeable thickness, it won't fit inside a flat picture frame. Display your piece in a deep frame—often labeled as a "shadow box frame" or "3D display frame"—with a depth of roughly 1.5 cm to 3 cm (0.6 to 1.2 inches).
The natural shadows cast inside the deep frame will highlight the dimensionality of your artwork even further!
Now that you understand the beauty and steps for Kirie and shadow box art, all that's left is taking action! Don't let hesitation hold you back—open your favorite shopping app like Amazon and add your starter gear to your cart.
Here is a hassle-free shopping checklist to get you started immediately:
When searching online, try these keywords:
For Kirie (Papercutting):"Kirie starter kit beginner", "30 degree design knife cutting mat set", "Japanese paper cutting kit"
For Shadow Boxes:"Shadow box kit beginner", "3D papercraft kit", "Silicone glue for papercraft"
Even if you purchase all these items, the initial budget is very affordable—usually around $20 to $40 USD total. Compared to other costly hobbies, it requires minimal initial investment to acquire craft skills you can enjoy for a lifetime!
When your kit arrives at your doorstep, don't leave it sitting on a shelf—open it that very day! The moment you make your first cut into paper is the start of a wonderful, relaxing craft journey.
Don't worry about perfection on your first try. Simply enjoy the wonderful sense of accomplishment that comes from creating art out of a single sheet of paper with your own hands!
In this guide, we covered everything you need to start Kirie and shadow box crafting—from basic concepts and essential tools to troubleshooting techniques and fast-start kit advice!
Papercraft requires no rare artistic talents or expensive machinery. With the right tools and a little bit of quiet focus, anyone can create amazing, high-quality artwork.
The soothing focus of making precise cuts, combined with the pride of framing your completed creation in your living space, brings rich creativity and relaxation to daily life.
If you felt a spark of inspiration while reading, now is the perfect time to begin your new creative hobby! Grab a starter kit online today and dive into the wonderful world of fine papercraft. I'm cheering you on all the way!
If you enjoyed this article, sharing it with your craft-loving friends on social media would mean the world to me and keep me motivated!
See you in the next craft guide! This was Yassy from Crafters!


For example, if you are looking for articles about mizuhiki, try searching for "mizuhiki"; if you are interested in tools, try keywords like "nippers" or "pliers."
