Beginner’s Guide to Japanese Sashiko and Cross-Stitch: How to Start Needlework Today with Starter Kits
yassy
Crafters!

Hello, crafters! This is Yassy from Crafters! (・∀・)
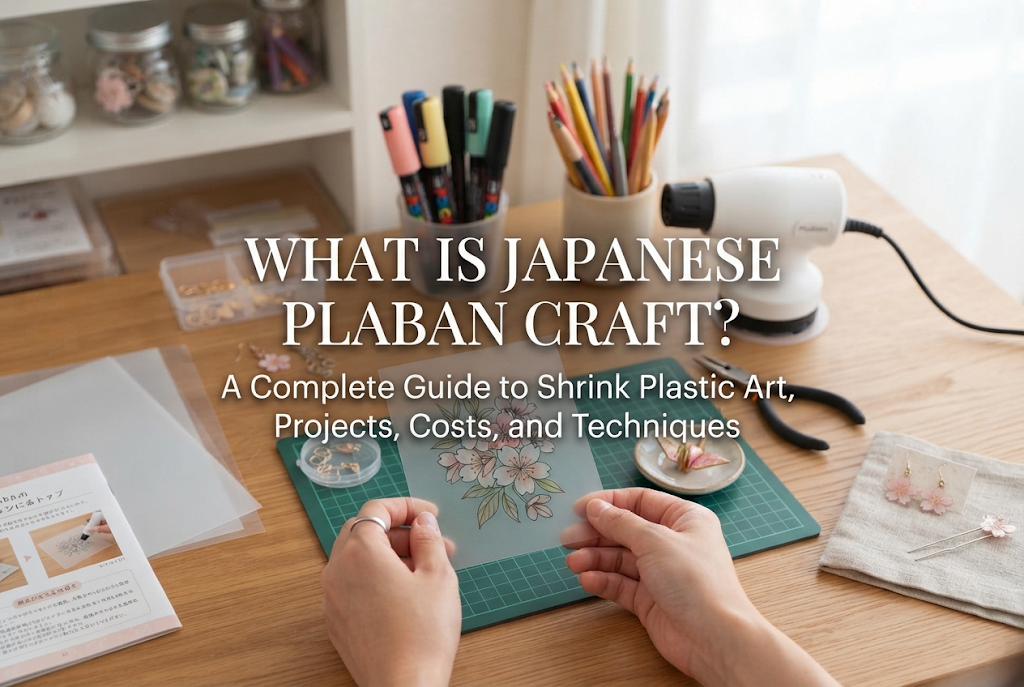
Draw an illustration on a thin plastic sheet, heat it in a toaster oven, and watch it shrink into a sturdy, miniature piece—that is the magic of "plaban" (the Japanese term for shrink plastic craft). Many of you might remember making character keychains this way when you were young. Today, however, shrink plastic in the Japanese handmade scene has evolved into a sophisticated, professional medium that inspires serious adult crafters.
From crystal-clear transparency to delicate three-dimensional floral sculptures and accessories resembling glazed ceramics or art glass, the expressive potential of plaban is limitless. Best of all, it requires a remarkably modest initial budget compared to many other handmade genres and can be completed in a very compact workspace at home.
In this guide, I will share my knowledge and hands-on experience to walk beginners through the fundamentals of Japanese plaban craft: what it is, what you can create, the difficulty level, required workspace, real costs, and four absolute rules to avoid failure. By the time you finish reading, you will be ready to take your first confident step as a shrink plastic artist!
In Japan, "plaban" (or puraban) is an abbreviation for "plastic board." It typically refers to thin sheets made primarily of polystyrene (PS). Polystyrene has a distinctive physical property known as heat shrinkability: when exposed to heat, it contracts as its molecular structure attempts to return to its original state.
When baked in a toaster oven, the plastic sheet shrinks to roughly 1/2 to 1/3 of its original length and width. In terms of surface area, it compacts down to about 1/4 to 1/6 of its starting size. At the same time, its thickness increases by about 5 to 6 times, transforming a flimsy sheet into a firm, durable plastic charm.
While some people still dismiss it as a children’s pastime, modern techniques tell a completely different story. By combining advanced coloring methods, 3D shaping while warm, and glossy resin coatings, you can produce exquisite jewelry and lifestyle goods that rival boutique merchandise. It is a delightfully deep craft where the low barrier to entry contrasts sharply with the high level of artistic finish you can achieve.
The greatest strength of plaban is its versatility, allowing you to manipulate shapes freely from flat cutouts to multi-layered 3D objects. Here are some of the most popular items you can create:
This is the most classic plaban project and offers maximum freedom of design. Simply draw your artwork, cut it out, punch a hole, and bake to produce a custom charm. It is wildly popular for fan art, pet portraits, original characters, and even baby handprint or footprint keepsakes.
As the plastic shrinks, the pigment density concentrates significantly. Colors become deeper and more vibrant than when you drew them, yielding a crisp, professional look.
For adult makers, wearable accessories are where plaban truly shines. You can craft sheer, airy designs that highlight clear negative space, build depth by layering colors on the reverse side, or apply metallic finishes for an antique appearance.
Because polystyrene remains lightweight even after shrinking, even large statement earrings won’t pull on your earlobes or weigh down delicate clothing fabrics.
Plaban is by no means limited to flat planes. In the few seconds immediately after removal from the toaster oven—while the plastic is still hot and pliable—you can wear protective gloves and bend the petals with your fingers or shaping tools to sculpt delicate three-dimensional elements.
Using this technique, you can assemble dimensional roses, hydrangeas with overlapping curved petals, or butterflies with raised wings. Mastering 3D plaban techniques elevates your work to an entirely new tier of craftsmanship and market value.
Beyond jewelry, plaban lends itself to charming everyday essentials. You can make faux-metal bookmarks, chopstick rests (cutlery rests), cable clips, and decorative garden picks for potted plants. Applying a waterproof topcoat ensures these practical pieces hold up well around moisture.
On a 5-point difficulty scale, plaban craft sits comfortably at Level 2 (Beginner Friendly). It is easily one of the most accessible crafts in the handmade world because it does not require specialized blades or heavy machinery; you can begin with everyday household tools like scissors and colored pencils.
However, "simple to pick up" does not mean you will never face mishaps. Beginners almost always stumble on the same specific challenge: controlling the baking phase.
The moment you place your cut piece into a hot toaster oven, it curls, warps, and twists dramatically as it shrinks. Anyone seeing this for the first time tends to panic, assuming their piece is ruined. Yet this dramatic curling is an entirely normal physical reaction during contraction.
If you keep baking steadily without panicking, the plastic will flatten itself out on its own. Once you understand this behavior and master the timing of when to pull it out, the process becomes smooth and predictable. With the right foundation of knowledge, you can achieve success on your very first try.
You need very little space for plaban—a desk area roughly the size of a single newspaper page (about 40 cm × 60 cm, or 16 × 24 inches) is plenty. Unlike ceramic clay, there is no messy dust to scatter, and you do not need multiple large appliances. You can easily work at a dining table or in a small studio apartment.
Here is the ideal workflow layout to prepare:
Two essential factors I cannot emphasize enough are efficient movement and proper ventilation.
Once removed from heat, hot plaban cools and hardens in just 3 to 5 seconds. Setting your pressing station right next to the oven door is mandatory. If your pressing station is even a few steps away, the piece will solidify mid-stride, freezing in a warped shape before you can flatten it.
Additionally, heating polystyrene produces a mild plastic odor. Always keep a window open or run an exhaust fan during baking. A safe, comfortable setup lets you concentrate fully on your art.
Budget is a practical question for any beginner. Fortunately, shrink plastic is one of the least expensive craft disciplines to try.
If you want to test the waters, 100-yen discount stores or local budget craft aisles carry everything you need for under $10:
If you already own scissors, a thick book, and a toaster oven, you can start today for virtually pocket change. This unbeatable accessibility is unique to shrink plastic.
If your goal is to produce boutique-quality items from day one, investing a little more in dedicated supplies pays off:
A modest investment of around $30 to $40 sets you up with everything necessary to make items indistinguishable from professional craft market goods. Furthermore, the low cost per sheet means mistakes carry minimal financial sting, which gives beginners great peace of mind.
Here are the four most frequent roadblocks beginners encounter, along with my proven solutions to ensure your success rate stays near 100%.
In the oven, the plastic curls over tightly, and the edges touch and fuse together permanently.
Why it happens: Placing the plastic directly onto smooth, flat aluminum foil, or baking at an overly high temperature. Flat foil conducts heat too aggressively across the entire bottom surface, causing abrupt, violent contraction.
The Fix: Always crumple your aluminum foil into a tight ball first, then gently smooth it back out into a ridged, wavy sheet before placing it on the oven tray. The ridges reduce direct contact area, allowing heat to circulate evenly and gently underneath. This single trick prevents over 90% of sticking accidents.
After removal from the oven, the cooled piece remains warped with an uneven surface.
Why it happens: Either you took the piece out too early while it was still shrinking, or you were too slow pressing it down after removal.
The Fix: Remember the three-step baking rhythm: curl up dramatically → flatten back down → stop moving completely. Never open the oven door until the plastic has flattened and all movement has ceased. Once it stops moving, extract it immediately with tweezers, slip it between folded parchment paper, and press down firmly with a thick, heavy book for about 5 seconds. The parchment paper keeps pigment from transferring onto your book pages while delivering a smooth, dead-flat result.
When you try drawing on slick, glossy shrink plastic, colored pencils glide across without leaving marks, and water-based or acrylic paints bead up and slide off.
Why it happens: The plastic surface is too smooth to provide mechanical tooth for pigments to grab onto.
The Fix: If you want to use colored pencils or soft pastels, choose pre-sanded "frosted" shrink film. If you only have clear, smooth sheets on hand, scuff the surface yourself using fine-grit sandpaper (around 400 to 600 grit) in crosshatch motions. Creating these micro-grooves allows colored pencil pigments to grip the surface cleanly.
After baking your charm, you realize you forgot to create a hanging hole, or the pre-punched hole shrank into an unusable micro-pinhole that no jump ring can fit through.
Why it happens: Attempting to drill hard, post-baked plastic is risky and often cracks the piece. Shrinkage also reduces hole diameters proportionally.
The Fix: Always punch your attachment holes before baking using a standard stationery single-hole punch (approx. 5 mm to 6 mm in diameter). A 6 mm hole before baking shrinks down to an ideal 1.5 mm to 2 mm opening—the exact diameter needed for standard jump rings and eye pins.
If you are wondering, "Where should I actually begin?", here is the exact 4-step path I would take if I were starting over today:
Skip clear sheets for your first project and select pre-frosted shrink film. Pair it with standard colored pencils you already have at home. This combination effortlessly yields a warm, soft, watercolor-like finish reminiscent of Scandinavian folk illustration. It is the most forgiving method and produces beautiful results even if you feel you cannot draw well.
Success depends on preparation before the heat goes on. Line your oven tray with crumpled-and-flattened aluminum foil. Place a folded piece of parchment paper right beside the oven door, with a heavy encyclopedia, atlas, or thick magazine resting on top. Keep metal tweezers within arm's reach.
Resist the urge to start with an intricate illustration right away. Cut a basic 3 cm × 3 cm square or circle, color it lightly, and run a test bake. Observe your specific oven’s heating behavior, how fast the plastic contracts, and the exact shrinkage ratio. Experiencing this once removes all guesswork before you bake your actual art.
Once your piece has cooled, squeeze a small drop of UV craft resin onto the top surface, guide it gently to the edges with a toothpick, and cure it under a UV-LED nail lamp (or direct sunlight). This resin layer permanently locks in your colored pencil pigment while creating a glossy, domed finish that instantly makes your piece look like high-end designer merchandise. Shrink plastic and UV resin are an unbeatable match in contemporary crafting.
Here are two technical insights to help elevate your results further:
Shrink film packaging typically lists sheet thicknesses like 0.2 mm, 0.3 mm, or 0.4 mm. The sweet spot for beginners is 0.21 mm to 0.3 mm. A 0.2 mm sheet cuts easily with standard household scissors and bakes down to a finished thickness of roughly 1.0 mm to 1.5 mm—ideal for jewelry. Sheets thicker than 0.4 mm can crack under scissor pressure and are best scored carefully with a craft knife.
Furthermore, extruded polystyrene sheets have an internal "grain," meaning horizontal and vertical shrinkage rates differ slightly. If your goal is a mathematically perfect circle, keep in mind that the post-baked piece may turn out faintly oval. Compensating slightly in your template or selecting consistent, reputable manufacturer brands helps achieve precise dimensions.
Shrink plastic is a wondrous material that adapts completely to your imagination—shifting seamlessly from playful crafts to refined artisan accessories.
Keep these core takeaways in mind:
Few crafts match the sheer excitement of watching your own hand-drawn illustration shrink and solidify inside the oven. That magical transformation never gets old.
Pick up a pack of frosted shrink film and some colored pencils, and craft your very own miniature treasure today. I hope your journey into handmade crafting brings you endless joy and creative fulfillment!
If you enjoyed this guide, please share it with your fellow makers. See you in the next tutorial! This was Yassy from Crafters!



For example, if you are looking for articles about mizuhiki, try searching for "mizuhiki"; if you are interested in tools, try keywords like "nippers" or "pliers."
