Bone Folder vs. Scoring Tool vs. Stylus: How to Choose and Use Essential Crafting Tools for Paper, Leather, and Clay
yassy
Crafters!

Hello, this is Yassy from Crafters! (・∀・)
Welcome to the wonderful world of pottery! Taking a lump of clay and shaping it into your very own tableware or decorative piece is an incredibly exciting and therapeutic experience.
I personally love everything about pottery—making my own pieces, admiring work made by others, and buying beautiful handcrafted ceramics to use at my daily dinner table. Just touching the warmth of natural clay helps me forget the busyness of everyday life and fully immerse myself in the joy of creating.
However, when you are ready to dive into pottery seriously, you inevitably hit a major roadblock: "There are so many different tools—I have no idea what to choose!"
When you see a confusing lineup of specialized tools with unfamiliar names and shapes—like wooden ribs, trimming loop tools, wire clay cutters, and chamois leather—it is totally normal to feel overwhelmed. What's worse, picking tools randomly can make it hard to shape the clay properly or even lead to ruining your work during the trimming stage.
Choosing the right tools is the single most crucial step that determines your success in pottery. With the right selection, even complete beginners can create surprisingly beautiful, high-quality pieces.
In this guide, I’ll share all my knowledge and experience to walk you through the essential Japanese pottery tools, their functions, and the selection criteria that will dramatically elevate the quality of your craft!
I will also dive deep into common beginner dilemmas and practical tips to prevent failure, so please read through to the end and build your ideal ceramic workspace!
Before buying any tools, it is vital to get a full picture of which tools are needed at each stage of making pottery. Without this understanding, you might end up purchasing unnecessary gadgets or finding yourself stuck halfway through a project without an essential tool.
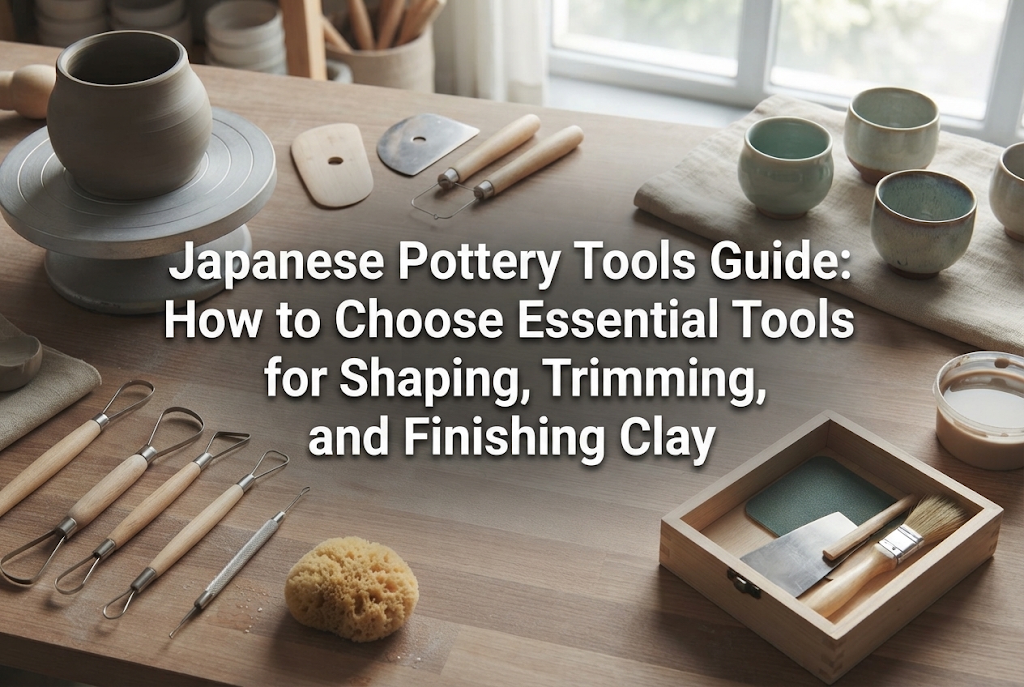
The pottery-making process can be broadly divided into three main stages: Shaping (Forming the clay), Trimming (Creating the foot ring and adjusting wall thickness), and Finishing (Smoothing surfaces). The tools required for each step play completely different roles.
You need tools to cut lumps of clay, roll it out evenly, or pull up walls to form your envisioned shape. Using improper tools at this point can trap air bubbles inside or create uneven wall thickness, causing the piece to crack during drying or firing.
When your piece reaches the semi-dry "leather-hard" state, you turn it upside down to carve out a proper foot ring (known as kodai in Japanese pottery) and shave away excess weight. Here, sharp metal trimming tools function like woodcarving chisels.
Finally, you smooth out the surfaces and rim (lip) of the pot to refine it into a piece that feels wonderful in the hands and against the lips. Finishing tools are essential to leave a pleasant tactile texture while elevating the overall craftsmanship.
Pottery tools are not mere accessories; they are partners that directly influence the quality of your work. Let's examine the exact tools required for each stage and how to choose them without regret!
Shaping is the exciting first step where you breathe life into raw clay. For handbuilding techniques like pinch pots, coil building, or slab building—which are very accessible for beginners—here are the four essential items you need to construct a solid foundation.
Even without an electric potter's wheel, a heavy hand-turntable (banding wheel) allows you to create authentic bowls and cups. A banding wheel lets you rotate the base smoothly with your hand to shape the clay evenly from every angle.
The golden rule for choosing a wheel is weight and smooth rotation. Avoid lightweight plastic wheels or thin sheet-metal turntables at all costs. During work, a flimsy wheel will wobble against the force of the clay, throwing your piece off-center and distorting its shape.
Opt for a heavy, solid cast-iron wheel. A heavy banding wheel creates inertia; once you spin it, it continues to rotate smoothly, making it effortlessly easy to build up coils or pull up smooth walls. For beginners, a turntable diameter of around 22 cm to 25 cm (8.5 to 10 inches) is the most versatile size for making daily-use plates and mugs.
A wire cutter (traditionally called kiri-ito in Japan) consists of a flexible wire or line stretched between two wooden handles. It is used to slice off chunks from a block of raw clay or to slice finished pieces off the banding wheel base. Choosing the right wire directly affects how clean your clay cross-sections will be.
For beginners, I strongly recommend a thin twisted stainless steel wire rather than a standard braided nylon string. Nylon strings tend to stretch or snap over time, whereas stainless wire offers outstanding durability and glides through dense clay effortlessly like a sharp blade.
There are also wavy textured cut-off wires available. Slicing clay slabs with these leaves a subtle, decorative wave pattern on the cut edge, which can be creatively incorporated into slab-built pottery.
When making flat plates or box shapes using the slab technique (known as tatara-zukuri in Japan), slab thickness guide sticks (tatara-ita) and a wooden rolling pin are indispensable tools.
By stacking wooden guide slats of equal thickness on both sides of your clay lump and rolling a pin across them, you can create a perfectly uniform clay slab with zero guesswork.
A combination of guide sticks in thicknesses of 5 mm, 7 mm, and 10 mm (approx. 1/5", 1/4", and 3/8") is ideal. If beginners try to roll out clay by hand without guide sticks, the slab will inevitably end up thick in the middle and thin along the edges, leading to warping or cracking during drying and firing.
Choose a rolling pin made of sturdy, hard wood like oak or cherry, with a generous length of at least 40 cm (16 inches). A pin that is too short will slip off the guide sticks when rolling larger slabs, leaving uneven ridges on the clay surface.
Wooden ribs and modeling tools excel at applying dobe (clay slip used as glue), blending joints seamlessly, and shaping interior curves that fingers cannot easily reach.
While wooden ribs come in countless shapes, beginners should start with two versatile shapes: a bamboo leaf shape with a pointed tip, and a gently curved shape designed for smoothing interior walls.
Although plastic modeling tools are widely sold, I strongly advise using natural wood or bamboo. Wood and bamboo absorb just the right amount of moisture from the clay, preventing the tool from sticking and dragging the wet surface. Avoid cheap, rough-surfaced wooden tools that scratch the clay; choose tools that feel silky smooth to the touch.
Once your shaped piece dries to a firm, leather-hard state, it is time for trimming. Trimming involves carving the foot ring (kodai) at the bottom and shaving off excess clay to achieve optimal wall thickness and lightness. It is the most critical stage for defining the overall silhouette and refined balance of your work.
A kakibera is a tool with a metal loop or ribbon attached to the end of a wooden handle. By pressing and gliding this metal loop against the revolving clay surface, you can carve away ribbons of leather-hard clay easily.
The shape of the loop dictates its specific function:
The key criteria when choosing loop tools is blade rigidity and metal thickness. Inexpensive tools with overly thin metal loops will flex when shaving firm clay, causing rippled or uneven trimmed surfaces. Choose solid loop tools made of robust stainless steel or hardened high-carbon steel.
For sharper, highly precise removal of clay where you need exact control, Japanese pottery turning tools (kanna) and specialized steel trimming blades excel.
When you want to carve crisp, defined foot-ring edges or adjust the overall profile down to the millimeter, a razor-sharp steel tool is unmatched.
Look for trimming tools with cleanly angled bevels and ergonomic wooden handles. Using a dull trimming tool requires excessive force, which often results in catching the blade and tearing the entire foot ring off your piece!
It is no exaggeration to say that "80% of successful trimming comes down to tool sharpness." Choose tools that feel comfortable in your hand and transmit force directly to the cutting edge without slipping.
When turning narrow-necked pieces like mugs, vases, or bottles upside down to trim their bases, placing them directly on a flat wheel head can cause them to tip over or crush the delicate rim.
To prevent this, ceramic artists use a supportive cylinder or cone mount called a shitta to hold the piece safely inverted.
While pre-made bisque-fired chucks exist, beginners can easily make quick temporary chucks out of un-fired clay on the spot. However, if you plan to make cups or bowls in consistent sizes frequently, owning wooden or resin chucks saves immense setup time and significantly improves trimming accuracy.
After shaping and trimming the base, the final touch is refining the surface texture. Taking time during this finishing stage gives your handmade pottery a sophisticated, professional touch.
The rim (lip) of a cup or bowl is the most critical part governing how pleasant a piece feels during use. If clay is left cut or unrefined, it turns into a rough, unpleasant edge after firing.
This is where natural chamois leather (known as nameshi-gawa in Japan) shines. By folding a piece of damp chamois leather and gently straddling it over the rotating rim of your piece, you compress and smooth out fine clay particles, creating a delightfully smooth lip.
Always choose genuine natural leather (such as sheepskin or deer hide). Synthetic chamois holds water poorly and lacks the gentle friction required to burnish clay smoothly. Genuine leather softens with use and breaks in to fit your fingers over time, becoming a cherished tool in your ceramic journey.
In pottery, a sponge is far more than a cleanup tool. It serves as a delicate dampener to soak up pooled water inside a pot during shaping, and gently wipes away minor scratches or roughness left after trimming.
Rather than standard coarse kitchen sponges, select ultra-dense facial sponges or natural sea sponges specifically made for ceramics.
Coarse household sponges have large open pores that leave pitted textures on soft clay surfaces. High-density, soft sponges allow you to absorb excess water cleanly without abrading the smooth clay surface.
A sharp needle tool set in a wooden handle is invaluable for popping trapped air bubbles in clay walls or incising your personal mark or date on the underside of a piece.
A sturdy needle tool is also perfect for checking clay bottom thickness by poking down through the base. Having one nearby allows you to troubleshoot almost any unexpected issue that arises during handbuilding.
Here are three common pitfalls beginners often encounter when picking pottery tools. Knowing these in advance will save you money and prevent unnecessary frustration!
Some beginners try to assemble their entire toolkit using cheap plastic clay tools, baking scrapers, or lightweight plastic rolling pins to save money initially.
While a few household items can work as secondary aids, relying entirely on cheap craft items for core pottery steps is a major trap!
Child-grade plastic tools flex too much under real ceramic clay density, and rough plastic seams (burrs) will gouge wet clay surfaces. Lightweight plastic rolling pins require excessive physical pressure to flatten dense clay, leading to uneven thickness and fatigue. Professional pottery tools are designed specifically for clay density and moisture behavior—invest in proper pottery-grade tools for your essential setup.
It is easy to find dirt-cheap 20-piece tool bundles online for a low price. While they seem like a bargain, more than half of those kits often contain specialized tools you will rarely use or flimsy tools built with poor quality control.
Thin metal loops on cheap tools can rust overnight or pull completely out of their wooden handles while carving, potentially destroying your artwork.
Unless you just want to touch clay once, skip the low-quality megakits. Instead, buy a curated basic set of 7–8 high-quality essential items—a solid hand banding wheel, wire cutter, slab guide sticks, wooden ribs, two quality loop tools, genuine chamois, and a high-density sponge—from reputable ceramic suppliers.
Pottery tools operate in a harsh environment of constant moisture and abrasive minerals. Leaving wet clay on wooden ribs causes wood to absorb water, warp, or grow mold. Metal loop tools can rust within hours due to the mineral composition in clay and water.
Always wash your tools thoroughly with clean water after each session and dry them completely with a cloth. Periodically applying a light drop of mineral oil or blade oil to metal parts will keep your tools rust-free and sharp for a lifetime.
If a friend ask me what tools to buy for their very first serious pottery setup, I would enthusiastically recommend this exact 7-item starter combination:
With just these seven core items, you can craft everyday mugs, elegant dinner plates, deep soup bowls, and flower vases with near-professional precision!
Choose well-crafted tools instead of chasing bargain prices. Once you experience how a solid tool feels in your hand and how effortlessly it responds against clay, you will immediately appreciate the value of quality equipment.
In pottery, your tools act as extensions of your hands, translating your creative ideas directly into natural clay.
By understanding the precise function of tools at each stage and investing in durable, thoughtfully made equipment, your studio time will become frustration-free and the quality of your finished pottery will reach incredible new heights.
Keep these core principles in mind as you curate your personal ceramic setup. Drinking coffee or enjoying a meal from a ceramic cup or plate you crafted with your own hands using great tools is truly one of life’s finest pleasures!
If you enjoyed this article, please share it with your fellow craft lovers on social media! See you in the next article! This was Yassy from Crafters! (・∀・)




For example, if you are looking for articles about mizuhiki, try searching for "mizuhiki"; if you are interested in tools, try keywords like "nippers" or "pliers."
