Screen Printing Mesh Explained: How to Choose the Right Mesh Count for Your DIY Projects
yassy
Crafters!

Hello, everyone! It's Yassy from Crafters! (・∀・)
Screen printing is a wonderful technique that lets you print your custom illustrations onto T-shirts, tote bags, paper goods, and more. It beautifully combines the warmth of handcrafted items with a clean, professional finish that looks store-bought.
When you want to print detailed, high-quality designs using screen printing, one essential material you need is photo emulsion. Photo emulsion is the liquid used to create custom screen stencils. However, many craft enthusiasts often feel intimidated, thinking, "It looks like a complicated chemical," or "I keep failing at the exposure step!"
In this article, I will explain everything you need to know about photo emulsion—the heart of screen printing—from how it works and how to choose the right type, to step-by-step coating techniques and tips to prevent mistakes. Once you understand the basic mechanism, you'll be able to print crisp, fine line drawings and delicate text with confidence!
In simple terms, photo emulsion is a liquid light-sensitive coating that hardens when exposed to ultraviolet (UV) light.
A screen printing frame consists of a fine mesh (a net-like fabric) stretched tightly over a wooden or aluminum frame. To create a print stencil, you must block certain openings in the mesh while leaving others open so that ink can pass through. The primary role of photo emulsion is to form the solid "wall" that blocks the mesh openings.
Creating a stencil using photo emulsion works very similarly to developing traditional film photographs. Here are the basic steps:
When light hits the photo emulsion, a chemical reaction occurs that turns the emulsion into a hard, water-insoluble film. On the other hand, the areas blocked by the black design on your film remain soft because UV light cannot pass through them.
Finally, when you rinse the screen with water, the unexposed emulsion underneath the black design washes away, opening up the mesh holes in that exact shape. This creates a stencil that allows ink to pass through only where your design is located.
While you can make simple screen printing stencils by cutting vinyl sheets by hand, using photo emulsion offers overwhelming advantages:
When searching for photo emulsion online or at craft suppliers, you will notice different varieties. They are generally categorized along two main axes: liquid preparation type and matching ink type.
1-Part Emulsion (Direct Emulsion): This type can be used straight out of the bottle. Because the light-sensitive components are pre-mixed, there is no need to blend chemicals yourself. It is very user-friendly, making it the most recommended option for beginners.
2-Part Emulsion (Diazo Type): This comes as a set containing a base emulsion and a powder or liquid Diazo sensitizer. You mix the two components together right before your first use.
2-Part emulsion provides exceptionally high resolution and is frequently used in professional screen making. However, keep in mind that once mixed, the emulsion gradually degrades over time, giving it a shorter shelf life of about 1 to 3 months.
For beginners or hobbyists who want to make screens gradually, I recommend starting with a 1-part emulsion. It is less prone to errors and lasts much longer after opening, preventing product waste.
You must choose a photo emulsion that matches the specific type of ink you plan to print with. Selecting the wrong combination can cause the stencil layer to dissolve during the printing process.
In handmade crafting, most fabric T-shirts, tote bags, and paper goods are printed using easy-to-handle water-based inks. Therefore, look for an emulsion labeled "Water-Based Compatible" or "Dual-Cure / Universal."
Working with photo emulsion requires a few specialized tools alongside the liquid itself, as well as an appropriate workspace environment. Gathering these beforehand makes the process go smoothly.
Among these, the scoop coater is particularly crucial. Attempting to spread emulsion with a spatula or spoon will inevitably cause uneven thickness, leading to exposure failure. Always purchase a scoop coater that matches the width of your screen frame.
Photo emulsion reacts to UV radiation. If you apply emulsion in a room flooded with direct sunlight or bright fluorescent light, it will start curing while you are coating.
While you don't need a professional darkroom, close your curtains to darken the room and completely block sunlight. For working light, it is ideal to use yellow lighting that lacks UV rays (such as yellow bug lights, low-wattage incandescent bulbs, or yellow LEDs). Wrapping yellow cellophane around a flashlight or desk lamp creates a great DIY safe light!
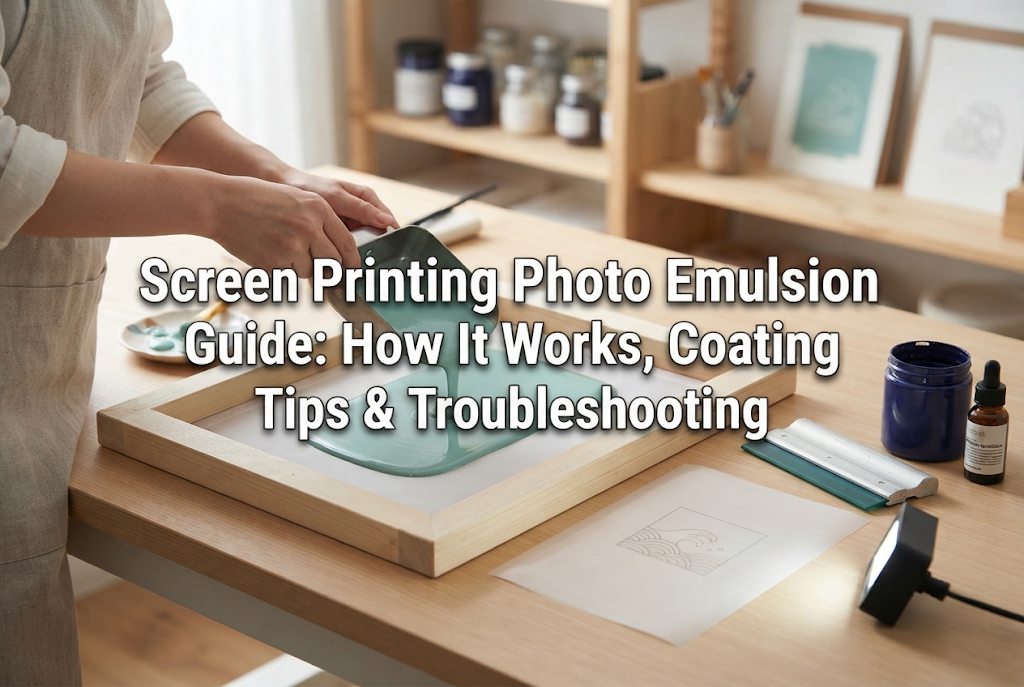
Here is a detailed guide on how to apply photo emulsion to your screen frame. Coating is the most critical step determining the quality of your stencil!
New screens or reused frames often have residual oils or dust on the mesh surface. Oil repels emulsion, causing tiny pinholes or peeling during washing.
Wash both sides of the mesh thoroughly using mild household dish soap and a soft sponge. Rinse completely with clean water and let it dry 100%. Any leftover moisture will dilute the emulsion and prevent proper curing.
In your darkened room, open the emulsion container and pour liquid into the scoop coater. Fill it about 1/3 to 1/2 full. Pouring too little causes running out mid-stroke, while pouring too much risks spilling over the edges. Adjust according to frame size.
The correct coating order is: Print side (substrate side / outside) first, then the Ink well side (squeegee side / inside) second.
If you coat too quickly, the emulsion coat will be too thin, leading to pinholes. If you coat too slowly, it becomes too thick, taking longer to dry and expose. The key is one smooth, continuous stroke per side!
Immediately move to the drying stage after coating. The most important rule here is: Always lay the frame completely flat (horizontal)!
If you dry the screen standing vertically, gravity will pull the wet emulsion downward, creating an uneven thickness top-to-bottom. Place small blocks under the four corners of the frame so it rests horizontally off the surface.
Position the screen with the print side facing down. Gravity will draw a smooth layer of emulsion toward the printing surface, yielding sharp edges that prevent ink bleed during printing.
Use a hairdryer on warm or cool air from a reasonable distance inside your dark area until the surface loses all stickiness and feels completely smooth to the touch.
When making stencils with photo emulsion, beginners often run into a few classic failure patterns. Understanding the causes beforehand saves time and materials!
If the entire emulsion layer washes down the drain during rinsing, the cause is usually underexposure (insufficient UV exposure time) or incomplete drying before exposure.
If moisture remains inside the emulsion layer during burning, the chemical reaction will not take place properly. Furthermore, if your light source is too weak or light exposure time is too short, the inner emulsion layer fails to harden.
Solution: Ensure the emulsion is 100% dry before burning, and try increasing your light exposure time slightly.
Conversely, if the areas where ink should pass through remain hardened and refuse to wash out with water, the cause is overexposure or insufficient opacity on your film transparency.
If the black ink printed on your film is thin or translucent, UV light will pass right through it, hardening the emulsion under the design.
Solution: Print your film on high-quality inkjet transparency paper using the highest resolution/darkest ink setting. Stacking two identical printed films together on top of each other is an extremely effective way to stop light leaks!
Pinholes are tiny holes in the cured stencil layer. During printing, ink leaks through these spots, leaving stray dots on your prints.
The main causes are dust particles on the screen, air bubbles during coating, or residual oils on the mesh. Keep your workspace clean and blow away dust before coating.
Fix: If pinholes appear on a dried, exposed screen, simply dab a tiny dot of fresh emulsion over the hole with a fine paintbrush, then expose it to light to cure it. You don't need to strip the whole screen and start over!
Photo emulsion contains specialized liquid chemicals. Prioritizing safety and health is vital when crafting!
Photo emulsion is sensitive to light and high temperatures. Close the container cap tightly after use, place it inside an opaque black plastic bag or cardboard box, and store it in a cool, dark location below 20°C (68°F). Storing sealed containers in a dedicated craft refrigerator (clearly labeled away from food) during hot summer months works well.
Always aim to use opened emulsion as soon as possible. For 2-part Diazo mixed emulsions, the shelf life is roughly 1 to 2 months even when refrigerated. Old emulsion loses light sensitivity, so replace expired bottles promptly.
Here are two simple techniques I use in my studio to take stencil quality to the next level!
If there is even the tiniest gap between your printed film transparency and the coated mesh screen during light exposure, light will leak under the design edges, causing fuzzy, blurred print lines.
To eliminate gaps, stack your exposure setup in this exact sandwich order from bottom to top: Black Foam Pad/Sponge → Coated Screen (Print Side Up) → Film Transparency → Heavy Clear Glass Plate.
Pressing down firmly with a heavy glass plate forces the film flush against the emulsion, producing amazingly crisp, sharp graphic details!
Optimal exposure times vary depending on bulb wattage, distance, coating thickness, and brand. Rather than blindly trusting default time instructions, run a step-test first!
Coat a test screen, cover most of the frame with an opaque piece of cardboard, and expose sections in timed increments—1 minute, 2 minutes, 3 minutes, 4 minutes, and 5 minutes. Wash out the screen with water; the time segment that yields the sharpest, cleanest open design without washing away represents your exact ideal exposure time!
Finding your magic exposure time takes the guesswork out of future screen printing projects!
In this guide, we explored screen printing photo emulsion—from how UV light hardens the film, to choosing between 1-part and 2-part types, scoop coater application, and fixing common washout failures.
While it might sound like a science experiment at first, photo emulsion is easy to master once you understand the basic principles:
Once you master this process, seeing your intricate hand-drawn illustrations and custom typography turn into a crisp printing stencil is an incredibly rewarding experience!
Give photo emulsion a try on your next screen printing project to create beautiful, high-quality handmade goods and original merchandise!
If you found this helpful, please share this guide with your fellow crafters on social media! It truly means the world to me.
Until next time, happy crafting! This was Yassy from Crafters! (・∀・)

For example, if you are looking for articles about mizuhiki, try searching for "mizuhiki"; if you are interested in tools, try keywords like "nippers" or "pliers."
