How to Store Jesmonite Properly and Smart Ways to Dispose of or Upcycle Leftover Material
yassy
Crafters!

Hello everyone, it's Yassy from Crafters! (・∀・)
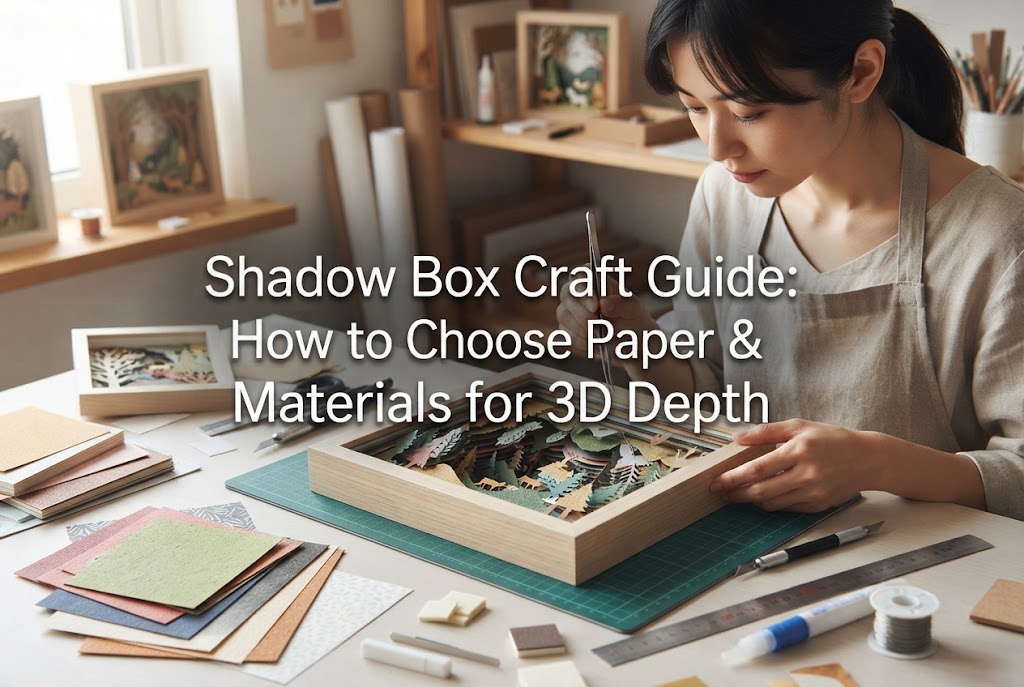
Shadow box craft—also known as 3D paper craft—is a wonderful art form where you cut out multiple copies of the same illustration and layer them piece by piece to create stunning three-dimensional depth. The moment your creation gains realistic volume and comes to life inside the frame, it feels truly magical!
When people first get interested in shadow box art and decide to try it out, the very first hurdle they encounter is: "What kind of paper and materials should I actually buy?" Walking into a craft store, hardware shop, or dollar store, you'll find countless types of paper, glues, and adhesives, leaving many beginners confused about what will give them the best results.
In fact, the final quality and smooth finish of a shadow box piece depend up to 80% on choosing the right paper and adhesive materials before you even consider advanced techniques! Picking the wrong supplies can cause your carefully cut paper parts to warp under humidity or adhesive weight, or result in layered elements collapsing without maintaining their height.
In this guide, I will walk you through everything you need to know about selecting the ideal paper for shadow box craft, essential spacer materials like silicone glue and 3D foam tape, and edge-finishing markers to give your artwork a professional look. I'll also cover common beginner mistakes and how to avoid them, so you can gather your supplies with complete confidence. Let's dive in!
Shadow box art transforms a flat 2D illustration or photo into a sculpted, realistic 3D display. By cutting out individual paper components, gently curving their edges, and layering them with spaces in between, you achieve remarkable dimension.
During these steps of floating pieces and preserving rounded shapes, the quality of your paper and adhesives plays a direct role. Unlike flat paper cutting, origami, or collage, paper used in shadow box art requires both structural strength and flexibility for shaping.
If you use paper that is too thin or glue that shrinks or stays too soft, your artwork may sag over time or develop unsightly paper waves—even if you spent hours assembling it carefully. That is why getting your material selection right from the start is your shortest path to success.
Paper is the absolute star of shadow box art. To get right to the point: standard thin printer copy paper and typical promotional flyers are not suitable for shadow box work. Here are three essential checkpoints to keep in mind when selecting your paper.
The most crucial factor when selecting paper is its weight and thickness. If you use thin copy paper (around 64–80 gsm), it tears easily during detailed cutting, lacks resilience when you try to shape curves with a stylus, and easily warps when absorbing moisture from adhesives.
The ideal paper weight for shadow box art ranges from 160 gsm to 220 gsm (grams per square meter). This thickness is comparable to standard postcards, business cards, heavyweight illustration paper, or fine art paper.
At this thickness, intricate cutouts remain sturdy and self-supporting. Furthermore, when you shape them using a paper stylus (embossing tool), the paper holds its beautiful 3D curves over long periods. If you plan to print your own illustrations at home using an inkjet printer, select matte photo paper or papercraft paper labeled as "Heavyweight" or "Extra Heavy."
The surface finish of your paper significantly impacts the mood of your finished piece. Paper generally falls into two categories: matte (non-glare) and glossy.
For beginners, I strongly recommend using Premium Heavyweight Matte Paper. Because matte paper does not create reflections, it allows the deep layers of your shadow box to be seen clearly under any lighting condition, ensuring an elegant finish without glare.
A frequent question beginners ask is: "How many identical prints should I prepare?" Generally, you will need 5 to 10 copies of the same design.
The exact number depends on the complexity of the design and the depth of the layers you want to create:
When starting out, try using a commercial shadow box kit (which usually includes 4 to 5 prints) or print 5 copies of your chosen design. Having extra copies gives you peace of mind in case of accidental cuts!
To layer cutouts above one another and create physical space, you need specialized spacer materials. Regular craft glue or stick glue flattens paper against paper, eliminating depth entirely. Here are the two main dimensional adhesives used in shadow box art.
Silicone glue is the absolute staple material loved by shadow box crafters around the world. It comes as a clear or semi-transparent thick gel that hardens into a firm yet flexible cushion while holding its solid form.
The biggest advantage of silicone glue is that you can control the height of each part completely by adjusting the amount you apply. You can even tilt pieces to make the front side higher and the back side lower.
Additionally, because silicone glue takes a few hours to dry completely, you have plenty of time to tweak, shift, or adjust the height and angle of your paper pieces after placing them. Be sure to pick an acid-free silicone adhesive made for crafts, as this prevents paper from yellowing or discoloring over time.
Another convenient option is 3D foam cushion tape. This is sponge-like double-sided tape that often comes pre-cut into small squares or circles.
The main advantage of foam tape is that it requires zero drying time and provides instant, uniform height. It comes in standard thicknesses like 1mm, 2mm, and 3mm, making it ideal when you want to lift large, flat base pieces evenly.
However, cutting tape into tiny pieces with scissors can be tedious, and once adhered, it is difficult to reposition. It is also less suited for creating subtle sloped angles.
If you're wondering which to pick, my recommended approach is to use silicone glue as your primary adhesive, while using 3D foam tape for wide base layers or quick assembly. Starting with silicone glue gives you the greatest flexibility.
Once you have your paper and adhesives ready, these extra finishing supplies will elevate the appearance of your shadow box from beginner to professional quality!
When you cut thick paper with scissors or a craft knife, the white interior core of the paper becomes visible along the cut edges. If left untreated on dark or colored illustrations, these bright white lines stand out and make the piece look cheap or unfinished.
To fix this, use water-based markers on the cut edges to mask the white paper core. Gently run the tip of the marker along the edge from the back side of the cutout piece.
Crucial Tip: Always use water-based markers! Never use oil-based markers (such as permanent markers), because the oil-based ink will bleed through the paper fibers to the front of your artwork and ruin the print.
Selecting colors that match the illustration parts is ideal, but if you are unsure, keeping a few versatile earth-tone water-based markers—such as gray, brown, dark green, and black—will cover almost any situation.
Applying a protective spray or varnish to your paper parts protects your work from moisture and UV-induced fading over time. A light coat of acid-free UV protection spray or specialized shadow box varnish keeps colors vibrant for years.
Additionally, applying a spot brush coat of gloss medium or water-based glossy varnish to specific elements—such as water droplets, gemstones, eyes, or ceramic items—catches the light and adds a realistic glossy shine!
Transforming flat paper into realistic curved shapes requires embossing tools.
A paper stylus is a metal tool with small metal spheres on both ends. By turning the paper piece over and rubbing it gently in circular motions on the back, you can shape flat paper into smooth, bowl-like curves. This tool is essential for creating curling flower petals, rounded fruits, or draped clothing folds.
Attempting to curve paper on a hard surface like a standard cutting mat won't give good results. Using a flexible embossing foam mat or cushioned silicone sheet under your paper provides just enough give to absorb stylus pressure smoothly without damaging the paper fibers.
Cause: Paper that is too thin or using water-heavy glues in large amounts.Solution: Avoid spreading water-based liquid glue over large areas. Stick to paper weighing 160 gsm or higher and use moisture-free silicone glue for height adjustments.
Cause: Applying too much silicone glue at once.Solution: Apply small dots of silicone glue using the tip of a toothpick or bamboo skewer. If silicone glue accidentally squeezes out, wait until it dries completely—you can easily peel it off cleanly with fine-tipped tweezers or a cotton swab!
Cause: Outlining every cut edge with a harsh black marker.Solution: Choose a marker shade that is just one tone darker than the main color of the cut piece (e.g., beige or light brown for skin tones, dark green for leaves, soft gray for white petals). This allows edges to blend seamlessly.
If you are wondering what to buy first, here is the basic list I would recommend to anyone starting from scratch:
You don't need to buy expensive, complex equipment right away. Just grabbing sturdy paper and a tube of silicone glue will allow you to create breathtaking 3D paper art!
To summarize, the key secret to successful shadow box craft comes down to two main choices: selecting sturdy paper (160–220 gsm) and using silicone glue for flexible height control. Adding the simple finishing step of coloring white cut edges with water-based markers will instantly give your artwork a polished, high-end feel.
Start with simple designs and gradually work your way up to multi-layered projects as you gain confidence. There is nothing quite like watching a flat image come to life in 3D right before your eyes!
If you enjoyed this guide, please share it with your fellow crafter friends on social media or messaging apps!
Until next time, happy crafting! This is Yassy from Crafters signing off!

For example, if you are looking for articles about mizuhiki, try searching for "mizuhiki"; if you are interested in tools, try keywords like "nippers" or "pliers."
