How to Choose Masking Tape & Double-Sided Tape for Handmade Crafts: Uses, Types, and Pro Tips
yassy
Crafters!

Hello, everyone! I'm Yassy from Crafters! (・∀・)
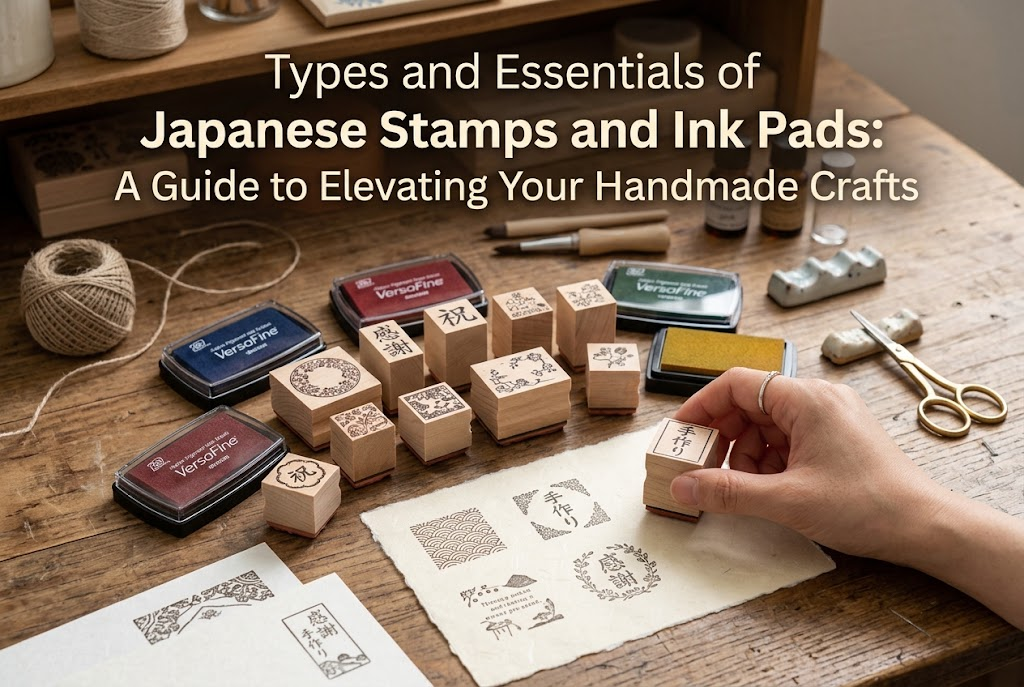
When it comes to tools that can effortlessly elevate the quality of your handmade items, stamps are at the top of the list. From adding accents to shop cards, packaging, and backing cards, to stamping directly onto your products, a single crisp impression can instantly give your creations a professional touch. As a craft writer and dedicated stamp enthusiast, I love making items with various materials and can never resist collecting cute stamps at Japanese zakka (lifestyle) shops and craft events.
However, beginner crafters often ask me questions like: "I bought a stamp, but I can't get a clean impression," or "There are so many types of ink pads, I don't know which one to choose!" In truth, stamps and ink pads have distinct characteristics and compatibility requirements. Once you understand the right combinations and proper techniques, anyone can achieve a flawless stamped image on the very first try.
In this article, I will cover everything you need to know: the types of stamps and ink pads, how stamps differ from similar crafting tools, recommendations for beginners, and foolproof tips for perfect stamping. By the end of this guide, you will be able to confidently choose the ideal stamp tools for your creative projects!
Stamps are far more than mere office stationery. In the world of handmade crafting, stamps are powerful tools for expressing your brand's aesthetic while blending handcrafted warmth with professional quality.
Handwriting logos or patterns on every item takes a lot of time, while digital printing can sometimes feel a bit cold and devoid of texture. Stamping allows you to duplicate refined, uniform designs quickly while preserving that charming handmade feel.
Here are four main ways you can use stamps in your craft projects:
Because stamps are so versatile—from the main product to the final packaging—choosing the right tools with accurate knowledge is a crucial step that directly impacts the finished quality of your work.
Stamp dies come in several materials and structural designs. Understanding the pros and cons of each type will help you choose the best tool for your project.
Clear stamps are made from transparent silicone or photopolymer resin. The self-clinging stamp die is attached to a clear acrylic block for use.
The biggest advantage of clear stamps is that because both the handle and the stamp itself are completely transparent, you can see exactly where you are stamping (100% placement accuracy). This makes them incredibly effective when making shop cards where precision is essential, or when stamping inside a precise frame. Additionally, because they come in thin sheets, they take up very little storage space.
On the other hand, they require a separate acrylic block, and they are sensitive to direct sunlight, which can cause them to yellow or degrade over time if left exposed.
This is the classic stamp style, where a rubber die is attached to a wooden or acrylic handle.
Rubber holds ink exceptionally well, transferring delicate lines and intricate designs clearly onto paper and fabric. Rubber stamps are highly durable and can last for years with proper care. The natural warmth of a wooden handle fits comfortably in the hand, allowing you to feel the firm pressure as you stamp.
The main drawbacks are that you cannot see through the handle from above, requiring a bit of practice for alignment, and they take up more storage space as your collection grows.
This type consists of just the rubber die sheet without a handle. Crafters glue them onto custom wooden blocks or pair them with static cling cushion foam to use with acrylic blocks. They are ideal for crafters who enjoy customizing their tools or who want to store many designs in a compact space.
Equally as important as the stamp itself is the ink pad. Changing the ink pad can produce a completely different finish and durability, even when using the exact same stamp.
When choosing an ink pad, focus on two key aspects: the pad surface structure and the ink composition.
The surface structure of an ink pad generally falls into three categories:
Regardless of the surface material, it is crucial to select a raised pad (convex surface) that sits above the surrounding case frame. A raised pad allows you to gently tap ink across the entire surface of a stamp, even if the stamp is larger than the ink pad itself.
The chemical composition of the ink determines which materials it can be applied to. Choosing the wrong ink can lead to frustrating mistakes like ink that never dries, bleeds into a smudge, or washes out in the laundry.
In the crafting world, several tools create effects similar to stamping. Here is a quick breakdown of how they differ:
Stenciling involves placing a cut-out template over a surface and dabbing paint through the openings using a sponge or brush. It is suitable for large patterns or creating a distressed, vintage painted effect. Stamps, on the other hand, excel at instantly duplicating fine text and intricate lines uniformly. For mass production speed and precision, stamps are far superior.
Wax seals involve melting wax onto a surface and pressing a metal seal into it to create a raised, three-dimensional crest or pattern. Unlike regular stamps that apply flat color with ink, wax seals are decorative tools meant to add physical texture and dimension.
Tooling or heat branding used in leatherwork, woodworking, and metal crafts involves using a hammer or heat to physically indent the material itself. Stamps simply apply ink onto the surface, allowing you to add color effortlessly without altering or damaging the structure of the underlying material.
If you are just starting out and wondering what to buy first, here is a straightforward selection guide to ensure success.
For your very first stamp, a set of clear text or frame stamps is ideal because alignment is so easy. When crafting shop cards or thank-you notes, you can stamp in the exact spot you intend without frustration.
If you prefer a small accent illustration or logo mark, a compact rubber stamp measuring around 2 cm to 4 cm (about 0.8 to 1.5 inches) per side is recommended. Larger stamps require precise pressure control, making them prone to fading or uneven ink coverage, so starting with a manageable size is best.
If you are buying just one ink pad to start, choose a multi-surface (non-porous compatible), fast-drying solvent or oil-based pigment ink pad in black or dark brown.
With a multi-surface ink pad, you can stamp on paper, fabric, wood, leather, plastic films, and poly bags. Before investing in separate paper-only and fabric-only ink pads, a single multi-surface pad will cover almost all your wrapping, tagging, and product needs.
For color, choosing a soft dark brown or charcoal gray instead of intense jet black gives your creations a gentler, stylish, and highly integrated aesthetic.
When stamped images come out faded at the edges, smudged, or blurry, the issue almost always lies in the application technique. Master these simple steps for a perfect impression every time!
Stamping directly on a hard table surface is a common mistake. On a completely rigid surface, slight imperfections in the stamp can cause the center or edges to lift, resulting in faint or missing areas.
Always place a cutting mat, a firm rubber mat, or a thick notebook underneath your work surface. The subtle cushion allows pressure to distribute evenly across the entire stamp surface, eliminating uneven impressions.
The biggest mistake beginners make is pressing the stamp down firmly into the ink pad. Doing this forces ink deep into the grooves of the stamp die, resulting in thick, blobby, and illegible text.
The correct method is as follows:
Simply switching to this "tapping pad onto stamp" technique will dramatically improve the crispness of your stamped images!
Once you place the stamp onto your material, do not let it slide horizontally.
Using the thumbs and index fingers of both hands, apply pressure straight down from directly above, shifting your weight evenly. Avoid twisting or rotating the stamp while pressing down, as this creates blurred or double impressions.
Remember the golden rule: Place straight down, press evenly from above, and lift straight up.
Here are common issues crafters run into, along with solutions and maintenance advice to keep your stamps in top condition for years.
Cause: Too much ink was applied, or the ink is incompatible with the highly absorbent material (such as coarse linen or traditional handmade paper).
Solution: Use fabric or multi-surface ink on textiles, and apply the ink sparingly by tapping the pad lightly before stamping.
Cause: Insufficient drying time. Multi-surface inks on non-porous surfaces may look dry but can take several minutes to fully set.
Solution: Allow the item to dry completely without touching it. To speed up drying, apply warm air from a hairdryer for a few seconds to set the ink instantly.
Never leave ink to dry on your stamps after use. Dried ink clogs fine details in the stamp die and degrades rubber and silicone over time.
Avoid washing stamps directly under running water, as this can cause wooden handles to warp, swell, or rot. If water cleaning is necessary, gently wipe the rubber or silicone portion with a damp sponge and dry thoroughly immediately.
Direct sunlight, high temperatures, and humidity are the biggest enemies of rubber and clear stamps. Exposure to sunlight can cause rubber to harden and crack, or silicone clear stamps to melt and become sticky.
Store your stamps flat in a drawer or light-shielded container in a cool place. Furthermore, avoid stacking clear stamps directly on top of one another; always store them between protective backing sheets or inside plastic clear folders so they do not fuse together.
With the right tools and basic techniques, stamps and ink pads are wonderful crafting companions that allow anyone to produce professional-quality finishes easily.
Choose an ink pad suited to your material, place a cushioned mat underneath, and gently tap the ink pad onto your stamp. Keeping these basic principles in mind will instantly elevate your handmade products and packaging.
To get started, pick up a versatile multi-surface ink pad and a favorite text stamp, and try making your own backing cards or gift packaging. The excitement of stamping and the joy of seeing a crisp, beautiful impression will make your creative journey even more rewarding!
If you enjoyed this article, sharing it with your crafting friends on social media would mean the world to me! Until next time, happy crafting! This was Yassy from Crafters!


For example, if you are looking for articles about mizuhiki, try searching for "mizuhiki"; if you are interested in tools, try keywords like "nippers" or "pliers."
