How to Neatly Finish Mizuhiki Ends: Glue Selection and Techniques for Hiding Cut Ends Beautifully
yassy
Crafters!

Hello, everyone! It’s Yassy from Crafters! (・∀・)
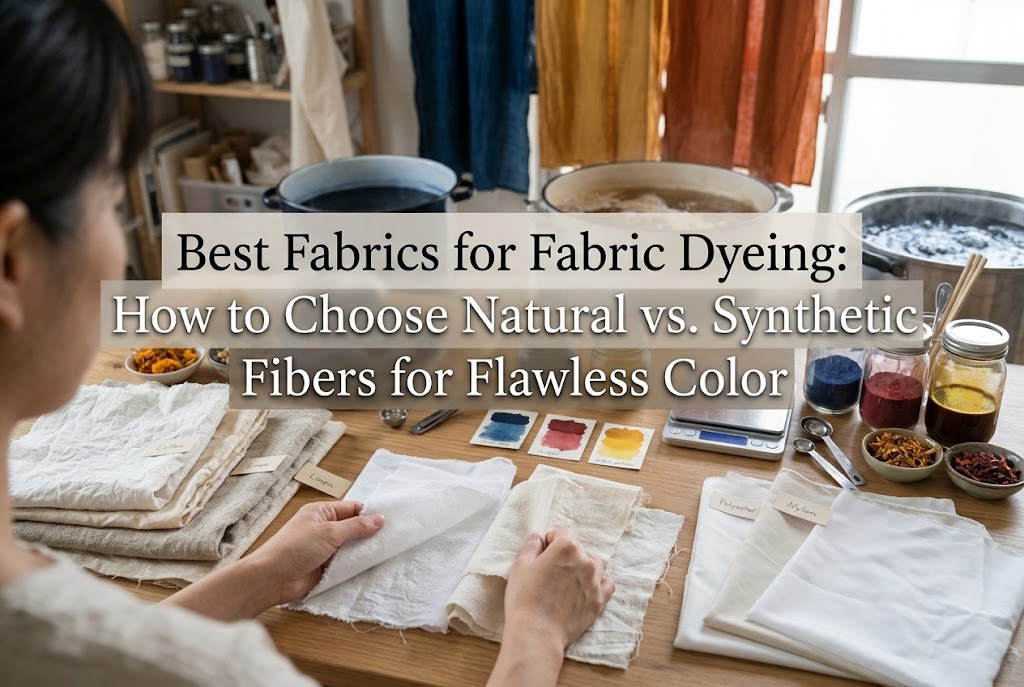
Transforming plain white fabric into vibrant, custom-colored textiles with your favorite hues and gradients is one of the most rewarding and original crafts out there. I personally love the world of fabric dyeing—whether it is dyeing various cuts of cloth to sew into finished projects or simply admiring beautifully hand-dyed textiles in my studio.
However, almost everyone who starts experimenting with fabric dyeing hits the exact same wall early on: "The color didn't turn out vivid at all," "The dye completely washed down the drain during rinsing," or "The fabric ended up with splotchy, uneven patches."
Here is the truth: more than 90% of these dyeing failures are not caused by a lack of technique. They happen because of the fabric choice. If you introduce dye to a piece of fabric without understanding its fiber content, weave structure, and surface treatment, you will never get a satisfying result.
In this guide, I will thoroughly explain how to choose the right fabric to achieve vivid colors and permanent dye fixation. From the critical differences between natural and synthetic fibers to how weaves impact color depth and the essential prep work that prevents failure, here is everything you need to know based on my hands-on craft experience!
To succeed at fabric dyeing, you must keep one fundamental rule in mind: the fiber type completely dictates which dye you can use and how well it will take.
Fabrics are broadly divided into natural fibers and synthetic (chemical) fibers. As a general rule, standard household dyes that you can easily purchase (such as direct dyes or fiber-reactive dyes) will only produce rich, vivid results on natural fibers.
If you ignore this rule and grab whatever random scrap fabric is lying around, all the time and effort you spend dyeing will go to waste. Let’s break down the main fiber categories and their dyeing characteristics.
Plant-based natural fibers such as cotton and linen (including ramie) are primarily composed of cellulose. Cellulose bonds strongly with direct dyes and fiber-reactive dyes, which are widely available for home crafters.
These fibers absorb dye smoothly, deliver honest and true color reproduction, and hold up exceptionally well to washing. That is why they are the undisputed favorite for beginners and professionals alike. You don't need dangerous chemicals or specialized commercial equipment—just hot water, salt, and a fixer (or soda ash) are enough to achieve gorgeous color.
If you are new to fabric dyeing, starting with 100% cotton or 100% linen is definitely the way to go. It minimizes the risk of failure while letting you enjoy rich, deep color payoff.
Animal fibers like silk and wool are made of protein. Protein fibers have completely different chemical properties than plant fibers and bond strongly with dyes under acidic conditions.
Silk features a natural sheen, giving dyed silk an unmatched vibrancy and luxurious finish that stands out above all other fibers. Wool dyes into warm, deep, and comforting tones.
However, when dyeing animal fibers, you must use acid dyes alongside an acidifier like white vinegar or citric acid, heating the dye bath throughout the process. Furthermore, wool can easily shrink or felt if exposed to sudden temperature shocks or aggressive agitation, requiring strict temperature control and gentle handling.
Synthetic fibers such as polyester, acrylic, and polyurethane are made from petroleum-based raw materials and have a structure closer to plastic. Because of this, they repel water and standard dye solutions. No matter how long you soak them in standard household dye, they will not take the color.
A common beginner trap is thinking, "It’s a blend, so it should be fine!" If you dye a 50% cotton / 50% polyester shirt with direct dye, only the cotton portion will absorb the dye. The resulting piece will look washed out, heathered, and faint.
Dyeing polyester requires disperse dyes, which function almost like tiny pigment particles, along with sustained boiling temperatures over 100°C (212°F). Doing this in a home kitchen is challenging, carries burn hazards, and produces strong odors. It is not something I recommend for beginners.
Even when working with 100% cotton or linen, the weave of the fabric dramatically alters the final look and how dye penetrates the fibers.
Choosing the right weave for your project's intended purpose and aesthetic is the secret to elevating your finished craft piece. Here is a look at the most common fabric weaves and how they behave.
Sheeting is a standard plain-weave cotton where warp and weft threads alternate evenly. It offers balanced thickness and moderate thread density, allowing the dye liquid to spread smoothly and uniformly throughout the entire cut.
Lawn, on the other hand, is a lightweight plain-weave fabric made from fine yarns, resulting in a delicate, airy hand feel. Because it is thin, dye penetrates it extremely quickly. When practicing tie-dye or traditional shibori (resist-dyeing) techniques, the dye reaches all the way into tight folds and pleats effortlessly.
If you want a clean, streak-free dye job or clear patterns from folded resist methods, sheeting and lawn are foolproof choices. They are affordable, widely available at fabric shops, and perfect for practicing.
Oxford fabric is woven with threads paired up in a basketweave style, giving the surface a subtle textured, grid-like look. Canvas (often called hanpu in Japan) is a thick, rugged fabric woven tightly with heavy threads.
These heavier and textured fabrics absorb significantly more dye solution than thin plain-weave cloths. As a result, even at the same dye concentration, they tend to yield a much deeper, weightier color tone.
Keep in mind that due to their density, you will need to spend more time agitating and working the dye into the fabric to achieve full saturation. For projects requiring durability and structure—such as tote bags, cushion covers, or home decor—these sturdy fabrics are fantastic.
Twill is characterized by diagonal parallel ribs across the face of the fabric—the classic weave used for chino pants and denim.
When you dye twill fabric, subtle variations in how dye settles along the raised ridges and sunken grooves create natural depth and shadows. Even when dyed in a single solid color, it avoids looking flat and gives off a sophisticated, artisanal nuance. I highly recommend twill for making pouches, bags, and apparel accessories.
Gauze is a loosely woven, highly breathable lightweight fabric. Double gauze consists of two layers of gauze joined together at regular intervals during weaving.
Because gauze holds generous pockets of air and moisture between its loose fibers, dye bleeds through it with a gentle, blooming effect. Taking advantage of this property allows you to create lovely, seamless gradients and soft, watercolor-style tie-dye patterns.
For dyeing handkerchiefs, baby items, breezy room curtains, and lightweight scarves, gauze is unbeatable. Since the loose fibers are delicate, always handle gauze gently during washing and rinsing to avoid damage.
Selecting the right fiber is only half the battle. If you drop standard off-the-shelf fabric directly from the store into your dye bath, you will likely run into frustrating issues.
To achieve professional-quality results, understanding fabric preparation is indispensable. Whether you do this prep work or skip it makes a night-and-day difference in your finished craft.
Standard fabrics sold at craft and fabric stores are treated with sizing agents (starches applied during weaving) and finishing agents to prevent soiling during storage. Natural cotton also retains natural plant oils and waxes.
These invisible coatings repel water. If you apply dye without washing them away, the dye solution will bead up, roll off, and leave blotchy streaks—or simply rinse out completely. No matter how premium your dye is, it cannot bind to fibers coated in sizing.
When dyeing ordinary fabric yardage or ready-to-wear clothing, always perform a scouring wash before you begin. Scouring is a straightforward step, but it must not be skipped:
This simple scouring process drastically boosts fabric absorbency, transforming regular yardage into a dye-ready canvas.
If you want to skip the stovetop scouring step and guarantee even, streak-free color, I strongly suggest buying PFP fabric.
PFP stands for "Prepared for Printing / Dyeing." These fabrics have already undergone thorough de-sizing, scouring, and bleaching at the mill, specifically intended for dyers and textile printers.
With PFP fabric, you do not need to boil-wash it yourself. Simply wet it out with clean water straight from the package, and it will immediately pull in dye solution, producing stunningly vibrant colors. Search online for terms like "PFP cotton" or "prepared for dyeing fabric"—if you want consistent, top-tier results, it is the smartest way to start.
Alongside fabric selection, matching your dye to your fiber is critical. Even the best fabric will not hold color if the dye cannot chemically bond with it.
Whenever you are unsure, stick strictly to these pairings:
To answer the question, "What should I buy for my specific project?" here are the reliable combinations I personally use when making different types of dyed pieces:
Here is my reliable three-step routine to avoid mishaps whenever starting a new dyeing project:
Whether buying fabric yardage or sourcing a blank garment, check the tag for fiber content. Look for "100% Cotton" or "100% Linen." Avoid blends like 80% cotton / 20% polyester unless you deliberately want a faded, heathered look, because synthetics will mute your final color.
Before mixing any dye, place a few drops of water on a corner or scrap of your fabric. If the drops bead up and roll across the surface, sizing and protective finishes are present—meaning you need to scour the fabric. If the water absorbs instantly into the fibers with a soft hiss, your preparation is complete.
Dipping a full project into a dye bath without testing is a gamble. I always cut a small scrap (a few centimeters wide) and run a quick test dye. This lets me check whether the shade is too dark, whether I need to adjust immersion time, or if the fabric drinks up dye faster than expected, requiring extra dye bath volume. This five-minute test ensures complete success on the final piece.
Once you are comfortable with basic plain weaves, experimenting with unique fabric textures will unlock a whole new dimension of creativity.
Traditional Japanese wazarashi (loom-state bleached) gauze is processed gently in large vats over several days without aggressive mechanical tension, keeping the fiber cross-sections round and exceptionally soft. Dyeing wazarashi gauze with indigo or muted reactive dye tones yields charming, pillowy tenugui towels or bandanas with a warm, Japanese-modern aesthetic.
Waffle-weave fabric (thermal cloth) has a three-dimensional grid pattern. When dyed, dye pools differently in the recessed squares compared to the raised borders. Even when dyed in a single color, the fabric texture creates an automatic two-tone depth that looks fantastic for loungewear or tea towels.
Dyeing 100% cotton lace or eyelet embroidery cloth is another favorite technique of mine. Differences in thread density between the intricate lace patterns and the open background yield crisp tonal contrasts. Hand-dyed lace pieces make gorgeous accents for doll clothes, pouches, and mixed-media projects.
The success of your fabric dyeing journey is almost entirely decided before you even mix your dye powder. Stick to 100% natural fibers like cotton or linen, scour out any sizing (or use ready-to-dye PFP fabrics), and pair your fiber with the right dye type.
Seeing a pure white piece of fabric emerge from the dye bath in the exact rich color you envisioned is an unforgettable, addictive thrill. I hope this guide helps you choose the perfect material for your next dyeing adventure!
If you found this guide helpful, please feel free to share it with your fellow crafting friends on social media. See you in the next article! This was Yassy from Crafters!

For example, if you are looking for articles about mizuhiki, try searching for "mizuhiki"; if you are interested in tools, try keywords like "nippers" or "pliers."
