The Ultimate Guide to Glue Guns: Types, Uses, and Pro Tips for Crafting Success
yassy
Crafters!

Hello, this is Yassy from Crafters! (・∀・)
The world of clay crafting is truly deep and exciting! I personally love creating pieces using various types of clay, and as a collector, I frequently enjoy browsing and purchasing wonderful items made by other crafters.
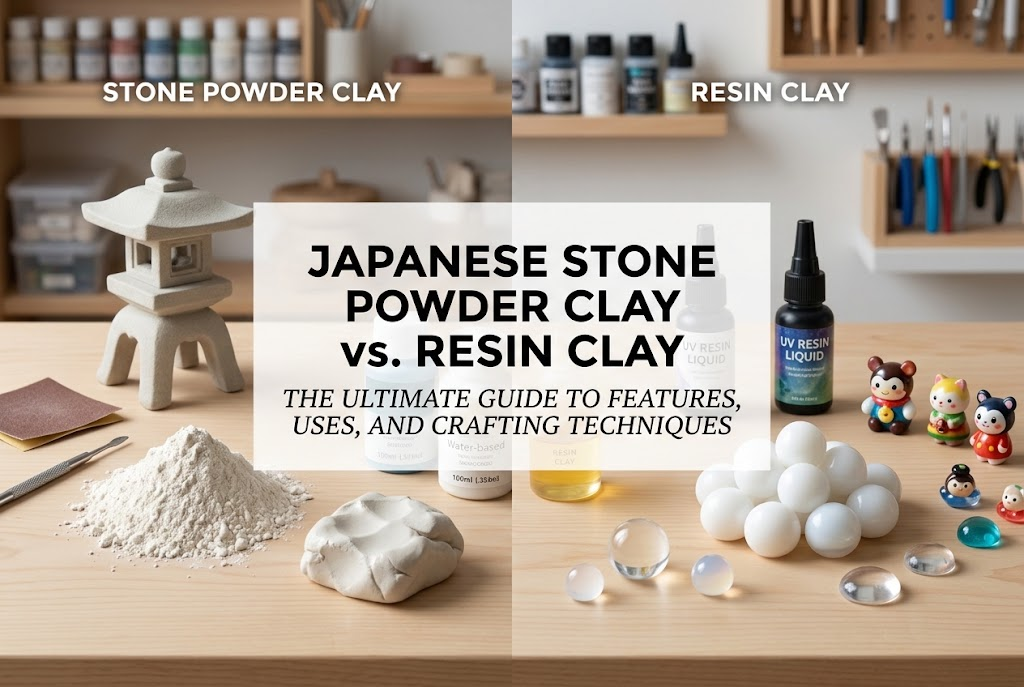
When you visit craft supply stores or the clay aisle at 100-yen shops, you will see many different types of clay lined up. Among them, beginners often get confused trying to decide between Stone Powder Clay (Sekifun Nendo) and Resin Clay (Jushi Nendo).
Because both look like white blocks at first glance, many crafters assume they can be used interchangeably and end up purchasing the wrong one. However, these two materials are completely different in their raw ingredients, post-drying properties, and ideal shaping methods. Choosing the wrong clay for your project can lead to cracking during the crafting process or parts snapping off after drying, ruining all your hard work.
In this guide, I will thoroughly explain the differences between stone powder clay and resin clay! Beyond just comparing basic properties, I will dive deep into common mistake patterns for beginners and share the exact selection rules I use in my own crafting projects.
By reading this article to the end, you will be 100% able to identify the best clay for the project you want to create! Expand your range of expression and complete your ideal clay crafts!
Stone powder clay and resin clay differ fundamentally in their raw materials. This difference directly impacts their tactile feel, post-drying hardness, and overall texture.
First, let's understand the basic composition of each clay type.
As the name suggests, stone powder clay is made by mixing finely ground stone powder (such as quartz powder or talc) with water and binders. To the touch, it feels slightly damp and has a rustic texture similar to ceramic clay used in pottery.
When it dries, it hardens completely, transforming into a texture resembling bisque-fired ceramics or plaster. The greatest strength of stone powder clay is that it can be smoothly carved with knives or sculpting tools after drying.
Because you can freely carve, sand, and build up additional clay, it is ideal for three-dimensional figures, sculptural items, and retro-style goods.
Furthermore, by adding more water, you can achieve a smooth, liquid-like texture. Its appeal lies in the natural weight of stone and its rustic, matte finish.
On the other hand, resin clay is primarily composed of synthetic resins such as vinyl acetate emulsion, starch, and oils. When held in your hand, it is extremely stretchy, fine-grained, and smooth.
As it dries, the properties of the resin allow it to become very hard while maintaining a slight flex (elasticity). Thanks to this elasticity, it resists snapping even when rolled thin, offering remarkable durability.
Another major feature is that once completely dry, it exhibits a subtle translucent shine and depth. It can mimic the natural transparency of real plant stems or fresh fruits, making it indispensable for fake sweets, miniature foods, delicate plants, and flower petals.
Once cured, it feels smooth like plastic and results in a finished piece that is resistant to moisture and impact.
To deepen your understanding of the differences between stone powder clay and resin clay, let's compare them across seven essential crafting factors. Grasping these differences is the fastest route to zero crafting mistakes.
The texture of stone powder clay changes significantly based on water content. Right out of the package, it is often a bit firm and requires finger strength to knead. Adding water makes the surface smooth, but adding too much water makes it stick excessively to your hands.
Resin clay feels squishy and elastic from the start, boasting excellent stretchability. It does not easily stick to fingers, allowing tiny parts to be shaped effortlessly by rolling them between your fingertips. Its high viscosity makes it easy to smooth out wrinkles, making it ideal for quickly crafting detailed shapes using just your fingers.
In terms of approach before drying: stone powder clay focuses on "sculpting, carving, and adding clay," while resin clay focuses on "shaping with fingers/tools and letting it harden as-is."
The post-drying texture is immediately obvious both visually and to the touch.
Stone powder clay dries to a completely light-absorbing matte finish. A slight graininess remains on the surface, giving it a calm and warm impression. Additionally, because it contains stone powder, the finished product has a comfortable weight and a premium feel.
Resin clay dries with a slight translucency that subtly passes light, along with a high density. The surface becomes smooth and slick, resembling a plastic product. In terms of weight, it is somewhat lighter than stone powder clay, offering a compact, solid firmness.
Strength greatly impacts how long your piece will last.
Stone powder clay becomes hard and sturdy if crafted with a certain thickness. However, thin sections or narrow parts will easily snap if dropped or subjected to impact. Understand that it shares a similar brittleness to glass or ceramics.
Resin clay retains a plastic-like elasticity inside the material even after drying. Therefore, even thin parts like leaves or flower petals remain flexible enough to bend slightly with your fingers without snapping. Resin clay is overwhelmingly superior for wearable accessories or keychains that are handled frequently.
If you want to modify the shape during the crafting process, this difference in workability becomes decisive.
Blades slice easily into stone powder clay after it dries. Carving details with a craft knife or sanding the surface to a smooth finish with sandpaper is extremely easy. Furthermore, adding fresh stone powder clay onto dried clay using water bonds firmly. It offers high freedom for changing shapes later on.
Once resin clay dries, it hardens like plastic, causing blades to slip or leaving white scratches on cut surfaces. Sandpaper clogs easily, making clean carving difficult. Additionally, adding new resin clay onto dried resin clay can cause it to peel off easily, so you must aim for 100% completion during the pre-drying shaping stage.
The two clays require different approaches when applying color.
Stone powder clay is highly absorbent, making it excellent for post-painting (applying paint to the surface after drying). It readily absorbs acrylics, watercolors, and pastels, allowing for deep color expressions. However, mixing paint directly into stone powder clay before drying disrupts its moisture balance and causes cracking, so post-painting is the correct method.
Resin clay primarily relies on pre-coloring (kneading small amounts of paint directly into the clay). Mixing in paint yields vibrant colors that, combined with the clay's natural translucency, replicate the vivid hues of real fruit or sweets. While post-painting is possible after drying, the smooth surface can repel paint, requiring paints with high adhesion like acrylics.
Clay inevitably shrinks as water evaporates during drying.
Stone powder clay has a low shrinkage rate of around 5%. Because its size does not change drastically after drying, it is easy to craft pieces according to planned dimensions. Drying time depends on thickness, but it requires 2 to 4 days to dry completely.
Resin clay has a higher shrinkage rate of about 10% to 15%. It shrinks one size smaller as it cures. Fine parts tighten up significantly, so if you are using molds or aiming for specific dimensions, you must shape the piece slightly larger to account for shrinkage. Drying takes about 1 to 2 days, hardening rapidly from the surface inward.
Price is an important factor for enjoying crafts over the long term.
Stone powder clay is relatively affordable. Large 500g packs can be purchased for a low cost, allowing you to craft large decor items or bulky 3D objects without holding back. High-quality stone powder clay is also readily available at 100-yen stores in Japan.
Resin clay is more expensive than stone powder clay. A package of 100g to 200g often costs the same as a much larger pack of stone powder clay. It is best suited for delicate, small-scale creations such as tiny accessory parts or miniature food.
Beginners in clay crafting almost always fall into certain typical trap patterns by ignoring the material properties of the clay.
Here are reliable techniques to prevent failures and achieve success on your first try!
This happens when crafters use stone powder clay to make delicate flower petals or thin doll fingers. While moist during shaping, the clay holds its form, but once dry, it lacks all elasticity and snaps at the base with the slightest touch.
【Reliable Solution】When making thin or narrow parts with stone powder clay, always insert an internal core or armature! Using wire, aluminum foil, or bamboo skewers as a base and building stone powder clay around it is an absolute rule. With an internal armature, even if the clay suffers an impact, the piece will not break completely. If you want to make ultra-thin pieces without armatures, switch to resin clay instead.
This mistake occurs when using resin clay to make parts intended to fit perfectly into pre-made molds or frames, only for the finished piece to shrink, leave gaps, or warp. This stems from not accounting for resin clay's high shrinkage rate.
【Reliable Solution】When using resin clay, shape your piece one size larger than your intended final size! Also, when making flat, thin pieces, exposing only one side to the air causes the top layer to shrink faster, leading to warping. To prevent this, dry the piece on a sponge or flip it over regularly to ensure even drying on both sides. For 3D objects requiring strict dimensions, switching to low-shrinkage stone powder clay is the smarter choice.
This phenomenon involves noticeable cracks appearing on the surface while the piece is drying. While it can happen to both clays, it occurs frequently with stone powder clay due to rapid drying or uneven moisture distribution.
【Reliable Solution】Never force-dry your clay using the hot air of a hair dryer! The exterior will shrink rapidly while the interior remains wet, causing tension that results in severe surface cracking. The golden rule is to let your piece dry slowly and naturally in a well-ventilated, shaded area. Also, if clay dries while you work, adding water unevenly to re-knead it creates moisture inconsistency. Ensure uniform softness throughout the clay during the kneading phase before shaping. If cracks do appear on stone powder clay, you can fix them completely by filling the gaps with softened, watered-down clay and sanding it smooth once dry.
"So, which clay should I use for the project I want to make?" Here are clear rules for deciding between the two materials based on project category.
These projects maximize stone powder clay's strengths: a matte finish, ease of carving, and comfortable weight.
These projects require resin clay's key strengths: flexibility, translucency, and smooth texture.
There is no rule saying you can only use one type of clay in a single project! Combining stone powder clay and resin clay allows you to cover each material's drawbacks and create professional-grade pieces.
For example, when I make a miniature "Cafe Plate," I combine them as follows:
Matching the clay type to the specific role of each part is the secret technique to dramatically boosting the quality of your work!
Success in clay crafting depends not just on shaping time, but on every phase: preparation, drying, storage, and finishing. Here are practical techniques to keep your work beautiful for a long time.
Preventing clay from sticking to your fingers or tools requires different approaches depending on the clay type.
When working with stone powder clay, water is your best friend. Lightly dampening your fingertips with water and smoothing the surface easily erases seams and wrinkles. However, adding too much water dissolves the clay into mush, so keep your water use light.
When working with resin clay, applying a very thin layer of baby oil or hand cream to your hands is standard practice. Because resin clay contains oils, having a light oil layer on your hands prevents sticking entirely, allowing you to shape smooth, clean surfaces. Applying a thin coat of baby oil inside molds also ensures effortless release without ruining the shape.
When drying clay, do not place it directly on plastic trays or work mats. The contacting surface will fail to dry, stick, or potentially grow mold underneath.
When drying stone powder clay, place parchment paper over a flat board and set your piece on top. Parchment paper prevents sticking. For thick, large pieces, flip them over halfway through to allow air to reach the underside.
When drying resin clay, placing it on a fine-mesh, flat sponge is best. Sponges allow air to circulate, releasing moisture from the bottom for even drying. A soft sponge also prevents the bottom surface from flattening under the weight of the piece.
Once your clay piece is complete, finish it with a protective coat of varnish. Compatibility varies by material.
Because stone powder clay is highly absorbent, leaving it unsealed causes it to absorb oils and dust. Once painting is complete, always seal the surface with varnish. To preserve its rustic ceramic feel, apply a matte varnish. For a glossy, high-end shine, apply 2 to 3 coats of gloss varnish.
Resin clay naturally possesses subtle gloss and water resistance. However, protective varnish is recommended for accessories or items you want to keep dust-free. Use high-gloss varnish or UV resin on fake sweet sauces or fruits for a plump shine, and matte varnish on baked goods like cookies or bread to create a realistic texture contrast.
Once a package of clay is opened, it begins to dry immediately. Allowing leftover clay to harden into an unusable block is a waste.
Follow these storage steps to keep leftover clay soft over long periods:
Following these steps thoroughly will keep your clay as soft as new for months after opening!
Stone powder clay and resin clay are materials with completely different personalities and wonderful charms. It is not a matter of which one is superior, but rather choosing based on which clay aligns best with the vision of the piece you want to create.
If you want a heavy, rustic finish that you can carefully carve and build up by hand, choose Stone Powder Clay. If you want to enjoy smooth translucency, vivid colors, and create durable, delicate parts, choose Resin Clay.
When you understand clay properties correctly, unexpected troubles and failures mid-project drop dramatically. The excitement and sense of accomplishment when completing a piece exactly as envisioned is an irreplaceable joy of handmade crafting!
Pick up a clay that piques your interest and experience its feel and transformations firsthand. I warmly root for your wonderful ideas to take shape through the art of clay!
If you found this article helpful, sharing it with friends on social media would make me very happy and encouraged! See you in the next article! This was Yassy from Crafters!



For example, if you are looking for articles about mizuhiki, try searching for "mizuhiki"; if you are interested in tools, try keywords like "nippers" or "pliers."
