The Ultimate Guide to Inks for Japanese Eraser Stamps: Best Types by Surface, Stamping Tips & Care Secrets
yassy
Crafters!

Hello everyone! It’s Yassy from Crafters! (・∀・)
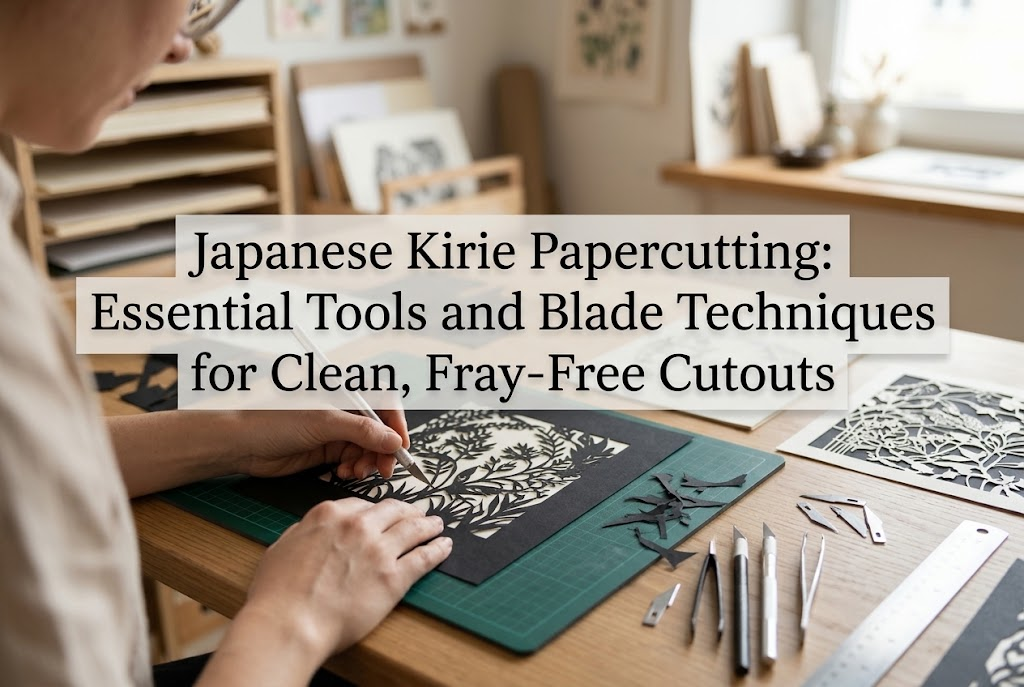
One of the greatest appeals of papercutting—known in Japan as Kirie—is that with just a single sheet of paper and a craft knife, you can create a breathtakingly intricate and beautiful world. I personally enjoy making and collecting all kinds of handmade crafts, but the feeling of awe I get when looking at the tense, delicate lines of a finished Kirie artwork is truly special.
However, a common frustration I hear from beginners is: "My cut lines end up jagged," "The corners turn out rounded instead of sharp," or "The paper tore halfway through and ruined the whole piece." After spending so much time carefully carving out a design, it is heartbreaking to see frayed, fuzzy edges along your cuts.
If you are struggling to achieve clean cuts, it is not due to a lack of talent or dexterity. It simply means you haven't learned the fundamental rules of choosing the right tools, controlling your blade, and following the correct cutting order. Once you master these basic rules, even complete beginners can craft smooth, professional-quality Kirie pieces.
In this guide, I will break down all the essential tips for cutting paper cleanly without fraying—from choosing your equipment to blade manipulation and mistake-prevention techniques. I'm sharing all the key secrets I've learned through my own crafting experience, so please read through to the end and try them out!
80% of the precision in Kirie is decided before you even begin cutting, simply by the tools you select. No matter how nimble your fingers are, you will never get clean cuts if you use unsuitable equipment. Let's start by gathering the perfect set of tools.
Please refrain from using standard heavy-duty utility box cutters for Kirie. Standard cutters have blades that wobble inside the handle, and their blade angles are too dull, making them completely unsuited for cutting delicate curves and sharp angles.
For Kirie, always use a dedicated design knife (also known as an art knife or detail knife). Shaped like a pen with a blade firmly clamped at the tip, it allows for delicate, precise control just like holding a pencil.
Design knife blades generally come in two main angle types: 30-degree and 45-degree angles. For Kirie, I absolute recommend the 30-degree acute angle blade. Because the tip is extremely sharp, it slices into the paper effortlessly, making intricate intersections and fine curves vastly easier to cut.
The absolute golden rule of Kirie is to keep your blade edge at peak sharpness at all times. As you cut paper, the blade tip dulls at a microscopic level far faster than you might think. A dull blade pulls on the paper fibers instead of slicing them, causing fraying, fuzzy edges, and tears.
Experienced Kirie artists swap out their blades without hesitation. Continuing to cut just because "it still cuts okay" is the single biggest trap beginners fall into. In my own practice, even for a small postcard-sized piece, I change to a fresh blade tip at least 3 to 5 times.
Make it a strict rule to replace your blade immediately the moment you feel even the slightest drag or resistance against the paper. Replacement blades for design knives are very affordable online or at craft stores. Keeping a fresh, razor-sharp blade is your fastest shortcut to clean lines.
Do not compromise on your choice of cutting mat. Using thick cardboard or hard plastic boards as an underlayment will cause your blade to slip—risking injury—or instantly dull the fine tip of your knife.
Be sure to prepare a proper self-healing cutting mat designed for papercrafts. A good mat has just the right amount of soft give to receive the blade point, reducing strain on the tip. Choosing an A4 to A3 size gives you plenty of working room to move freely.
Also, avoid using an old, heavily scratched mat covered in deep grooves. Your knife tip can get caught in those old tracks, causing your lines to warp. Keeping your mat surface clean and smooth is another secret to achieving flawless cut edges.
Selecting the right paper is equally vital for Kirie. Ordinary copy paper has loose, soft fibers that rip easily under blade pressure, leading to fuzzy edges. On the flip side, heavy cardstock or thick watercolor paper requires too much cutting force, exhausting your hands and preventing delicate control.
The best papers for beginners are Joushitsushi (high-quality uncoated fine paper, around 70kg–90kg basis weight / approx. 80–105 gsm), Tanto paper, or thin black drawing paper. These papers feature densely packed fibers that allow the blade to glide smoothly, resulting in crisp edges.
Tanto paper, in particular, is widely loved by Japanese papercut artists because of its rich color palette, beautiful surface texture, and ideal firmness. Starting with a sheet of black Tanto paper will give your work crisp, elegant lines right from the start.
Once your tools are ready, it's time to begin cutting. Cutting Kirie cleanly relies on clear rules regarding how you apply force and position your knife.
When cutting paper, do you find yourself gripping the knife tightly and pressing down hard to force the cut? Excessive force makes it impossible to control the knife precisely, leading to wobbly lines and a higher risk of slipping and injuring your fingers.
The correct pressure feels as though you are merely stroking the paper's surface with the weight of the sharp blade. If your design knife blade is brand new, it will slice through the paper effortlessly without needing heavy pressure.
If you feel you have to press hard to cut, do not strain your hand—simply replace the blade with a fresh one. Relax your shoulders and guide the knife with a light touch, as if drawing smoothly with a pen.
Holding your design knife at roughly a 45-degree angle relative to the paper surface provides the most stable control. Angles that are too upright or too low cause the blade to snag against the paper.
Equally critical is ensuring that the blade is not tilted sideways—it must remain perpendicular to the plane of the paper. If the knife tilts to the left or right while cutting, the line may look straight from above, but the cross-section of the paper will be cut at a bevel. This exposes the white inner fibers along the cut edge when viewed from the side or back, making it look fuzzy.
Always check from the front to make sure your knife blade pierces straight down into the paper. Kirie pieces cut with clean, vertical cross-sections cast beautiful, crisp shadows and acquire a wonderful sense of depth.
The most common mistake among Kirie beginners is trying to cut curves by twisting their wrist or turning the knife itself. Maneuvering the knife in circles causes the blade angle to wobble, guaranteeing jagged lines.
The ironclad rule of Kirie is to keep the hand holding the knife fixed in its most comfortable cutting direction, while using your other hand to rotate the paper. Keep your knife hand pulling straight toward your body, and smoothly rotate the paper beneath it to produce perfectly seamless curves.
Clear away any clutter around your workspace so you can rotate the paper freely. Mastering this "rotate the paper" technique alone will dramatically elevate the quality of your cuts.
You cannot simply start cutting Kirie anywhere you like. Cutting out of order can cause the paper to become flimsy and tear mid-project, or cause fine details to catch on your hands and snap.
Always follow these two absolute principles for cutting order:
If you cut out the outer frame first, the paper loses its structural tension, making it warp and bend when you try to work on the delicate inner details. Likewise, cutting out large holes early removes support for thin neighboring lines, causing them to break under pressure.
Always start your blade in the smallest, most challenging inner sections, working your way outward. The moment you make the final cut along the outer boundary and the finished piece lifts effortlessly from the surrounding paper is pure joy.
When cutting shapes with sharp corners like squares or stars, trying to turn the knife around a corner in a single continuous stroke is a mistake. Forcing the blade to pivot at a point rounds off the corner or tears the paper tip.
To create razor-sharp point corners, the key is not to cut into the corner, but to cut starting from the corner point outward.
Insert the very tip of your blade precisely at the apex of the corner, and draw the knife toward yourself along the line. Then, insert the tip at the corner apex again to cut along the adjacent line away from the point. By moving the blade away from the apex in both directions, you avoid crushing the corner, resulting in needle-sharp points.
When cutting out intersecting lines or sharp V-shapes, use the "overlap cut" technique.
If you try to stop your blade exactly where two lines meet, you will often leave a microscopic uncut fiber. Pulling the cut piece away will snag and tear that point, leaving a noticeable burr.
To prevent this, allow the blade to pass just a fraction of a millimeter past the intersection point, letting the cuts overlap slightly. This slight overlap ensures the waste piece releases cleanly without any pulling, keeping the inner corner completely crisp.
Cutting flowing curves and hair-thin lines is often considered the most challenging part of Kirie. Here are practical methods used by experienced artists.
When cutting curves or circles, keep your elbow and shoulder steady, guiding the knife using only your fingers and the rotation of your left hand. Relax your right grip, keeping the tip resting lightly against the paper.
Gently pull the knife toward you while rotating the paper with your opposite hand at a steady speed. Maintaining a smooth, constant rotational speed produces seamless, beautiful circles.
If your hand pauses mid-cut, do not force the movement. Lift the blade gently, reinsert it slightly behind where the cut stopped, and smoothly resume cutting to hide the seam.
When working on lines thinner than 1 mm—such as plant stems or strands of hair—how you press down on the paper makes all the difference. To prevent the paper from stretching and tearing along the blade's path, always press your fingers down firmly directly alongside the cutting line.
Holding the paper flat right next to the blade disperses the pulling pressure, preventing fragile lines from snapping. If your fingers block your view, holding down the paper with a flat acrylic ruler works brilliantly as well.
For extremely delicate patterns, you can tape your printed pattern sheet onto your final Kirie paper using masking tape along the edges. Cutting through both layers together adds extra stiffness to the paper, keeping fine lines supported while you cut.
Even with great care, a tiny burr or uncut fiber might occasionally remain. If you spot a small frayed piece, never pull or pick at it with your fingers. Pulling it will catch on adjacent lines and cause a major tear.
Instead, fit your design knife with a brand-new blade. Place the point vertically right at the base of the burr, and gently press straight down from above to perform a vertical "push-cut."
By pressing straight down without dragging the blade horizontally, you cleanly sever the stray fiber without damaging the surrounding artwork.
Once every piece is cut out, it is time for the final finishing steps. The way you display your Kirie artwork can multiply its beauty tenfold.
Applying colorful paper to the back of a black Kirie piece—a technique called Urabari in Japan—instantly transforms it into a vibrant, enchanting artwork.
Great materials for backing include Chiyogami, handmade Washi paper, colored construction paper, tracing paper, or origami sheets. Translucent Washi paper or gradient origami sheets applied behind cutouts yield a glowing, stained-glass-like effect when light passes through.
If you want different colors for different sections, cut pieces of colored paper slightly larger than each opening and glue them behind individual cutouts from the back. Fitting these colors together like a jigsaw puzzle is one of the most satisfying parts of Kirie crafting.
The most common failure during mounting is glue bleeding or paper warping. Standard liquid school glue contains high water content, which causes paper to expand and wrinkle, ruining your crisp cutouts.
For Kirie, always use spray adhesive (repositionable or low-tack craft spray), removable tape runner glue, or a fine-nozzle precision craft bond applied in tiny dots.
If you want to adhere an entire intricate piece evenly, spraying a light, uniform coat of spray adhesive onto the back of the artwork in a well-ventilated area gives the cleanest, most professional result. If using precision liquid craft glue, pick up a tiny pinhead of glue on the tip of a toothpick and apply tiny dots along the thicker lines. Minimizing the amount of glue used is essential for avoiding wrinkles and squeeze-out.
Once your piece is finished, put it in a frame! Framing elevates the quality of your craft immensely compared to simply taping it to a wall.
My top recommendation is a floating acrylic frame (double-pane glass/acrylic picture frame). By sandwiching your Kirie cutout between two clear acrylic sheets, the cut lines cast natural shadows onto the wall behind it when displayed, creating a captivating sense of 3D depth and shadowplay.
If using a standard picture frame, placing a thick mat board between the Kirie piece and the background paper creates a subtle gap that casts gentle shadows, highlighting the delicate cuts of your work. Find a frame you love and display your handmade paper art with pride!
We’ve covered the fundamental techniques for cutting Kirie cleanly without fraying. Let's do a quick recap of the most important takeaways:
Cutting precise, delicate lines might feel challenging at first, but once you equip yourself with the right tools and master the habit of rotating the paper, your cuts will glide smoothly and cleanly.
Watching an intricate pattern emerge from a simple sheet of paper by your own hands offers a deep sense of calm, focus, and accomplishment unmatched by any other craft. Keep these fundamental tips in mind, and enjoy exploring the wondrous, delicate world of Kirie!
If you found this guide helpful, sharing it with your crafting friends on social media would mean the world to me! Thanks for reading, and see you in the next article! This was Yassy from Crafters!

For example, if you are looking for articles about mizuhiki, try searching for "mizuhiki"; if you are interested in tools, try keywords like "nippers" or "pliers."
