How to Choose and Use a Hot Wire Cutter: Tips for Clean Foam Crafting
yassy
Crafters!
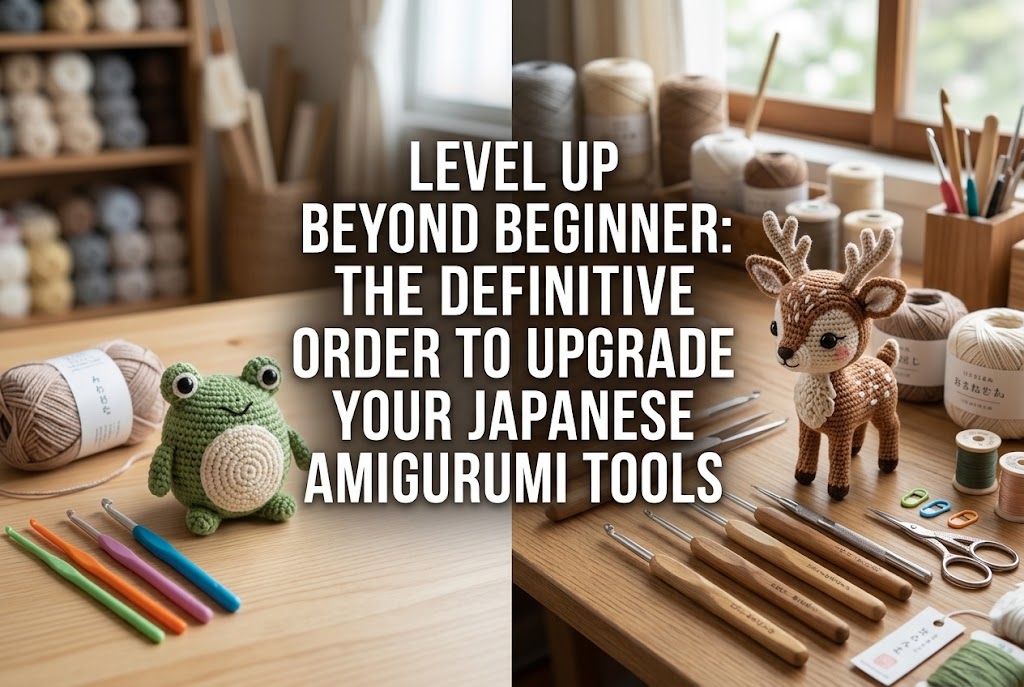

Hello, crafters! It’s Yassy from Crafters! (・∀・)
Once you start making amigurumi and finish your first few projects, almost everyone hits the same wall: "Why doesn’t mine look as cute as the sample pattern?" "Why are my stitches so uneven?" or "Why do my parts twist and distort when sewing them together and stuffing?"
If your amigurumi looks misshapen or your hands ache while crafting, the main reason isn’t a lack of skill. The real culprit is continuing to rely on the basic, budget tools that came inside your starter kit.
Tools included in beginner kits or bought from 100-yen discount shops are merely intended to let you experience the basic motions of crochet. They simply aren’t engineered to withstand the firm tension, delicate seaming, and uniform stuffing required for high-level amigurumi crafting.
In this article, I will explain the definitive order in which you should upgrade your tools once you graduate from starter kits. Upgrading your tools in the right sequence will dramatically transform the quality of your finished pieces. Here is the essential know-how gained from my own journey of crocheting, observing, and testing tools over the years.
Amigurumi has fundamentally different requirements compared to standard crochet projects like garments or scarves: you are densely packing stuffing inside a crocheted fabric to sculpt a three-dimensional form.
To prevent stuffing from poking out between stitches, amigurumi demands an exceptionally tight and even tension. Furthermore, crafting tiny ears or limbs and attaching them seamlessly to the body requires continuous, delicate precision.
The bare metal or plastic crochet hooks and plastic yarn needles found in starter kits are not designed for such demanding work. Grips slip, preventing you from holding tension comfortably; unrefined hook tips split yarn fibers; and thick plastic needles damage your stitches. When your tools are actively fighting you, achieving a professional finish becomes nearly impossible, no matter how much time you invest.
To elevate your work, you must prioritize upgrading the tools that handle the heaviest load. Investing in the right tools directly reflects in the beauty of your stitches, faster crafting speed, and significant relief from hand and wrist fatigue.
When upgrading, don't just buy supplies at random. The rule of thumb is to acquire them in an order that directly impacts your project's beauty while slashing physical strain. Here is the definitive sequence I recommend with absolute confidence:
By upgrading in this precise sequence, you will avoid unnecessary spending while experiencing a dramatic leap in quality with every single piece you make. Let’s break down why each tool is essential and how to choose the right one.
The crochet hook is the tool you hold longest throughout your amigurumi journey. Please stop using thin, bare metal hooks or flimsy plastic hooks from starter kits right away.
Because amigurumi requires tight tension, gripless hooks put excessive strain on your hands and fingers. As your hand tires, your thread tension fluctuates, which is the primary cause of uneven, sloppy stitches.
Your absolute first upgrade should be an ergonomically designed crochet hook with an elastomer rubber grip. A non-slip, comfortable grip allows you to maintain tight, even tension consistently without having to clench your fingers with excessive force.
Assembly—joining individual pieces together—is often the biggest roadblock where beginners struggle or give up. It's time to retire the plastic yarn needles that come in starter kits.
Plastic needles are too thick, making them difficult to push through tight amigurumi stitches, and they often snag and fray the fibers. Moreover, plastic bends under tension, preventing you from pulling pieces flush against the body. If your limbs wobble or show unsightly gaps at the seams, the flexibility and thickness of your plastic needle are to blame.
Upgrade to smooth, rigid metal darning needles. Look for a set containing multiple sizes so you can match the needle to your yarn weight.
My strongest recommendation for amigurumi is a bent-tip tapestry needle. When sewing limbs onto a curved, spherical surface, a straight needle tends to catch the internal stuffing and pull it out, making clean stitches difficult. A gentle upward curve at the tip allows you to glide precisely under the surface loops of your crochet fabric, resulting in dramatically cleaner, virtually invisible seams.
The smooth glide of metal combined with the maneuverability of a curved tip will cut your assembly time in half while multiplying the structural strength of your work.
Stuffing is the unsung hero that defines the three-dimensional form of an amigurumi. Many beginners attempt to stuff using tweezers, wooden chopsticks, or their bare fingers. However, these makeshift tools cannot pack stuffing thoroughly into tight corners.
Stuffing with fingers or chopsticks packs fiber in uneven clumps, resulting in a lumpy, irregular surface. Furthermore, stuffing cannot reach the very tips of narrow hands or feet, leaving them floppy and weak.
The indispensable tool here is a pair of craft hemostat forceps (a craft version of locking medical clamps). The tip firmly grips fibers, locks securely, and allows you to guide stuffing deep into tiny openings without slipping.
Hemostats allow you to feed small wisps of fiber into exact spots. By working from the inside out and building density evenly in circular motions, you can create smooth, round shapes completely free of bumps.
They also allow you to pack limbs firmly until they hold their structure, ensuring your amigurumi will not deflate over time. Once you experience stuffing with hemostat forceps, you will never go back to chopsticks or tweezers. For anyone aiming to create artisan-level amigurumi, this is an absolute game-changer.
The face is the soul of an amigurumi. Moving an eye placement by just a single millimeter can change an expression from endearing to comical. Almost every crafter has experienced the disappointment of parts shifting out of place during stitching, resulting in a crooked face.
To eliminate this issue, you need a fine-pointed metal awl and extra-long positioning pins designed for amigurumi.
When inserting post-style plastic safety eyes, forcing them between tight stitches with your fingers stretches and distorts your fabric. Using a fine metal awl to gently open the stitch intersection into a clean round hole allows the eye post to seat flush against the fabric without damaging the yarn.
Additionally, before sewing pieces together, always anchor them thoroughly with long craft pins (such as fork pins or extra-long ball-head pins). Short standard sewing pins slip out easily due to the pushback from the dense stuffing. Long pins penetrate deep into the core, securing parts at multiple points so they cannot shift while you sew.
Once your tools are in order, turn your attention to your primary filler material: stuffing. Budget polyester fiberfill from discount stores often has short, brittle fibers that lack bounce. Over time, cheap stuffing compresses and settles, leaving your amigurumi limp and shrunken.
Upgrade to high-grade, silicone-coated 100% polyester fiberfill.
Premium fiberfill features strongly curled, resilient fibers with high loft recovery. Even a modest amount expands pleasantly, and the slick coated fibers resist poking through gaps in your crochet fabric.
High-grade stuffing completely transforms how an amigurumi feels to hold. Even when packed firmly, it retains a pleasant bounce, instantly springing back to shape when squeezed. If you sell your work or give it as gifts, this difference in tactile quality is what distinguishes a professional piece from amateur craftwork.
Beginners often fall into a few traps when shopping for tools. Keep these common missteps in mind to avoid wasted expenses:
Avoid cheap mega-sets found online. The hooks in these sets often feature poor surface polishing that drags against yarn, and their rubber handles frequently slip off. You will also end up paying for numerous sizes you never touch. You don't need a dozen sizes at once; purchasing one or two individual hooks from reputable manufacturers in the sizes you actually use is a far wiser investment.
Thin hand-sewing needles, short dressmaking pins, and utility scissors are built for flat textiles, not 3D yarn structures. Amigurumi deals with thick yarn and firm, dimensional shapes. Using specialized tools built for yarn and heavy-duty 3D crafts is the fastest path to clean results.
You don't need to purchase everything at once. Here are tiered upgrade plans based on common budgets so you can progress at your own pace:
Resolve the two largest pain points: stitch tension and sewing frustration.
These two tools alone will dramatically boost your stitching speed and seam cleanliness.
A comprehensive setup to elevate your entire project to artisan standards.
With this collection, you will be equipped to craft balanced, distortion-free amigurumi with complete confidence.
In amigurumi, tools are not mere accessories—they are your trusted partners in translating the cute character in your mind into reality.
Graduating from starter kit notions to ergonomic, dedicated tools will simultaneously resolve uneven stitches, warped seams, and misshapen silhouettes. Most importantly, it makes every moment of crocheting far more relaxing and enjoyable.
Start by picking up a quality ergonomic hook and a metal tapestry needle set in your favorite size. The moment you switch, you'll feel as though your hands have unlocked a new level of skill. Take that first step and elevate your amigurumi journey today!
If you found this guide helpful, please share it with your fellow crafters on social media! See you in the next post—this was Yassy from Crafters! (・∀・)


For example, if you are looking for articles about mizuhiki, try searching for "mizuhiki"; if you are interested in tools, try keywords like "nippers" or "pliers."
