Upgrading Your Bead and Gemstone Jewelry Tools: The Step-by-Step Priority Guide to Elevate Your Craft
yassy
Crafters!

Hello, everyone! It’s Yassy from Crafters! (・∀・)
Creating handmade pieces, admiring inspiring craftwork, and hunting for charming lifestyle goods are some of my absolute favorite ways to spend time. When bringing a craft project to life, having quality tools and knowing how to choose the right one not only expands the range of what you can make, but also dramatically improves the quality of your finished work.
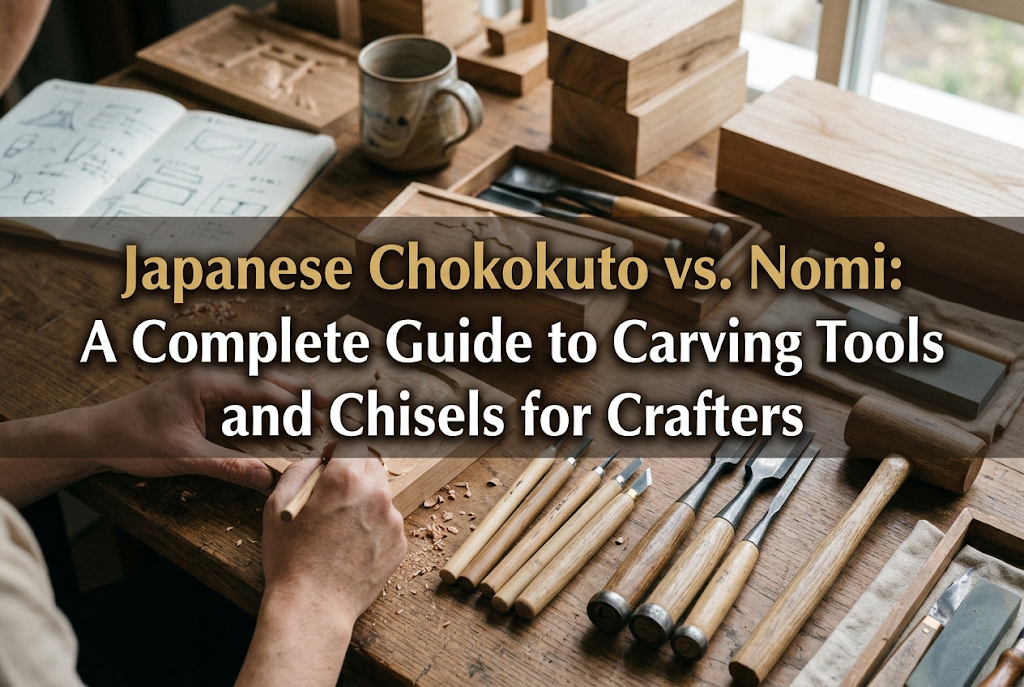
Whenever crafters explore three-dimensional mediums—whether it is woodworking, eraser stamp making, or sculpting with clay—two tools almost always come up: chokuto (small carving gouges and knives) and nomi (chisels). However, many beginners are not entirely sure how these two tools fundamentally differ or when to reach for which. Assuming that “anything that carves is essentially the same” can lead to rough, jagged cuts or, worse, irreversible damage to a cherished project.
In this guide, I will share everything you need to know about the differences between carving tools and chisels, their specific blade profiles, how they compare to other studio blades, how to pick the right set as a beginner, and essential techniques to work safely while achieving a clean, polished finish. By the end, you will know exactly which cutting tool suits your project best, making your craft sessions even more rewarding!
While both chokuto (carving tools) and nomi (chisels) are designed to carve, hollow, and pare away material, they differ distinctly in their construction, intended purpose, and the way force is applied. Grasping this distinction is the first step toward smart tool selection.
The defining difference comes down to whether the tool is held solely in the hand for delicate, controlled shaving, or struck with a wooden mallet or hammer (or driven with substantial two-handed body weight) for deep material removal.
Carving tools (chokuto) are held much like a pen, resting in the hand so that fingertip sensitivity directly guides every cut. Because the cutting force relies strictly on hand pressure, they excel at fine curved lines, delicate surface textures, and intricate incisions in softer or thinner materials. Their handles are typically compact and fit comfortably within the palm for optimal control.
In contrast, Japanese chisels (nomi) are built heavy-duty to chop away substantial amounts of wood, create perfectly flat reference surfaces, or hollow out mortises and joints. Many feature a metal hoop (known as a katsura) at the base of the handle designed to withstand strikes from a wooden mallet or a genno (Japanese hammer). Even non-striking push chisels (tsuki-nomi) are proportioned so you can apply full two-handed leverage. Compared to carving gouges, chisels deliver far greater cutting depth and power.
Carving tools are ideal for wooden jewelry, decorative relief work on coasters and cutlery, carving rubber stamps (keshi-gomu hanko), and refining fine details on dried stone-powder or resin clay.
Whenever your project calls for millimeter-precision—such as translating line art into low relief, shaping the silhouette of a tiny brooch, or clearing the background around a stamp design—carving tools are the clear choice. For palm-sized projects and delicate expressions, they are indispensable.
Chisels come into their own during structural woodworking and substantial craft projects, such as hand-carving wooden spoons, deep bowls, custom picture frames, or small wooden furniture.
When roughing out a basic shape from a large wooden block, scooping out a deep bowl cavity, or cutting mortise-and-tenon joints to join pieces together, carving gouges simply lack the required leverage and clearance. For efficient, accurate removal of dense wood, a sturdy chisel is essential.
Even under the umbrella of carving tools, different blade profiles serve entirely different functions. Picking the wrong profile can cause the blade to catch or tear the material rather than cutting cleanly.
Here are the four foundational blade shapes, along with two specialty profiles worth knowing.
The hira-to features a straight, flat cutting edge oriented perpendicular to the shaft.
It is primarily used to smooth out the ridges left behind by gouges or V-tools, leveling surfaces and beveling sharp edges. By sliding the flat edge evenly across the material, you can achieve clean, crisp planes. It is also handy for scoring straight, shallow stop cuts.
This tool features an angled, knife-like edge. Depending on the maker or region in Japan, it is often referred to as kiridashi-to, in-to, or shaha.
Its primary role is scoring sharp outline cuts and clearing out narrow, acute corners. You can draw it toward you like a knife or push it forward to incise stop lines. In rubber stamp carving and wood relief work, this is arguably the most crucial blade for establishing crisp contours along drawn lines.
The maru-to has a U-shaped curved profile. It comes in various curve radii, typically categorized in Japanese sets from large (daimaru), medium (chumaru), small (komaru), down to extra-small (gokukomaru).
This gouge creates soft troughs and hollows. Because the cut leaves a gentle, curved groove, it is ideal for shaping spoon bowls, suggesting animal fur textures, or carving wavy decorative patterns. Wider gouges are also frequently used to clear large background areas efficiently.
The sankaku-to features a V-shaped cutting edge, commonly ground to an angle of 60 or 90 degrees.
It produces sharp, narrow incisions. Rather than making two opposing angled cuts with a knife, a single push of the V-tool carves a crisp, clean trench. It shines when carving lettering, fine linework, and intricate geometric patterns.
Beyond the primary four, you will also encounter shallow gouges (asa-maru-to) and bent blades (magari-ba).
Shallow gouges leave much softer, less pronounced ridges than standard U-gouges, making them wonderful for creating subtle shading, textures, or soft undulating surfaces. Bent blades feature an angled neck that elevates the handle, allowing you to reach deep into the concave bottom of a bowl or cup where a straight handle would hit the rim.
Woodcraft chisels also come in specialized variations. Using a chisel outside its intended purpose can chip the cutting edge, so understanding their specific traits is important.
The oire-nomi is the quintessential, all-around Japanese chisel used for everything from joinery to general shaping. It features a steel hoop (katsura) at the butt end of the handle, allowing it to be struck firmly with a wooden mallet or Japanese hammer.
If you are choosing a single chisel or basic starter set for woodcraft projects, the oire-nomi is the standard choice. It handles mortising, grooving, and edge trimming reliably.
The tsuki-nomi is designed strictly for hand-pushing rather than striking. It has a longer handle and lacks a striking hoop.
This tool is used for paring thin shavings from wood surfaces to produce smooth planes and for fine adjustments on tight wood joints. Because it is guided without hammer blows, it allows exceptionally sensitive tactile control, making it ideal for accentuating clean, natural grain patterns.
The maru-nomi features a curved, U-shaped cutting edge on a heavy-duty chisel shank. Versions are available for both striking and hand-pushing.
When hollowing out the interior of large wooden plates, bowls, or traditional wooden cups (such as kuksa), a maru-nomi is indispensable. Dense hardwoods that would stall a small hand-held carving gouge can be hollowed smoothly and quickly with this robust tool.
Craft benches often hold several tools that look somewhat similar at first glance. Using them interchangeably can slow you down or ruin your blades. Here is how to keep them separate:
Craft knives and utility cutters are designed to slice thin materials like paper and craft film. Their blades are deliberately thin and flexible.
Carving tools and chisels, on the other hand, are engineered to pare, scoop, and chop solid materials, and feature thick, rigid steel backs. Prying into wood or cured clay with a thin craft knife risks snapping the tip violently. Always use dedicated carving tools or chisels when shaving solid, dimensional stock.
Leather craft knives, such as kawabocho or bettachi, are specialized tools for cutting leather cleanly or skiving (thinning) edges. They feature broad, razor-sharp angled edges.
They are intended strictly for leather and are not shaped to withstand the resistance of carving hard wood. Conversely, using a woodcarving chisel on leather tends to stretch and snag the flexible fibers rather than slicing them cleanly. Reserve leather knives for leather, and use carving tools or chisels for wood and rigid clays.
Clay spatulas and wire modeling tools are meant to shape, blend, and texture soft, pliable clay. Most do not have sharp cutting edges.
Carving tools and chisels are used only after the clay has fully dried and hardened, allowing you to shave down high spots, refine facets, or carve sharp relief lines. Match the tool strictly to whether the clay is wet or dry.
With so many options available in specialty shops, choosing your first set can feel overwhelming. Here is a clear guide to making the right pick.
Your medium dictates the best tool profile:
The sharpness retention and lifespan of a blade depend heavily on its steel metallurgy. The three most common categories are:
Mono-steel (Zenko): Cut from a single piece of steel, these are common in budget starter sets. While affordable, they dull relatively quickly. They are sufficient for occasional, light hobby use.
Laminated Steel (Niso-ko / Awase-gane): Highly recommended for serious crafters. This traditional Japanese construction forge-welds a hard, brittle high-carbon steel cutting layer to a softer, shock-absorbing iron backing. It yields exceptional sharpness that is also easy to resharpen on waterstones—the ideal balance for committed beginners.
High-Speed Steel (HSS / Haisu-ko): Exceptionally hard and wear-resistant. HSS holds an edge remarkably well, even when repeatedly carving dense hardwoods or abrasive cured clays. While more expensive, it is worth considering if you want to minimize frequent sharpening sessions.
For carving tools (chokuto), starting with a basic boxed set of 4 or 5 foundational profiles is economical and immediately opens up varied carving expressions.
For chisels (nomi), buying a full boxed set right away is rarely necessary. Instead, purchase a single oire-nomi in a versatile width—such as 12 mm (about 1/2 inch) or 15 mm—tailored to your current project. You can add specialized widths later as your work requires.
Comfort in the hand is vital, especially during long crafting sessions. Handles that are overly bulky or slick can cause hand fatigue.
Traditional wooden round handles or octagonal profiles sit securely in the hand and resist rolling off the workbench. Carving tools featuring rubberized, slip-resistant grips are also widely available and provide secure handling for crafters with smaller hands or lighter grip strength.
Once you have your tools, practicing proper handling ensures both beautiful work and personal safety. Cutting tools are safe when handled properly, but improper use can cause serious injuries.
There is one absolute rule when working with carving blades: Never place your supporting hand in front of the blade’s cutting path.
The most common carving mishap occurs when a blade slips off the work and lunges forward into the hand holding the piece. Keep your free hand strictly behind the cutting edge or well off to the side.
For small blanks, avoid holding the piece in your palm altogether. Secure it firmly to your bench using a small bench vise or wood clamps before beginning your cut.
When working with timber, recognizing grain direction is essential. Japanese woodcrafters distinguish between cutting with the grain (shitagaime) and cutting against the grain (sakamoku).
Cutting with the grain means sliding the blade along the natural lie of the wood fibers. The tool glides smoothly, shaving off whisper-thin ribbons and leaving a silky, reflective surface.
Cutting against the grain causes the blade to dive downward under the fibers, tearing out chunks of wood and leaving a rough, splintered surface. If you feel sudden resistance or notice rough tearing, stop immediately and reverse your cutting direction by 180 degrees. This simple adjustment transforms the quality of your cuts.
When applying a carving tool or chisel, angling the blade too steep will cause it to dig in and jam. Angling it too shallow will cause it to skid across the surface without biting.
Aim for an approach angle of roughly 30 to 45 degrees relative to the workpiece. Rather than driving the blade using only wrist strength, engage your elbow and upper body to guide it smoothly forward.
Never attempt to remove thick chunks in a single pass. The golden rule of clean carving is to take light, shallow shavings repeatedly, peeling away thin layers until you reach your target depth.
Placing workpieces directly onto a bare, slick workbench invites slips and requires excessive hand clamping. A simple rubber non-slip mat makes a tremendous difference.
Placing a non-slip rubber pad under your work keeps the material planted firmly. This allows you to carve with relaxed hands, focusing all your attention on blade control.
Carving edges naturally dull with use. A dull blade produces cloudy, torn cuts and demands extra pushing force, dramatically increasing the risk of slips. Regular care keeps your tools performing like new.
After each session, brush away all wood shavings and clay dust with a soft brush or rag. Perspiration from fingers contains salts and moisture that cause rapid rust on carbon steel.
Wipe the steel clean with a dry cloth and apply a thin film of camellia oil, light machine oil, or mineral oil before storing. If storing tools long-term, keep them with rust-inhibiting paper or silica gel packets in a low-humidity space.
When the blade begins to drag or push wood fibers instead of severing them cleanly, it is time to refresh the edge.
For waterstone sharpening, a fine finishing stone (around 3000 to 8000 grit) works best. Soak the stone thoroughly, align the blade's primary bevel flat against the surface, and slide it steadily without rocking. Once a tiny wire edge (burr) forms on the back, flip the tool over, lay the back flat against the stone, and take a couple of light passes to remove the burr.
If waterstones feel intimidating, a leather strop loaded with polishing compound (such as chromium oxide) is a fantastic, beginner-friendly alternative. Pulling the bevel backward across the charged leather strop a few times quickly restores a razor-sharp edge. For carving gouges, stropping is an easy and safe maintenance routine.
Both chokuto carving tools and nomi chisels bring distinct strengths to the craft room. Carving gouges offer fingertip control for organic curves and miniature relief, while chisels deliver the structural power and flatness needed for solid woodworking.
Understanding their structural differences and matching the right blade to your material will elevate your craft projects to a professional level of refinement.
Start with a dependable carving tool set or a single, versatile Japanese chisel. The tactile pleasure of watching clean wood curls peel away to reveal the shape you envisioned is deeply satisfying. Take your time, prioritize workshop safety, and enjoy every shaving along the way!
If you found this guide helpful, please feel free to share it with your fellow makers. See you in the next craft article! This was Yassy from Crafters! (・∀・)









For example, if you are looking for articles about mizuhiki, try searching for "mizuhiki"; if you are interested in tools, try keywords like "nippers" or "pliers."
