A Japanese Crafter’s Guide to Knitting: Projects, Difficulty, Tools, and Beginner Costs Explained
yassy
Crafters!
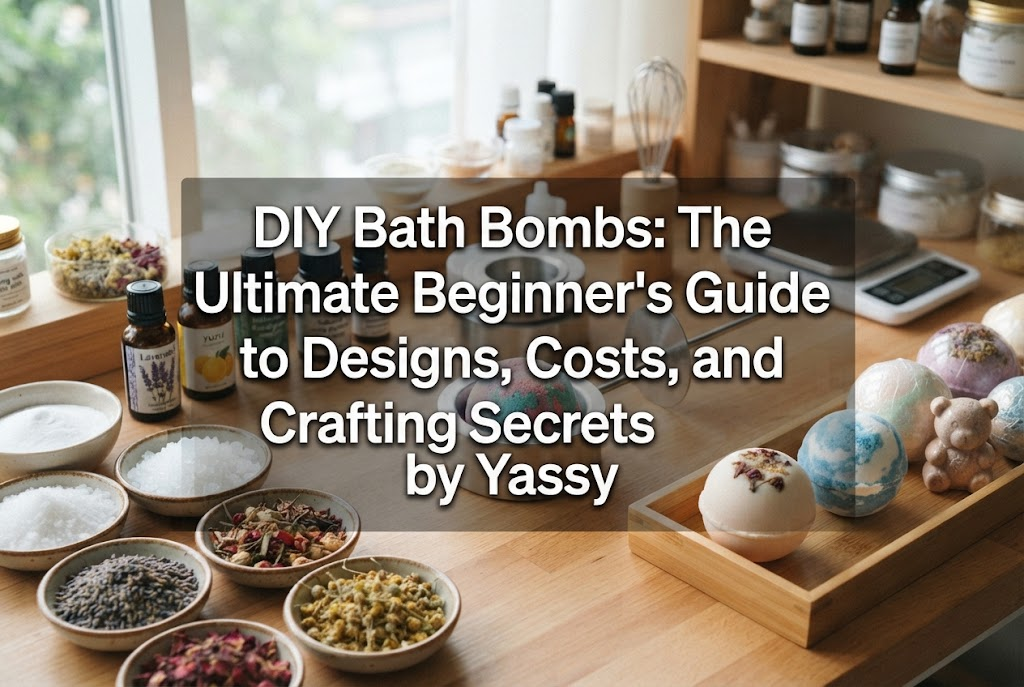

Hello, everyone! I’m Yassy from Crafters!
When it comes to turning an ordinary bath into a luxurious, relaxing sanctuary right at home, nothing feels quite as magical as a bath bomb. The moment it hits warm water, it fizzes with a satisfying sizzle, filling the room with soothing aromas and beautiful colors. It is an experience that almost anyone has felt comforted by at least once.
As someone who is obsessed with every genre of handmade crafting, I have a special place in my heart for bath bomb making. From the joy of crafting them yourself to the excitement of floating your finished creation in the tub—and seeing the beaming smiles on friends' faces when you give them as gifts—every single step from production to use is packed with charm.
However, many beginners might wonder: "Can I really make bath bombs easily at home?" or "Don't I need special ingredients and complicated tools?" As a writer for a comprehensive craft website, I am here to share everything! In this guide, I will thoroughly explain the appeal of bath bomb making, the project variations you can create, handling difficulty, required workspace, and realistic initial costs. By the end of this article, you will have complete confidence to start making your own bath bombs today!
The greatest feature of homemade bath bombs lies in the creative freedom you cannot get from commercial store-bought products, combined with the peace of mind that comes from using simple, safe ingredients. The fizzing action is caused by a very straightforward chemical reaction between baking soda (sodium bicarbonate) and citric acid, which release carbon dioxide gas when they come into contact with water.
Both of these core ingredients are so safe that they are widely used in food preparation and household cleaning. This makes them extremely gentle and safe for items that touch your skin. Because you are making them yourself, you can completely skip synthetic dyes and harsh artificial fragrances, opting instead for organic essential oils, natural clays, and dried herbs.
Dropping your custom bath bomb into the water is pure entertainment. Watching it fizz vigorously while releasing colorful petals that float across the surface melts away the day's fatigue in an instant. It is fun to look at, fun to make, and fun to use—which is precisely why bath bomb crafting is loved by DIY enthusiasts around the world.
If you think a bath bomb is just a plain round ball, think again! Modern bath bomb crafting has evolved tremendously. You can design stunning creations that look like delicate pastries from a high-end bakery or sophisticated spa-quality art pieces.
The most iconic yet versatile shape is the classic round bath bomb, made using spherical molds or even plastic toy capsules (like Japanese gachapon capsules). While single colors look clean and cute, layering two or more colored powders creates gorgeous striped or earth-strata gradient patterns.
By simply altering color combinations, you can create anything from dreamy pastel aesthetics to chic, mature earth tones. Achieving a perfectly smooth, solid sphere offers immense satisfaction precisely because of its simplicity.
Immense popularity among adult crafters goes to botanical bath bombs, which feature dried flowers and herbs embedded inside or scattered across the surface. By placing rose petals, chamomile flowers, lavender buds, or dried orange slices at the bottom of your mold before packing the powder, you achieve a luxurious look straight out of a boutique shop.
When dissolved in warm water, the petals float gracefully on top, transforming your bathroom into a high-end spa experience. Leaving them out on display before use also releases a gentle floral scent, allowing them to double as aromatic room sachets.
To showcase the playfulness of handmade crafts, try making sweet-inspired bath bombs! Use silicone cupcake cups or donut molds for the base, then whip up a topping using baking soda and liquid soap to create a foam "frosting."
Top them off with bath-safe sprinkles or miniature charms, and you will have a creation so adorable people might mistake it for a real dessert. Their eye-catching appearance makes them absolute showstoppers for party favors and gifts.
By hiding a small toy, water-resistant charm, or polished gemstone in the center of the powder while packing the mold, you can recreate popular surprise bath bombs at home.
As the bath bomb fizzes away in the tub, a cute little figure slowly emerges—a surprise feature that kids absolutely adore. Hiding secret items inside to gift to family and friends is a wonderful way to add an element of fun.
You can also customize bath bombs to enhance the water quality itself. By adding moisturizing oils like jojoba oil, shea butter, or coconut oil to the base, along with Epsom salt, Himalayan pink salt, or cosmetic clays, you create a deeply nourishing soak.
These additions soften the bathwater and leave your skin feeling hydrated and smooth after stepping out. Tailoring the formula to suit your specific skin type is one of the best privileges of DIY crafting.
Many beginners think, "It’s just packing powder into a mold, so it must be easy!" only to face common stumbling blocks like the powder swelling up mid-process or crumbling apart when removed from the mold. Understanding key handling techniques guarantees 100% success!
The most critical aspect of making bath bombs is moisture control. Baking soda and citric acid start fizzing the second they touch even a single drop of water. If you introduce too much liquid while mixing, your mixture will begin expanding like bread dough before or during the drying phase, puffing right out of the mold.
The golden rule to prevent this is never pouring liquid directly into the bowl. Always use a spray bottle (mister) to apply tiny, controlled mists of water. Furthermore, working on rainy days or during humid seasons can cause the powder to absorb moisture from the air. Always craft on dry, clear days or in an air-conditioned room with reduced humidity.
If your bath bomb crumbles like a sandcastle upon demolding, it is usually due to two reasons: insufficient moisture binding the powder, or inadequate packing pressure.
The ideal texture before molding should feel like damp beach sand—holding its shape when squeezed in your hand, yet easily crumbling when poked. When filling your mold, add the powder in small increments, pressing down firmly with your fingers or palm every single time. Giving it maximum pressing force is the secret to producing rock-solid, durable bath bombs.
Never use random household paints, craft inks, or liquid perfumes in your bath bombs, as they can ruin your bathtub or irritate your skin.
For color, stick strictly to food-grade food coloring, cosmetic-grade mica powder, or natural cosmetic clays. For fragrance, use 100% pure plant-extracted essential oils rather than synthetic fragrance oils. Aim for roughly 5 to 10 drops per bath bomb, keeping concentrations safe and skin-friendly.
If left exposed to room air, finished bath bombs will gradually absorb ambient humidity and lose their fizzing power.
Once fully dry, wrap each bath bomb tightly in plastic wrap to exclude air, or seal them in OPP bags using an impulse sealer. Storing them in an airtight container with a food-safe silica gel packet is the best way to preserve freshness. Their recommended shelf life is about 2 weeks to 1 month. Since natural essential oil scents fade over time, using them fresh is the most luxurious way to enjoy them.
To state it clearly: compared to other handmade crafts, bath bomb making falls into the "ultra-beginner, extremely easy" category! There are no fine needles to thread like in sewing, nor do you need specialized machinery like UV lamps used in resin art.
The core process consists of just three basic steps: weigh, mix by hand, and pack into molds. Because no heat or open flames are used, there is zero risk of burns, making it a safe activity for children to enjoy alongside adults.
Even if you make a mistake with water and the mixture swells or loses its shape, don't worry! While the visual shape might be lost, the chemical properties of the baking soda and citric acid remain completely unchanged. Simply store the loose fizzing powder in a zip-top bag and pour it into your bath as a delightful bubbling bath powder. In short, there are no wasteful total failures in this craft. It is one of the most forgiving and frustration-free crafts available!
When starting a new craft, required workspace is always a consideration. Fortunately, bath bomb making requires no spacious studio or dedicated craft room.
The workspace needed for making bath bombs is minimal—a spot large enough to lay out a single sheet of newspaper is more than enough (roughly 60 cm × 45 cm / 24 in × 18 in).
A corner of your dining table, a kitchen counter, or a small coffee table instantly converts into your personal workshop. Setup takes under five minutes, and cleanup is equally fast and effort-free.
I strongly recommend covering your table with a plastic sheet or newspaper before starting. Because baking soda and citric acid are fine powders, a small amount may dust the surrounding area during mixing. A disposable sheet makes cleanup as easy as rolling it up and throwing it away.
Additionally, airborne citric acid powder can cause a mild tickle in your nose. Turning on a kitchen exhaust fan, opening a window, or wearing a lightweight dust mask makes the process comfortable and pleasant.
Most tools required for bath bomb making are items you already own or can easily buy at 100-yen shops, dollar stores, or local home centers:
When taking up a new hobby, initial costs are always top of mind. Bath bomb crafting is remarkably light on the wallet.
Even if you start with zero supplies, you can gather all necessary tools and ingredients for around 1,000 to 3,000 yen (roughly $10 to $20 USD). Buying basic tools from 100-yen shops or dollar stores and purchasing bulk ingredients keeps your starting budget surprisingly low.
Unlike resin work, pottery, or leatherworking, there is no need to purchase expensive specialized machinery or tools upfront. This low barrier to entry is a huge advantage for beginner crafters.
Let's look at the basic ingredient cost for a standard 100g (3.5 oz) bath bomb:
When purchasing baking soda and citric acid in bulk online or at local stores, 60g of baking soda costs about 20 yen, 30g of citric acid costs about 20 yen, 10g of cornstarch/salt costs about 5 yen, and a few drops of essential oil plus colorant run about 10–20 yen. That brings the total cost per bath bomb to just 45 to 65 yen (approx. $0.30 to $0.50 USD)!
Boutique store-bought bath bombs often cost between 600 and 900 yen ($5 to $8 USD) each. By crafting them yourself, you can enjoy luxurious, custom bath bombs every day at less than one-tenth of commercial prices.
Crafters often ask if budget dollar store supplies are okay. The answer: for tools (bowls, spray bottles, molds, spoons), 100% yes! They work wonderfully.
However, pay closer attention when buying ingredients. Industrial cleaning-grade baking soda and citric acid can have coarse grains or impurities. Because bath bombs touch your skin directly, always select ingredients labeled as "Food Grade" or "Cosmetic Grade." Buying food-grade bulk packages online or at pharmacies is the safest, most economical choice.
For fragrance, I strongly recommend choosing 100% pure natural essential oils over cheap synthetic fragrance oils. Pure essential oils offer superior aromatherapy benefits while remaining gentle on your skin.
Here is my foolproof step-by-step roadmap for bath bomb success! Follow these exact instructions to craft gorgeous bath bombs that look like they came from a high-end store.
The golden ingredient ratio is 2 parts Baking Soda : 1 part Citric Acid : 1 part Cornstarch (or Salt). Use a digital scale to weigh them out accurately (e.g., 100g baking soda, 50g citric acid, 50g cornstarch).
Pass all dry ingredients through a fine-mesh sieve into your mixing bowl. Baking soda and citric acid tend to form small lumps from ambient moisture; skipping this sifting step can cause uneven surfaces or weak structures. Mix the dry ingredients thoroughly by hand until soft and silky.
Add your chosen mica powder or food coloring powder to the dry blend, mixing until uniform. Next, add 5 to 10 drops of essential oil, rubbing the mixture between your palms to distribute the scent evenly throughout the powder.
Now comes the crucial phase. Hold your spray bottle filled with water (or witch hazel/rubbing alcohol) slightly above the bowl and give it one light spray. You might hear a tiny hiss; quickly rub and knead the powder with your hands to blend the moisture before it reacts further.
Repeat the mist-and-mix routine while watching the texture carefully. Squeeze a handful of powder firmly in your palm: if it holds together like a solid block without crumbling, yet breaks apart easily when poked, it has reached the ideal texture—just like damp beach sand. Stop adding liquid immediately. Err on the side of slightly dry for the highest success rate.
Prepare your mold halves. If placing dried flowers at the bottom, lay them down first, then fill the mold with your prepared mixture in small stages.
Don't be shy with the powder—mound it slightly over the rim of the mold. Use the pads of your fingers to pack the powder down firmly with strong pressure. If using a two-part spherical mold, overfill both halves slightly and press them together firmly with both hands to lock them into place. Firm compression is the absolute key to preventing cracking upon demolding.
After pressing tightly, tap the outside of the mold gently with the back of a spoon to loosen the bond. Carefully lift the top mold away. Seeing your smooth, perfectly formed creation emerge is a magical moment!
Because fresh bath bombs still contain trace moisture, place them on a soft surface (like a sponge or paper towel) in a dry, well-ventilated room out of direct sunlight. Let them dry undisturbed for 12 to 24 hours. Once completely hardened, your custom bath bomb is ready!
A. Standard ingredients (baking soda, citric acid, salt, cornstarch) will not damage tubs or plumbing. Baking soda is a gentle cleaning agent that actually helps clear light oils from drain lines.
However, if you include large dried botanical petals or whole buds, place a fine mesh drain catcher over your drain when emptying the bathwater to catch plant debris and prevent clogs.
A. As long as you use modest amounts (a few drops or a tiny pinch of powder), food coloring and cosmetic micas dilute thoroughly in water and will not stain your skin or tub.
If you accidentally add excessive dark dye, colored foam might leave a ring around the tub line. It washes away easily with a quick shower rinse, but aiming for soft pastel shades is always the smartest approach.
A. Giving your handmade bath bombs to family and friends as free gifts is completely fine and warmly appreciated!
However, if you intend to sell them online or at craft markets in Japan, be aware that marketing bath products with health, moisturizing, or cosmetic claims requires compliance with local cosmetic regulations (such as Japan's PMDA / Pharmaceutical and Medical Devices Act). If selling casually, crafters often label them as aromatic room decor or novelty crafts. Starting out by enjoying them personally and gifting them to loved ones is the best way to begin!
Bath bomb crafting requires no costly equipment or complex background knowledge, using safe ingredients to deliver instant creative joy. With tiny initial costs, minimal workspace needs, and a foolproof process, it is one of the most accessible crafts available today.
From classic colorful spheres to elegant botanical spa bombs and sweet dessert shapes, the creative possibilities are endless. Crafting your own signature scents and colors, then watching your creation fizz dramatically in warm water, offers a deeply rewarding experience every single time.
If you are looking for a fun new DIY hobby that is easy to start and delightful to use, give bath bomb making a try! Grab some baking soda and citric acid on your next shopping trip, and take your first step into this wonderful craft.
If you found this guide helpful, please share it with your fellow DIY friends on social media! Until next time, happy crafting—this was Yassy from Crafters!


For example, if you are looking for articles about mizuhiki, try searching for "mizuhiki"; if you are interested in tools, try keywords like "nippers" or "pliers."
