Beginner’s Guide to Candle & Aroma Wax Sachet Making: Start Today with a Starter Kit
yassy
Crafters!

Hello! This is Yassy from Crafters! (・∀・)
The greatest charm of clay craft is being able to transform raw material freely in your hands to create three-dimensional pieces exactly as you imagine. While I enjoy many different types of handmade crafts, I am constantly captivated by the joy of clay—creating adorable miniatures and realistic fake sweets with just your own two hands!
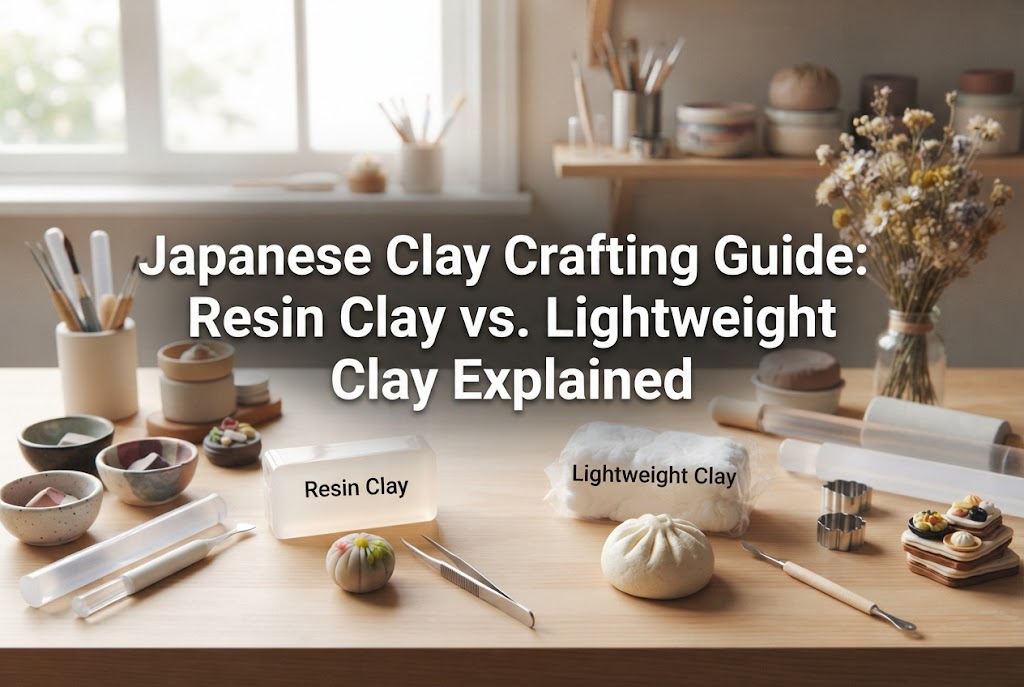
When you first decide to start clay crafting, two main materials immediately come up as top candidates: resin clay and lightweight clay. However, for complete beginners, it is completely normal to have questions like: "What is the difference between these two?", "Which one should I buy?", or "Is clay hard to handle?"
To jump straight to the conclusion: resin clay and lightweight clay have fundamentally different properties, and the right choice depends 100% on what kind of project you want to create. If you choose without knowing these differences, you might end up with clay that hardens before you finish shaping it, or a finished product with an unexpected texture, leading to major mistakes.
In this guide, I will fully explain everything a beginner needs to know—from the fundamental differences between resin clay and lightweight clay to the types of projects you can make, difficulty levels, required workspace, and initial budget. By reading this article to the end, you will know exactly which clay to choose and start your clay crafting journey with zero failures!
Before diving into crafting, let's build an accurate understanding of the basic properties of resin clay and lightweight clay. Although they sound similar, their finished texture, weight, durability, and ease of handling during the creation process are entirely different.
First, put aside any childhood memories of paper clay or oil clay. Modern clays used for handmade crafts in Japan have evolved significantly and offer professional-grade quality favored by expert artists.
Resin clay (jushi nendo) is a clay made primarily from vinyl acetate resin. Its defining feature is that it hardens like solid plastic once dry.
It possesses remarkable strength, resisting breakage even when rolled thin, and develops a subtle translucency upon drying. This transparency and fresh glossiness perfectly replicate the texture of glossy glazes on miniature foods, fruit pulp, and delicate clay flowers.
It has a substantial, weighty feel that adds a luxurious quality to your creations. Because its water resistance is relatively high after drying, resin clay is the absolute top choice for wearable accessories used in daily life, such as keychains and bag charms.
Lightweight clay (keiryou nendo) is formulated with micro-hollow spheres (ultra-lightweight resin balloons). The moment you touch it, you will be surprised by how incredibly light and soft it feels.
It stretches exceptionally well and does not stick easily to your hands, making it stress-free even for those who dislike sticky textures. Once dry, it cures into a soft, matte finish reminiscent of marshmallows or freshly baked bread.
Because it is extremely lightweight, you don't have to worry about heavy pieces falling down when making larger home decor items, fake succulents, or wall hangings. It is soft enough to be kneaded effortlessly even by children, making it an approachable material where beginners rarely get frustrated.
Here is a simplified comparison table to help you match each clay to your project ideas:
As a quick rule of thumb: remember resin clay as "heavy, hard, translucent, and high-strength" and lightweight clay as "light, soft, matte, and fluffy."
With a little imagination, clay crafting allows you to produce endless creations. Here are some of the most popular genres for beginners.
Hyper-realistic miniature sweets and foods are immensely popular in the handmade craft scene. Using resin clay, you can craft glossy fruit tarts, translucent strawberries, realistic seafood bowls, or miniature bread. The detailed process of making tiny parts and assembling them is endlessly engaging.
With lightweight clay, you can create soft-looking ice cream scoops, doughnuts, cookies, and whole cakes. Because its natural texture closely resembles real baked goods, even beginners can easily produce delicious-looking pieces.
Clay is also fantastic for creating decorative items to brighten your room. Fake succulents and clay flowers made with lightweight clay require no watering and never wither, making them wonderful home accents. Because the clay is light, you can easily turn your creations into large wreaths or bouquets without worrying about weight.
Crafting delicate single-stem flower petals or antique-style trinkets using resin clay is also very popular.
By pairing clay elements with metal jewelry findings, you can create one-of-a-kind accessories including earrings, brooches, hair ties, and bag charms. When crafting items meant to be worn, they must withstand everyday friction and accidental drops, making durable resin clay the ultimate choice.
You can also create original character figurines, small animal statues, pen toppers, and magnets. From cozy animal figurines made of lightweight clay to detailed miniature figures crafted with resin clay, your expressive possibilities expand as far as your imagination allows.
A common question from beginners is: "Can I really make these? Isn't it difficult?" The short answer is that the actual sculpting difficulty of clay craft is not high. You don't need special certifications or dangerous chemicals, so anyone can start today.
However, resin clay and lightweight clay each have unique handling characteristics. Understanding these will help you avoid common pitfalls.
Resin clay is at an intermediate difficulty level because it is slightly firm and dries relatively quickly. Fresh out of the package, it feels stiff, so you need to knead it thoroughly with your hands to warm it up and soften it. If you skip this kneading step, cracks will appear on the surface during shaping.
Additionally, exposure to air causes the surface to dry quickly. You need to shape your pieces briskly. Unused clay must always be wrapped tightly in plastic wrap and stored in an airtight container. Keep in mind that resin clay shrinks by about 20% as it dries, so you should design your pieces slightly larger than the desired final size.
Lightweight clay is at a beginner level. Because it is soft and effortless to shape, even first-time crafters can enjoy it without stress.
The main precaution is that it is sensitive to water. Even after drying, contact with water can soften the clay, making it unsuitable for use around sinks or wet areas. It also lacks the extreme strength of resin clay, so thin, stretched parts may snap under heavy pressure.
Furthermore, when joining dry pieces of lightweight clay together, they do not stick well on their own, so you must use craft glue (wood glue) to connect them securely.
Here are three common issues beginners face, along with absolute solutions to solve them:
When starting a new hobby, space is always an important consideration. A wonderful advantage of clay craft is that it requires no dedicated studio or special ventilation systems.
You only need a desk area about the size of an A4 to A3 sheet of paper (roughly 9×12 to 12×18 inches). A corner of a dining table or a small low coffee table provides more than enough room. Since there are no large machines to set up, you can simply pack your tools into a box when finished, returning your room to a tidy state instantly.
Neither resin clay nor lightweight clay produces harsh chemical solvent odors. You can safely work near family members and pets. There is also no airborne clay dust. To protect your tabletop from stray clay bits or paint splashes, simply lay down a silicone craft mat, plastic folder, or placemat. A silicone mat prevents clay from sticking and dramatically improves your workflow.
The basic setup needed to start clay crafting is remarkably simple. You don't need to purchase expensive tools from the beginning:
Most of these items can be found around the house or at budget dollar stores.
If you're worried about startup expenses, rest assured—clay crafting is one of the most budget-friendly hobbies in the handmade world.
Starting clay craft from scratch typically costs around $10 to $20 USD (1,500 to 3,000 JPY). You can gather basic tools at budget shops and spend the main portion of your budget on quality clay and acrylic paints. Unlike resin craft, which requires UV lamps, or leathercraft, which requires specialized hammers, clay craft has a very low barrier to entry.
Clay pricing varies depending on where you buy it and the brand:
Beginners often ask if budget clay is sufficient. My recommendation is: budget clay is great for practice, prototypes, and home decor. However, if you plan to give pieces as gifts or sell your work, choose clay from specialized Japanese craft brands like Padico or Nisshin Associates. Specialized brands offer noticeable superior elasticity, crack resistance, and post-drying durability compared to standard budget options.
A great approach is to practice with budget clay first to get a feel for sculpting, then upgrade to specialized brand clay once you feel ready for higher quality!
Once you have your basic tools, ongoing costs are extremely low. For example, a single $5 package of clay can yield dozens of miniature sweets or accessory parts, making the material cost per piece just a few cents. The cost-performance ratio is exceptionally high.
Here are several practical techniques that will instantly elevate the quality of your finished work:
There are two ways to color clay: kneading paint directly into the raw clay, and painting the surface after drying.
For uniform color throughout the piece, use the kneading method. Add a tiny dot of acrylic paint to white clay and knead thoroughly until the color is even. Key rule: start with a very small amount of paint using the tip of a toothpick. Adding too much paint makes the clay sticky and causes the color to darken unexpectedly as it dries and shrinks.
For realistic baked textures, gradients, or intricate patterns, paint the surface after the clay has dried completely. Dilute acrylic paint slightly with water and dab it on gently using a sponge or brush to create realistic toasted edges and depth.
When joining wet clay pieces together, moisten the contact surfaces slightly with water or apply a thin layer of craft glue before pressing them together. To attach dried clay pieces together or join clay to metal hardware (such as earring studs or keychain rings), craft glue alone isn't strong enough. Always use a two-part epoxy adhesive or heavy-duty multi-purpose glue on dried surfaces for an unbreakable hold.
If you leave freshly sculpted clay on a hard flat table to dry, the bottom surface will flatten out under its own weight. To preserve round or 3D shapes, place your pieces to dry on a melamine kitchen sponge. The soft cushion supports your piece gently, allowing air to circulate evenly from all sides without flattening the bottom. Let pieces dry undisturbed for at least 2 to 3 days to ensure they cure completely inside and out.
Applying a final coat of varnish preserves your hard work, protects against dust and fingerprints, and shields the clay from humidity:
Applying 2 to 3 thin layers of varnish gives your work a professional finish and a durable protective coat.
In this guide, we explored the characteristics of resin clay and lightweight clay, suitable projects, handling tips, workspace setup, budget considerations, and pro techniques for a clean finish.
To recap the key points:
Clay crafting offers the wonderful excitement of watching plain clay transform into charming shapes right in your hands. Starting with a tiny strawberry or a simple leaf is more than enough. Grab a pack of clay and enjoy the delightful sensation of creating! I am cheering you on as you take your first step into clay crafting!
If you found this guide helpful, please share it with your crafting friends on social media! See you in the next article! This was Yassy from Crafters!



For example, if you are looking for articles about mizuhiki, try searching for "mizuhiki"; if you are interested in tools, try keywords like "nippers" or "pliers."
