The Ultimate Guide to Choosing Beading Thread (Tegusu): Sizing, Material Types, and Selection Rules for Flawless Beadwork
yassy
Crafters!

Hello, fellow crafters! It's Yassy from Crafters! (・∀・)
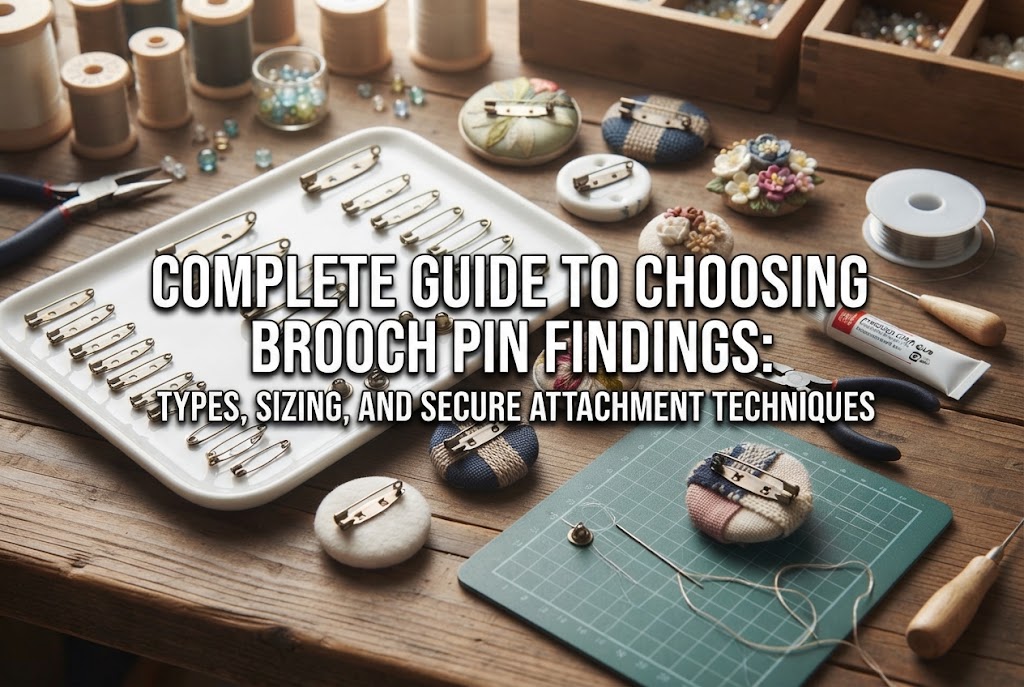
When turning your handmade motifs, cute embroidery, or resin creations into lovely brooches, have you ever wondered, "Which brooch finding should I actually use?" Browsing craft stores or online shops reveals so many different shapes, lengths, and styles of brooch pin backs that it can be tricky to know which one best suits your piece.
In fact, choosing the right brooch finding is a crucial step that greatly affects the overall quality, durability, and usability of your accessory. Pick the wrong size or style, and your brooch might wobble forward when worn—or worse, come undone and get lost.
In this guide, I'll walk beginners through the standard types of brooch findings, how to pick the right match for your project's material and weight, and key mounting techniques to keep your brooches perfectly secure!
Brooch findings come in several classic styles. Each has distinct advantages and ideal uses, so let's start by looking at five common types.
Rotating lock pins feature a revolving safety catch over the clasp that holds the tip of the pin securely in place. Turning the tiny lever locks the pin, effectively preventing it from accidentally popping open.
Because they offer maximum security—making pieces far less likely to fall off clothing or bags—these are the most popular choice among crafters selling their handmade items. If you want your customers or recipients to enjoy your work with lasting peace of mind, rotating lock pins are the way to go.
Known in Japan as zōka-pin (flower pins) or ura-pin (back pins), these are classic findings resembling safety pins attached to a flat metal bar with holes.
They feature a simple, user-friendly construction and are very affordable. The holes on the flat base allow you to glue the finding in place or stitch it directly onto felt or fabric, making them versatile across countless designs. However, because they lack a locking mechanism, keep in mind they may slip open on thin fabrics or during active movement.
These oversized, decorative safety pins make a statement all on their own. In Japan, they are often called kabuto-pin. With their thick, sturdy needles, they are ideal for fastening heavy knits, cardigans, shawls, and canvas bags.
Many designs feature loops (beading channels) along the top spine, making it easy to dangle charms, beads, natural gemstones, or resin pendants. Since the metal finding itself becomes part of the design, this style is wonderful for creating vintage, classic, or casual statement pieces.
These clever hybrid findings feature both a brooch pin and an alligator hair clip mounted onto a single round base. They allow the wearer to clip the accessory directly onto garments without piercing delicate fabrics, or even wear the piece as a hair accessory.
This style is widely used in Japan for tsumami zaiku (traditional folded fabric flowers), large floral corsages, and event accessories.
These findings consist of a straight pin backed by a removable clutch or catch. Long hat pins are designed to accent hats or jacket lapels, while shorter tack pins (clutch back pins) work well for small, minimalist accent brooches.
They create a sleek, modern impression, making them ideal for unisex accessories, lapel accents, or petite single-point motifs.
Now that you know the hardware types, the next step is identifying which one fits your project. Let's look at how to match findings according to your work's material, weight, and size.
For lightweight, soft textile crafts such as needle-felted animals, hand embroidery, or fabric-covered buttons, standard flat plate pins or rotating lock pins are ideal.
If the back of your piece is felt or cloth, you can stitch the pin securely through the holes in its metal base. Combining sewing with a touch of adhesive creates a joint that will practically never peel away with age.
When I make needle-felted or embroidered brooches, I cut a backing piece from stiff felt, sew a rotating lock pin firmly onto it, and then attach that backing to the main motif. This yields a clean finish and keeps the hardware permanently intact.
For pieces with smooth, hard backs—such as cured UV resin, shrink plastic, or polymer and air-dry clay—rotating lock pins or flat-back plate pins work wonderfully.
Because you cannot sew into these materials, you must rely on strong adhesives or resin. Choosing a pin back with holes in the mounting plate is key: adhesive or liquid resin flows through the holes to create a mechanical anchor, forming a significantly stronger bond than attaching to a completely solid flat plate.
Motifs densely stitched with glass seed beads or incorporating natural stone cabochons can be deceptively heavy. If you attach a pin that is too small, the top of the brooch will tip forward under its own weight, causing it to sag or droop when worn.
For heavier creations, select a wide, sturdy rotating lock pin. As a general guideline, choose hardware that spans at least half the total width of the motif. In some cases, mounting two parallel pins or opting for a wide-plate finding provides the stability you need.
Choosing the right pin length is where many crafters get stuck. You might assume that bigger is better, but if the pin is too long, the metal ends will stick out past the borders of your piece.
The golden rule for choosing a brooch pin is: select a pin length 5 mm to 10 mm shorter than the total width of your piece.
For example, if you are making a circular motif that is 30 mm across, choose a pin between 20 mm and 25 mm long. This ensures the hardware remains completely hidden from the front view without peeking out over the edges.
Conversely, avoid going too small. If you place a tiny 15 mm pin on a motif that measures 40 mm or wider, the distance from the pivot point to the edges is too great, causing the brooch to wobble unsteadily while worn.
Here are four typical issues crafters encounter when mounting brooch findings, along with practical solutions.
One of the most common complaints is attaching hardware with standard craft glue or wood glue, only to have the metal piece pop off cleanly after minimal use.
Bonding metal to smooth resin, fabric, or leather is notoriously tricky because smooth metal does not absorb water-based glues.
Solution: Use a high-strength, two-part epoxy adhesive or an impact-resistant multi-purpose adhesive formulated specifically for metal bonding. In addition, gently rough up the bonding surface of the metal pin with fine-grit sandpaper beforehand to create microscopic grooves that give the adhesive a firm grip.
Gluing the pin back dead center on your motif often causes the piece to droop or tilt forward when worn on clothing.
Fabric naturally flexes and stretches when worn. If the pin is mounted at the exact center, the upper weight of the motif pulls outward away from the body.
Solution: As a general rule, mount your brooch pin slightly above the center—roughly one-third of the way down from the top edge. Positioning the hardware higher allows gravity to pull the lower portion of the motif downward naturally, keeping the brooch resting flat against the garment.
If you attach a pin without paying attention to the needle's orientation, you might find it unexpectedly clumsy to put on.
For right-handed wearers, pinning from right to left or from bottom to top is typically the smoothest motion.
Solution: When mounting a pin horizontally, it is standard practice to position the hinge on the right and the catch/clasp on the left. If mounting vertically, orient the pin so the point inserts from the bottom upward; this way, even if the latch ever loosens, gravity prevents the needle from sliding out downward.
Pinning a slightly heavier brooch onto a delicate blouse or fine knit T-shirt can pull on the threads, leaving visible holes or sagging fabric.
Solution: Place a small scrap of fabric or felt on the inside of the garment, then push the pin through both the garment and the reinforcement backing together. This spreads the weight over a broader surface area and protects delicate textiles from tearing or stretching.
Here are two secure mounting methods I personally use in my studio to give brooches professional-level durability and clean presentation.
When making needle-felted or embroidered brooches, this method produces the neatest and sturdiest result:
Because the base plate is trapped inside the felt sandwich, the pin cannot pull away, no matter how often it is fastened and unfastened. The back looks tidy and professional.
Relying solely on glue for hard, slick resin pieces can be risky over time. Try this reinforcement technique:
This resin coating encapsulates the base plate, fusing it directly to the body of your piece so it will not snap off even if subjected to sudden impacts.
Brooch findings come in several electroplated finishes. Matching the hardware color to the mood of your project creates a harmonious, professional look:
Before securing your pin back, run through this quick checklist:
A brooch is a delightful accessory that travels out into the world on your favorite coat, sweater, or bag. Putting care into your choice of findings and mounting methods guarantees that your wearable art stays securely in place for years of enjoyment.
While the variety of hardware might seem intimidating at first, keeping your project's material, weight, and size in mind makes choosing straightforward. I hope you'll try out these sizing rules and reinforcement techniques in your next crafting session!
If you found this guide helpful, please share it with your fellow crafting friends! See you in the next article—Yassy from Crafters signing off! (・∀・)




For example, if you are looking for articles about mizuhiki, try searching for "mizuhiki"; if you are interested in tools, try keywords like "nippers" or "pliers."
