A Guide to Crafting Pins and Japanese Machibari: How to Choose and Use Pins for Sewing and Jewelry Making
yassy
Crafters!

Hello, fellow crafters! It’s Yassy from Crafters! (・∀・)
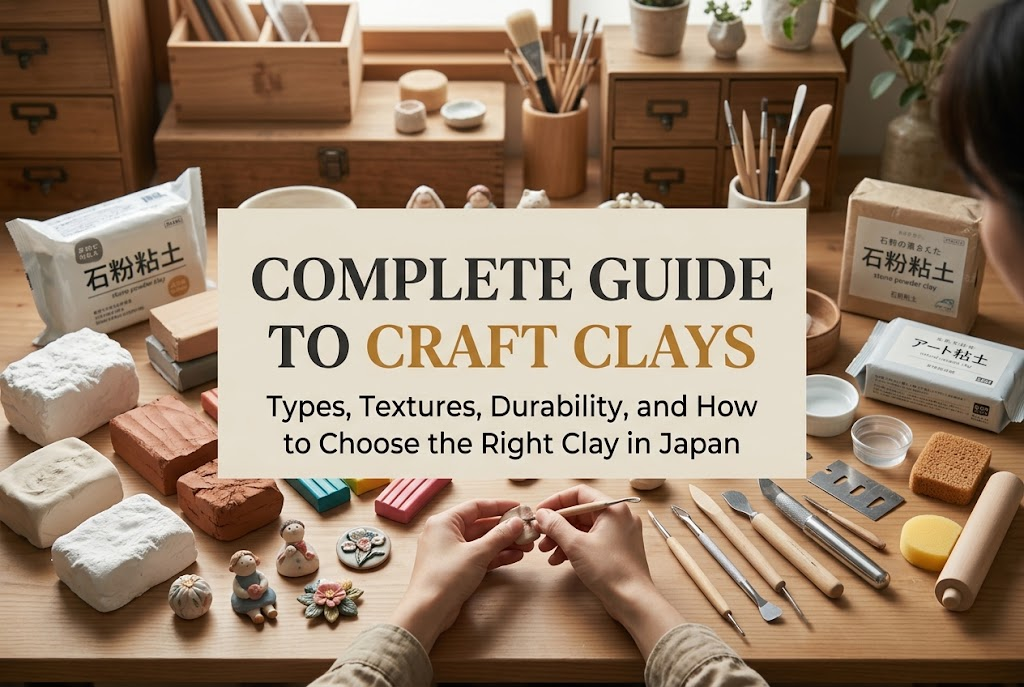
The world of handmade crafts is filled with fascinating clay creations that inspire just by looking at them. From adorable miniature sweets and delicate floral accessories to rustic interior decor, the possibilities you can express with clay are virtually endless. I personally love sculpting with clay myself, admiring the creations of other talented clay artists, and collecting materials from my favorite craft stores!
However, newcomers venturing into clay crafting often hit a major wall right at the beginning: “There are so many types of clay—how do I know which one to pick?”
Step into any craft store, 100-yen shop, or browse online retailers like Amazon and Rakuten, and you will see a dizzying array of clay packages. If you simply choose one at random because they look similar, you might run into disastrous results: the clay tearing while you work, snapping and cracking after drying, or ending up with a texture completely different from what you envisioned.
When it comes to clay selection, the idea that “any clay will do” simply does not exist. The best clay is determined entirely by the genre of your project and the specific texture and finish you want to achieve.
In this guide, drawing from my own experience and knowledge, I will break down the characteristics of seven major craft clays, golden rules for matching clay to your project, and tips to avoid common beginner mistakes. By reading this guide to the end, you will be able to confidently choose the perfect clay for any handmade piece you want to create!
The first step to succeeding in clay crafting is understanding the distinct properties of each type of clay.
Clay is not just “mud you shape and let dry.” Each variety differs completely in raw ingredients, drying process, post-dry hardness, water resistance, and shrinkage rate. If you disregard these traits, no matter how meticulously you sculpt, you will not get a satisfying result.
For instance, if you are making items that require strength—like keychains or stud earrings—and choose an ultra-light, soft clay solely for its fluffy texture, your piece will break under everyday impact. Conversely, if you want to capture the airy feel of miniature bread or cake slices and pick a heavy clay that dries rock-hard, you will lose that signature realistic, soft appearance entirely.
Choosing clay comes down to balancing three core factors: the required strength after curing, the surface texture, and ease of handling during sculpting.
From what I have observed, over 90% of beginners who give up on clay crafting do so simply because the clay they chose was incompatible with what they were trying to make. Once you grasp the unique nature of each clay and select the right medium, you can achieve professional-looking results right from the start.
Most clays used in Japanese handmade crafts fall into seven main categories. Let’s look at their unique traits, strengths, and weaknesses.
Resin clay (often vinyl acetate or acrylic resin-based, popular in Japan for fake sweets and floral craft) dries into a plastic-like hardness. Its standout characteristics are its exceptional durability, fine density, and smooth surface finish.
Because it holds its structure even when rolled out paper-thin, resin clay is the premier choice for tiny miniature food elements and delicate flower petals. As it dries, it develops a subtle translucency, giving it a reassuring weight and an upscale feel.
Keep in mind that resin clay shrinks by roughly 10% to 15% as moisture evaporates, so you should sculpt pieces slightly larger than your target finished size. Thanks to its strength and density, it is an indispensable staple for accessory making.
Lightweight clay is formulated with microscopic hollow spheres (micro-balloons) and pulp fibers, making it astonishingly featherlight. It feels remarkably soft and non-sticky, allowing even total beginners to shape it without frustration.
Once dry, it provides a matte, velvety texture reminiscent of a marshmallow or sponge. Because it weighs next to nothing, it is ideal for larger decorative home items or statement earrings that you want to wear comfortably without pulling down on earlobes.
The trade-off is lower mechanical strength compared to resin clay; it can tear or snap if subjected to bending or pulling forces. A very effective technique is blending it 50/50 with resin clay to balance lightness and durability.
Stone powder clay (often called stone clay or sekifun nendo) is made from finely pulverized mineral stone particles. When dry, it cures into a solid, heavy block resembling unglazed pottery or plaster, giving pieces a grounded, earthy heft.
The greatest advantage of stone clay is that you can carve and sand it after it has fully dried. You can use craft knives, chisels, or sandpaper to refine shapes, shave down details, and buff surfaces completely flat.
For this reason, it is deeply loved by makers of art dolls, character figures, vintage-style brooches, and diffuser stones. Wetting your fingers with water allows easy smoothing and joining of clay segments, making adjustments seamless even after drying begins.
Polymer clay is a PVC-based medium that does not dry in the open air. It remains pliable indefinitely until baked in a conventional household oven at approximately 110°C to 130°C (230°F to 266°F).
Because you are not racing against a drying clock, you can spend hours refining tiny details without worrying about the clay cracking or crusting over. Once baked, it cures into durable plastic that is completely waterproof and impact-resistant.
With virtually zero shrinkage during baking, it is perfectly suited for intricate modular assemblies, canes, and the millefiori patterning technique where patterned canes are sliced cleanly.
Transparent clay—widely recognized in Japan under brand names such as Sukerukun (すけるくん)—is a specialized air-dry resin clay that turns remarkably translucent upon drying.
Because it lets light pass through once cured, it is the absolute go-to choice when making realistic miniature citrus wedges, jellies, hard candies, water droplets, and glass-like accents.
Handling it requires a bit of caution: the clay looks opaque white while wet and only clears up as moisture leaves it. If you knead in too much color paint up front, the clay will dry cloudy and lose its see-through charm. Adding only a pinprick of pigment is the golden rule here.
Wood clay uses finely milled wood powder as its base. After air-drying, it mimics the warm, natural appearance and texture of carved timber.
Featuring a faint natural wood aroma and a subtly coarse surface, it is wonderfully suited for country-style miniature furniture, rustic figurines, and organic home accents.
Like stone powder clay, it can be filed and carved post-drying. However, it lacks high structural strength, making it less suitable for slender elements or accessories subjected to frequent handling.
Familiar from school craft projects, standard paper clay consists primarily of pulp fibers. It is inexpensive and widely available, but tends to have a rough grain and cracks easily during shrinkage.
While not ideal as the main material for detailed, sale-ready handmade jewelry, it is fantastic for bulking up the inner cores (armatures) of larger sculptures on a budget, or for practicing basic hand-forming techniques.
Here are three typical pitfalls that new clay crafters encounter, along with practical solutions to save you time and material costs.
Please resist the temptation to sculpt intricate fake sweets or sale-quality jewelry solely with ultra-cheap dollar-store paper clay, even when practicing.
Bargain clays often contain coarse pulp fibers that catch fingerprints easily, fuzz up around edges, or develop deep shrinkage cracks upon drying. Regardless of your sculpting skill, coarse raw material will inevitably cap the refinement of your work.
If you plan to make durable accessories or pieces to sell, investing in high-quality resin clay or polymer clay from established craft manufacturers makes an immediate, visible difference in both finish and structural integrity.
Many crafters assume that hardness equals water resistance, but that is a dangerous misconception.
Air-dry clays (resin, lightweight, and stone powder clays) remain sensitive to moisture after curing. In particular, lightweight and paper clays will absorb water and dissolve back into mush if submerged. Even cured resin clay will soften and turn cloudy white if exposed to sustained moisture.
If you are creating keychains, bag charms, or brooches exposed to humidity, rain, or hand sweat, you must seal them thoroughly with a high-grade water-resistant varnish or UV resin, or opt for inherently waterproof oven-bake polymer clay.
As moisture evaporates from air-dry clay, the piece contracts and pulls inward. This is natural shrinkage.
Resin clay and transparent clay contain substantial water content, meaning their shrinkage is noticeable. If you pull a piece from a mold and expect it to fit into a pre-made bezel without factoring in shrinkage, you will end up with loose gaps or lopsided symmetry.
Account for this shrinkage by sculpting 10% to 20% larger than your target size, or wait until the clay is completely dry (2 to 3 days) before assembling pieces together. For high-precision components that cannot tolerate dimensional shifts, choose oven-bake polymer clay with near-zero shrinkage.
Wondering which clay matches your specific project? Here is how to select the best medium for each craft genre.
For fake sweets and miniature cuisine, matching the clay to the actual food texture is the secret to lifelike realism:
For everyday wearable jewelry, structural resilience and moisture resistance take top priority:
For display items, mini vases, wall hangings, and rustic brooches, stone powder clay is exceptional. Its smooth, dry texture complements Scandinavian or minimalist interior decor beautifully. Once cured and sanded with fine sandpaper (400 to 1000 grit), it feels silky smooth like fine unglazed ceramic. It also absorbs diluted paints wonderfully for vintage or antique finishes.
For detailed miniature doll props and character figures, look to stone powder clay or polymer clay:
Coloring and sealing play an enormous role in giving clay pieces a polished, professional look. Here is how to handle each step effectively.
When tinting clay prior to sculpting, your best options are acrylic paints or oil paints (including paints formulated for resin clay):
For adding baked golden-brown crusts, gradients, or fine patterns, wait until the piece has dried completely. Use acrylic paints applied with a sponge; moisten a makeup sponge slightly, pick up a tiny dab of ochre or brown acrylic paint, blot off the excess, and dab gently along edges to create realistic browned bread or cookie crusts. Do not use standard watercolors, as they can bleed if touched by moisture later.
Once dry and colored, always coat your creation with a protective sealant to keep out dust, oils, and moisture:
Air-dry clay begins losing moisture the second its factory packaging is opened. Here is how to keep leftovers fresh for months.
This triple-layer barrier keeps natural air-dry clays pliable for months. If using an airtight plastic storage container, store the bagged clay inside the tub for extra protection.
If your resin or lightweight clay has developed a slight crust or feels rubbery and stiff, you can often rescue it. Add just a few drops of water (or dedicated clay softening conditioner) to the clay, wrap it in cling film, and let it rest for 20 to 30 minutes. Once the moisture softens the outer layer, knead it thoroughly and vigorously with your hands until the stretch returns.
Note: If air-dry clay has cured completely rock-hard down to its core, its internal chemical bonds have permanently set, and it cannot be revived. Keep storage airtight to prevent this!
Mastering clay crafting starts with matching the clay to your creative vision. Let’s review the key takeaways:
Clay is an extraordinary craft medium that allows you to sculpt your imagination into tangible art with your own hands. Armed with the right material knowledge, you can eliminate frustrating mistakes and create work of wonderful quality.
Start with a reliable resin or lightweight clay, experiment with textures, and watch your creative possibilities expand. I wish you wonderful crafting adventures!
If you found this guide helpful, please share it with your fellow makers. See you in our next craft tutorial—this was Yassy from Crafters! (・∀・)




For example, if you are looking for articles about mizuhiki, try searching for "mizuhiki"; if you are interested in tools, try keywords like "nippers" or "pliers."
